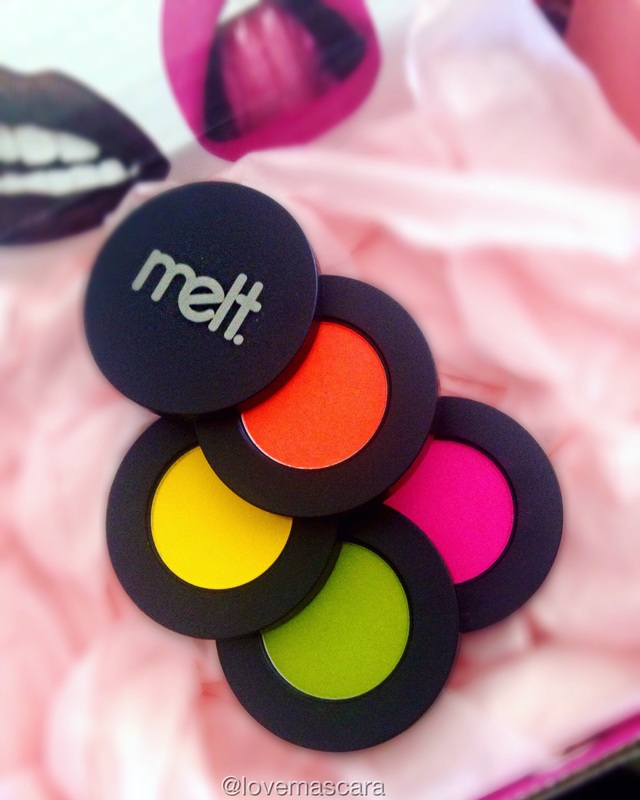
 This glorious product is the Melt Cosmetics Radioactive Stack. If you know me you know this is right up my alley. It's bright, it's pigmented, and it's a lot of product. Which I always love Melt for is their huge shadows. This is like all Melt Stacks magnetized and can be separated and re arranged. It's the same price as all Melt stacks which is $48.  These are the swatches, the only one that seems not matte is Xenon. It's a satin finish. These are kinda powdery because they are so pigmented and large, you're naturally gonna have some dust to them. Bright colors tend to have a lot of white powder in them which make them naturally dry and dusty. So the fact that these are still so pigmented and keep their intensity really says a lot. Even the yellow is insanely bright which is hard to pull off. Yellows tend to be patchy and sheer this is not. 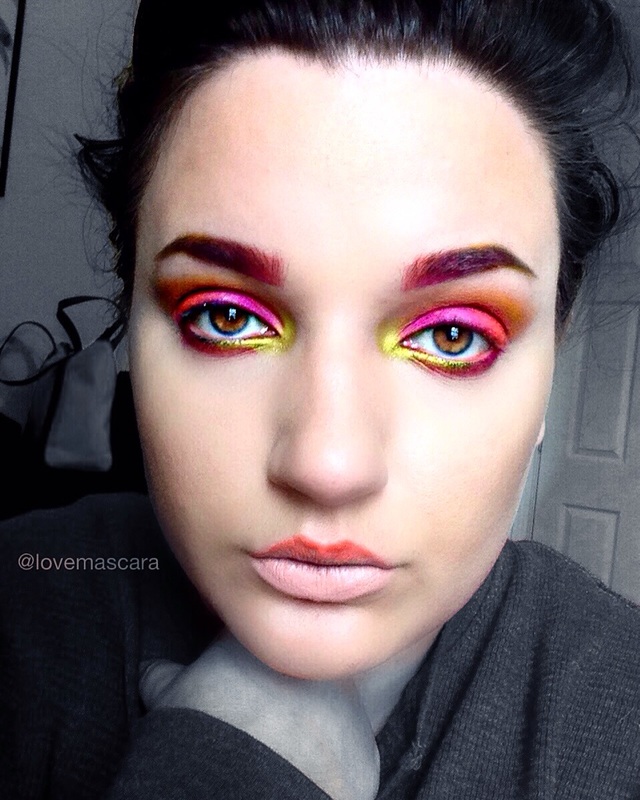 This is an artistic look that I done with this. It's obviously not "everyday" for some of you, with the colored brows and what not, but to each their own. Neon is in the crease above Radon. Radon is on the outer half of the lid and top lip. Xenon is in the inner corner and lower lash line. Radioactive is on the inner half of the lid.
These apply great and a little goes a long way. If you love color you will love this. Melt has awesome eye shadows and this has been a while in the making and I understand why it takes them so long to put out new stacks, because they're near perfect every time. These are Vegan as always and come with a mirror on top. ***you need to know that Radon and Radioactive include ingredients that aren't technically approved for the eyes. Most pink shadows are not approved for the eyes because of something in the pigment, some companies do have approved pink shadows though. I had no reactions to this except a little staining on the lid from the pink but that didn't last when I actually used my cleanser to take it off and not makeup remover. I want you to know that just to be aware. In saying that though there are hardly any glitters that are approved as "eye safe" and yet there are a ton of eye glitters out there. So just putting that out there.
2 Comments
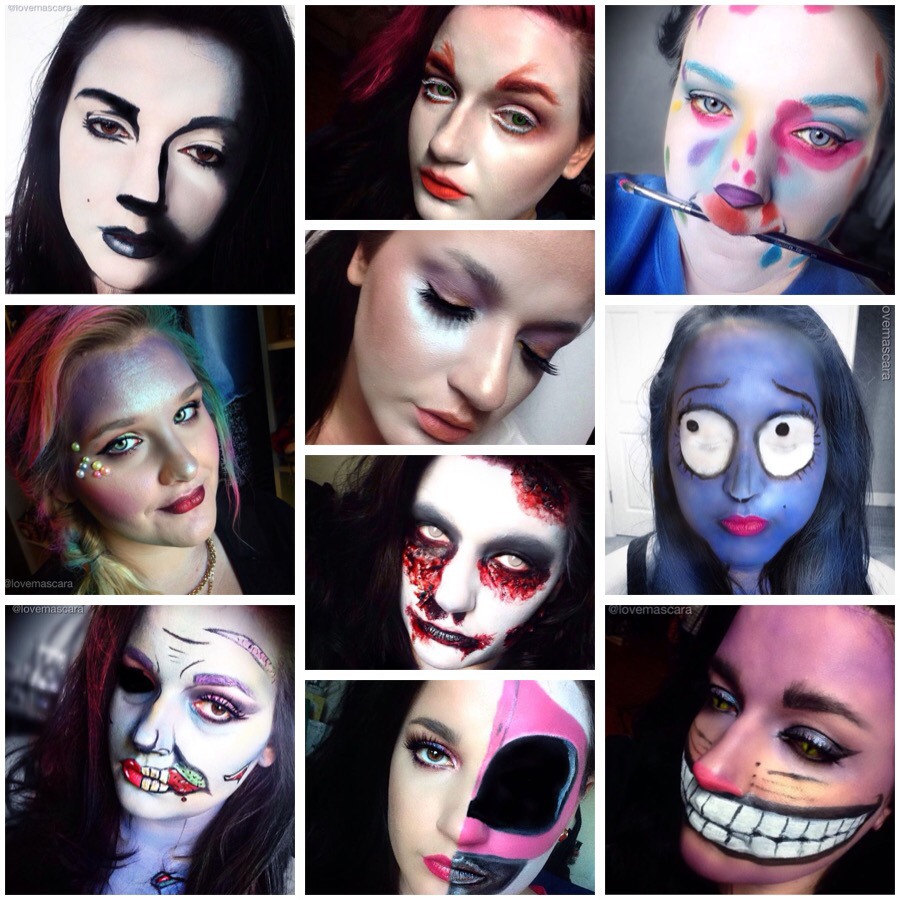 Halloween is tomorrow, so I wanted to put together my most favorite looks from this year. A few of them, my beautiful friends participated in. I'm not going to go in depth with this, just wanted to say good bye to Halloween with a look back at some of the past month (or more) work. Some being very detailed and time consuming others being easier that you think. Also wanted to tell you what products I used the most.
Left Row Top to Bottom Sketch Drawing: This was mainly black gel liner and Ben Nye Aqua Cake in white. It was relatively easy if you used a reference picture. Mermaid: My lovely friend Danielle participated in this one. It's a lot of "candy colors". Some in duo chromes and others just bright colors. Used a lot of Makeup Geek duo chromes, color hair spray, glued on pearls, and the Morphe 35S palette. Pop Art Zombie: This was hard. It was time consuming and tedious. It's also the one I'm most proud of. Lots of Ben Nye cream paints, gel liner, and lip liner. Center Row Top to Bottom Female Mad Hatter: This was fun and quite easy. I used white cream paint to make myself a lot more pale but I didn't make it indredibly opaque I let a little of my skin color show through. Lots of orange shadow, and also orange liquid lipstick from Colour Pop on my lips and brows. Green Contacts and white mascara. Angel or Fairy makeup: This was very easy and It seems like nothing but if I would've had an angel costume I would've been an angel for sure this Halloween. I literally sparkled all over. Using mainly Makeup Geek Duo Chrome Pigments and highlighters. The Undead: This was freaky. I used Ben Nye Thick Blood and Vampire Blood from Walmart. White face paint and black shadows. It was pretty easy because it's a "messy" look so you don't have to be very careful. Power Ranger: This I wish I could take credit for, my friends talked me into this look. One wanted me to do a power ranger, and one wanted me to do half the normal face and the other side the power ranger helmet to show how they have hidden identities. I used mainly Colour Pop Cosmetics lippie pencils for it. It takes a steady hand to draw out the lines. Other than that with a reference pic pulled up it was moderately easy. Right Row Top to Bottom Lisa Frank Puppy: This was very easy. I used mainly Colour Pop lip pencils for the spots. Ben Nye white face paint for the base. It was very very easy and different. The Corpse Bride: This was accomplished with the help of my friend Jamie who was willing to sit through this. It took quite a while. Using Ben Nye cream paint in blue for the base. Gel Liner for brows and detailing. White face paint for the eyes. Black shadows for contouring to hollow out the cheek bones and collar bones and around the temples. Cheshire Cat: This was just done last night. It wasn't time consuming but it wasn't very easy. I used Ben Nye purple cream paint, Colour Pop pencils and Makeup Geek purple shadows around the eyes and to contour. Gel Liner for the detailing, whiskers, and mouth. White Aqua Cake from Ben Nye to make the teeth. Cat contacts. As far as what I found I used the most. I was surprised. The things that worked the best was Colour Pop lippie pencils and they come in tons of colors. I really like Snazaroo face paints too. I used a lot of Ben Nye products as well. They wanted to sheer out a lot though. The Thick Blood was amazing and cool to work with. You can't keep messing with it because it separates on the skin so I found you had to goop it on really thick and let it dry some. Also NYX Jumbo Eye Pencils are always a great option as well. Milk and Black Bean are must haves but they have every color under the sun too and very affordable. Don't disregard your eye shadows either they are very useful over a base especially. They're great on their own or to set different colors. So there you go. Happy Halloween! Have fun and BE SAFE! 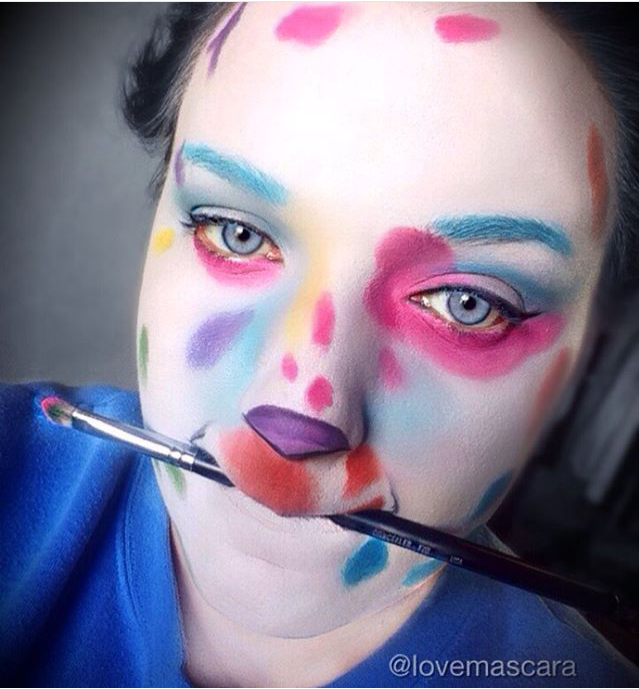 This is a Lisa Frank puppy inspired Halloween look. Google it and you'll see why I have a brush in my mouth. lol This was really easy. All you do is:
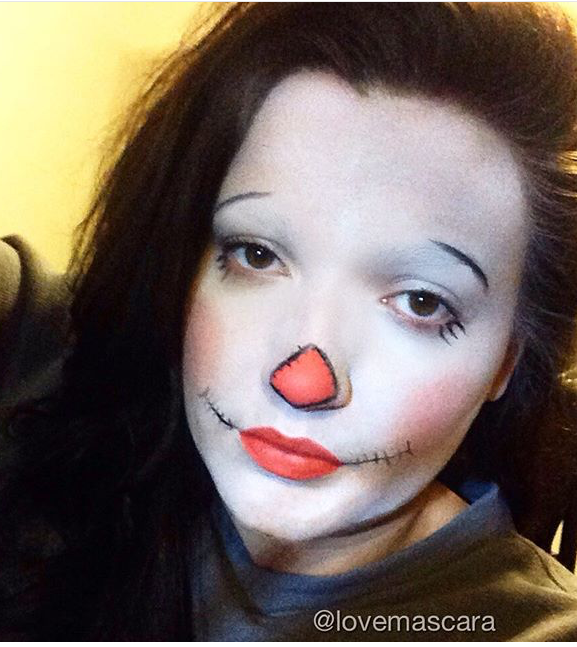 This is a scarecrow. You can choose to paint your face white or just use foundation.
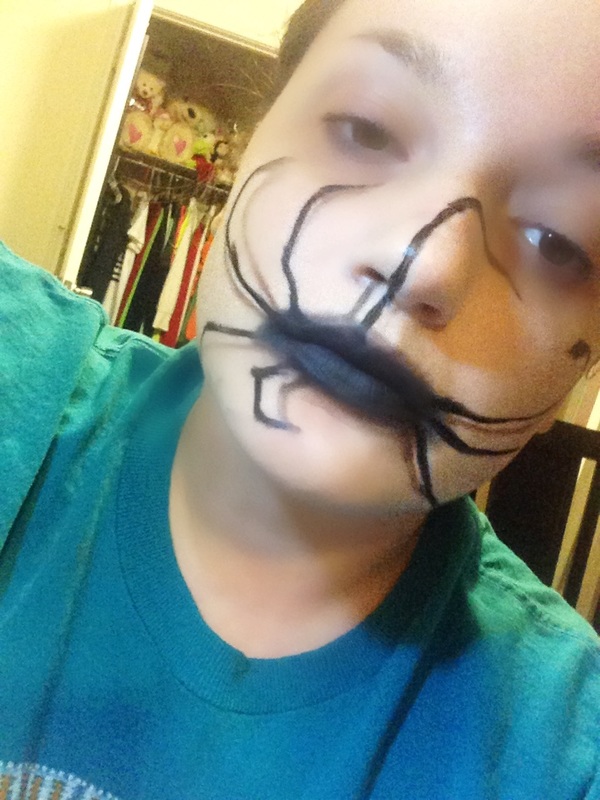 This was actually inspired from an Instagram picture I seen fro @amyrichardsmakeup. It looked so Tim Burton. I have no other makeup on in this so it's just a rough draft. I would make my face very pale though in this and maybe use some white mascara or something. To keep the Tim Burton vibe alive! 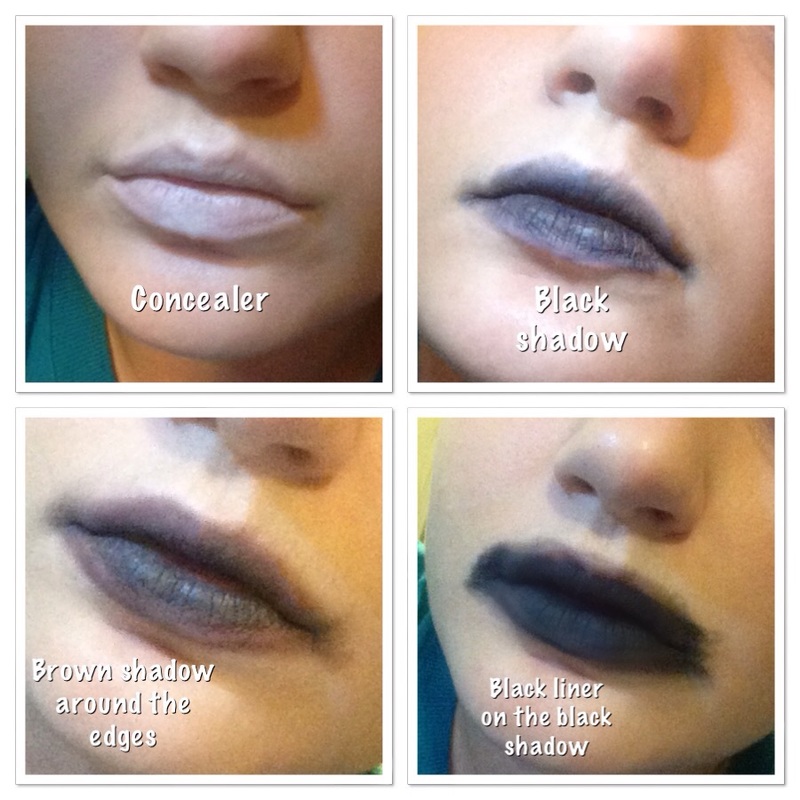 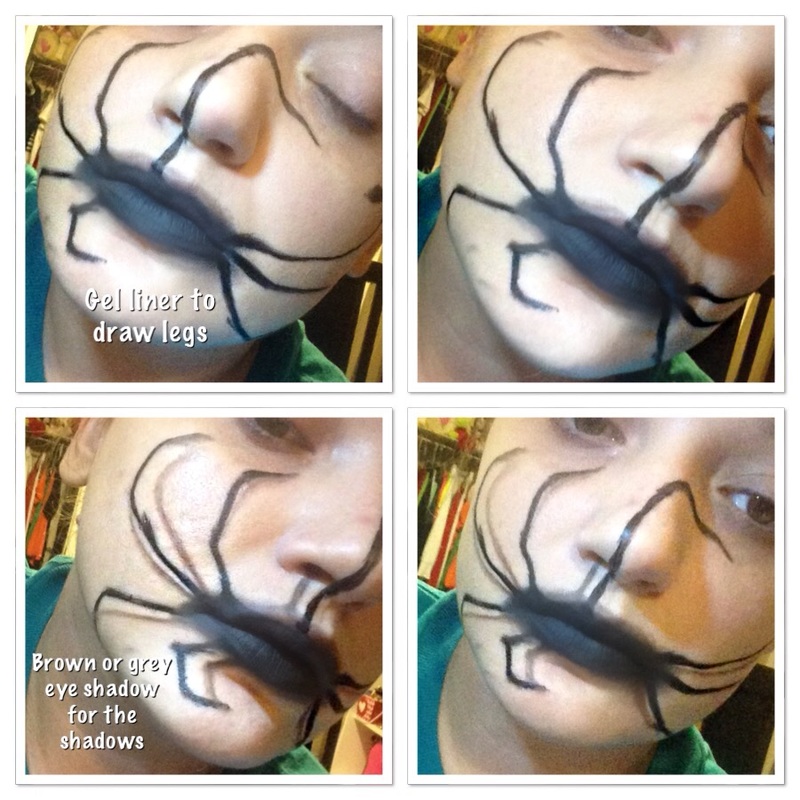 The trickiest part of this is making the shadows of the legs which make it look 3D, make sure you're using actual shadow to do it and actual liner on the lips to make them very black. Gel liner for the legs. This look is easy because its meant to be messy. It's easier than it looks.
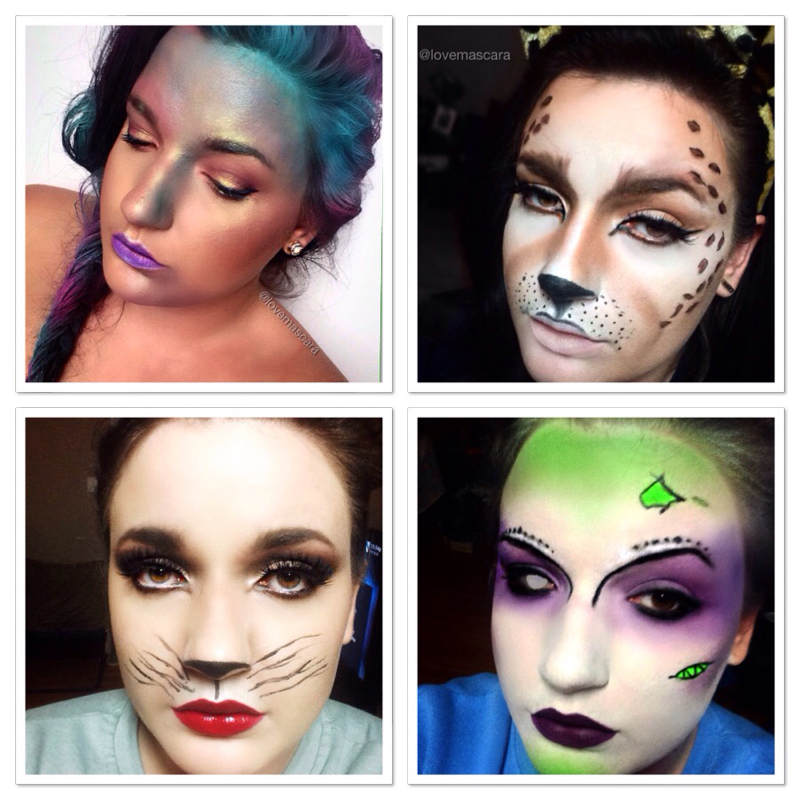 ITS TIME!!! Thursday is the first day of October!!! I was going to wait until October 1st to officially start doing halloween looks butttttttttt as you can see that didn't happen. I'm too excited and honestly it's a good outlet for me, I thoroughly enjoy creating and re-creating looks any time of year. So some of these are inspired by Pinterest and some are looks I just threw together. So top left: Mermaid Barbie. This is actually using a lot of duo-chrome and foiled shadows. I didn't do scales or anything cause I wanted her to be iridescent and majestic. I used colored hair spray. I sprayed the braid first with white spray and then went in with pink and blues. It was actually really easy just pile on the blues, greens and purples.....lots of highlight. Top Right: Leopard/Cheetah Cat This was a little more difficult. More detailing there are alot of different variations of this online to look at. Basically lots of contour colors, browns, and liner. White paint was laid down first on the face before anything else. Bottom Left: Cute Kitty This was actually on Pinterest. I loved it super simple and great if you want to be a cute little cat for a party. Red lips was a fun turn to it as well. Liner for detailing and whiskers. Fluffy lashes and a really heavy brown smoky eye. Bottom Right: Beetle Juice inspired. This was a look I found on pinterest although that one was far better. It's from an artist Alana Dawn on Instagram. It was an amazing feminine Beetle Juice look. Requires lots of white paint, purple shadows, neon green, a dark lip and liner for detailing. 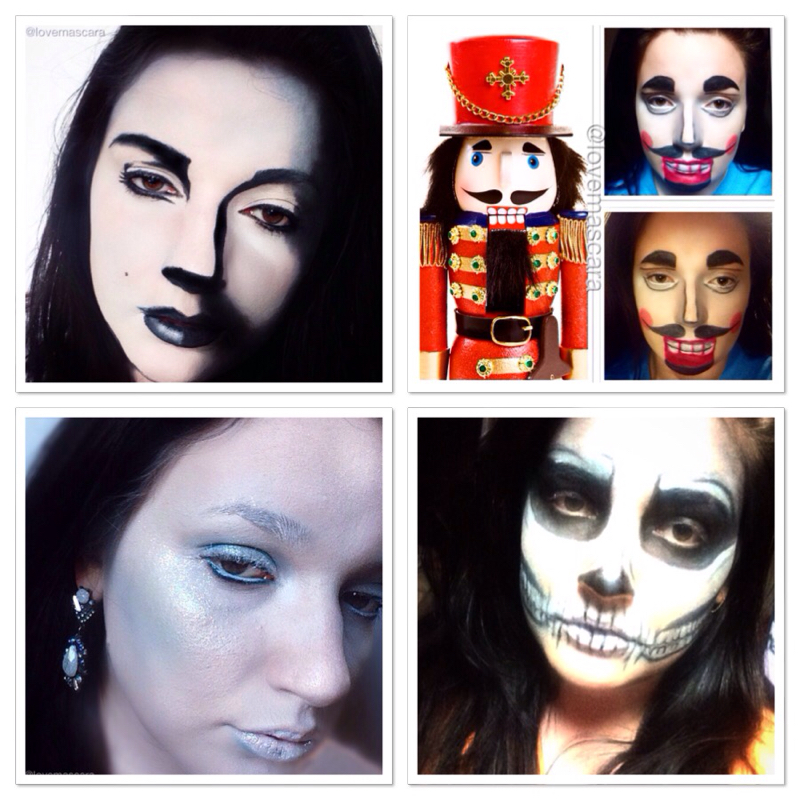 Top left: Drawing/Sketch This was something I seen on Pinterest. The had done Marilyn Monroe. I obviously don't look like Marilyn Monroe. This is lots of white paint and black shadow and gel liner. It's pretty easy. You just look at a picture and where the dark areas are like shadows, or whatever on the picture you just shade your face in that area as well. If that makes sense. Top Right: Nutcracker This was something really cool. I don't know why I wanted to do a Nutcracker look but I liked how it turned out. It's a lot of strategic and symmetric detailing. It has to be very neatly done so that makes it difficult somewhat, however if your comfy with that then it's easy and fast. Bottom Left: Ice Queen You always see a lot of Ice Queens or Frozen queens. Nicole Guerriro done one a while back that was beautiful. I wanted mine to be completely frozen. Everything about her just cold and statuesque. I added glitter to this one for extra and sparkle like ice statues. Pale blue shadow as contour or blush, which ever. Bottom Right: Skull You see a lot of skulls around this time. Skulls are hard in my opinion. It's a lot of detailing and time consuming. This was inspired by a male artist who does insane SFX makeup. I don't remember his name but it was amazing. 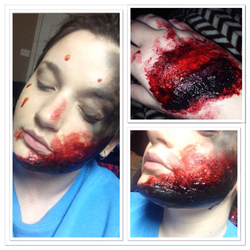 For gory looks I use Ben Nye Thick Blood and tissue paper for texture. I also add in some black paint or shadow before hand if I want it to look charred or burnt. Pink if I want it to look fresh and I also use liquid blood from Walmart if I want it to be runny. These are actually really easy to do but messy. So if you want to just be something scary and gory get some Thick Blood or Fresh Scab and you can have a look in no time. I'll be coming up with some looks for you to do. Like deers, scare crow, so on so forth. I'm so excited. Get ready for Halloween overload.
Here's some fun Fourth of July makeup looks for you to try if you're feeling festive! 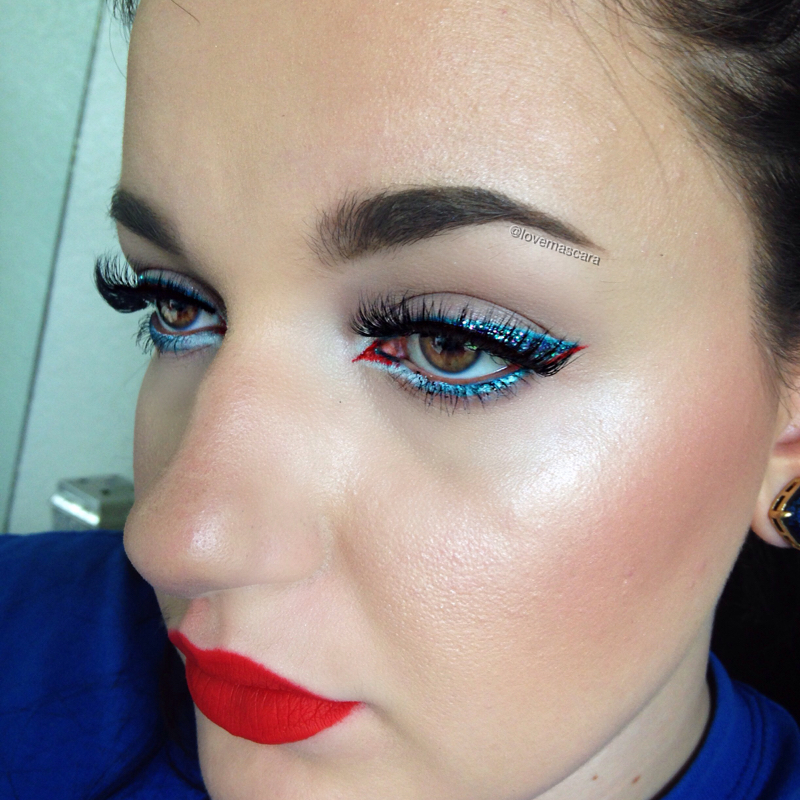 This one I used a black gel liner first and then went over it wil MUG Poolside and then Pegasus. To make the blue really pop rub a white crayon liner or base onto an angled brush and go over the black that way the blue is brighter over the black liner. Yes it's easier if you just use blue liner. Or a white liner and then put blue shadow over it. I didn't have those in gel liners. Then I applied glitter glue and Beauty Bar Baby Rain Drops glitter to the wing. I took LA Splash Hypnotized lip tint (liquid lipstick) on a pointed eyeliner brush and just outlined the wing underneath and made a cat eye effect in the tear duct. It's also the color on my lips. Lena Lashes in Tina ***it doesn't say you can use the lipstick on the eye area but I didn't have any issues so use it at your own discretion.  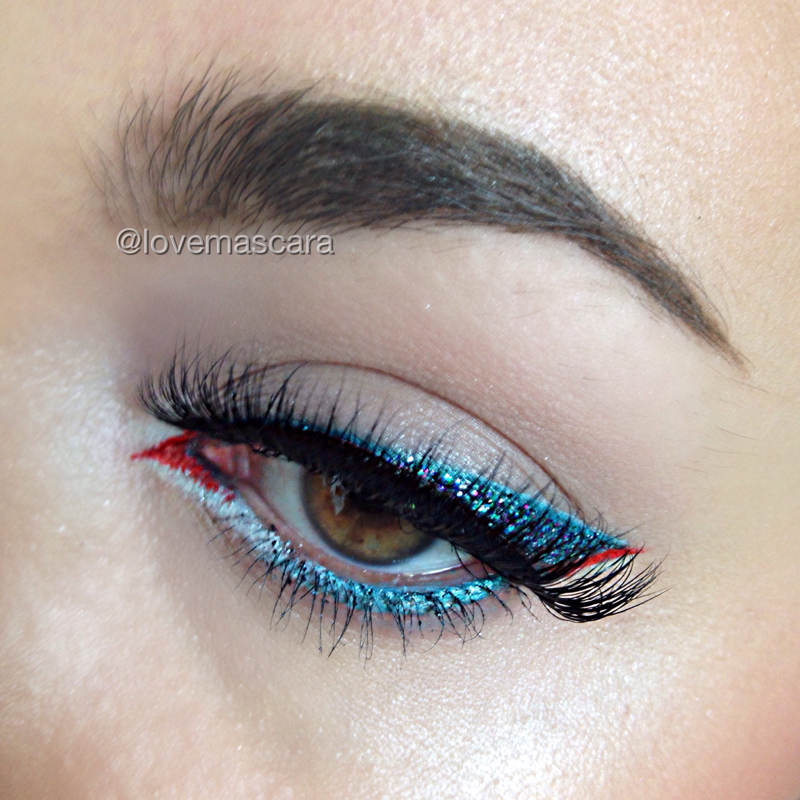 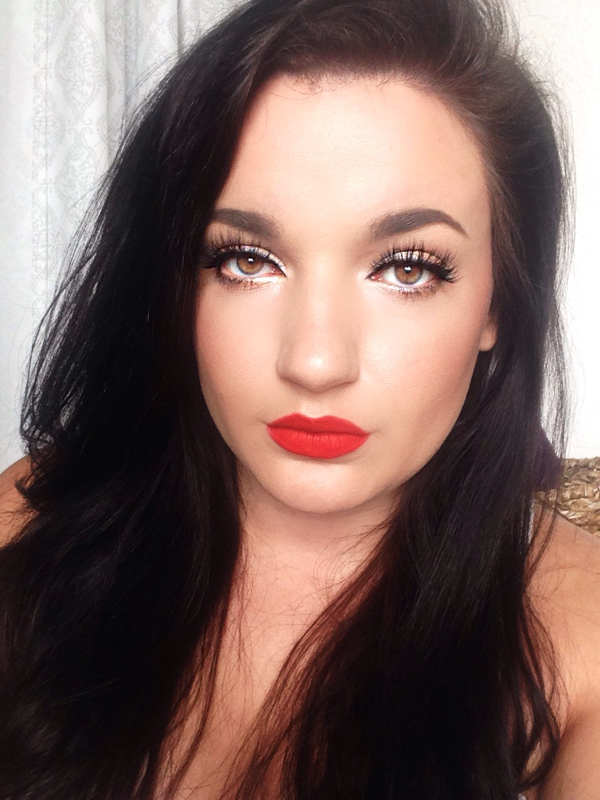 This one is just lashes and lips. Perfect for a cookout cause the main focus is skin and highlight. Lashes are Bella from Nubounsom I did a winged liner with it. Lips are LA Splash Hynotized Highlight was Becca Opal and NARS High Intensity Blush in Fervor 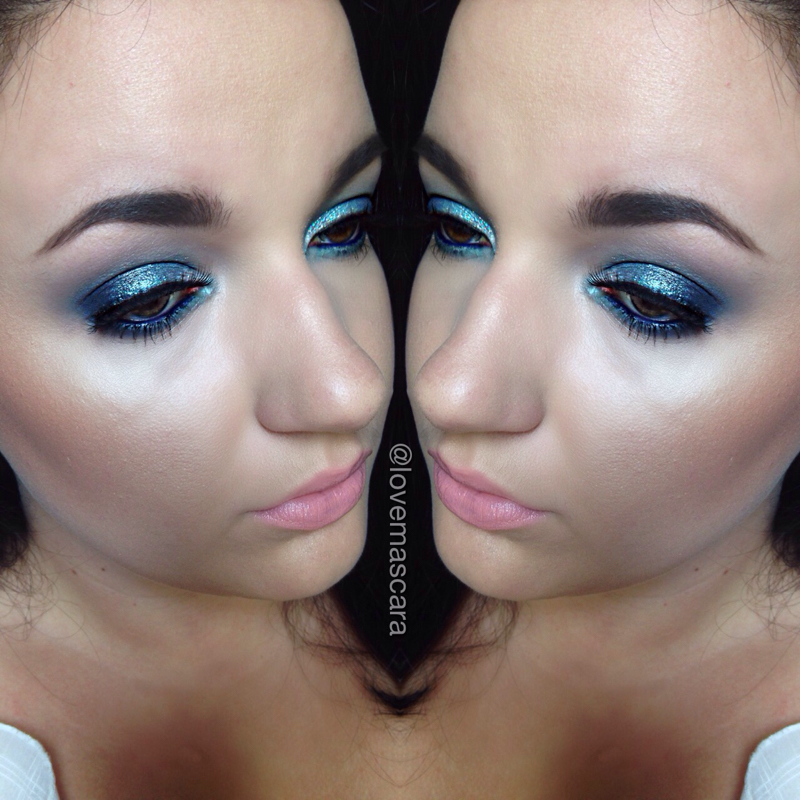 This is a navy smokey eye. It's MUG Poolside and Pegasus with ABH Blue Velvet on the outer corner and Violet Voss Wendy glitter on the inner corner. Lips are Gerard Cosmetic Butter Cup and Spring Fling gloss Luxy Lash Woke Up Like This 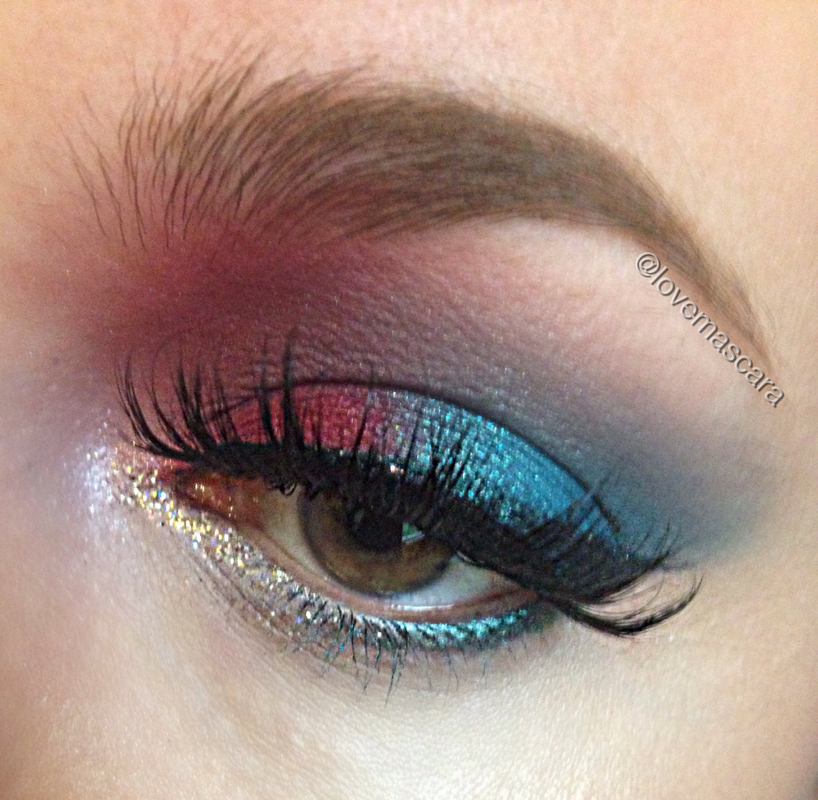 This dramatic look is for my girls who like to live a little. It's heavy on the eyes and lips. It's a reverse smokey eye with the red going all the way into the start of the brow. MUG Cupcake, Bitten, Razzleberry, Poolside ABH Dragon Fly lower lashline Beauty Bar Baby Diamonds and Pearls inner corner over white base. Lena Lashes Naomi lashes Colour Pop Clique on the lips I got creative lately. So as makeup is my outlet obviously I done some lip art. Which mostly turned out to be food inspired lol. 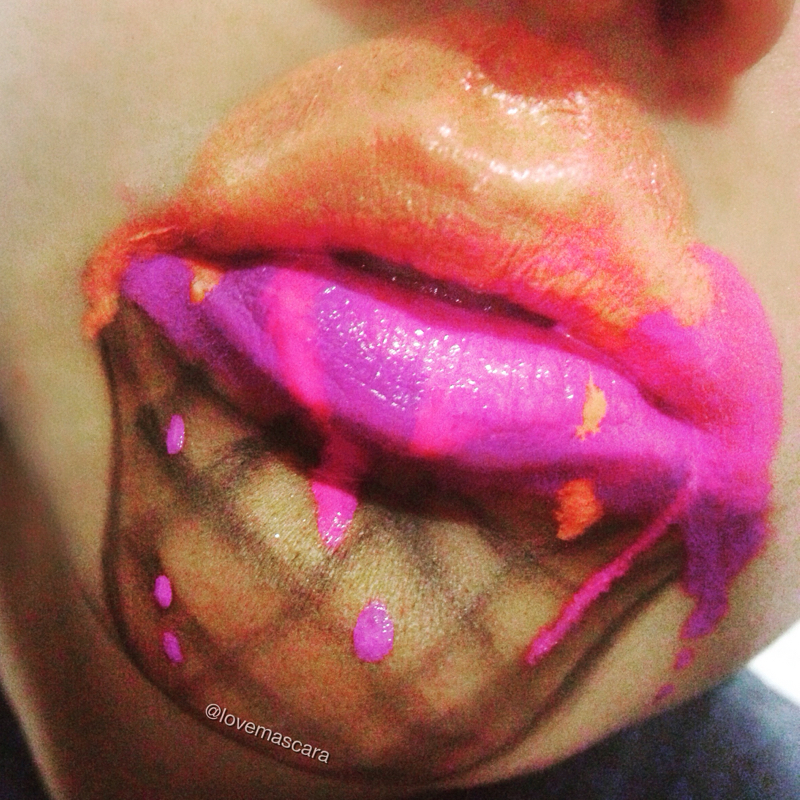 Neon Melted Ice Cream Cone. Using OCC Liptars in ChaCha, Nylon, and Hoochie. And brown shadows. 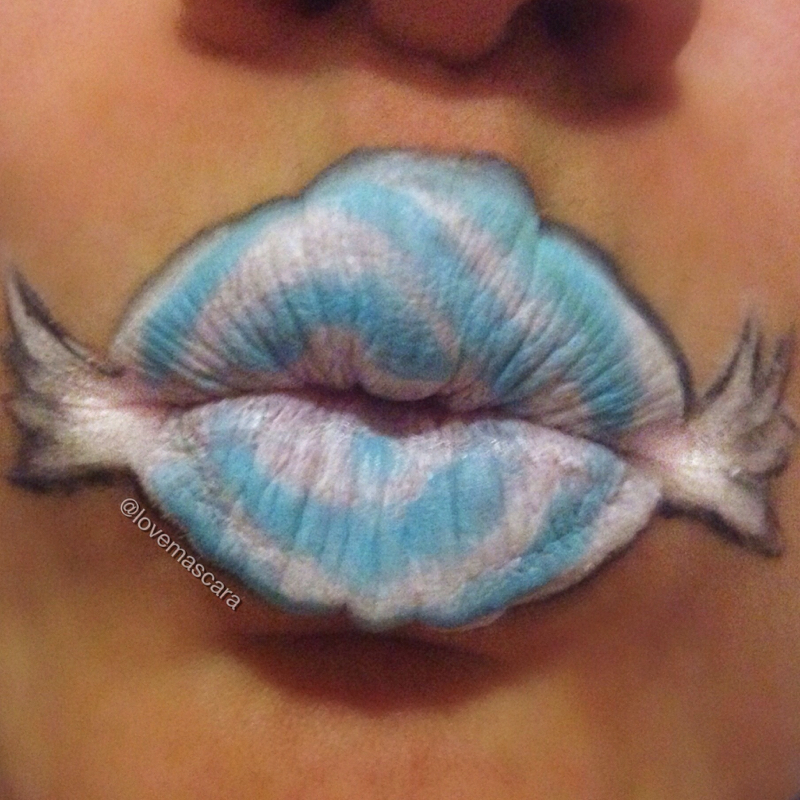 Candy Kisses. Using OCC Feathered and Poolboy lip liners 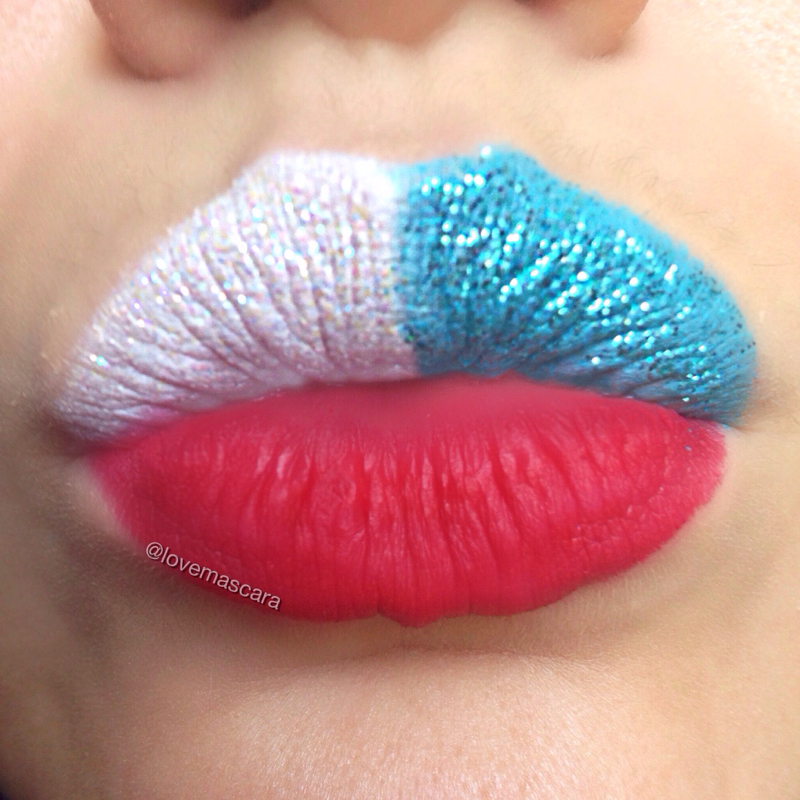 Memorial Day/ Patriotic Lips. Using occ NSFW lip liner, Pool Boy lip liner, and Feathered. With Violet Voss glitters in Wendy and Teresa. 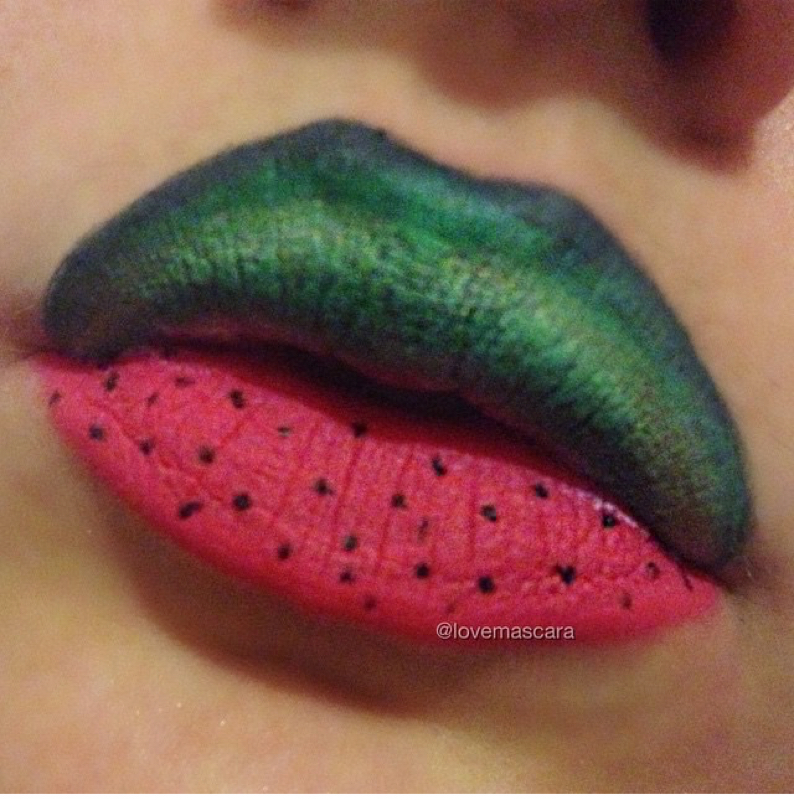 Watermelon Lips using ABH liquid lipstick Sweet Talker and shadows for the green part shaded with black lip liner. 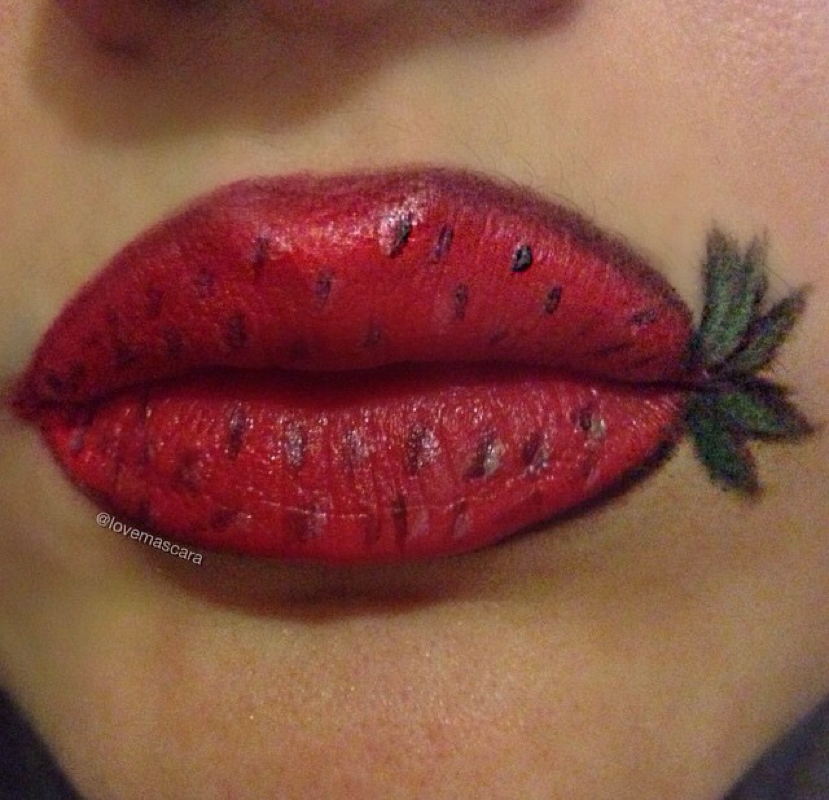 Strawberry Lips. Using OCC Harlot liptar and shadow for the leaves. 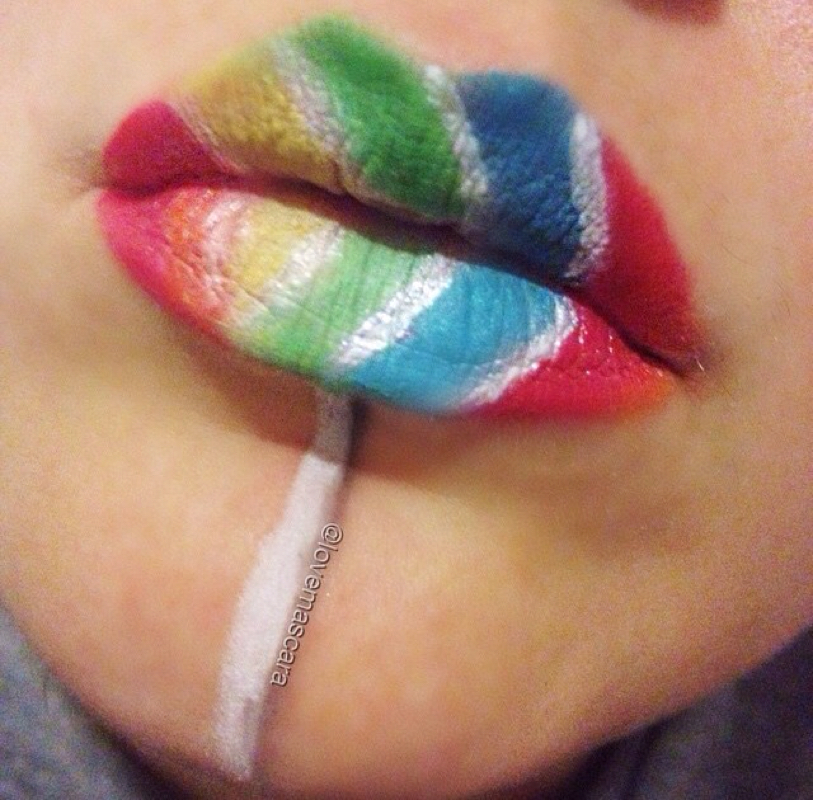 Lollipop lips. Using nyx jumbo stick in milk as a base. Occ lip liners and liptars for the swirls and stick and also some shadows. 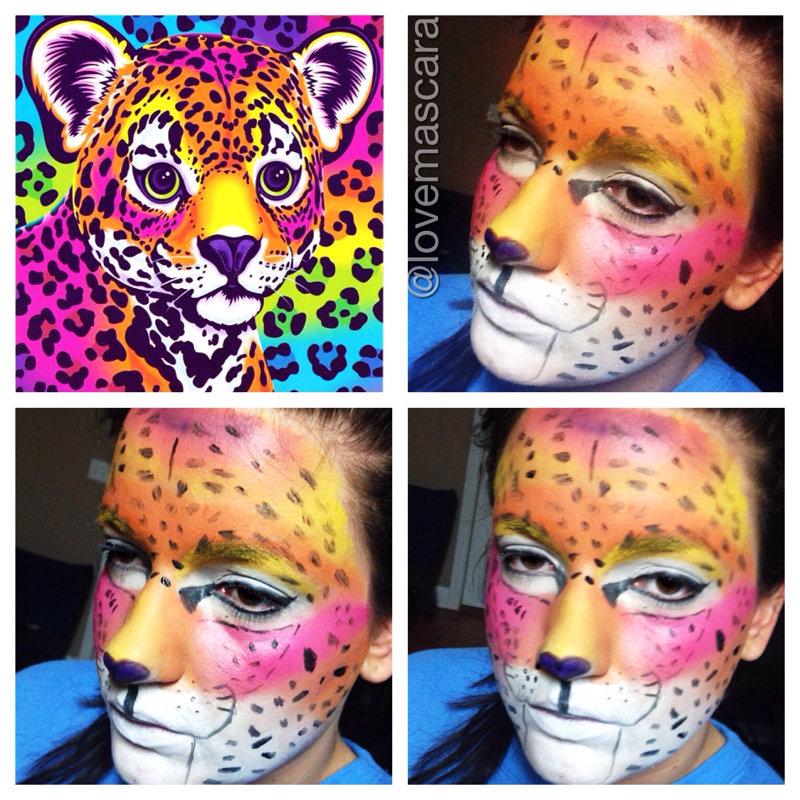
I really love using makeup in an artistic way. It's so much fun for me. Lots of times when I feel sick or not having a good health day I'll go play in my makeup and create something weird and crazy as a form of release I guess. As you know I love color and Lisa Frank is pretty much as colorful as you can get. I used mainly face paint crayons and some pink lipstick for this along with a few eyeliners. The detailing was done with liquid liner from Wet n Wild. 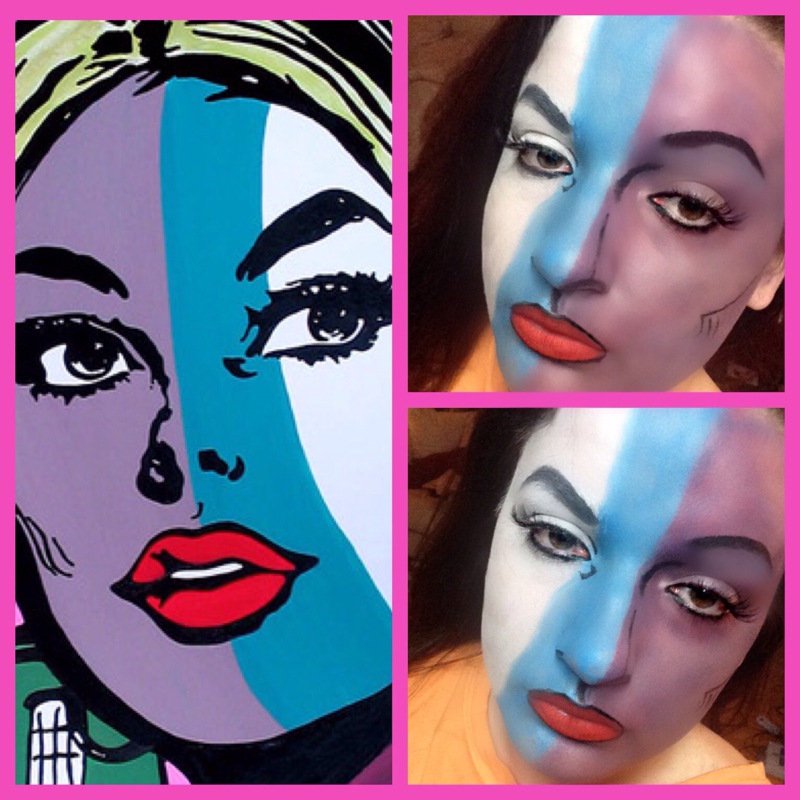
Whenever I start feeling sick, for some reason it makes me feel better to go and dive into my makeup which usually ends up looking something like this. I found the picture online. I really like pop art and I think it's fun to use makeup to create really artistic things that are just really out of the box. I used halloween face sticks for this. Mixing colors to get the correct purple tone. I used gel liner to re draw the brows and lines in the face. I used Colour Pop Cosmetics lip pencil in Clique. 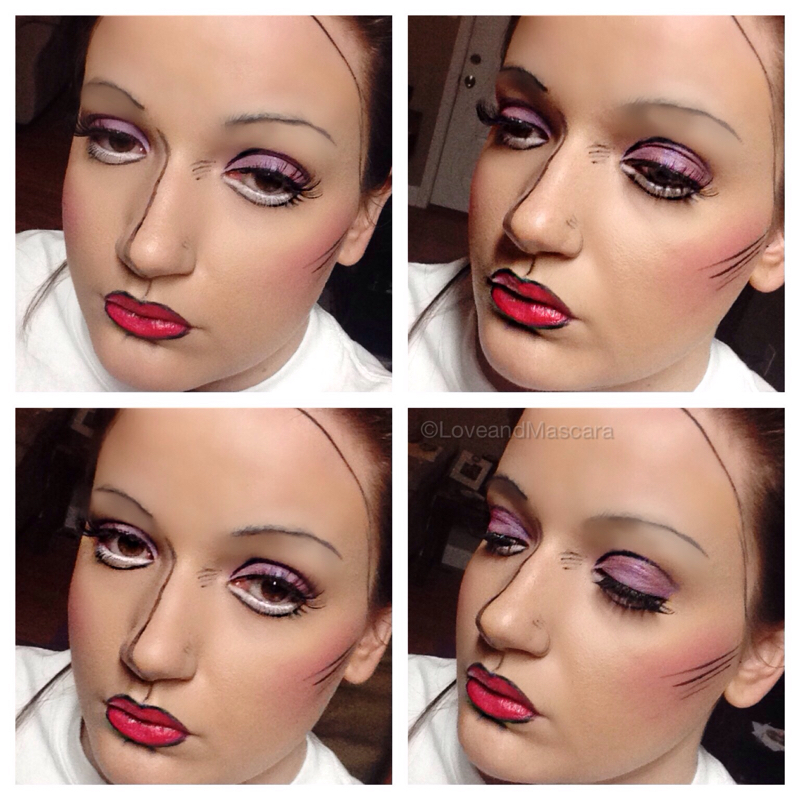
When I feel under the weather, I always go mess with my makeup and do dramatic costume makeup to get my mind off being sick. I get so caught up in the details that before I know it I am either ready for bed or feeling better. So tonight I worked on my pop art makeup. As always I use eyeliner to detail. The eyeshadow is Electro from Anastasia Beverly Hills. The lashes are Red Cherry Lashes in 46 I believe. The lips are BH Cosmetics Coral Escape. The foundation is actually Maybelline Fit Me Foundation in 210 and I really liked how it applied and the finish. 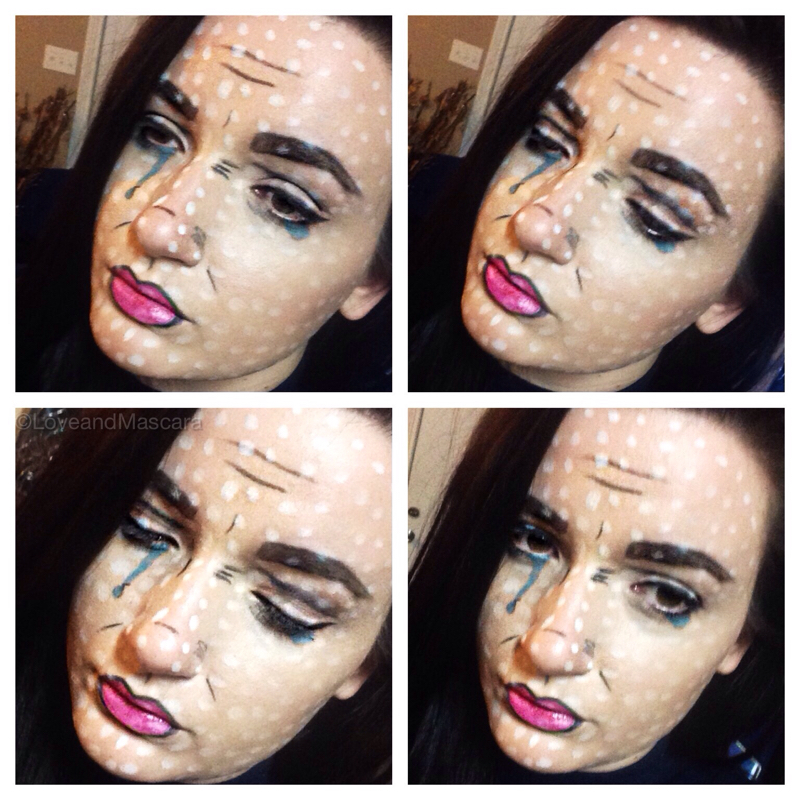
I done this with mainly Maybelline Gel Liner and the white dots are from a face paint stick. I made this one a crying face as hopefully you can tell. I outlined the brows this time which was really fun. I colored them in with grey so you could still see the outline. |
ErinI'm from Tennessee. I'm a makeup and skincare lover. I have always enjoyed creating looks but I love to help people with product knowledge and application even more. I've been able to start blogging and do these things I love because God has seen fit to bless me with the opportunity. Thanks for stopping by and visiting with me! 

 
Categories
All
Archives
January 2022
|
 RSS Feed