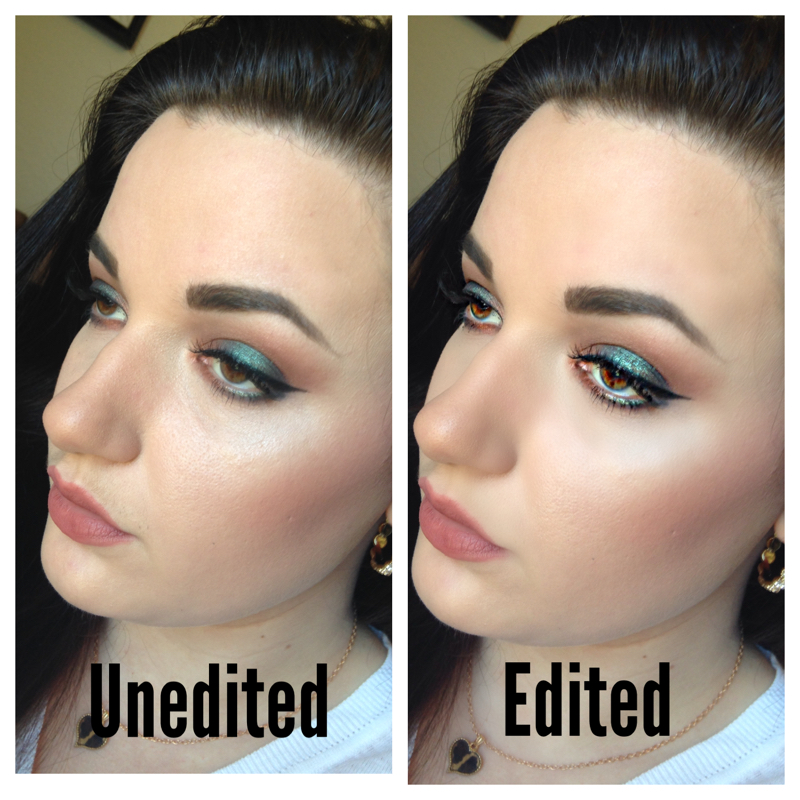
 Let me start by saying I'm not mad and im not attacking anyone. I just wanted to be honest with you entirely and give you my thoughts on this subject. Lately there has been excess amount of photoshop going on with Instagram. For some people this seems to be an issue for others like myself I don't really care, to me it's no different than looking in a magazine which you know is "airbrushed". On some photos yea you can tell, on others it's a little harder. I can still look at photoshopped images and say "I love that makeup and I'm going to try that look tomorrow" I know that's not how they look in real life but it's a beautiful IMAGE. Do I edit my pics? Yes I do. Point blank. Straight forward. Do I edit my pics to alter the makeup? No I don't. Meaning I don't filter them I literally don't have any lighting to use other than LED or natural light. So if it's sunny that day my picture is gonna be warmer, if it's over cast its gonna be perfect, if it's raining or snowing it's gonna be cool toned. That's just how it is. I don't have a ring light or awesome lighting set ups as of yet but I hope to. Also I use my phone camera which isn't the best resolution or HD quality. There are cameras out there that people literally call the "selfie" camera cause it edits pictures for you by adjusting redness and evening out skin tone. Here's my issue: you can look at pictures and know whether or not that's real life, my question is why does it bother you so much that I smoothed out my texture issue on my nose, upper lip or wherever? Kim Kardashian supposedly pays a photoshop artist to be on call 24/7 for her selfies. Does that make her less appealing to you? Does it make you think she's not beautiful in real life regardless of how you feel about her? No it typically doesn't. Instagram itsself was designed with filters and editing tools to let you choose how cool you want your photos to look. When you look at someone's wedding photos do you think the grass was that green that day or the sky was that blue in the original shot? Could've been but probably someone just wanted that moment in time to not only be captured perfectly but to also look as lovely as it did in person. Rarely we can take a picture that does the actual image justice. If you have a problem with someone editing their photos that's absolutely fine and I have to say I really respect those people that don't edit at all. I will say though that companies usually only repost images that are absolutely stunning and the "focus" is on their product. Whether that is lips or lashes it doesn't matter if the light can hit it the right way or if the back ground is blurred or if the focus and detailing is hightened just so you can see the beauty of their product that's what they notice. Does that alter the image? yea it does slightly. Does that mean the entire look isnt beautiful? No it doesn't. It means that I want to show you how awesome this lip color or lip art is as if you were right here with me. Or I want to show you how stunning these lashes are and I need these things in the background to not be as noticeable. There are cameras that film in the best HD quality you can get. Meaning it's as close as your going to get other than an in person experience. It's still not gonna be exactly like the real thing. Not everyone has that camera. My camera from my phone and my real camera that I use often are still not going to have the HD quality needed to show you how it would look if you were right in front of me. I know this, you know this. So I can leave the picture a little dull a little grainy and make it not as cool as what I done that day or I can bring it up to par. Heres some things that isn't photo shop it's just lighting: Highlight. If I look super glowy and like I'm glistening then I've found a good spot in my window and the light is shining on my face just right. It would look that way if you were there as well. Eye color: if I look like my eyes are very gold or Amber then im standing in the light straight on and also eyeshadow color plays a big roll in that for me. Lip gloss shine: again direct lighting. Here's editing/photoshop: No pores: generally I don't care about if you can see mine cause we all have them what I do hate is flaky textured skin so yea if I'm having a day where it's really bad that I can't fix Im gonna take the focus off that area hopefully. But that doesn't always work. Under eye circles: Lighting can totally help with this it really really can but when they're really not having a good day and sunken in sorta they still show through even the best makeup. Do I take the focus off that? Depends on how bad it is. Does it always work? No it doesn't, cause smoothing it out isn't going to fix it and blurring it would cause you to have to blur your whole face and look a little plastic. Sparse hairs: I usually don't care about this either. If I've not tweezed so what? I'm not gonna let it get insane. Beside editing it would be more trouble than it's worth. Lip color: this one is tricky. To get a good lip shot I do usually smooth the skin around it. Only because that brings the lips out more which is what you want, just like when something is blurred behind you so you stand out more. If I have super dry skin on my lips yea I might smooth it out just a little if my lip balm ain't cutting it. I can't do it too much cause then it won't look like I have any texture to my lips and they need to look like suede almost. Or I'll look like I'm wearing lip gloss when it's actually a matte shade and I've smoothed so much the sculpting is gone so I can't go overboard. Does this mean that the skin around my lips is crazy looking? No it's skin, and it looks like skin. I'm just trying to show you this awesome lip color or look I done and I need that to be the focus. Stroll through your Walgreens look at the posters of the model wearing the makeup or just the lip part that's cropped out for the packaging can you see her pores? No you can't. In conclusion am I a fake? Well that's up to you. I gave you a true honest before and after at the top on what I do to edit and what I don't. Truth is though that I know no matter what, my makeup application was good and that's what I'm trying to get through to the rest of the world. My clients are happy, they feel good about themselves after I've done their makeup and showed them how to do it as well. We live in a world where people can contour themselves into Beyonce and Madonna literally and it looks epic because that's the power of makeup to change your appearance totally and yet your choosing to get upset because someone smoothed out a picture. Like I said I'm not mad I just think it's a little crazy to get offended or even to say something negative on someone's picture about it. It's not like it's a thigh gap controversy over here cause that for sure ain't happening lol. If you're interested in general about what I use to edit that would be Facetune, I used Instasize to make collages and A+ Signature for watermarks. I'll continue to like stunning pictures whether they're edited or not and hopefully you will too.
0 Comments
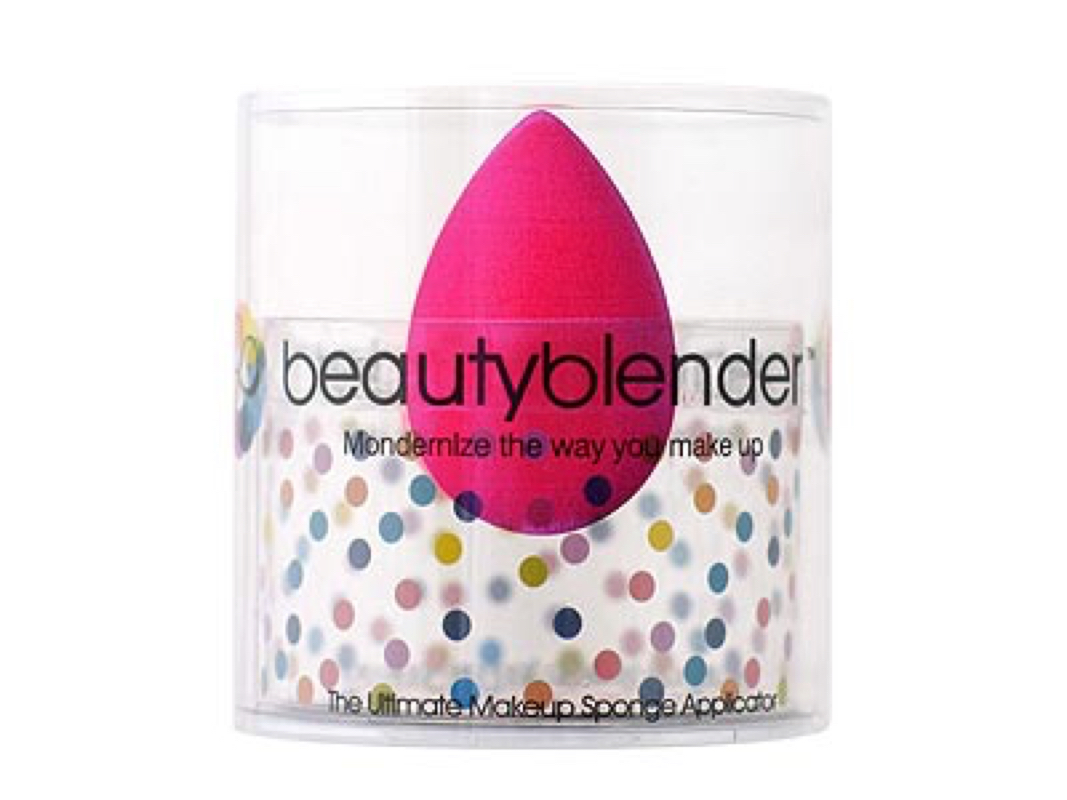 This week my stand out product is my Beauty Blender. I've had mine for a while and I've always loved it but I've really used it everyday this week and just fell more in love. Not only does this give the best application and finish for concealers and foundation but it's great for cream contour and even setting your makeup with powder which is why I love it. I've been placing my contour powder on my face with a brush and then blending it with the beauty blender and it's made everything so much smoother and not patchy. I was really having patchy dry areas right under my cheek bones when I used powder contour but this has really helped that. Get one for yourself remember to use it damp and not dry and bounce or roll it on the skin. They're $20 at Sephora and other retailers. 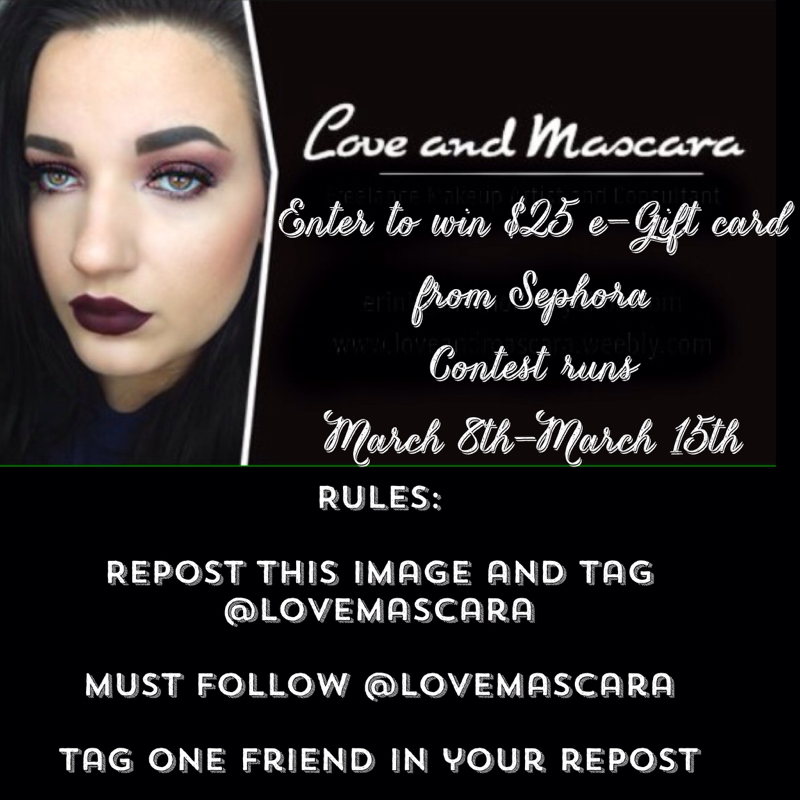
If you aren't following me on Instagram now is a good time to do so. I'm doing a giveaway for a $25 e-gift card to Sephora for reaching 10k views on my blog. So go follow @lovemascara and enter to win! Winner will be chosen March 15th and emailed the e-gift card that night. 💜💜💜 
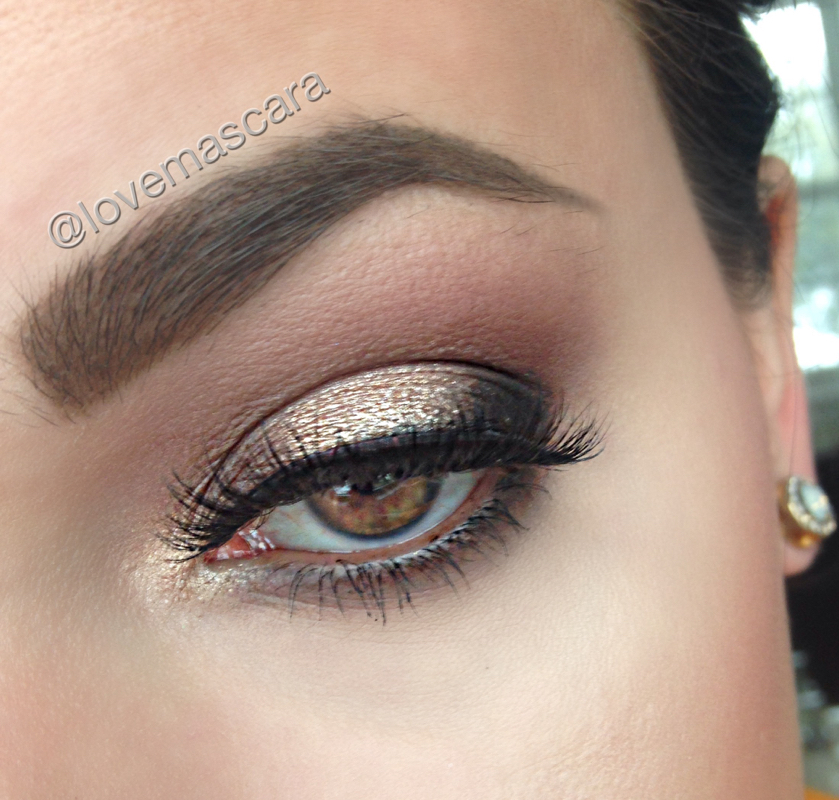
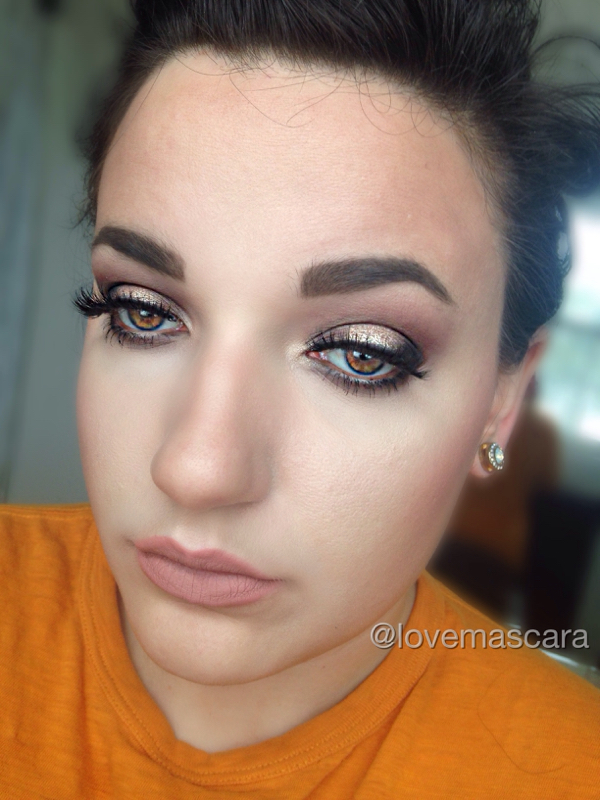
This is my dear friend Megan. Gorgeous isn't she? She will be getting married at the end of next month so she's s good candidate for my bridal series. We did a super glamourous timeless look on her today. Also she has beautiful green eyes so they really popped with the makeup and smokey eye as well as the shimmer. Eyes: ABH Red Earth, Smoke, Fresh Peach, Noir and a touch of Dusty Rose MAC Whisper Pink pigment applied wet Red Cherry Lashes in 213 ABH dip brow Face: Laura Mercier oil free foundation and RCMA VK 11 palette for concealing and contouring Becca Opal highlighter and Song Bird blush MAC Emphasize under the eyes RCMA no color powder to set Ben Nye final seal setting spray Lips: ABH Vamp and Lovely mixed. The pre makeup tools I used were Murad skin perfection moisturizer. Benefit 15 Hour Primer. Dr. Jart+ black label detox beauty balm. Toofaced Shadow Insurance. As you know I am a little OCD about concealing dark circles. If you don't know, now you do. I have them from sickness and hereditary so no getting around it I'm afraid. I've tried several correctors through the years and only have 3 favorites. That's right 3. Out of tons. I'm extremely picky and I want great results. I'm looking for miracles people. Though I've not found miracles yet I've found good products that do help. Correcting is only part of the equation I'm afraid. Moisturizing and concealing are the other part and I will have a post about favorite concealers next but I'm waiting for another concealer to get here that needed to be replaced so I can include it. So here we are just chatting about correctors. First up a corrector for dark circles typically needs to be orange based to cancel out the blueish purple tones. With corrective colors it usually looks peachy rather than orange. This is to cancel out or neutralize the dark colors. There are other colors that are brightening like pink. Benefit has an eye bright pencil that is baby pink that doesnt cancel out the dark circles it only brightens the area so it doesn't look so dark. Yellows can do that as well especially if your eyes are red. This is strictly about correcting the color and neutralizing it though to make the skin tone more even. 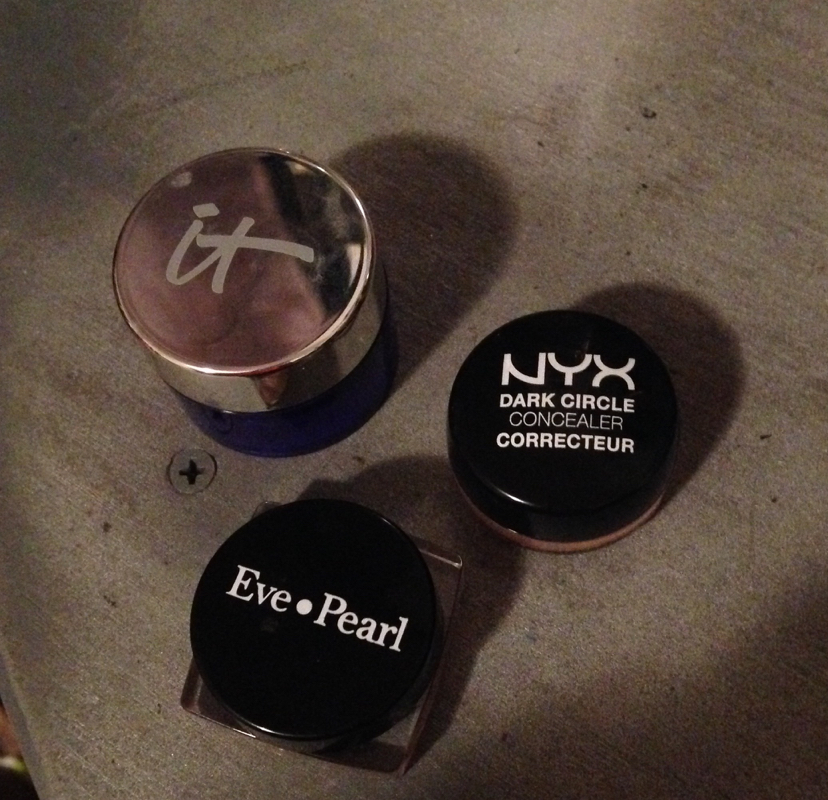 My three favorites are: It Cosmetics Bye Bye Under Eye Corrector in medium Eve Pearl Salmom Concealer in Light or Medium NYX Dark Circle Concealer Correcteur in Orange 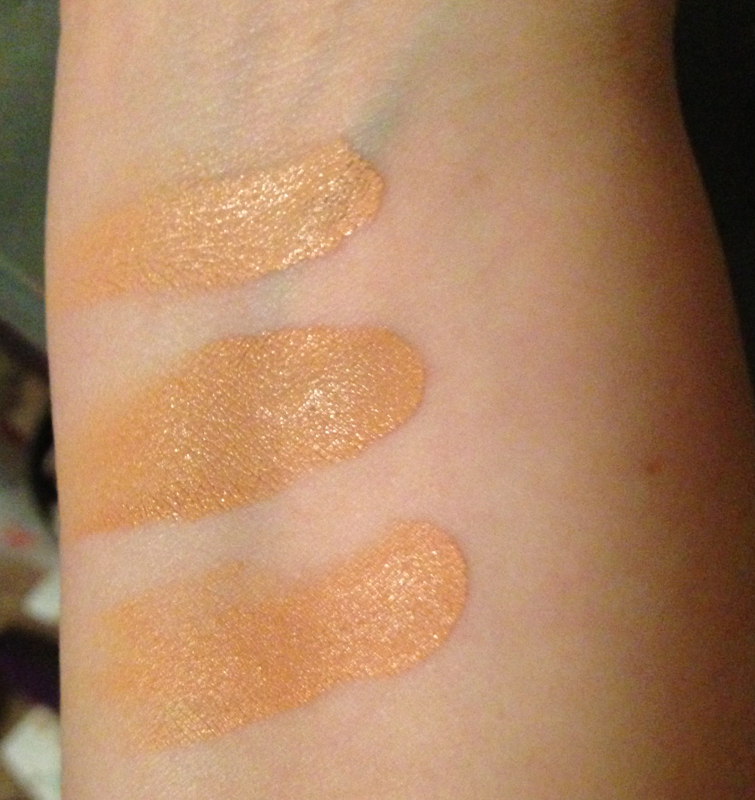 This photo is without flash in warm light. Let me start by saying that cream is the only way I go with corrector or concealer generally I only have one concealer that is a liquid that I like. So these are all cream. The top swatch is the Eve Pearl Salmon Concealer in shade light. This is a super creamy formula. It's highly pigmented so it does cover but it's very creamy and has so much shine to it. Which is awesome in regards to reflecting light. I got this off Hautelook over a year ago and I went back and forth with it because while it is really good it's so creamy it makes it thinner and easy to move. Like if you touch the area before setting it will wipe off some of the product. It is a nice corrector though and paired with a high coverage concealer does a fantastic job. I don't like using it with a medium coverage concealer though because it's not enough. This shade is also just peachy enough to neutralize and if it stayed on better could almost not need another concealer to even out the skin tone with the foundation. Another downfall is the price. It's $44 for 6.3 grams which is .22 oz. The next one is the It Cosmetics Corrector. This is a drier formula still shiny but definitely drier. It's very full coverage which I love and it's a darker peach which I also like. It's so dry though that you have to moisturize well with this and you either need to use your finger or beauty blender to blend. It doesn't wipe off easily though. I've had this well over 2 years and though I've made quite a dent it's not anywhere near empty. I used it almost daily for the two years as well. I always go back to this one. I got mine from Ulta and its $29 for .17 oz. Next is a new one that I just decided to try last week and it's the NYX corrector. I really love it though. There's not a lot of difference between it and the It Cosmetics one actually other than this one isn't as shiny and lots cheaper. Which made me so happy because when you have serious dark circles it's hard to find a product that's a good price that will be potent enough to fix it and this really fits the bill. I'm really enjoying it. This is $6 for .10 oz. 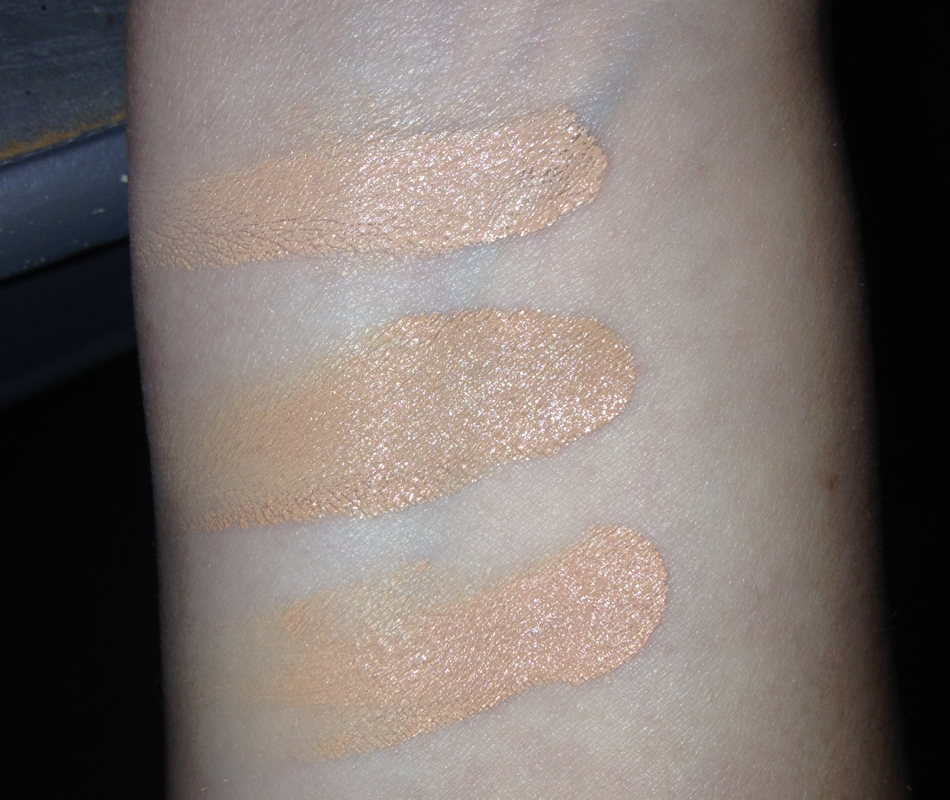 This picture is with the flash. From top to bottom Eve Pearl It Cosmetics NYX I want to add that the texture is huge when choosing a under eye concealer. Things that are too dry tend to look cakey and make you look much older and settle into fine lines more. So if you have a problem with a product for that try adding a drop of almond or jojoba oil to a portion of the concealer on the back of your hand to thin it out some, or to the container. You want it to be creamy but still be thick and not thin and runny. 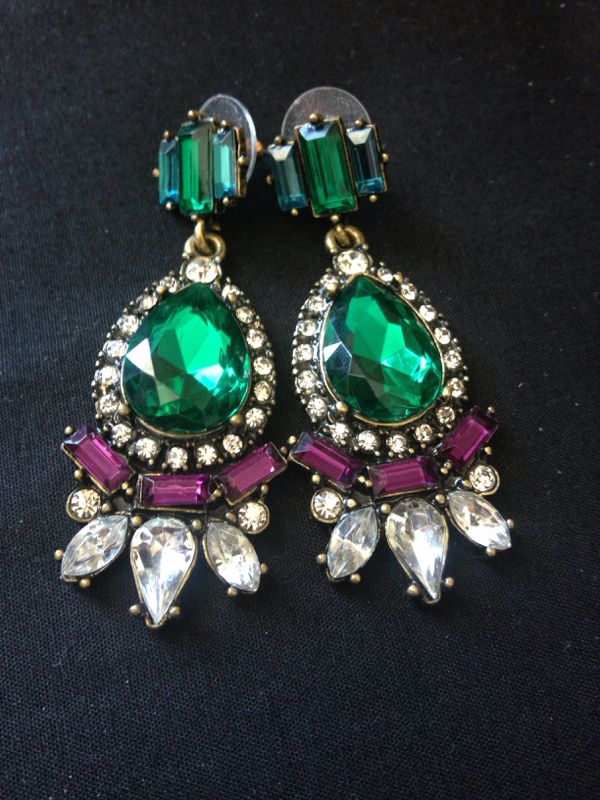 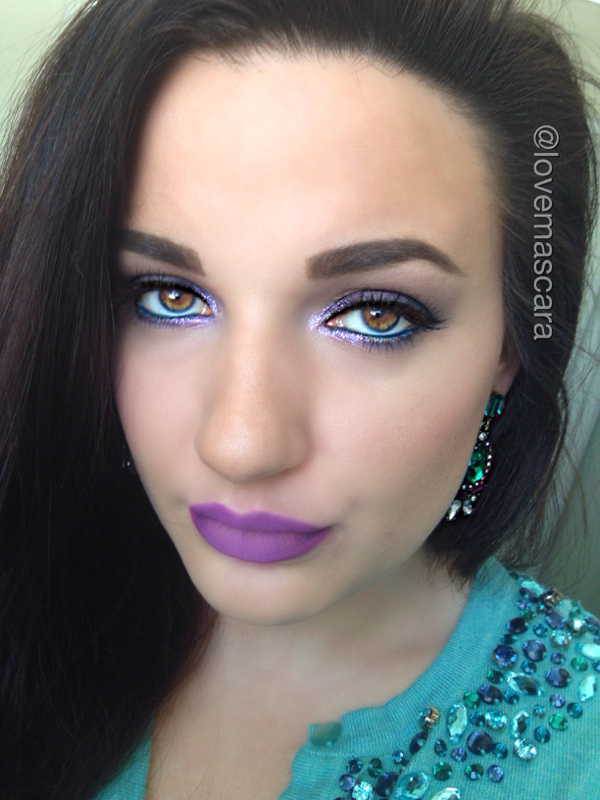 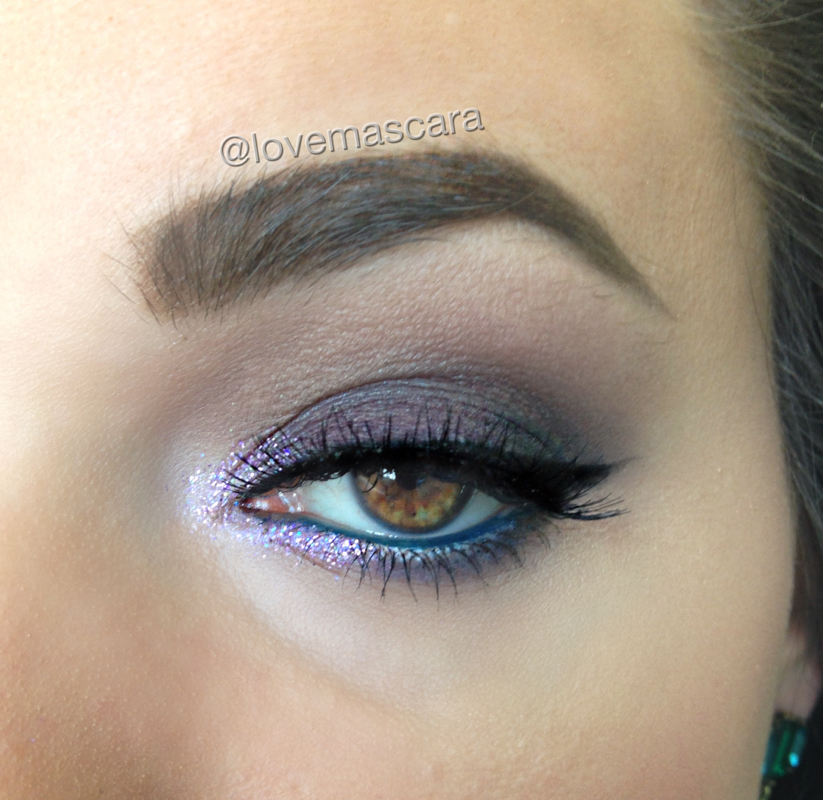 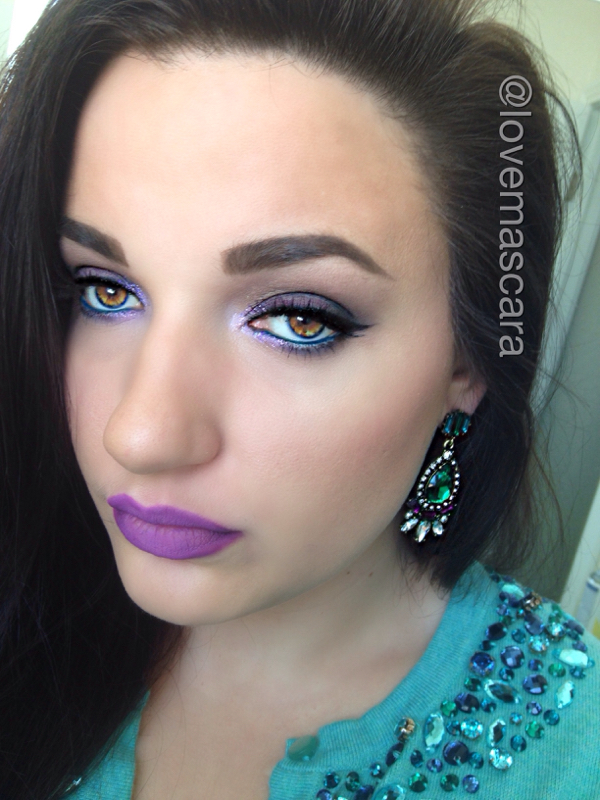 Here's another Bauble Bar inspired look. I got these earrings before Christmas to actually wear on Christmas Day cause I loved the Emerald green. I however can't find these online to tell you the actual name of these. Also unfortunate, is that I actually am wearing emerald green eyeshadow on the outer lid and outer lower lashline and it's so dark you can't see it really. Luckily I did use a teal green in my waterline though. None the less I do really like this and im really loving the wing in this. I often have a hard time finding the angle winged liner that I like. I made this one a little straighter and thicker so I liked it a lot more. Eyes: ABH Violet, Bengal (crease), Blanc (inner corner) electro (inner lower lashline only) MUG: Envy (outer half of the lid and lower lash line) Violet Voss Glitter in Parker (I 💜 this) Ardell Wispies lashes MUG Immortal gel liner ABH Dip Brow Face: RCMA VK 11 palette (custom mixed shade) (also used for contouring) Tarte smooth operator powder in Medium for bronzer MUG blush in Spell Bound TheBalm Mary Louminizer Lips: Colour Pop Brills, Feminist and a little of OCC "hoochie" lip liner 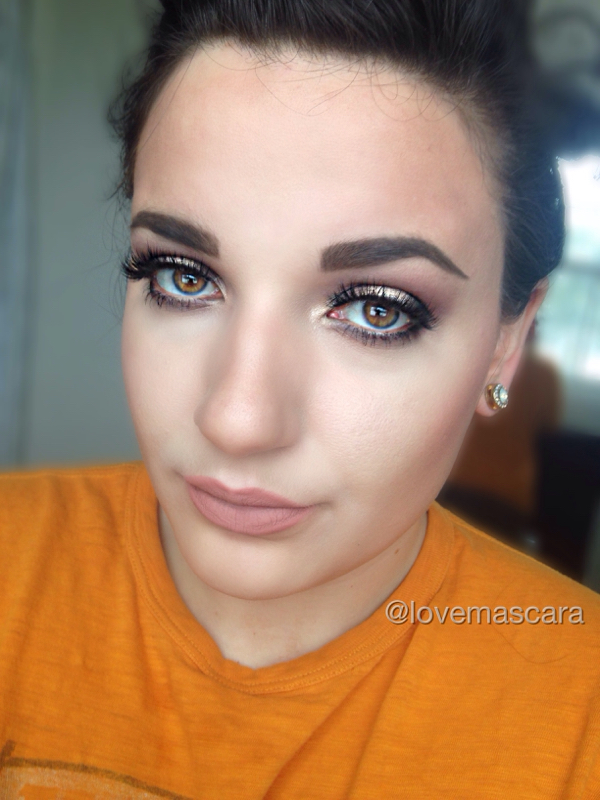
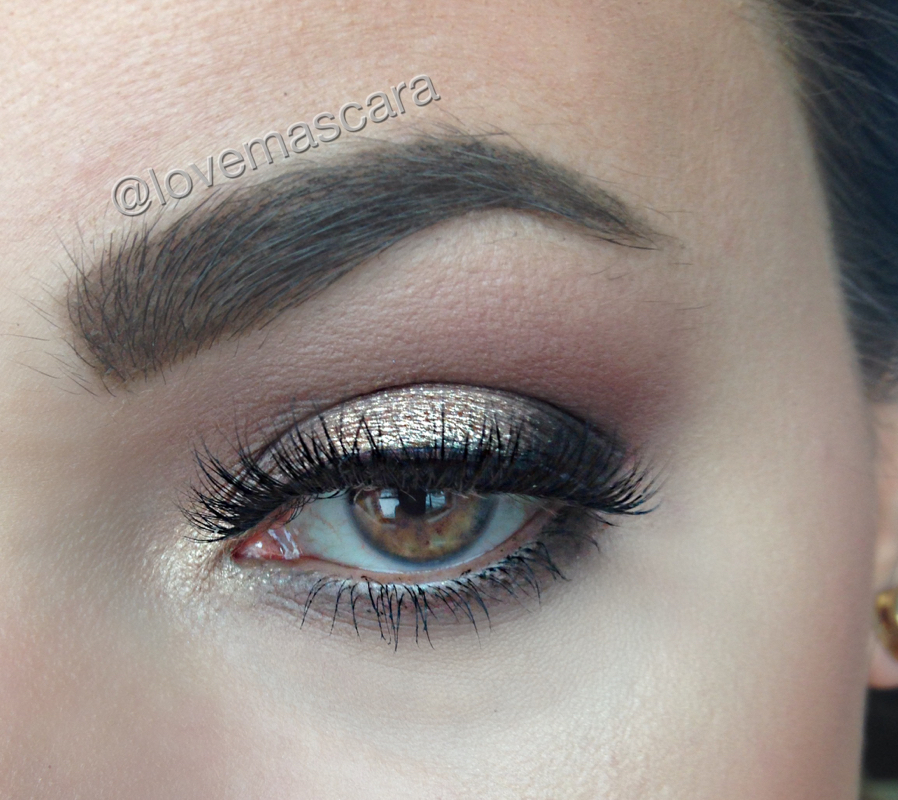
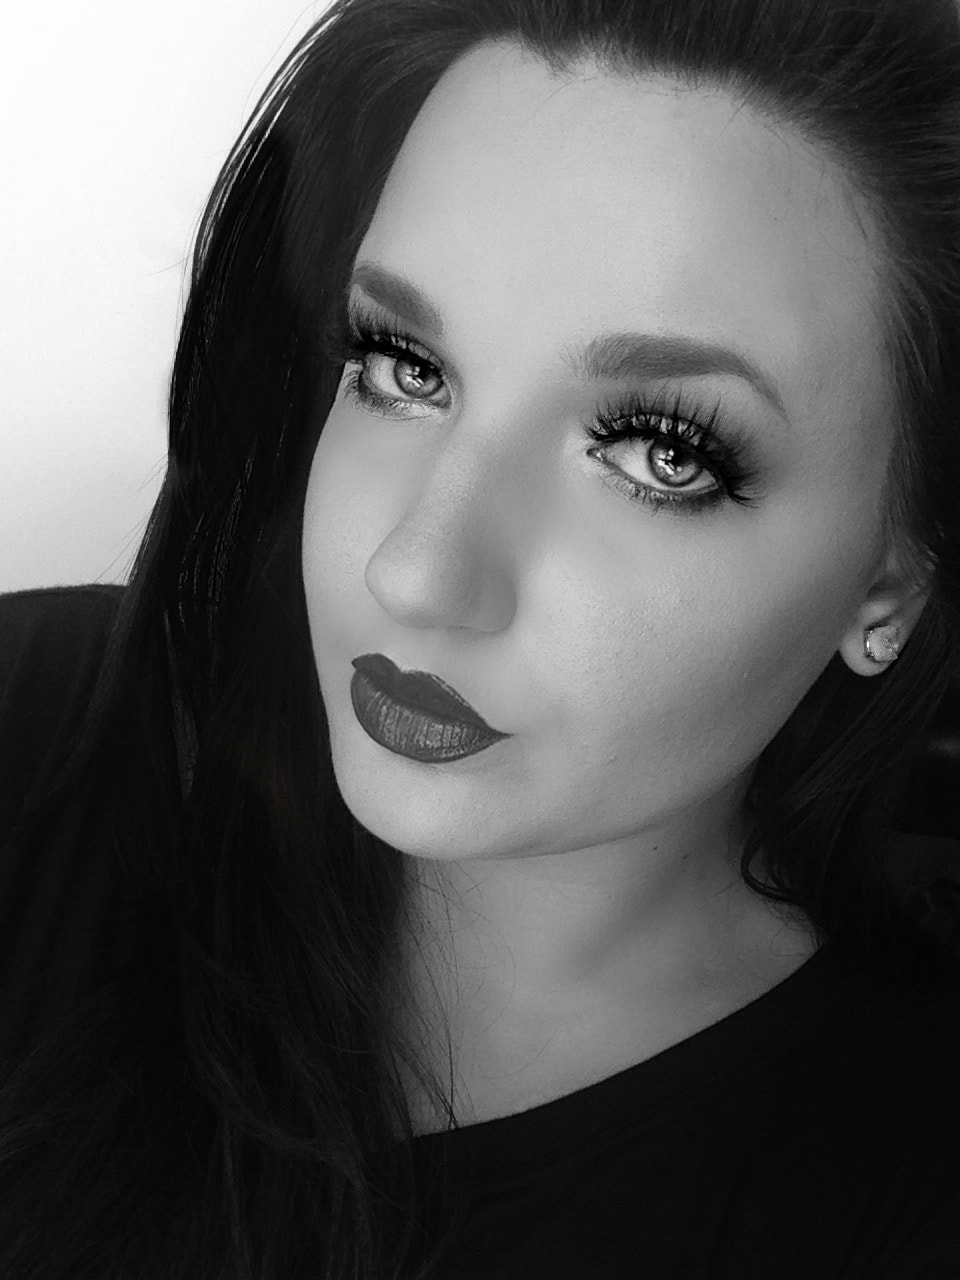
So this is my first installment of the Bridal Series. This is a perfect bridal look in my opinion. It's smokey with lots of lashes that aren't too long and dramatic but very thick. It has a touch of shimmer in the center of the lid. It's neutral but smokey and sexy. Eyes ABH Red Earth, Dusty Rose (both in the crease) Smoke and Noir. Smoke is on the inner and outer corners of the lid. Without much product touching the center of the lid. MUG After Glow pigment in the corner of the eye and center of the eye. Lena Lashes style Bianca ABH Dip Brow in Medium Brown Face: Nars All Day Luminous Foundation Cream contoured and highlighted (see seperate post about contouring) MAC Warm Soul Blush ABH Contour Kit (to set) MAC Lightscape for highlight Lips: ABH Pure Hollywood  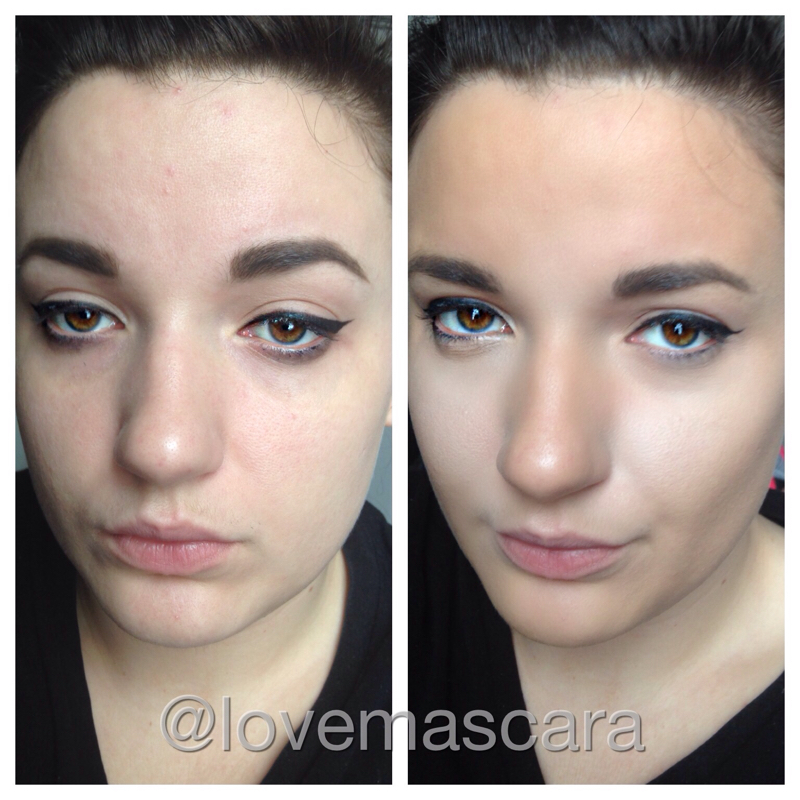 Yesterday my RCMA palette came in the mail. Nothing makes you feel more professional than have a foundation palette. Or at least it makes me feel professional. I got the Vincent Kehoe #11 palette. There are others but I feel like this one has the most shade range and that was really what I was looking for. I want to be able to match the lightest of skin tones and the darkest. Also these were more neutral in base so not overly warm or cool toned. Some shades are no doubt but in general it's very universal. I got mine from Frends Beauty. There's plenty of retailers you can buy from though as well as the RCMA website itsself. There are smaller palettes as well so you don't get over whelmed with all the shades. These can be pricey even the small ones but such a small amount goes such a long way that I feel like it's worth it especially to have in your kit. This formula is wax base and completely vegan. It's also 50% pigment which most foundations on the market are only 2-3% pigment. So it's incredibly high coverage. It's also mostly used for HD work. So photography and TV. I will say that this is difficult to learn at first. It's a huge product raved about by Wayne Goss and Kandee Johnson whom I trust inexplicably. So I was so excited to try it. I first tried it on my friend and found that it was hard to work with. I was used to watching people just dip their beauty blender in it and go to town. That wasn't working for me and it wasn't even covering. So after a few tries we got it on and it did look really heavy. Today however, after some research, I realized it needed to be warmed up. Most people do that on a palette or the back of their hand. In order to do that though you have to take a spatula to it and scrape product out and I was worried that would be wasteful. So I found that I could swirl my finger in the color I wanted and make it creamier and then dot it on the face. I buffed it out with a Kabuki brush today and not a beauty blender. Tomorrow I'd like to try a beauty blender. It was much fuller coverage today obviously by using a kabuki brush. I used this for everything correcting under eye circles, concealing, foundation, highlighting and contouring. It worked well for all of those things. I do like the finish of my under eye concealer a little better than this but it still worked and that was the point. So today was much better I provided a before and after shot. The after shot is no blush, powder, mascara, or lips. It's strictly just showing all the palette had done on my face. This foundation does need to be set though, I noticed through out the day it looked a little heavy or cakey so a finishing spray is needed I think. I have proms and weddings coming up so I needed to be ready for anything and im confident that I am now. There's also thinners that you can buy for these to make it a liquid foundation but I feel like anything can be sheered out with a Beauty Blender and maybe a drop of oil although I've not tried that yet. So oil may not work but I'll let you know if it doesn't. This isn't an everyday type product lets get that out of the way. Id try something MUFE Mat Velvet or HD foundation of you're just wanting a basic everyday foundation but this is a really nice palette. Side note my favorite part is that I won't be buying a cream highlight and contour kit now because of this and that's what makes me super happy because I was about to invest in the Laura Mercier contour kit. Which I totally still could, just to review it but I don't feel like it's necessary now. This was $72 without a discount, you can make an account with Frends Beauty and get 10% off orders unless you have a pro artist discount. There's also the 5 shade palettes that are $20-$30 if you don't want to buy the big guy like I got. There is also individual colors that's I think are in the $20 range but it seems you get quite a bit of product with it. They have blush and contour palettes as well. I don't know much about them though. Hope this was helpful. Have several new series im thinking about doing like a Bauble Bar one, bridal series, prom series cause you know I like to be busy churning out the looks for you. Also, we reached and done went over 10k views and I'm so blessed and thankful. Have a good night! 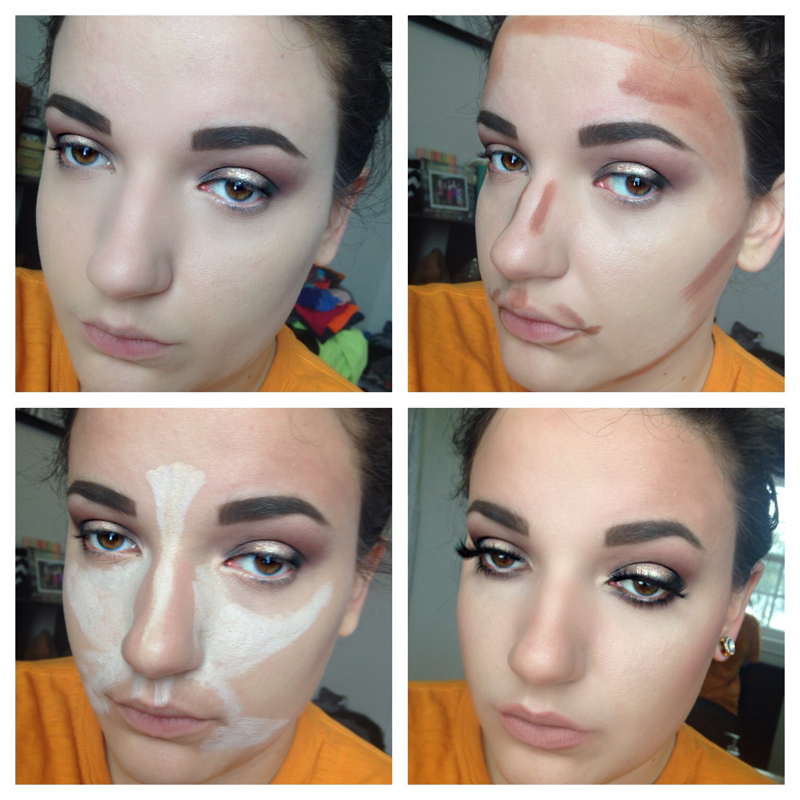 Like I said before cream contouring is huge right now, I'm going to be showing you different ways of contouring. There isn't really a universal way to contour that absolutely works for every face shape. There are general rules that are good guidelines but depending on your face shape you may need more or less. So what I like to do is look at the face to see what I need to be smaller, or what I want to bring out more. If I'm working on a client I ask them if there is anything they don't like about the structure of their face or anything they would like to bring out more and make more prominent.
I love contouring it's my favorite part of makeup. Its what got me started watching youtube videos and doing all kinds of research on different techniques. I love watching Kandee Johnson and Wayne Goss for contouring tips and tutorials they are the best in my opinion so if you have time definitely go look them up. So on to the step by step stuff. The first picture is only foundation. The second picture is the placement for contouring, this I done for a more oval shape. Like Adriana Lima kinda. She has very youthful structure. So I didn't make the jaw bone more prominent like I normally do. The highlighting placement which is the bottom left picture, is very heavy. You don't have to do it this heavy but I wanted a lot of light hitting the area. I blended all this out with a Beauty Blender and then set it with contour and highlight powders again with a Beauty Blender because it does the best job at blending. With my dry skin powder clings to my dry patches especially applied with a brush so a Beauty Blender sponge helps that alot. Next up is going to be contouring for a strong jaw line and more square face. So stay tuned for that. We're almost at 10K guys!! 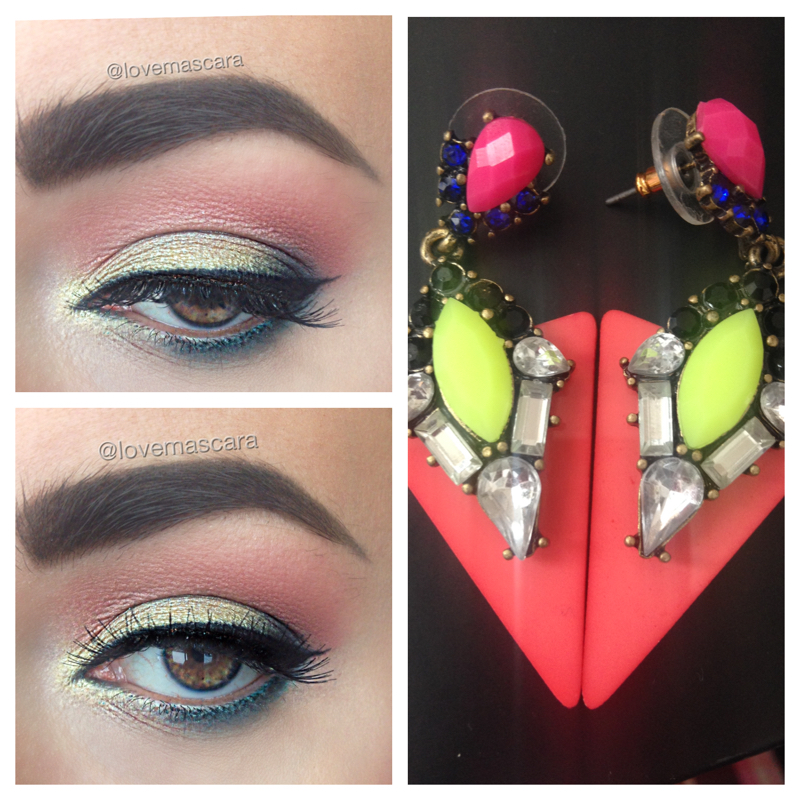 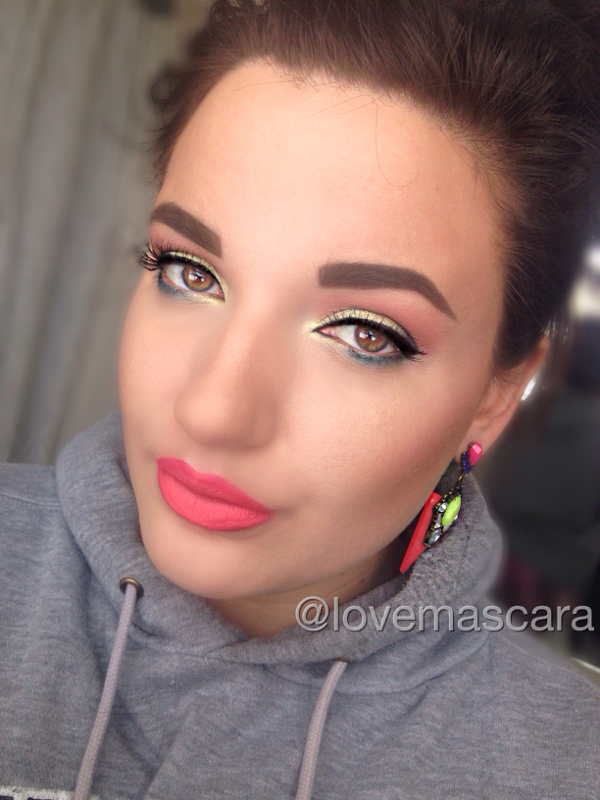 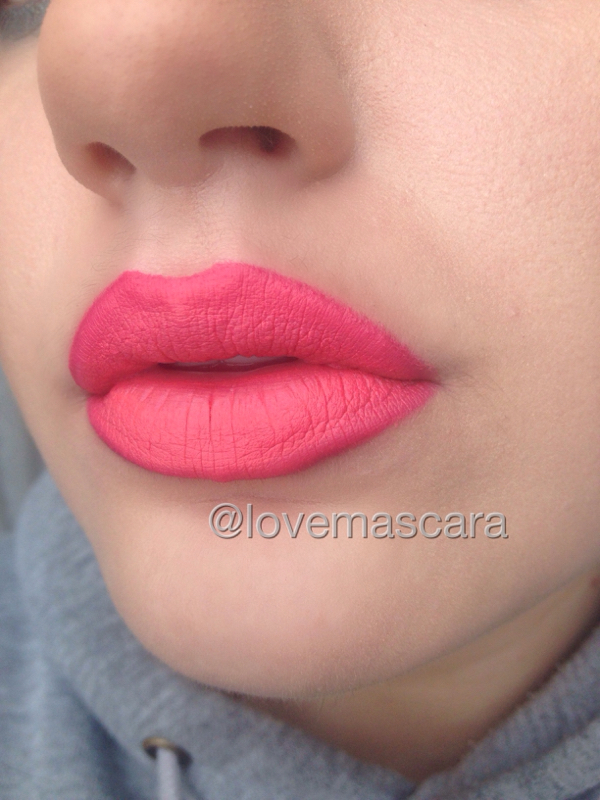 So I'm gonna start a series of makeup inspired by Bauble Bar. I have a lot of jewelry from them and they're so colorful and we all know how I love color. So it was the inspiration behind this look completely and then the more I thought about it the better it sounded. Cause I have some really cool pieces that would be awesome color combinations. These were after the Acid Trekkie Drops in Orange. Eyes: Morphe Brushes: Smokey Palette Sugar Pill: Lumi pigment Colour Pop: Animal and Ibiza Ardell Lashes: Wispies ABH: Dip brow MUG: Immortal Gel Liner Face: MUFE HD foundation MUG Bliss blush Eyeshadow to contour actually lol Lips: ABH Sweet Talker and Retro Coral mixed with NSFW Lip Liner from OCC |
ErinI'm from Tennessee. I'm a makeup and skincare lover. I have always enjoyed creating looks but I love to help people with product knowledge and application even more. I've been able to start blogging and do these things I love because God has seen fit to bless me with the opportunity. Thanks for stopping by and visiting with me! 

 
Categories
All
Archives
January 2022
|
 RSS Feed