|
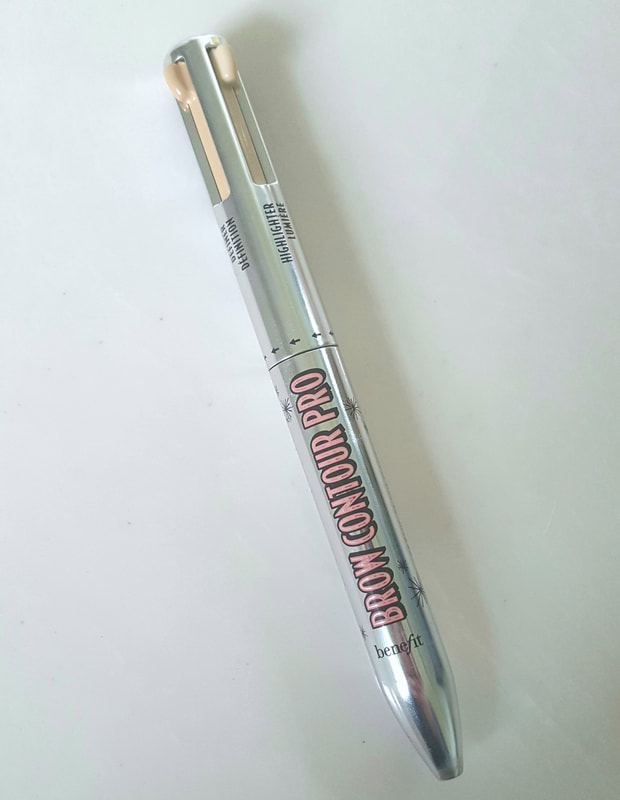
So in the Sephora sale blog post I mentioned that I picked up the new Benefit Brow Contour Pro pencil which reminds you of the 4 in 1 pens we had when we were kids. You just slide the tab down for which ever product you're needing. I have shade Brown-Black/Light. Which is light defining and highlighting shades for the skin and darker shades for filling in my dark brows.
0 Comments
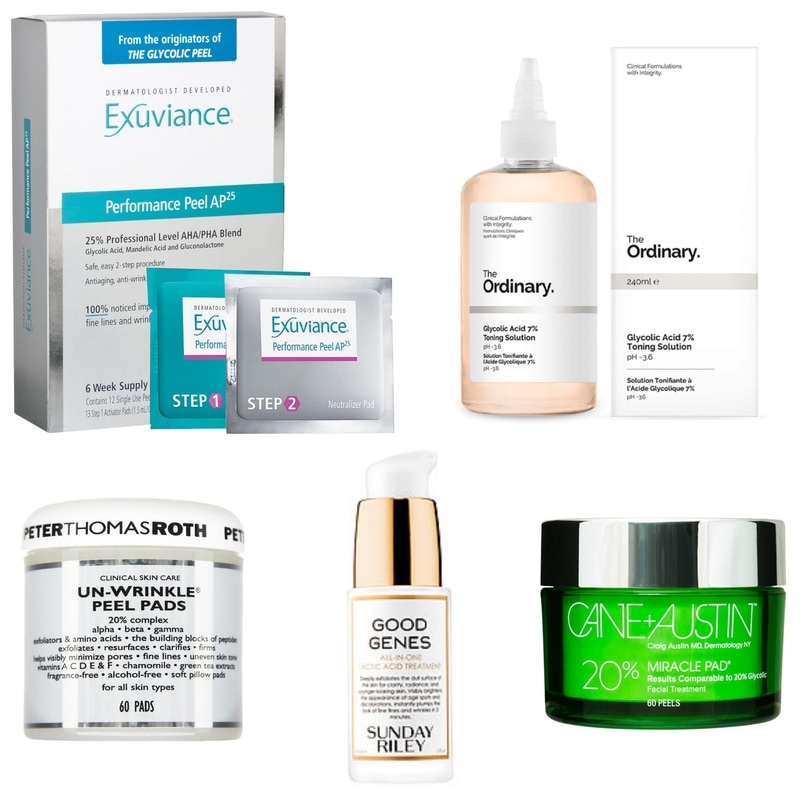
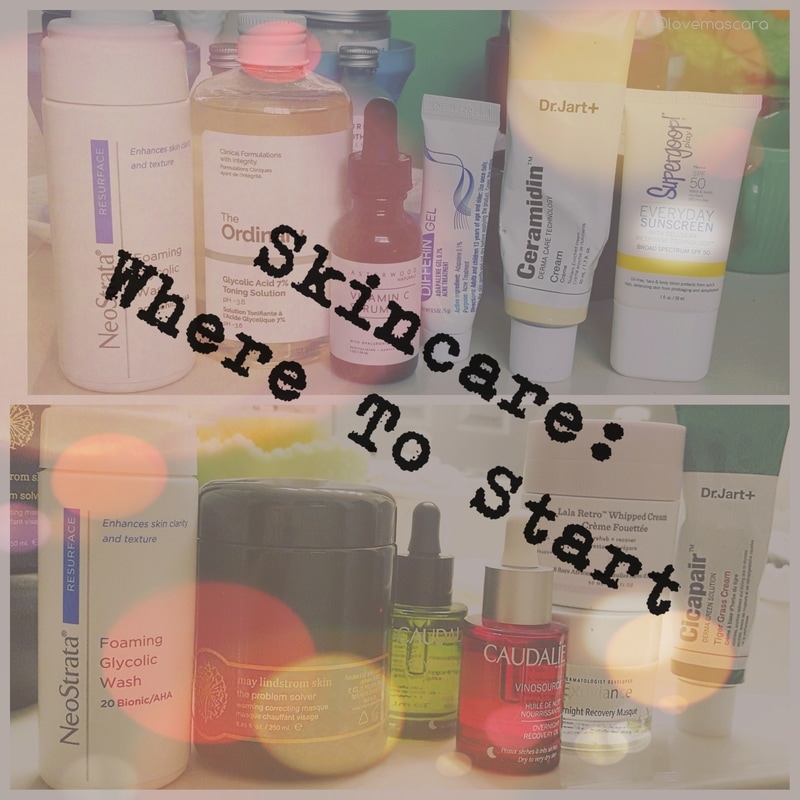
So with the "basics" of skincare steps out of the way I'm going to start with extra steps or treatments that could be beneficial to you or you may not like the idea at all. It's completely up to you. I always say "every skin has it's own cocktail". So whatever works for Sally may not provide the same result for Suzie. I'm going to start the "treatments" portion with "Acid Toning". I will be referring to them as AHA's and BHA's. I'll try to make this as plain spoken and as short as I can but bear with me.
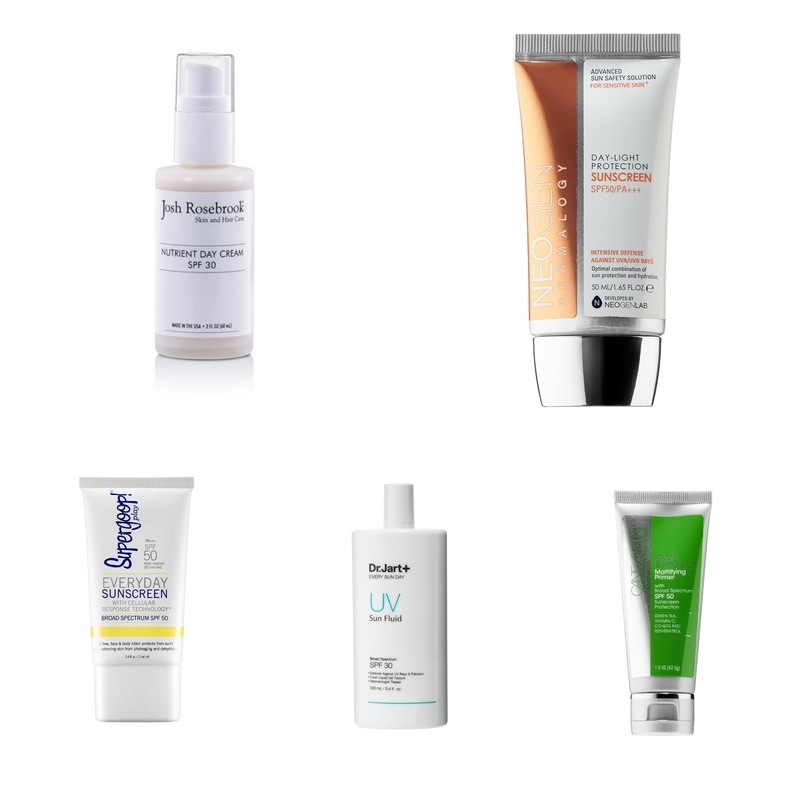
Alright the next installment of absolute necessity, meaning you should be using it no matter what, is SPF. I know, I know, you've heard it all your life, you don't need reminded, you know what it prevents, blah blah blah blah. Well regardless, we're gonna discuss it. Because some people still don't use it like they should, meaning in the winter, when it's overcast, they don't apply it correctly, and they don't re-apply.
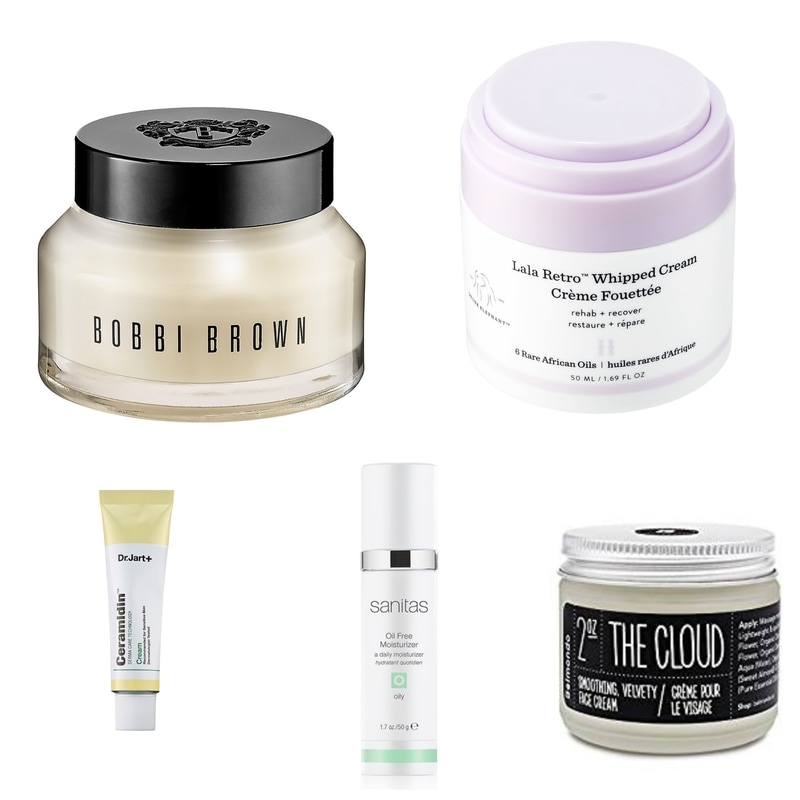
The next step of the skincare Step by Step series is going to be: Moisturizers. People often think of a cream, but really there are a lot of different formulas that moisturize the skin. However, I will be talking about traditional cream/lotion moisturizers because of how I use them. It won't be very long because it's the easiest step I think aside from cleansing. To be fair though it's a very in depth in regards to how it works for the skin. Even without bells and whistles.
For this post I'm kinda flying by the seat of my pants. There's no agenda, no notes like I usually do. I don't feel like it will be super long. I just have seen a lot of questions about skincare, skincare routines, not to mention we are flooded with products. A lot of people get overwhelmed and if you follow my snap it's easy to get overwhelmed by what I do because I have a lot of steps both morning and night. Plus, I review a lot of skincare on here as well. So it's hard to tell sometimes what might benefit you.
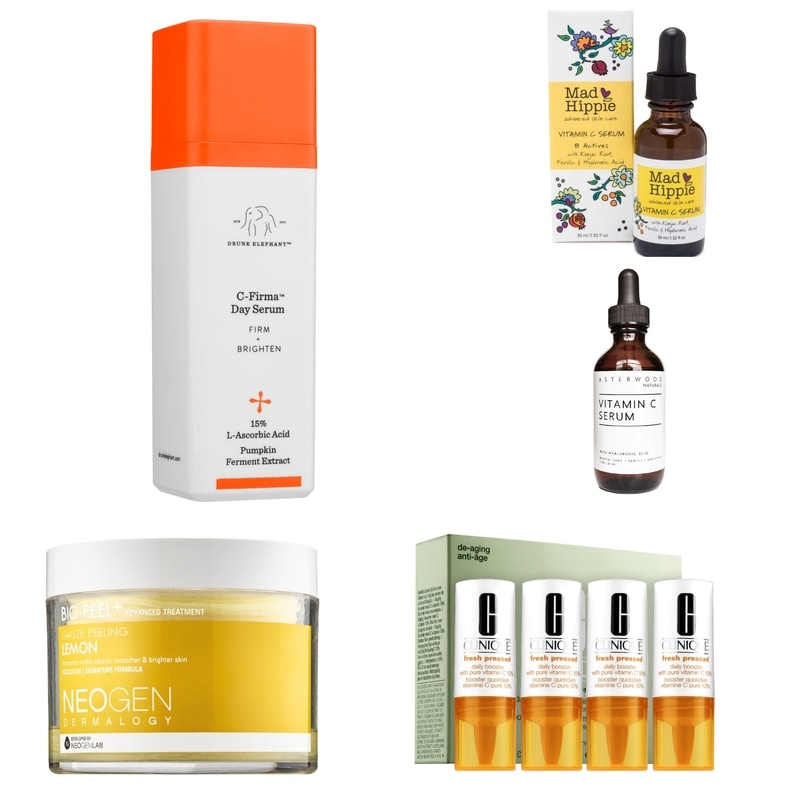
Next in the Step by Step series is going to be Vitamin C. I'm kind of keeping with day time products and then going into night time products unless I can just conjoin the two into one post. So moving on, yeah, Vitamin C. If you aren't using it. Please do. Your skin will thank you. I recommend a Vitamin C before a Retinol, AHA, Mist, etc. etc. For me with people that are like "bare minimum" when it comes to skincare (because hey, not everyone is obsessed with skincare such as I) my standards are: get all your makeup off and THEN use a cleanser to really cleanse the skin properly, please use a moisturizer I don't honestly care what you use just as long as you use one, USE SPF I don't care how old you are you'll thank yourself later, and finally you will benefit greatly from Vitamin C.
So for the next "Step by Step" installment. We're going to talk about liquid toners. Now these toners are gonna focus on the benefits for the skin. Like AHA/BHA ingredients possibly or mattifying benefits. Not the conventional method of liquid toners which is getting off any left over residue of makeup, or cleanser. Typically, they are thought to be reserved for oilier skin types. However, they've come a long way since Clinique toners hit the market and they can now do things that go unnoticed but are super beneficial for your skin "behind the scenes".
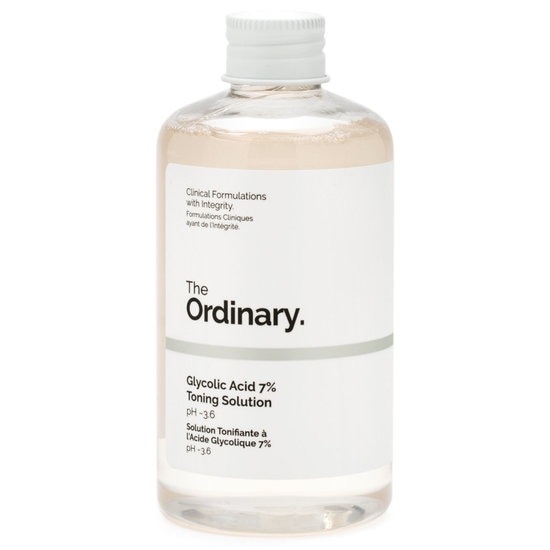
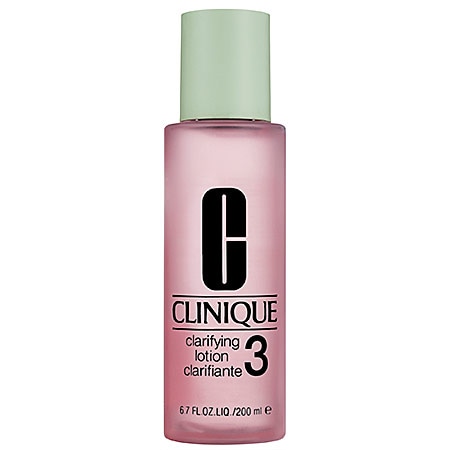
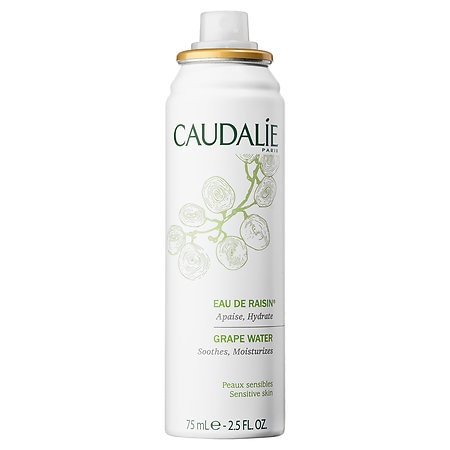
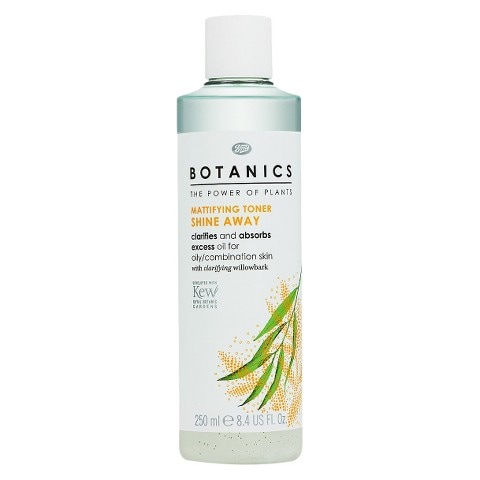
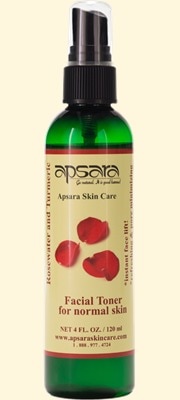
First of all, let's just get this out the way, Astringents and Toners are two different things. Think Sea Breeze vs Clinique Clarifying Lotion. Astringents are much more harsh in my opinion and not in a good way because they typically have a more alcohol base or heavy on the chemicals. The idea is to tighten the skin, close the pores, remove oils, and cleanse the skin. A toner is, traditionally, to remove residue left over either from cleanser or makeup and help adjust the skins pH and "tone". Toners actually can come in a moisturizer, spray, serum, etc. Toner is just an "umbrella" term for a lot of different products. Growing up you think of anti-aging, tightening the skin, removing left over residue from pores, and so on. Which sounds amazing actually. For a while toners were thought to restore the skins ph balance because cleansers were not properly ph'd thus the skins ph balance got out of wack. Turns out cleansers are mostly balanced now and even if they weren't the skin would balance itself out in most cases. So then it came down to, are toners necessary? My answer yes, as long as you're using the right ones. So I don't like one trick ponies, I need to see them do something. There is a big buzz around acid toning right now and we will get into that at a later date. These are going to be more mild than that but they do more than remove oil, and what have you. I use liquid toners in the morning after I've cleansed my skin. If you'd like to know my favorite cleansers then I will direct you to my other blog post. I have a few that serve different purposes. So let's get into my top 5: The Ordinary Glycolic Acid 7% Toning Solution with a pH of 3-6. This is really inexpensive and it's 8 oz for $8.70. I actually love this as a morning mild AHA.. I use stronger AHA's at night. AHA's help with texture and making the skin brighter. I feel like this does that and I would recommend it to anyone who wants to try acid toning in the form of AHA. I'm not sure I'd recommend it to those with problematic skin because AHA's tend to be better for dry, dull, and aging skin. If you're in your teens, have acne, an oily skin type, the next toner will be better for you I think. Clinique Clarifying Lotion 3. This is 6.7 oz for $14.50, but there are other sizes available. Clinique is notorious for not providing their ingredients so they're not easily accessible. There are actually 5 toners but only 4 on most stockist sites. My choice for every skin type is Lotion 3. It does a combination of things. It removes residue and takes care of excess oil. It also exfoliates dead skin and dull skin and then helps manage breakouts. It's really stood the test of time in my opinion. I think it's a great option for teens and early 20's. Botanics Shine Away Toner. This is at Ulta. It's 8.4 oz for $9 (on sale right now at Ulta for $7.19.). This is also available at Target as well. This is cool, you have to shake to activate because it has powders in it that mattify the skin. I use this specifically on hot days where I need my makeup to last, well.... any day that I need my makeup to last. Then I use it especially under dewy finish foundations. It really does work. Botanics is a very few ingredients and more of an "organic brand" all the way around. This product resembles that because there are very few ingredients, it doesn't say it's organic though. This keeps my T-Zone matte for most of the day and I love it. Plus you have the added bonus of clarifying the skin as well. Caudalie Grape Water, which has changed since I last bought it. It's $22 (it was $18 I swear) for 6.7 oz. I find this a good antioxidant and hydrating toner. For those of you that are super dry. It has good skin care benefits being antioxidants, not necessarily a targeted treatment say for clearing up blemishes and acne. This is an aerosol spray which I love and it is very hydrating and refreshing. It's a no bells and whistles so it's not for you if you're wanting a product that "multi tasks",this is my only one trick pony. Only because it does provide antioxidants and it's an aerosol spray so it's easier to use or more convenient I should say. Apsara Rosewater and Turmeric Facial Toner Spray. This is $22 for 4 oz. I find it lasts quite a while. I use this the most at night or after treatments. OR to help with "cake face". This is obviously refreshing, suited or everyone but marketed for normal skin types. Rosewater is naturally an "astringent". This spray is very soothing and brightening in my opinion. The soothing part is why I use it after treatments that are intense. It's fast and easy. It also minimizes the look of pores. In general I like a rosewater spray but this is my favorite. I really like their Rosedew one as well it's for combo skin. Apsara is a natural brand and this is non-alcohol based. It has only 7 ingredients 3 of which being Essential Oils so if you're sensitive to EO's then avoid this one. So there ya go, sometimes I do use "toners" more than once a day, like if I need some hydration or need my makeup to look less cakey, or if I'm using it underneath foundation specifically to help keep away shine through out the day. I'll use my Glycolic Acid 7% toning solution every morning and then who knows what the day will hold from there on, so I might have to use more than one. Like I said I will get into my AHA's which are acid toners for the skin but right now I'm working through the day time skin care steps and then I'll add the night time steps. So to recap so far we have: Step 1 Cleansing and Pre Cleansing ( if needed) Step 2 Liquid Toner I hope you're enjoying these. I've been doing a lot of skincare posts lately and that is just how the cookie crumbles right now we have a lot of skincare to discuss. I am going to get up some reviews on some more makeup products soon and hopefully there will be a good mix of stuff. If you want to hear my rambles and short reviews on products as they come in, then follow me on Snapchat @loveandmascara If you want first look at my Hauls and new skincare items I get as I go along then follow me on Instagram @lovemascara. If you want to keep up to date with blog posts as soon as they're published then follow me on Twitter @loveand_mascara Also I now have a facebook page Love and Mascara. Talk to you soon! So for this post I thought I'd give you a beauty hack of mine that makes a difference on prolonging my foundation, and keeping it as flawless and luminous as possible. Without being oily.
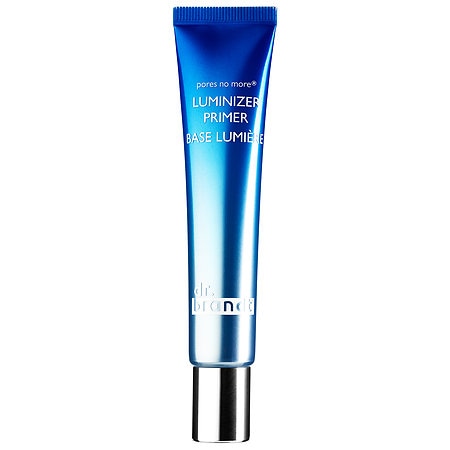
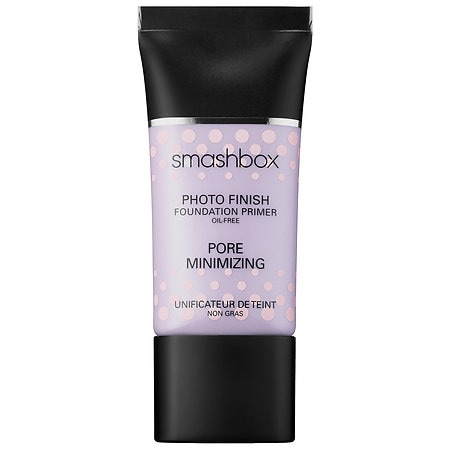
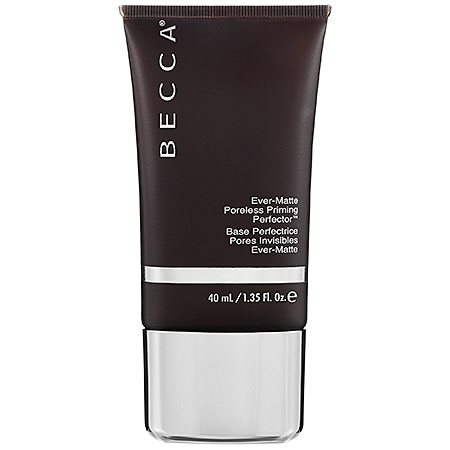
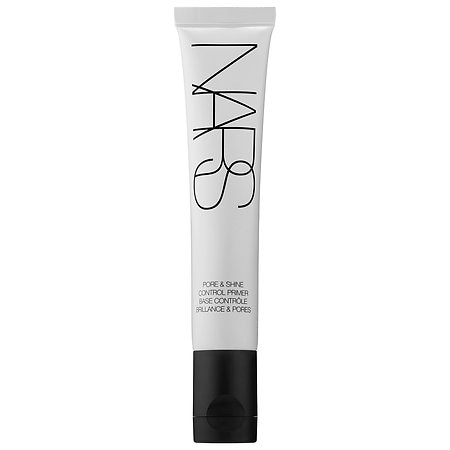
My trick plain is simple is I mix together difference primers with not just different benefits, but different textures also. The ones I mix together are for my T-Zone and the areas I get the oiliest. Now the luminizing part comes in with using it only on the perimeter of the face. I don't mix luminizng primers because I do not feel that would be beneficial since it's going around the outside of the face. My luminizng primers that I rotate are: Smashbox Radiance Primer Dr Brandt Pores No More Luminizng Primer The Smashbox is almost like a cream highlight, it's a golden hour effect. It's a bit thicker and I use it with a beauty blender. I really enjoy it. It's also a moisturizing primer due to the Hylauronic Acid that's in it. So it's got more benefits that just a pretty glow. Dr Brandt Pores No More Luminizing Primer, is a pearl shade but basically invidible one the skin. It really does make pores vanish and it is luminizng. In the most subtle way. It gives foundationa a satin finish and it's nice to mix into foundation as well. It's a typical lotion style primer therefore it's easy to mix it into other liquid and cream foundations. Of coure you could do that with the Smashbox one but the peach tint would change the color some in the foundation and the Hylauronic Acid would make the foundation more moisturizing. If that's not something you need because you get oily, or oily in your T-Zone, I would avoid mixing the Smashbox Radiance Primer with foundation. Now the primer mix that I do consists of primers that have these benefits: Oil Control Pore Minimizing Smoothing This is the little custom cocktail that I put in my t zone only because that's where I get oily. I don't see the point in putting these potent products in areas where you don't get oily. Now most primers that will control oil will also smooth lines and texture but I like to be extra. So I use 3 usually and they all have different textures. Which I think that's why it works because sometimes a primer can be fantastic but if it's not tacky enough it doesn't have the staying power. Get what I'm sayin? It may also be smoothing but if it's too thin and like a lotion it's going to absorb into the skin more than it should. Another reason why I do it, is because primers that have a ton of silicone (dimethicone, etc) in them, for some reason, my makeup slides off my face if I use it by itself. Honestly, it does. A great example of that is Smashbox original primer, that is like a cult favorite, the one that started them all. Yea, makes my makeup slide right off. So what I like to do is get travel size or deluxe samples of primers when there is a promo for one or whatever because: 1) I do mix them, so I don't need much product 2) it's easy for me to find ones I may really like that way without spending tons of money and having a bunch of duds. Recently the ones I've been mixing, have been: Smashbox Pore Minimizing Primer (always in there because of the thick texture) Becca EverMatte (always in there because it's the most mattifying primer I've used) NARS Pore and Shine Control Primer (This is because of the thin consistency and it has the benefits I want) Alone the NARS isn't enough. It's too thin. Alone the Smashbox one will work on pores but it doesn't control the oil and it doesn't keep my makeup on. Alone the Becca is enough to keep me matte and keep my makeup on for sure but I still have the noticeable pores and lines issue. So therefore instead of have a quest where one can do it all I'd rather mix less than a pea size of samples or travel size and use those for months on end. I really think the key here is having one that is thin as well. So bear that in mind if you're gonna try this. Have one that's thin so that it'll mix them properly for you and have a good consistency. I really like mixing in the Smashbox Pore Minimizing (it's the purple one) because it's so thick which is why it works to fill in pores and lines but at the same time it's almost too thick to blend out, thus we thin it out. Some people layer primers and I think that's fine especially if the primers are thin or like a lotion for the most part. Like I know some who use the Smashbox Primer spray and then use the Nivea After Shave Balm (which is a good primer by the way). Then my friend Alaina layers a color correcting actual cream not primer (for redness), the Cane and Austin primer and then the Becca EverMatte on the more oily areas for her skin, with EverMatte being on top. Which is perfectly fine because the thicker consistency is on top. Where as if it were in the middle or something it would start to ball up. Which is the other reason why I mix these and apply the mixture because some primers will ball up on the skin with too much blending and/or rubbing on the skin. Also they can ball up when you go in with foundation as well if you blend that in too much, depending on what primer you've used, so again that's why I apply a mixture. Sometimes I will apply the Nivea Shave Lotion over top of what I've already done or mix it into the other primers because it is a very tacky finish which makes foundation stick like glue to the face. I know this is a lot of information and kinda confusing but the jist is: if you're primer is not working for you like it should, be it pores are still noticeable, makeup isn't lasting like it should, you're getting oily, etc. Get some samples or what have you and try mixing different ones and see if that helps the situation. Focusing the mixture on the problem areas while using a different one if you want around the perimeter of the face that doesn't cause you any issue typically. If you're reading this the day when it's posted (4/15) or early the next day, there is a complete GRWM on my Snapchat where I explain the tips and tricks and why I do this and that. Along with other tips. Follow me on : Snapchat: loveandmascara Instagram: @lovemascara Twitter: @loveand_mascara I now have a Facebook page so feel free to follow me on there too it's Love and Mascara as well. So I want to start a Step By Step Series where I break down each step in my skincare regimen and give you my top 5 products for each step. Hopefully each step will have different price ranges for every one. I'm going to do cleansing tools last because they'll be a little more in depth, they're gonna need some explaining.
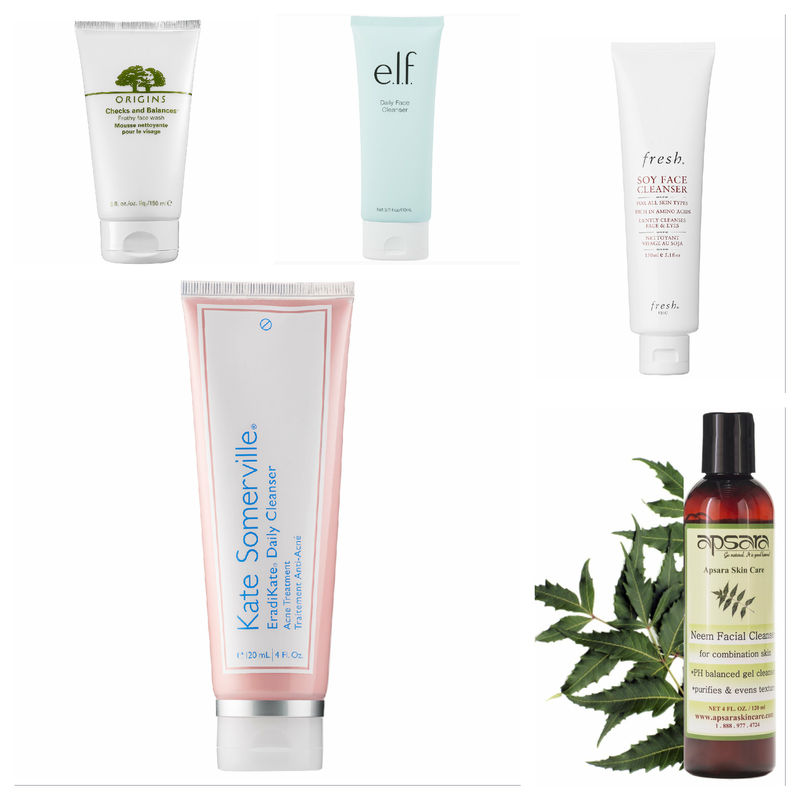
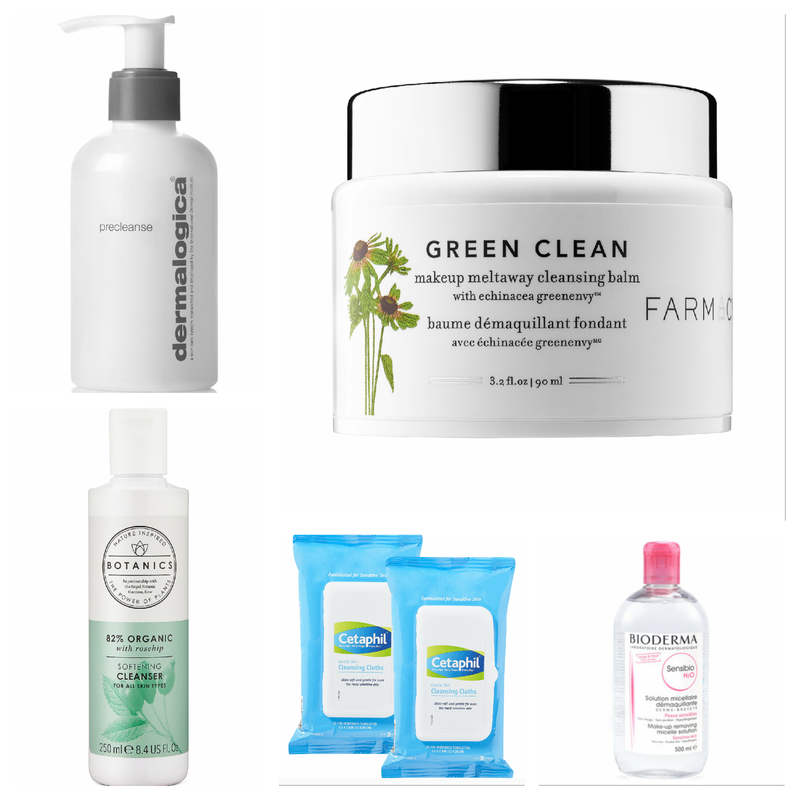
So we're gonna start with cleansers. I'm going to give you Top Five Pre Cleansers and Top 5 Cleansers in this post. Now second cleanse is relatively new to the skincare community. It stems from Korean skincare techniques I believe. I like it if I've worn makeup that day. If I've not then I go straight into my cleanser. This is obviously done in the evening. The idea is to get the majority of your makeup off before you go in with your actual cleanser, therefore letting that cleanser penetrate the skin better and really get everything else off. As well as exfoliating the skin a bit no matter what skin tool you're using. A lot of Pre Cleanse right now is "balms". That's what's really popular. In my eyes they don't have to be. Top 5 Pre Cleanse
You can use oils to take off makeup as well. I don't recommend Coconut Oil just because it clogs my pores. Some love it and that's great. You can use whatever oil you want though whether it's olive oil, facial oil, almond oil, etc. Next onto you're actual cleanse. I don't feel like cleansers should have tones of extra benefits aside from cleansing the skin. I think it's like 80% of the cleanser gets washed off so it doesn't really benefit you to buy fancy cleansers in my opinion unless you just want to. That being said I've tried some pricey cleansers that are very very nice. So it's all in your preference. Top 5 Cleansers
So those are my two Top 5's for cleansers. We'll be getting into some more intricate skincare as we go along but these are my tried and true.
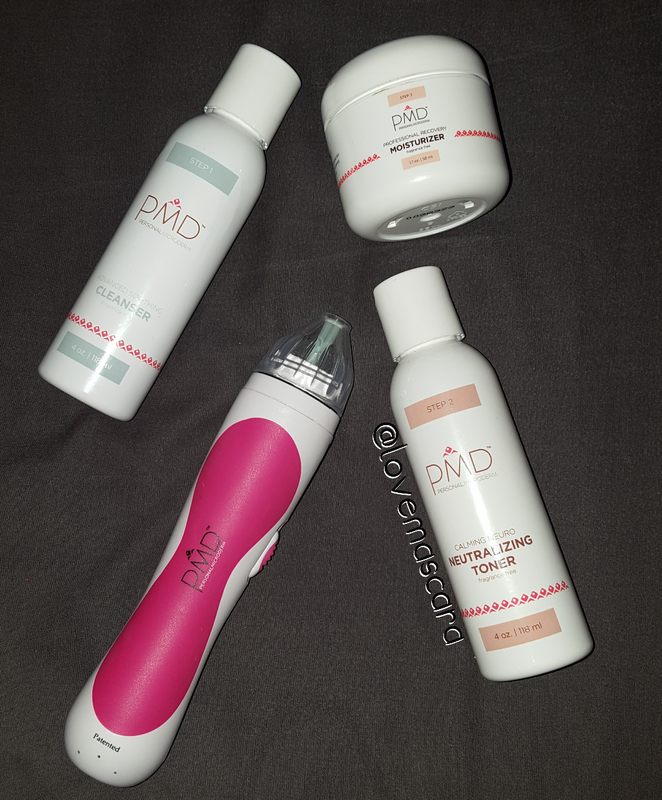
For the past month, literally 4 weeks, I've been using the PMD Personal Microderm and Regeneration System. You may be wondering what in the world I'm talking about, so thus let's go over ALL the details about this.
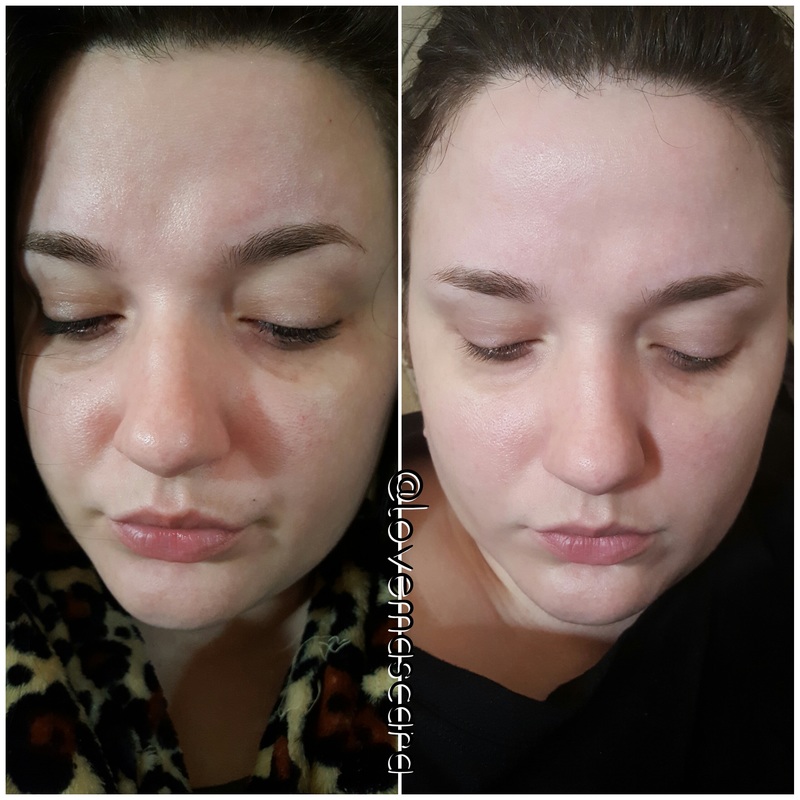
First, Microdermabrasion is a non invasive (meaning "not requiring the introduction of tools into the body") procedure that uses tiny crystals to exfoliate and remove dead skin cells on the skins top layer. This is typically an "in office" service. So you'll see this offered at spa's or dermatologist offices. This is a buffing and polishing type machine that uses a interchangeable tip on it and also has a suction effect to suction in the loose skin cells along with other benefits. Fine lines, clogged pores, large pores and uneven pigmentation are said to benefit from these treatments as well. Like I said this is typically offered as an in office service, and usually you need about 6-10 treatments (from what I've read that's the average they suggest). The norm from what I've seen of cost per treatment is usually more than $100. Maybe a little less if you can do a package, if they offer that. So that's a lot of money when you think of how many treatments you'd need to have. These tools range from $159 to $204, which includes discs and can include some skin care as well depending which one you get. This tool can be used for men and women. With the results I've seen I'm super impressed. I've also never been this proud of my skin's condition. I'm so pleased with how it looks and I will continue to use this for quite a while or as long as my skin needs it. It's helps me with my pictures for my makeup as well. I always had a lot of texture that showed in pictures and now I don't have hardly any. It's really worked wonders for me personally and it's something I can do myself and not have to go to an office or spa for. Which saves money. This is an at home, professional results, powerful tool. I'm going to leave a direct statement from the company about the device. "The Personal Microderm combines the power of Patented Spinning Disc Technology with a Perfectly Calibrated Vacuum Suction to brighten, smooth, and even skin tone and texture. The Personal Microderm reduces the appearance of fine lines and wrinkles, blemishes, and enlarged pores. After a treatment, makeup goes on smoother and skin care penetrates significantly deeper – 20X deeper." This is the Microderm Classic it comes with a white disc initially so you can see what it feels like and train with, but you could use it on the skin as well if you had ultra sensitive skin. It also comes with 6 other discs. Two of each color, each color representing how abrasive it is or what skin type it's for. So the grey disc is for very sensitive skin, blue is for sensitive skin, and the green is for normal skin. The farther away from sensitive skin you get the more abrasive the tip becomes. There are small discs and large discs. The small ones you use on your face, the larger ones can be used on your body (said to be very good for stretch marks). It also comes with two classic suction caps. One with a smaller opening for the facial discs and then one with a larger opening for the body discs. The caps provide the suction, which is like a vacuum suction pretty much. The suction not only sucks in the dead skin cells you loosened but, it also increases blood flow to the surface of the skin. It increases circulation and triggers the body's healing process which then builds collagen and elastin which makes the skin look visibly firmer. With most at home tools you don't get the suction benefit like you do with this one. Which is one reason why this is so different. Now once you've used the tool and got rid of the dead skin cells that was smothering your skin, your skincare will penetrate deeper and work better for you. Which is where the Regeneration System comes into play. I personally like using the actual skincare system they sell with this instead of my regular skin care when I use the Microderm. That could just be me though. I use this once a week. Like I said it's been 4 weeks. I can definitely tell you that it works and that I'm a fan. Everything about it from the tool itself to the skincare is really really good and has noticeable results. I have pretty normal skin. I don't have very many breakouts. My main issue has been texture problems from dry areas on my face. I still had texture even with using my Foreo Luna to really clean deep. While that did help, it wasn't enough. Even using super hydrating products didn't help either. So when I had the opportunity to try this I was thrilled. Also, I'll be 29 next month and I have started to notice some fine lines around my eyes. So that combined with my texture issues had me rip, roaring and ready to go with this. I also tend to have large pores but that wasn't a major concern for me as much as the other stuff. The first thing I will tell you is READ THE DIRECTIONS AND WATCH THE TUTORIAL. I will link thetutorial so you can watch it for yourself. I tried just reading the directions and doing it and I made some mistakes. Like I didn't have the right cap on (dummy) and then wasn't careful enough to not go over one area too much because it can become raw and irritated, which also happened to me. It's my own fault though I wasn't paying close enough attention. So to use this you first need to cleanse the skin. I use the PMD Advanced Soothing Cleanser because it really preps the skin and keeps it from getting irritated. After that I use the Microderm. Now, what you're supposed to do is pull the skin tight and make strokes in an upwards motion. Not passing the same area more than twice. I only pass an area once though. This is where you need to pay attention so you know not to go over an area that you've already went over before. The skin will be suctioned like a vaccum, so really all I feel is the suctioning not necessarily the dermabrasion. I started with the white disc first, then quickly went to the one for sensitive skin and used it twice and then finally went to the blue disc which is still for sensitive skin but has a stronger abrasion. After I'm done with the tool itself I rinse off any lingering dead skin. I then immediately use the Calming Neuro Neutralizing Toner. This helps with any discomfort or irritation you may feel, evens out texture and skin tone and also takes care of any lingering flakes you may have. After that I use their Professional Recover Moisturizer. This also helps soothe and also heals the skin. It keeps the skin hydrated, smooth and also helps with anti-aging. The skin care products are all fragrance free as well. They can be used on their own everyday if you want. The Microderm is supposed to be used every 6-7 days but I've seen some people use it only every 10 days. My skin felt a little uncomfortable the first two times right after I had used it and then the next morning. However, after the 3rd time and then even the 4th with the moderate abrasion disc I didn't really feel much discomfort at all. The little sensitivity I did feel was gone as soon as I used the toner and the moisturizer. Which I why I say use their skin care system for this. Keep in mind every skin type is different so that will be the deciding factor on what disc you should use. They offer more than just the ones I mentioned. I recommend that you definitely start with the lightest abrasion and then go up from there. I almost went for the moderate one first because my skin is normal and not sensitive. I'm very glad I didn't though because I made some mistakes and also my skin had to adjust to this new type of exfoliation. So start with white because it will work trust me and then go from there. Test it on your hand first and with every new disc I run it over my hand a few times to get that top layer on the tip ready to use on my face. Each disc can be used 2 times depending on how aggressive you are. You can buy replacement discs and they aren't super expensive either. I use a light hand with this I don't press down on the skin because the suction brings the skin to the tip anyway so there's no need in potentially irritating your skin even more by pressing way to hard. Don't use this under your eyes / above you cheek bones because the skin is much thinner there and can break easily. Don't use this if you're using prescription skin care or under the care of a dermatologist. Always ask you're dermatologist first before you start something as powerful as this anyway. PMD is actually a company that was built around beauty bloggers, and youtubers and their experiences through using this tool. Microdermabrasion dates back to ancient Egypt when they used sandpaper to exfoliate the skin. The first actual microdermabrasion tool was introduced in 1985 in Italy. It wasn't introduced into the states until 1990. In 2003 the Microderm was patented and the first at home, hand held microdermabrasion professional grade tool. It's also been proven to be as good as a 10k physicians dermabrasion machine with a study that showed 7 different patients who used it for 12 weeks and 15 times and had the same results at home as the results that came in office. They produced these without any financial backing. They made 1800 and sent 500 to "mommy" bloggers as a form of marketing and PR. Which worked amazingly well for them. From there, testimonials flooded in and word spread about new found confidence and life changing skin transformations. Which brings us here, today and they are quite popular and for a very good reason obviously. **Keep in mind, please, that this is a powerful professional grade tool and can be irritating to the skin. It may not be something you need right yet. Especially if you're in your teens or early 2o's and have no texture issues or the other issues this addresses. You don't want to do too much to the skin and damage it if it's not exactly something your skin can benefit from or doesn't need right now.** For more info on the PMD Microderm devices that they offer and skin care you can visit their website here. *This was powered by Brand Backer* |
ErinI'm from Tennessee. I'm a makeup and skincare lover. I have always enjoyed creating looks but I love to help people with product knowledge and application even more. I've been able to start blogging and do these things I love because God has seen fit to bless me with the opportunity. Thanks for stopping by and visiting with me! Categories
All
Archives
January 2022
|



 RSS Feed
