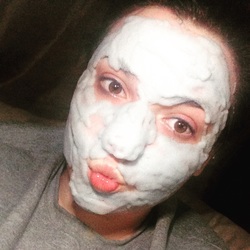
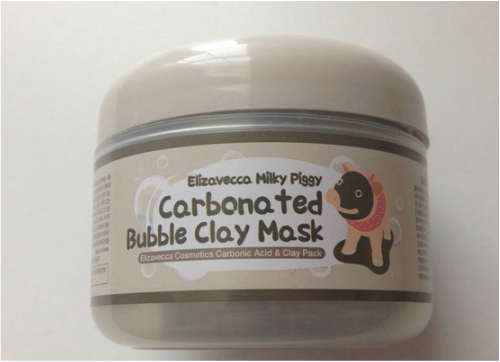
 If you've been paying attention to Facebook and other social platforms you've probably seen this new mask demo, which is where I saw it. This is the Elizavecca Milky Piggy Carbonated Bubble Clay Mask. This is some of the Korean skincare we're seeing that's making a huge impact right now in the makeup and skincare community. It's the newest "trend" as of right now, everyone wants some Korean skincare and for good reason. So far everything I've tried has been amazingly good. Sephora right now has a army of Korean skincare. This unfortunately isn't sold at Sephora. This is on Amazon and Ebay, it's on other sites as well but Amazon is where I'm comfortable directing you to. It's around $10. Ingredients according to Amazon are: "green tea extract, aloe vera leaf extract, matcha powder, charcoal powder, pomegranate extract, fermented soy extract, alantoin, peony root extract, oregano leaf extract, white willow peel extract, portulaca extract, cinnamon extract" The product is around 4 ounces I believe. It's quite a bit of product but you also have to apply quite a bit for it to spread evenly. You are supposed to put this over makeup or an uncleansed face. Wait 5 minutes for it to bubble (feels so strange), it applies grey and bubbles up like crazy. The bubbles act as an exfoliator to the skin. Which is why I love it. It doesn't scrub the face, scratch the skin or have a salty, sugary, residue left over. After the five minutes is up you rub the skin and the bubbles go away and reveal the paste again. Then rinse with "luke warm" water. Now, why I like this is because I had a medicine reaction a couple days prior to using this while I was in the hospital and for some reason it caused my nose to itch like crazy and then the skin started to peel like a bad sunburn. It didn't hurt or burn but it was annoyingly dry, flaky, and itchy. So I used this and it got rid of all that dead skin. Literally there was skin balled up on the washcloth. My skin was super soft. I didn't even apply it over makeup I actually used it on clean skin cause I didn't read the directions right. I've used this about 4-5 times and each time I really like how my skin feels, and my texture issues seem to get better. I will say it bubbles up pretty big so be careful around your eye, if you think your far enough away from the eye then go back even farther. The entire container is in Korean (I assume) so you'll have to go online for directions if mine weren't clear enough, unless you can read the container and in that case....awesome. This is a bit "trendy" and I assume it might fade out soon, BUT that doesn't change the fact that I think it's a really good mask, that's gentle and does a good job at getting rid of dead flaky skin. I will continue to use this because I find it works really well. I have a video demonstrating it here if you'd like to check out how it looks and what it does.
2 Comments
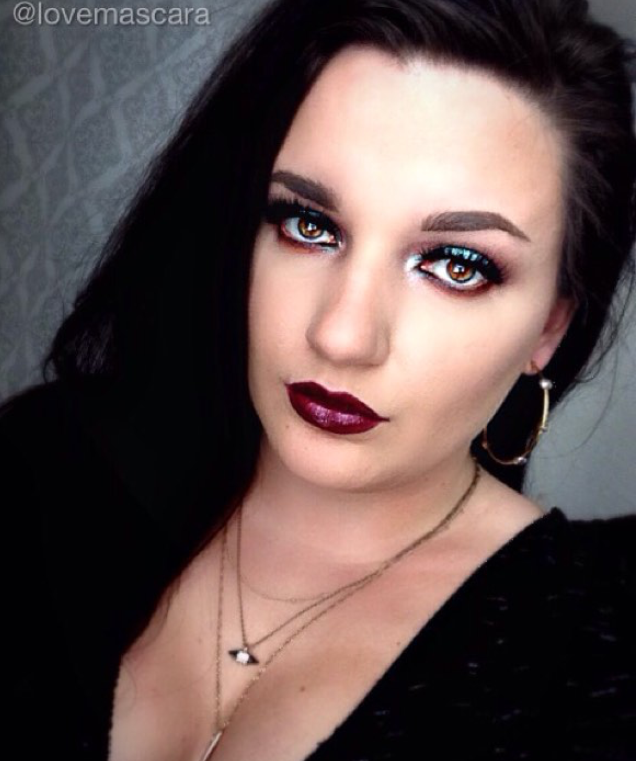
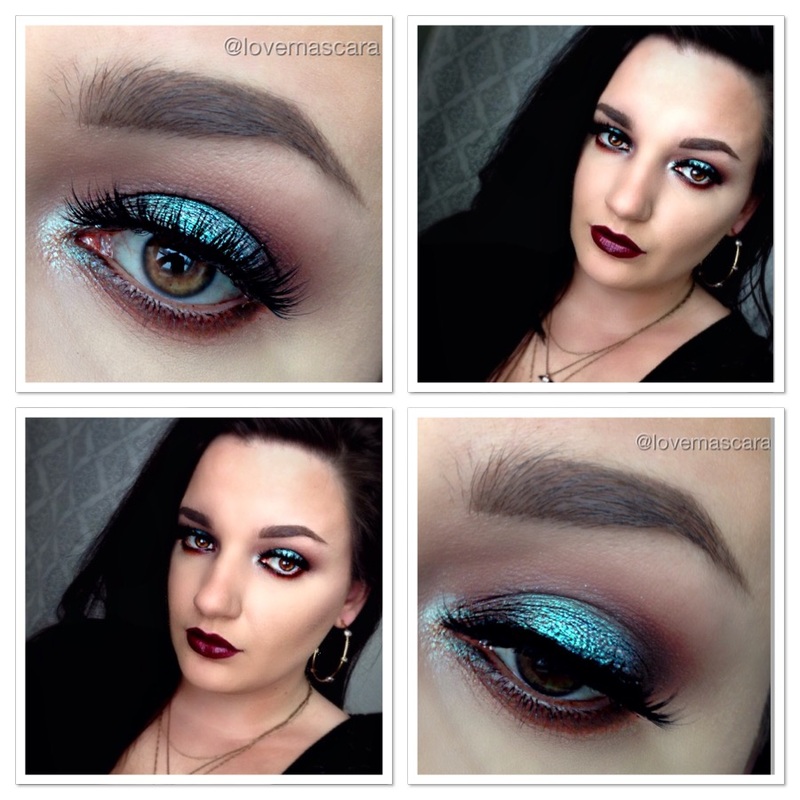
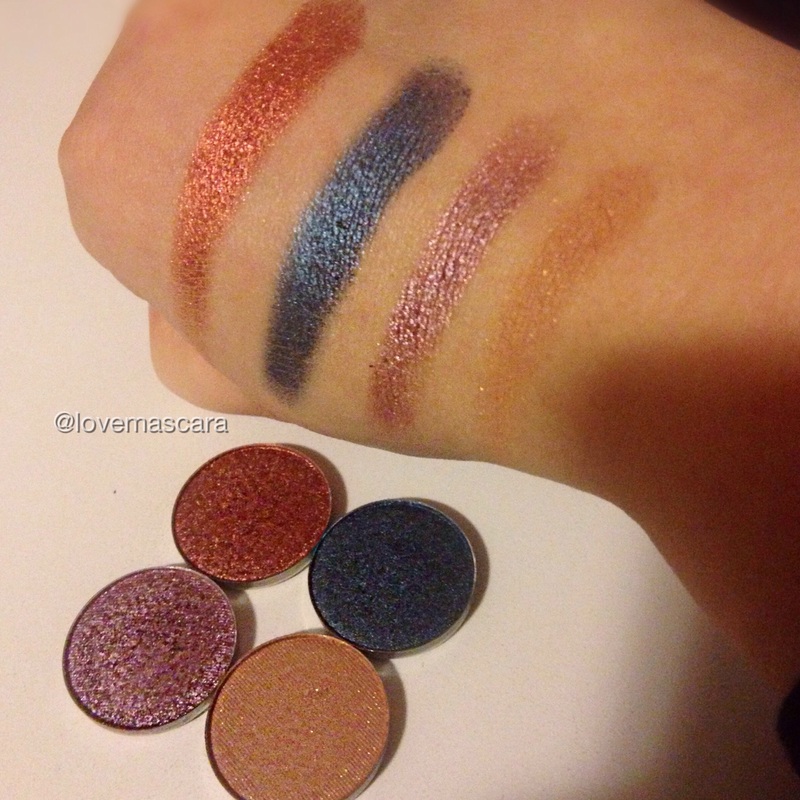
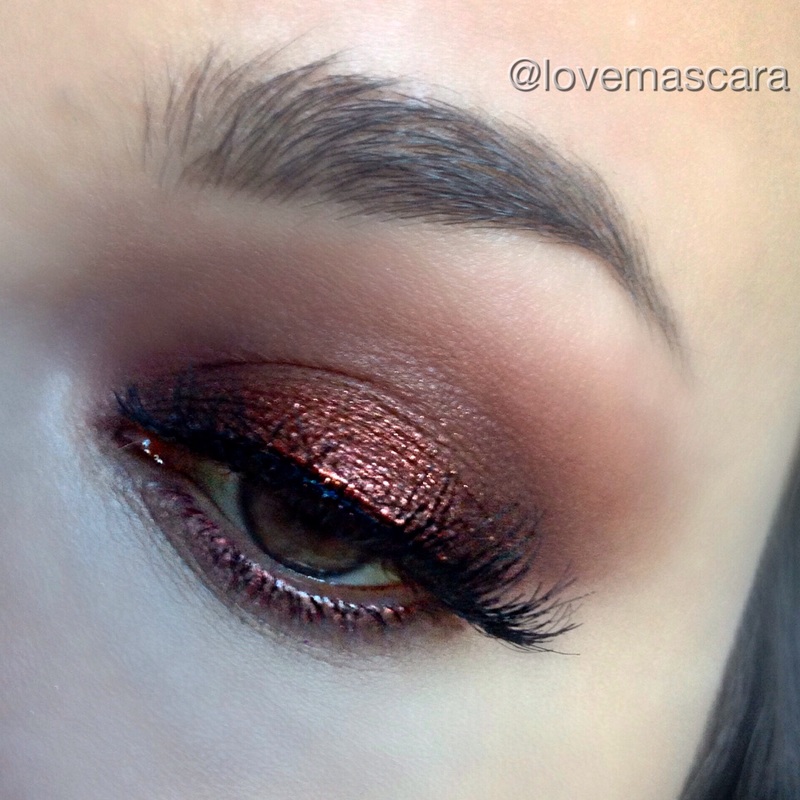
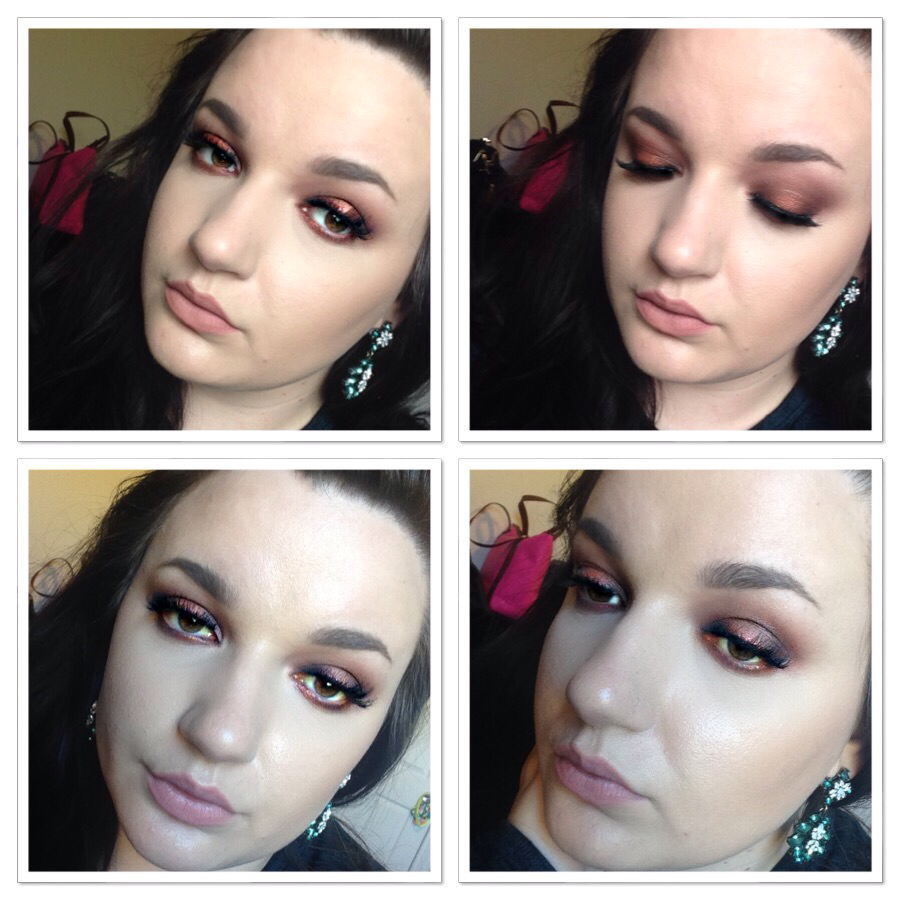
Today I'm going to talk about neutral looks and how you can bring a little something extra to them with a pop of color. Whether that be on the lid it self or with your lip color. So I have three. Two of them I've linked videos to that I done for Instagram. This look above, I actually seen @wickedbeautification on Instagram do with similar colors. I modified it somewhat to my own vision and used different products. Her's is gorgeous so you should check it out for sure, she's so talented. It had more plum/berry shades in it without the inner corner teal part. Mine is a bit more red brown, oranges and a lighter teal somewhat. Here's what I used to do mine:
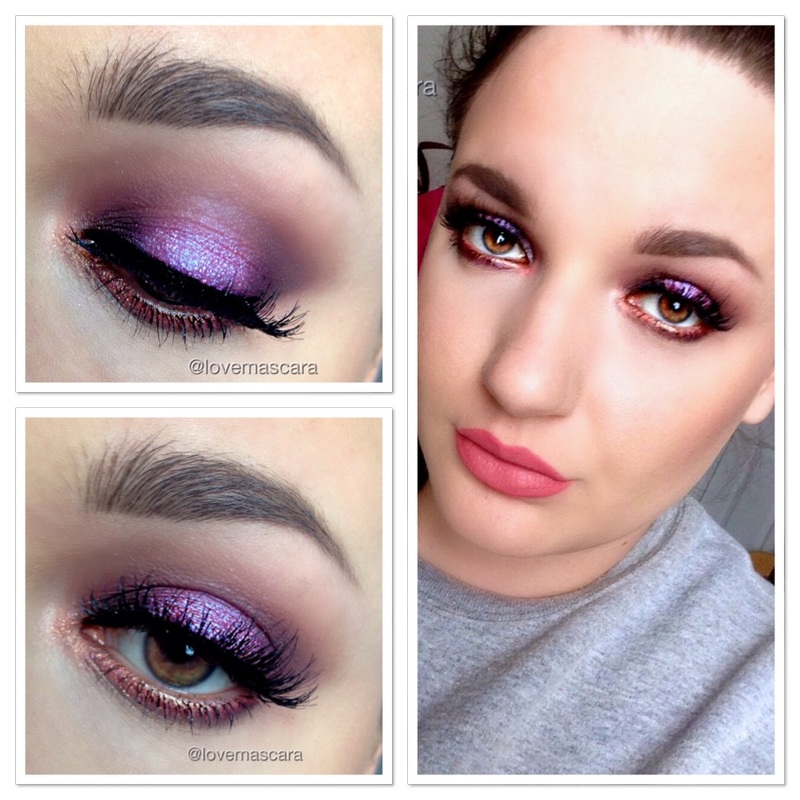
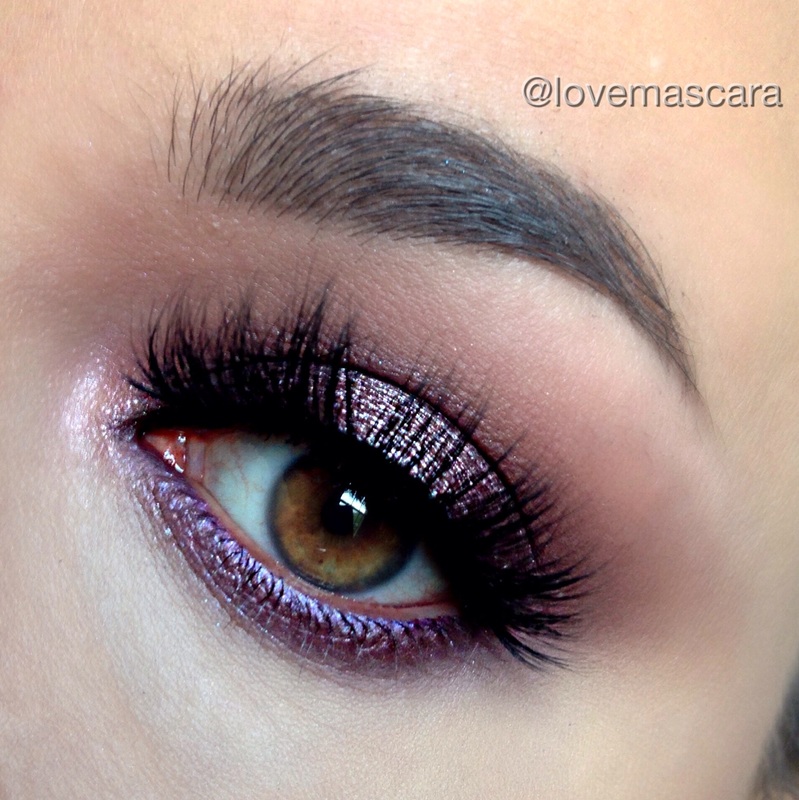
This is a more cool toned brown eye (halo again) which when you add pink over it it tends to look a little purple. I try to keep the brown tone as much as possible so I add in warmer tones to cancel out any purple it's trying to bring out. It has some orange on the lower lash line. I have a video for it here which will take you through the whole "halo" technique I use for all halo looks pretty much. Now you could actually add in much more brown to make this even more neutral. I went in hard with the pink so you may want to do less. The Star Powder pigment brings iridescence, it's not necessarily vital to the look though. You could use the pink shades and just go with a darker pink halo eye which is still beautiful. Here's what I used:
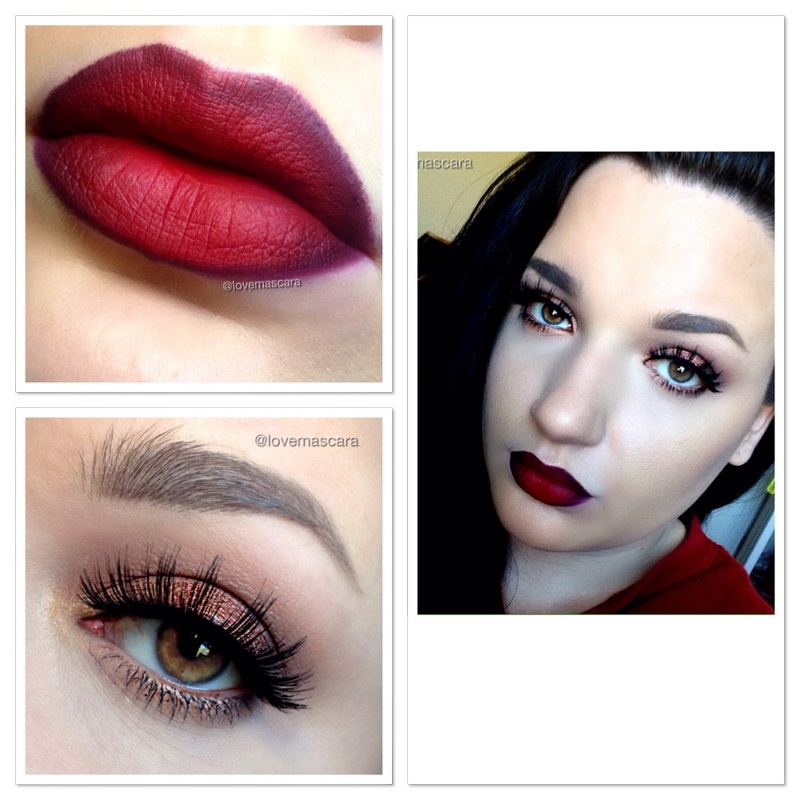
My lipstick is ABH Lovely liquid lipstick. This look I really love because it's a warm neutral smokey eye with an ombre lip that has a bright red center. I have a video on how I done my ombre lip here. The eyes can be modified to what ever you want as well as the lips, I just wanted to include a pop of color that wasn't necessarily on the eye.
Here's what I used:
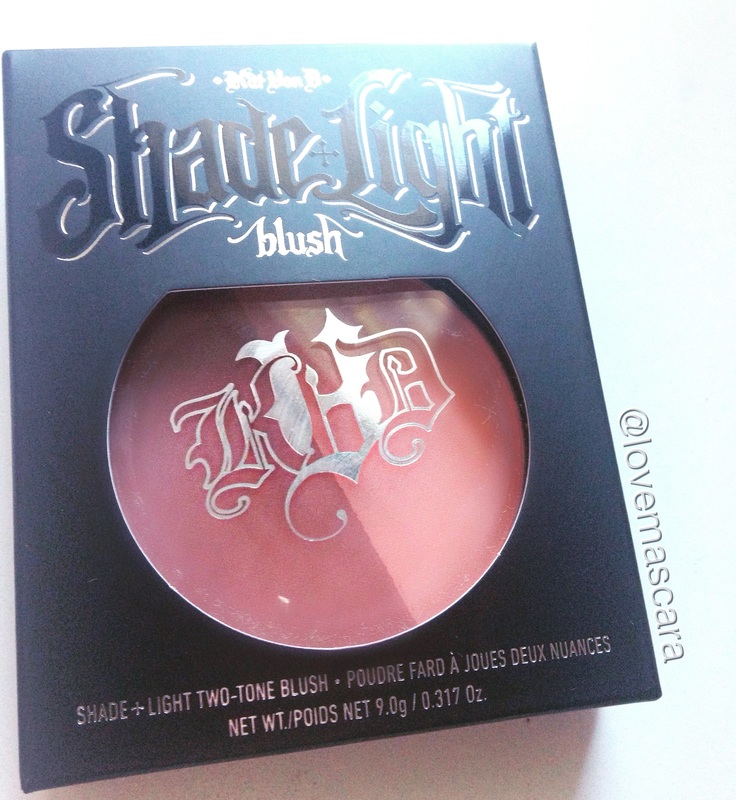
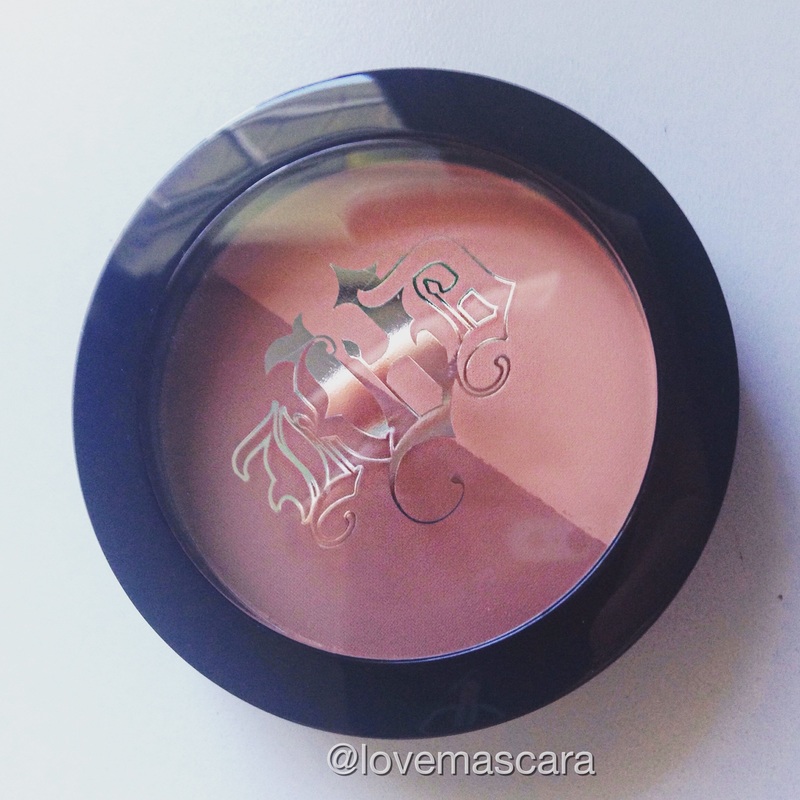
Lips are Feminist lip liner from Colour Pop and Atlantic City liquid lipstick from Ofra Cosmetics. So those are my latest, and best three examples of easy ways to add in color to your makeup. Whether it be daily, or for a special occasion they all would be suitable. My birthday is Friday so I'm thinking the first one with the teal is going to be my birthday look. If I don't find something I like better. Right now though it's my favorite. Also check out my Instagram (@lovemascara) for small tutorial videos every few days. I'm still working through the lighting and angles though so bear with me, I'm trying to better the quality of them. I'll sign off now and I hope this was helpful, remember to be kind to each other. Spread love not hate. I appreciate you and take care! Here we are with another review. I hope you aren't getting tired of them. Then again, this is a makeup blog lol. So today we have the Kat Von D Two Tone blush in Hansel+Gretel. First off, this is only a review of this specific color, as I do not own the rest of the colors and unfortunately sometimes formulas can vary between shades. There are 7 blushes in this line. All of them being matte, and designed to help you sculpt and define your cheekbones along with providing you color. They each have a dark shade and a light shade. It comes with a diagram of three ways you can apply it (according to your face shape) and it was made to work hand in hand with the Shade+Light Contour Palette. So for this shade, I really really like it. I'll be the first to tell you they don't swatch that great on the hand...they apply much better with a brush to the cheeks as you'll see on down. The pan in mine does seem a little wobbly. It's not on the verge of popping out or anything I don't think, but it does move.That has been one of the issues talked about with these. Which I either won't travel with it or I'll depot it and put it in a z palette if I'm determined to have it with me all the live long day. Another thing that I'm seeing people say is that they're "chalky" and "powdery". They do have excess powder when you use them, but so does my Shade+Light palette and everyone loves that so I don't really find that a huge issue. I do not find these dry however, which "chalky" products seem to be. 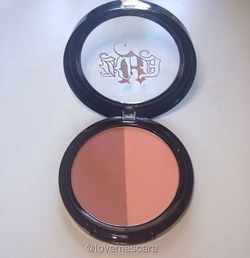 This particular shade is a peachy/apricot shade. The light shade reminds me very much of Makeup Geek Bliss blush and I don't have anything really for the darker shade. I will say that on the skin combined they remind me of Songbird from Becca only without the sheen, because it's a bit darker peach. This is also a lot of product as well. If you only wanted to use one side you could do that with a regular sized blush brush just fine because it's as big as a Becca highlighter. It's 9 grams which is .317 oz for $25. Here is a list of the size of other popular blushes and their price:
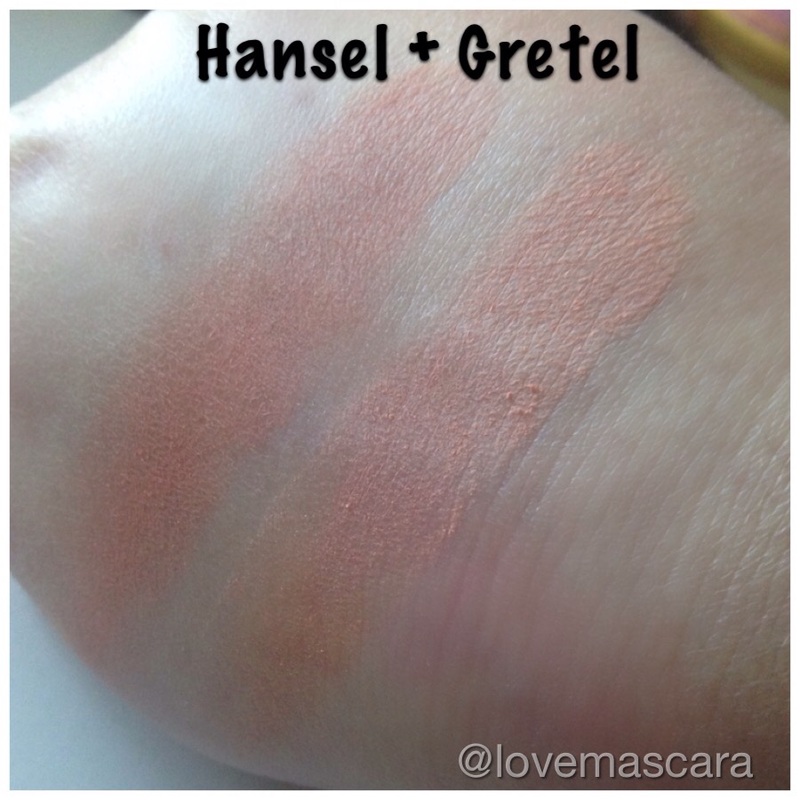
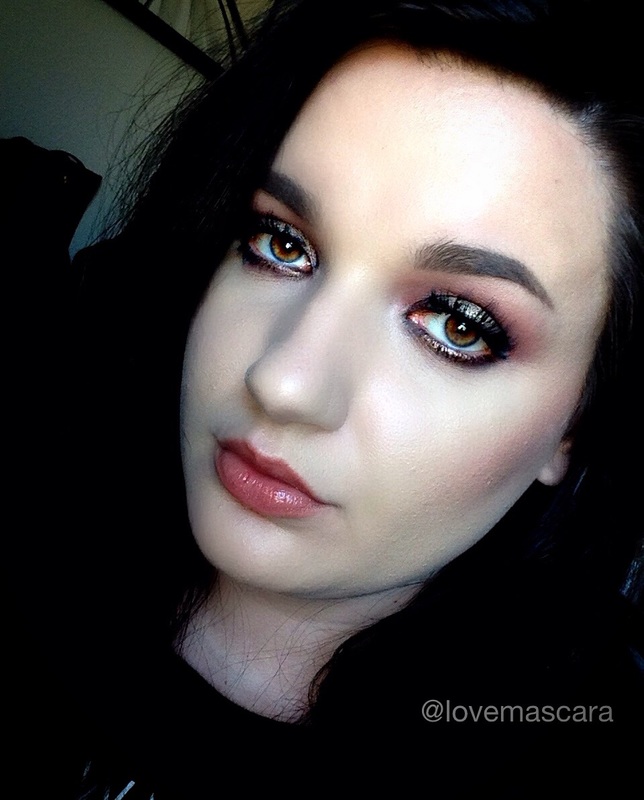
These are the swatches. As you can see they don't look as pigmented and they actually look very similar maybe just a shade difference between the two, when there are really several shades different. Also you can see some extra powder on the swatches because YOU DO GET SOME excess. This formula though is very silky and a bit thin which can be better than all these heavy "cream like" powders like Becca ( I love Becca though). I find these don't emphasize pores as much, and I get down with that. This formula is similar to the Shade+Light palette which would stand to reason because they are made to work together only the Shade Light palette seems to be a bit thicker and more pigmented. My advice is try your best to try this on with a brush and go from there. This is where I show you how I placed mine. Now you can totally just mix these together and use them as a blush, I wore mine for at least half a day before taking it off and it held up really well. I applied these like the diagram suggested, applying the dark shade near the ear and the lighter shade in front of that. I did use two separate brushes though to apply them to make sure I was getting the right shade in the right place. The last pic (bottom right) is when I added (very lightly) some contour in. So the definition you hopefully can see is mainly from the blush. Also if you happen to not like flat, matte, blushes, I feel like this is a good base for a a similar blush with a different finish you could possibly put over it. Alright, so final thoughts: I really really like this. I know they're getting mixed reviews so that's why I stress that this shade works really well for me. The pink shades aren't getting amazing reviews but I haven't tried them. They did say that this is build able color. I personally had to buff mine out some what, because I went in a little heavy. It was super easy to blend and apply. I really don't have many negatives about this, certainly nothing substantial enough to make me wish I hadn't purchased this.
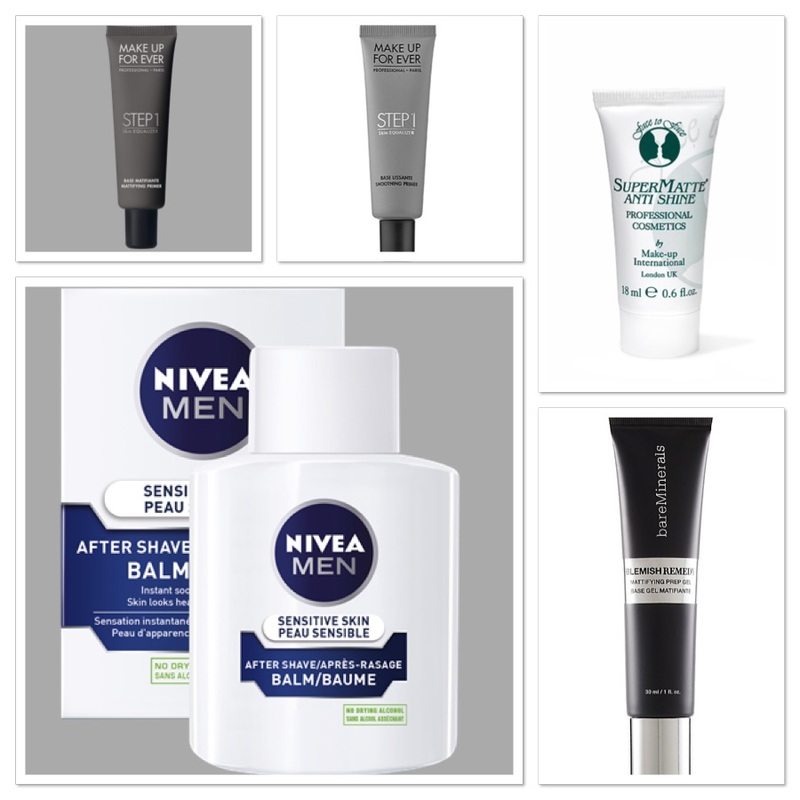
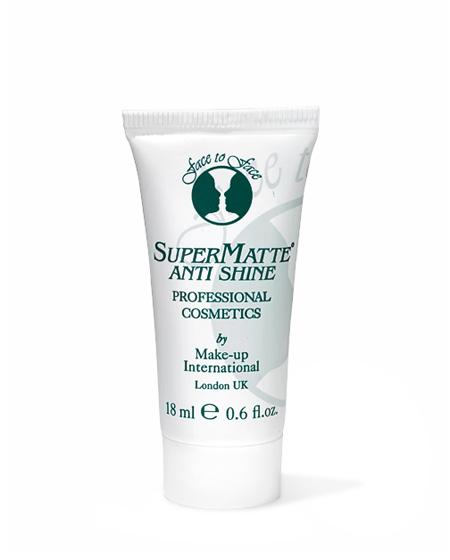
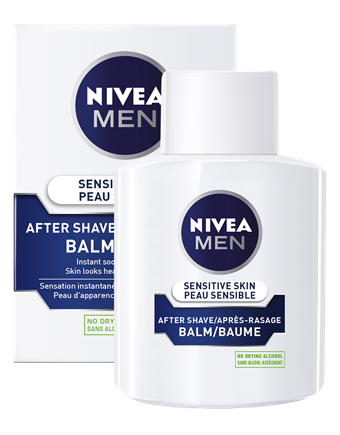
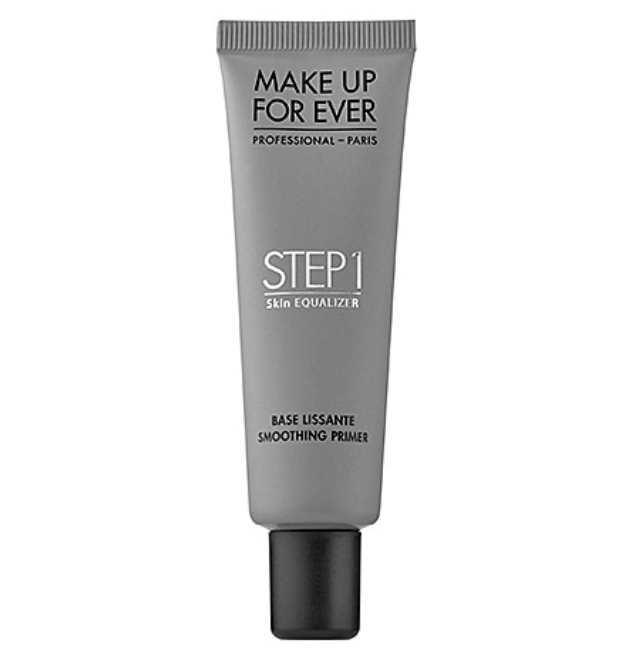
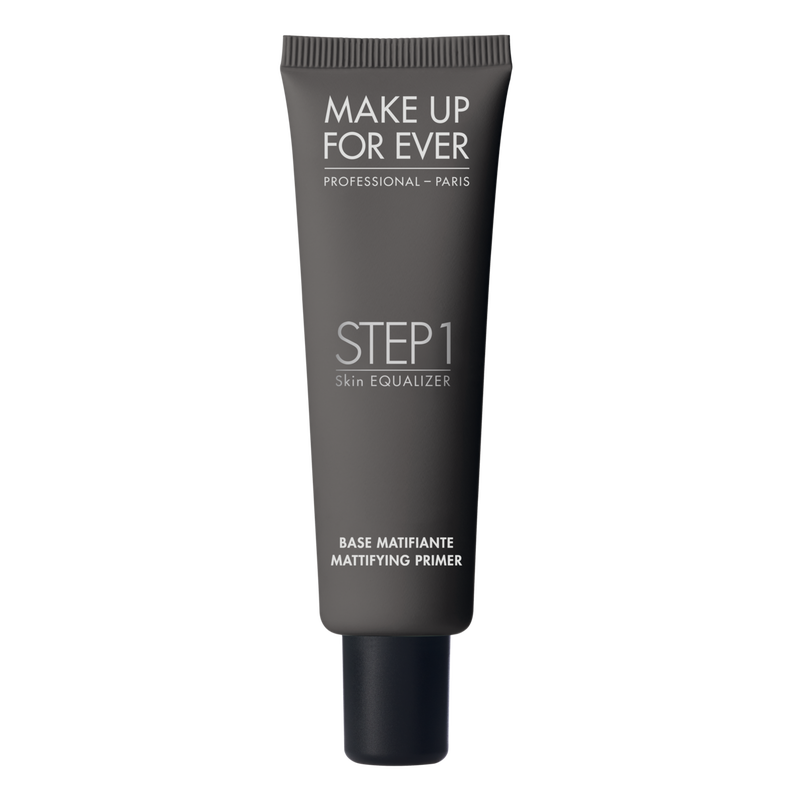
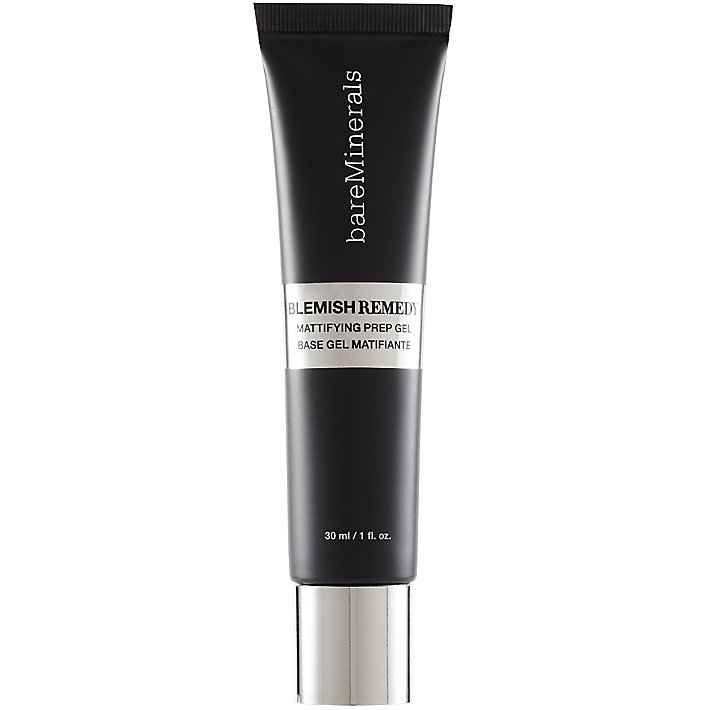
I got mine from Sephora. Remember to use Ebates when you order and get you some cash back. *There is also a link on the side bar for it.* I had two new primers that I was going to review separately. Then when it got down to it, I decided to put all my primers up against each other. Or at least the ones I use the most against each other. So here's the ones we'll be discussing:
So first lets talk about the Face To Face Super Matte AntiShine. This is used on stage for theater makeup. A lot of times its used by itself with a powder over top. It's also used to dab over makeup in any areas that may get shiny. Including bald areas. So therefore, I thought this would be a high potent primer. It's definitely potent. It dries completely matte. COMPLETELY MATTE. I do find however that this works best on its own with something added to it for more coverage. Using it under foundation doesn't seem to work amazingly well. My foundation actually broke apart through the day and there for I wasn't too impressed. Not to mention this is listed for nearly $28 on Frends Beauty for 0.6 oz. Which is not a lot of product. It's a chunky thicker gel formula with slight color to it (it comes in three tints). Very slight color. This is something I would use to reduce shine or spot treat but I wouldn't go for this as a primer. I can't find if this is water or silicone based. There are not a lot of reviews out for this particular product. It has very few ingredients, which I like. Next up Nivea Sensitive Post Shave Balm. Everyone and their mother has been talking this. EVERYONE. I feel like this originated from Nikki Tutorials. It went off like a rocket and dang it she was right! I got this, the scent is strong, and it's not that this primer works with longevity alone but it actually keeps your bronzer, blush and other products were you placed them without getting patchy. My makeup looked more airbrushed, smoother, and close to how I first applied it without shifting or moving through out the day. I apply it with just a brush, which is how I apply most of my primers because I tend to rub the skin with my hands and it balls up and rolls off. Isn't that a lovely picture, right? This is 3.3 oz for $5-$7 depending on where you buy. Now, keep in mind I got the "sensitive" one cause that's what I seen people using. I'm not sure if the others work as well as this formula. The bottle is nice and glass and the consistency is a thin milky gel/liquid. This is silicone based but it doesn't have Dimethicone which give you that "slip" feel in a primer. Last is kinda a surprising choice. Its the Bare Minerals Blemish Remedy Mattifying Prep Gel.
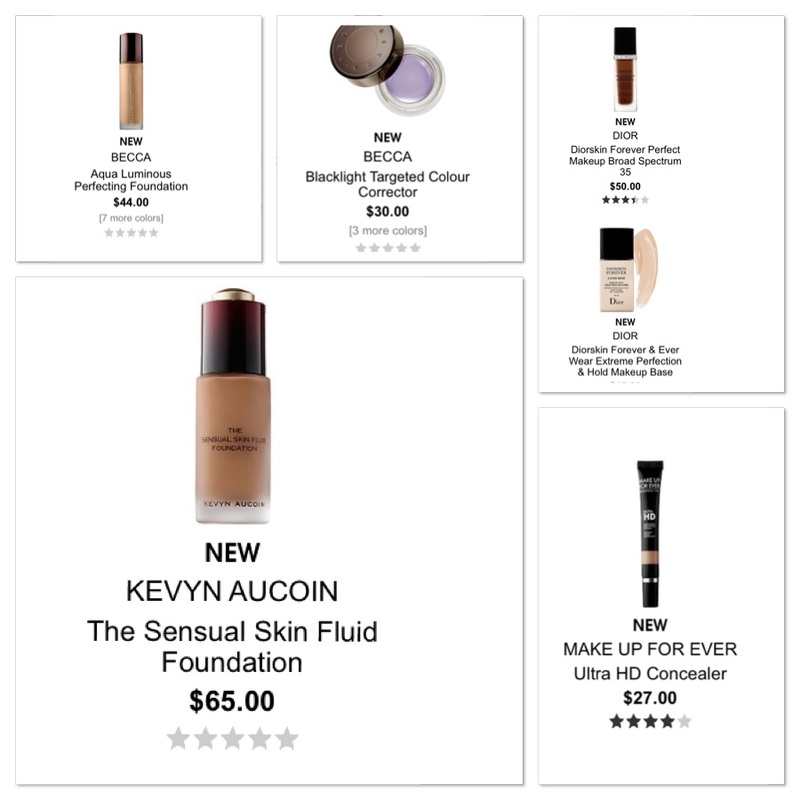
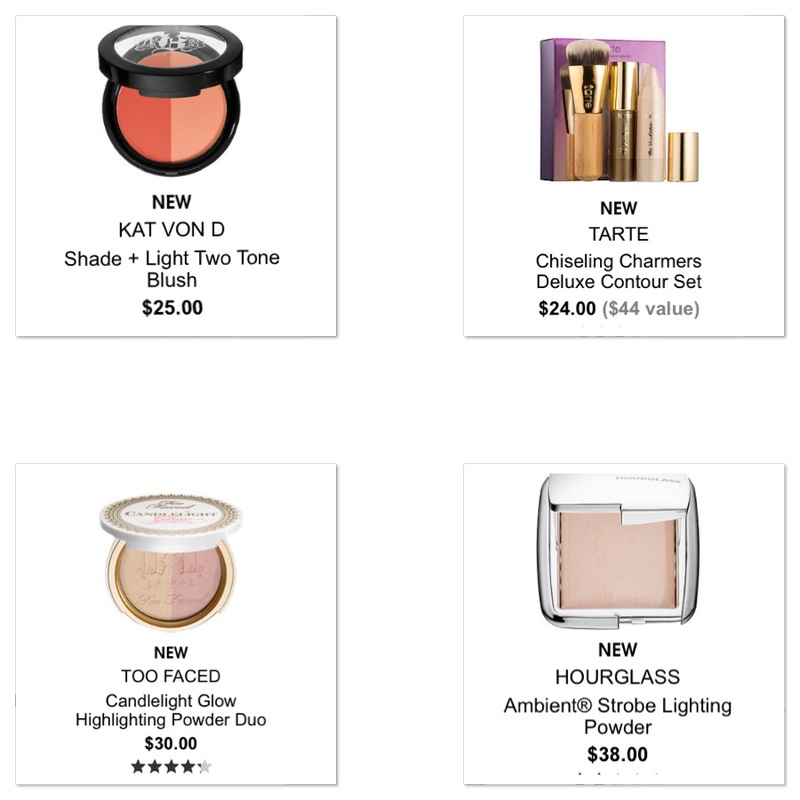
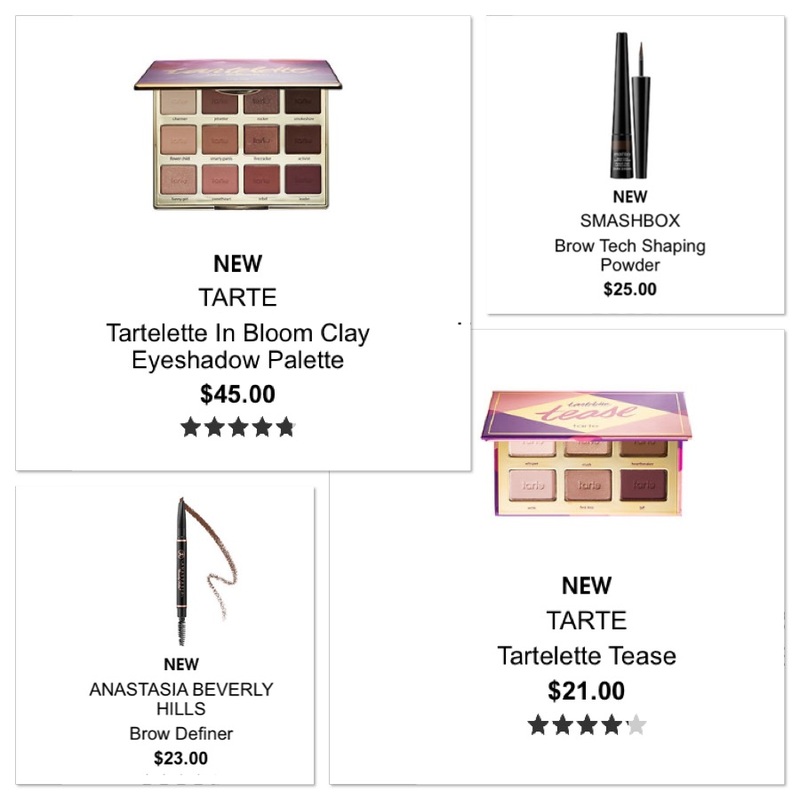
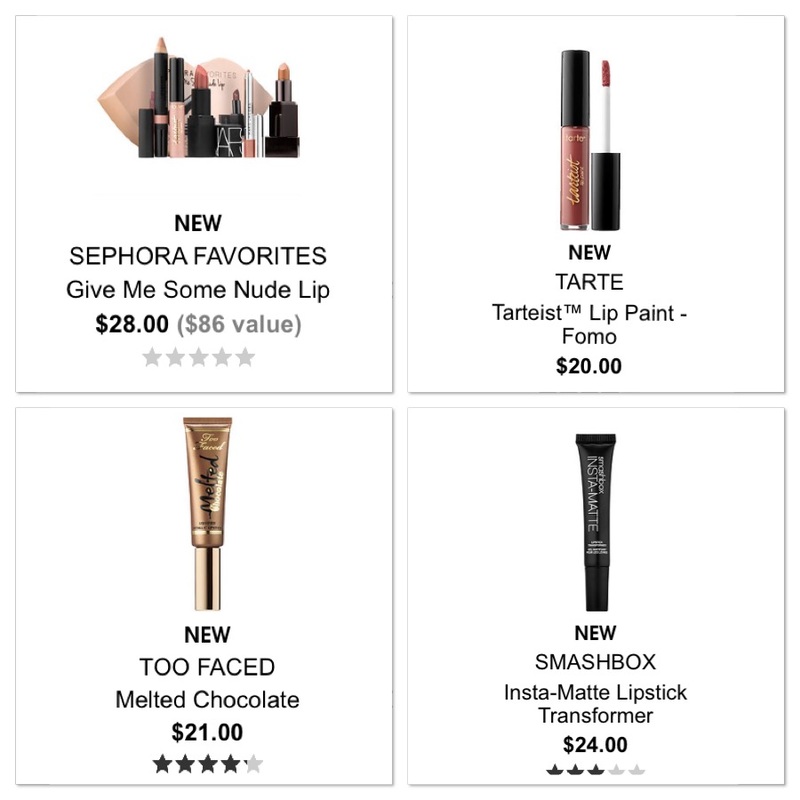
I was sent some of this to try. It's actually really good. It's very light weight and works great at mattifying the skin. It also uses Aspen Bark and Tea Tree Oil to promote clearer skin. Which is very interesting I think. I don't know for sure how well it works with problematic skin but as far as a primer, it's really good. Great actually. It's $24 for 1 oz. It's dermatologist tested and noncomedogenic therefore it's not going to cause you black heads. So if you have acne or are prone to break outs, I'd give this a go. This is silicone based and also has Dimethicone which makes it feel very silky. Which I typically don't like but this one isn't bad. To be considered a "silicone based" product most of the forms of silicone will be listed near the top of the ingredient list. You can google the different ingredients to look for cause there are quite a few. If they are closer to the bottom then it's probably not silicone based. Most all primers include some water, because water is what thins product out or makes them liquid people so just because it has water in it doesn't always mean it's "water based". I recommend reading the details of the product in description sections online because usually a company will put "water based" or "silicone based" in the description of their product. Especially for foundations. Well kids most of the mother load has hit. There is a TON of new products that are out now at Sephora. With more on the way by the end of this month. I've compiled a pretty hefty list of the ones I think are interesting. That's not even including the ones that I'm not personally excited about. So we're gonna get into these, some of them I don't have much information on and others I know a little bit about. Lets hit this by category instead of brands. I think that would be easier. First category in bases. Meaning foundation, concealers, primers, so on.
This category will be cheek products and powders.
Next lets move onto eyes and brows.
Last lets talk about lip products.
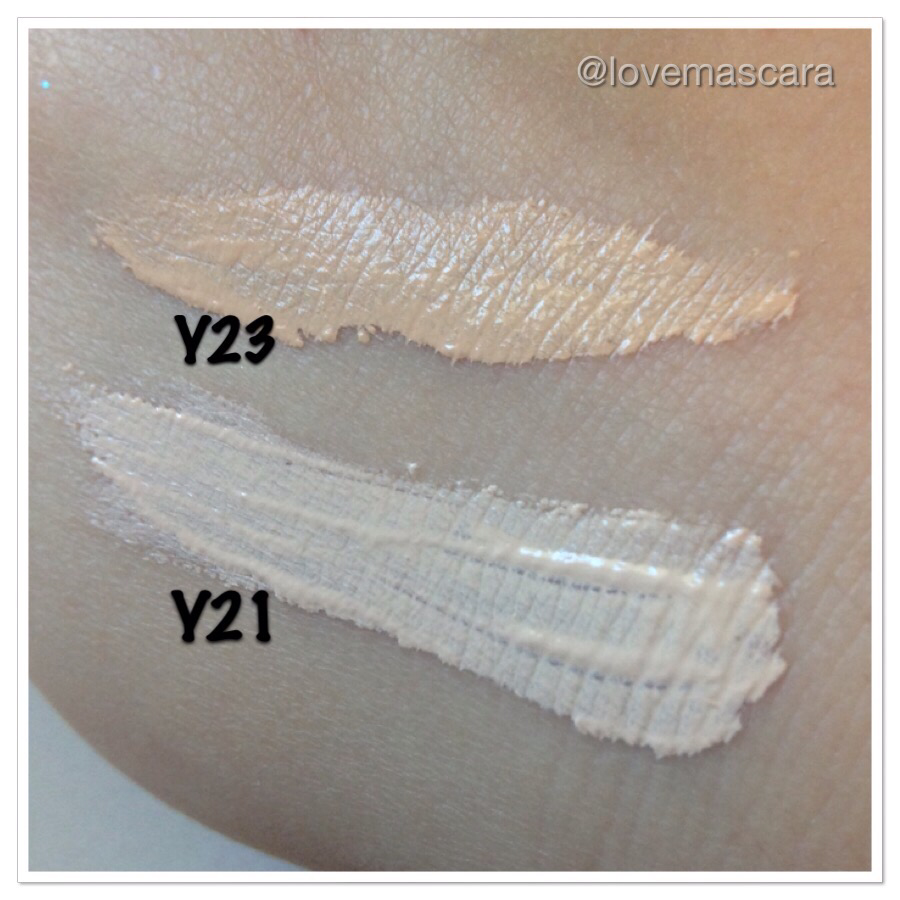
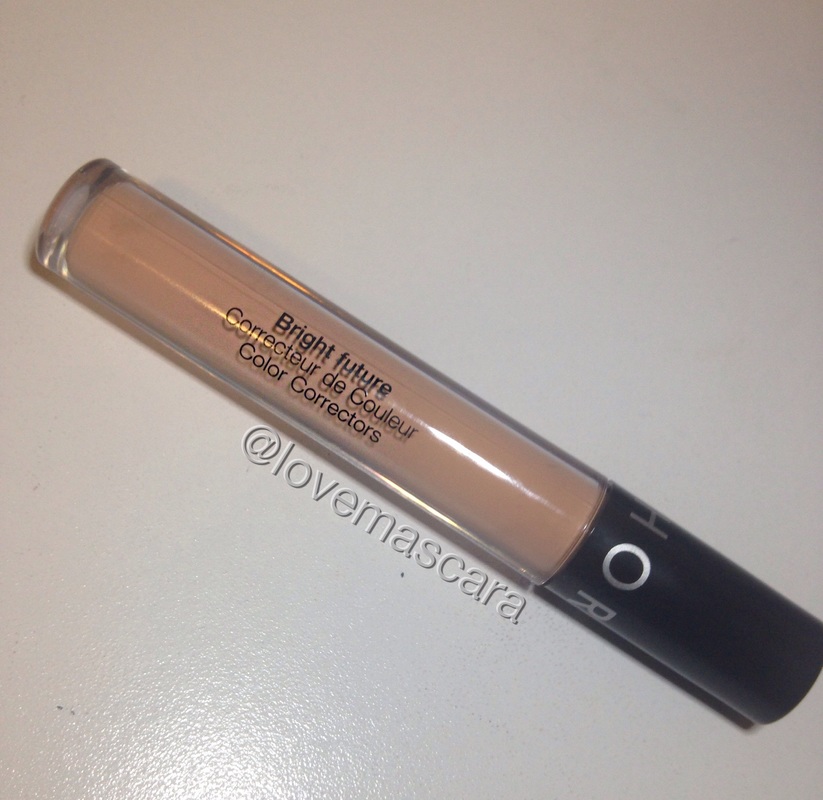
There is a 10% off code out not for VIB and VIB Rouge members that last's until the 11th of February. I don't know if all the codes are the same but try googling it and see. You should receive one in the mail though, I would think. 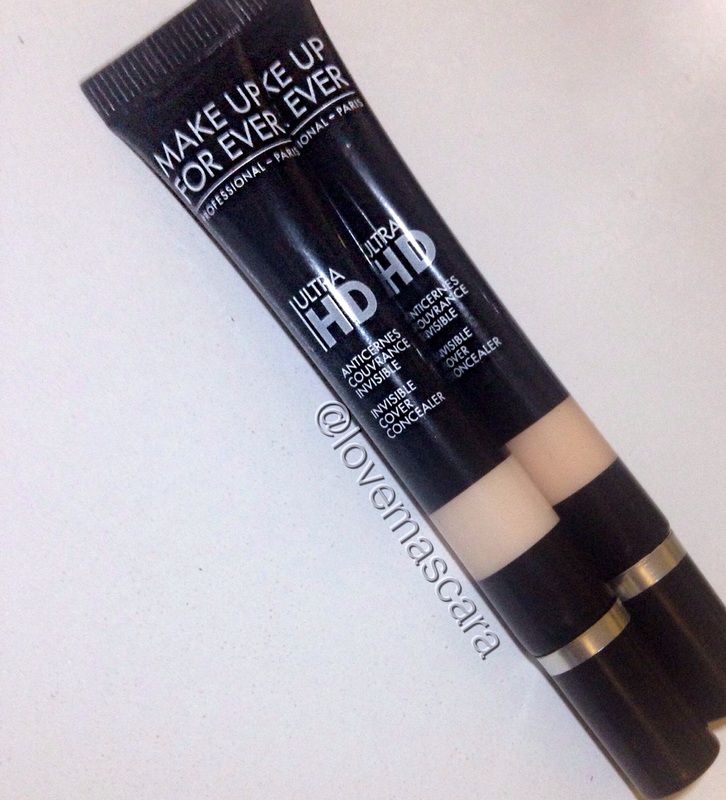 Tis time for all the new Spring launches to come out. They are already rolling them out and I can't wait for the rest to hit. In the meantime though I picked up some new launches of concealers. I was gonna do this review separately but I figured might as well kill two birds with one stone. Above we have the new Makeup Forever Ultra HD concealers. I have two shades Y21 and Y23. Y21 was sold out on Sephora so I went with Y23 only to find that Frends Beauty had Y21 in stock a few days later, so I got both. This line is currently 5 concealers and 5 correctors. The concealers start with Y and the correctors start with R. So there isn't a ton of color selection with these but I think they'll add more shades shortly because they really are great. You get .23 oz in the tube and a little goes a VERY long way. I don't mind that there is a little less product in this than say the Tarte Maracuja concealer (.28 oz) and a lot less product than Makeup Forever Full Cover Concealer (.5 oz ). Both of those being in squeeze tube packaging such as this. As far as wand type concealers you usually get around .16 oz except the NARS Radiant Creamy Concealer which actually has .22 oz. but its $2 more expensive than this. These are $27 and I feel like they are worth it. Also, you can sign up for free membership at Frends Beauty and get 10% off your purchases. So that's something to think about as well. Also don't forget there is a link to Ebates on my side bar where you can make money for spending money and Sephora always offers cash back on Ebates. Y21 and Y23 look extremely different from each other swatched. However when using them Y23 is still very bright on my skin as is Y21. Y23 is a bit warmer in tone and Y21 is more neutral. It actually reminds me of NARS concealer in Vanilla. Only Vanilla is about a shade darker than Y21. These are super hydrating. They don't look incredibly heavy on the skin and especially under the eye, and they don't crease that much on the skin under the eye and cause lines to be more apparent which can age you. Which I feel like the NARS can do that. After I've wore my NARS concealer for a few hours and I check it again it looks really heavy and it's creased no matter what I do. Which makes sense as to why these are so great under the eye, because they are super moisturizing. Moisture and Hydration plump the skin up so that lines are less noticeable. That's why you always hear people in makeup say "drink lots of water", it not only purges the skin it also plumps up any fine lines you may have. You can also apply eye cream over an over again before you put on concealer and that makes the area under the eye less sunken in and more plump as well. I've tried it and it does work. Apply moisturizer, let it dry and then repeat, however many times you want before using you concealer. Like I said a little goes such a long way that I really feel it would take a while to go through this tube. It's formula is very pigmented and concentrated. I applied it and originally try to blend with a brush but it wasn't blending in at all, so I ended up using my ring finger to spread it out and blend it somewhat and then use a brush to blend the excess. You could use a Beauty Blender or Real Techniques sponge and that works just as well. This doesn't feel heavy to me, nor does it feel greasy or smothering. I wouldn't say it's as light as the Urban Decay Weightless Concealer but it's close. Makeup Forever has just been killing it lately with their new formulations and product re-vamps and I'm loving all of them. I can't say anything bad about this at all except I wish there were more colors. Like I said earlier though I think there will be some more to come for sure. The next concealer I bought is actually a corrector. This is the Sephora Bright Future Serum Corrector in Peach. Now, I done a review on the actual Bright Future concealers several months ago and they weren't something I absolutely loved for concealing. They were great for cooking and highlighting but as concealers go I just didn't care for them. Since then I've actually come to use it more especially with my Elcie foundation, they pair up really nicely together if I let them sit on the skin for a bit.
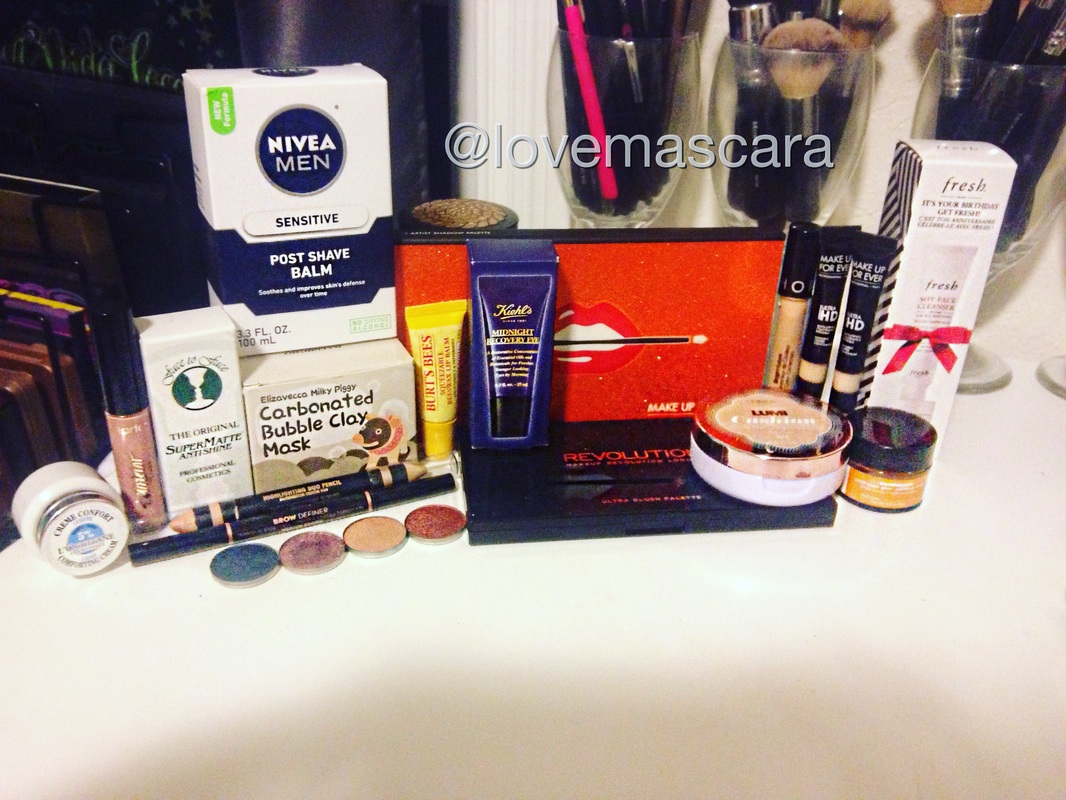
These are correctors though and correctors correct different tones or colors we have in our skin that we don't like. This would be where you reference a Color Wheel. I have an entire post about a Color Wheel actually, if you're unsure what I'm talking about. The short version is: Peachy/Orange tones cancel out blues and purples. Green cancels out redness (and so does yellow in my opinion) Pinks also can help brighten up darkness under the eyes and Lavenders correct yellow toned skin that looks almost sickly. These correctors come in 5 shades and they are $14 for .14 ounces which is pretty standard for wand and tube style packaging. They have the same wand, formula and price as the Bright Future Serum Concealers. The wand doesn't bother me though on these because I really don't want to pack on a ton of correcting colors. So the amount it gives me is perfect. I got the shade Peach for my dark circles. I almost got Melon instead thinking a darker orange would work better but I'm glad I didn't cause this is darker than I expected. Melon and Peach will do the same thing only Melon is for medium skin tones where Peach is for light skin tones. So to recap you have: Green, Yellow, Lavender, Peach and Melon. I got mine for correcting dark circle you get whichever one you need if you need to correct anything at all. I personally am seriously considering getting the Yellow one to see if it's like the MAC Prep n Prime in Light Boost. There's not much else to talk about with this. I think its a great product and I think the price is fair. I definitely prefer this to thicker consistency like Benefit Erase Paste and Eve Pearl Salmon Concealer because the coverage is there without the heaviness and when you're going to have to put a foundation and concealer over this you don't want it to be super heavy and create lines and age you. I also like that it's not as dry as NYX dark circle corrector THAT. I. LOVE. and It Cosmetics Bye Bye Undereye. This is much more hydrating than those and much thinner than first ones I mentioned. I have a small video on my Instagram demonstrating how I use both of these concealers I reviewed. Go check that out if you're interested. If the link doesn't work my Instagram in @lovemascara. P.S. If you want to know tid bits or small reviews faster than waiting on a blog post, I do have a Snapchat (loveandmascara) that you're more than welcome to follow and listen to me talk about makeup with the occasional rant thrown in about drive-thru issues at fast food places. From the beginning of January, the new launches of makeup have been rolling in for Spring 2016 collections and so on. Since I had plenty of gift cards to use, points to redeem and coupons, I stocked up on some new stuff from skin care to makeup. Some of these will have separate reviews for them and for those I won't discuss them too much. I will list everything in the picture above though and discuss a few things I'm not going to do a full post on.
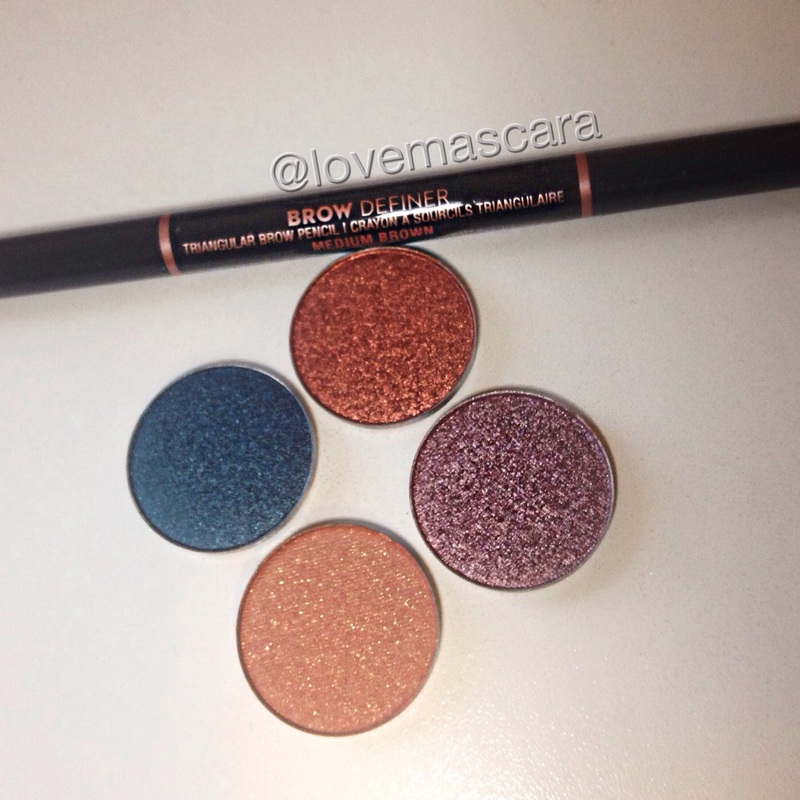
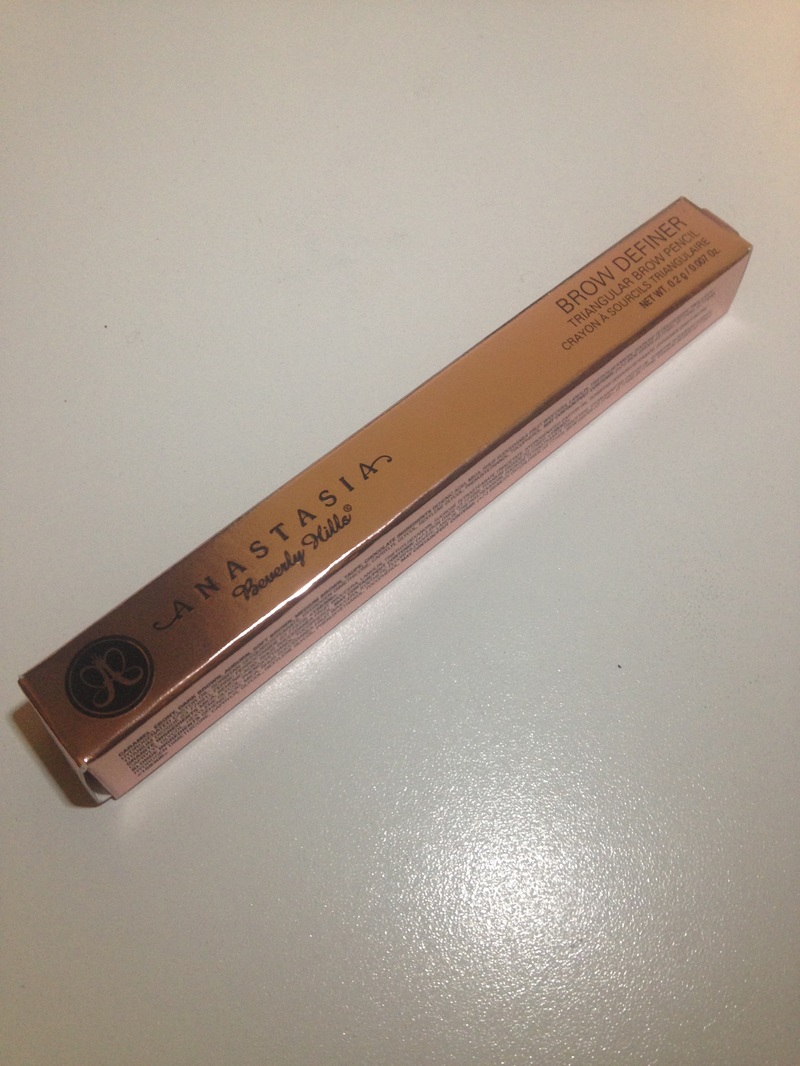
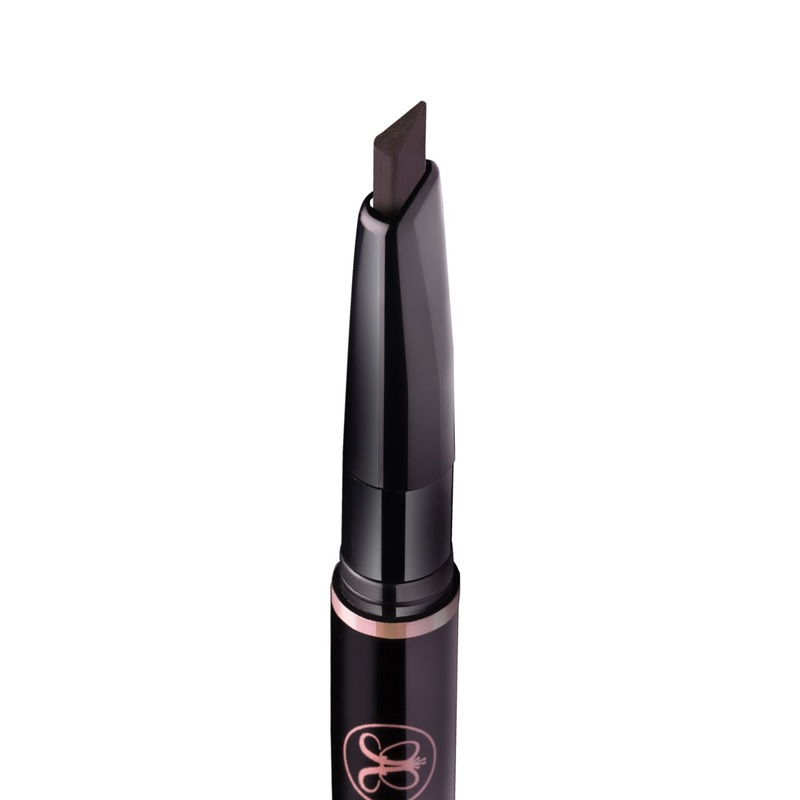 **the picture above is from the Anastasia website because I couldn't get a good pic of the shape of mine. If you are familiar with my blog you know that I'm a huge fan of Anastasia Beverly Hills. Everything that I have from them I've really liked. So it's never a question on whether or not I'm going to like a new product they launch, it's just a given. Their newest product they've launched is the Brow Definer. Which in my eyes is like brow wiz on steroids. Its a triangle shape looking at it straight down the tube. The reason for the shape is so you can have three different ways to fill in your brows from thin-thicker-very thick. So you could use it for short thin strokes to mimic hair like a brow wiz using the tip of the brush, you could make thicker hairs by using the back side of the pencil. Or you could use it to fill in the brow quickly with the full length of the pencil flat against the skin. You could also use it to draw and sculpt the brow holding it parallel (longest side) and using the length of the product. Being somewhat of an angled brush shape it carves a brow much easier than a Brow Wiz but not as sculpted and intense as Dip Brow pomade is, and this gives you more control. The Brow Wiz is a thin pointed tip that works really well to mimic hairs but harder and more time consuming to fill in the entire brow and also harder to sculpt brows evenly. This makes that much, much easier due to the slanted angle provided by the pencil. Now if you like that really intense brow, or ombre brow where the tail is super intense and sculpted I'd use Dip Brow and powder. If you like a softer, yet defined brow I would definitely use this. It just is more convenient and it cuts your time in half. Plus you don't have to reach for seven different products to do your brows. You have 3 options of application and a spooley brush on the opposite side. This spooley is bigger than the Brow Wiz spooley which I actually like the one on the Brow Wiz better. This works just as well though. I just prefer smaller spooleys. Another thing I LOVE about this is that you get .007 oz of product in this and in a Brow Wiz you get .003 oz. So that's more than double the product. My biggest issue with the Brow Wiz is that it runs out so fast on me and I'm hoping this won't do that. The Brow Definer is $2 more ($23) than the Brow Wiz ($21). If you have a pro discount with ABH you can not use it on the Brow Definer right now. This is available on the ABH website (of course), and online at Sephora, Ulta, Macy's, Nordstrom and Dillards. I also got 4 of the newer eye shadow shades they released for the fall. I got Henna, Prussian Blue, Macaroon and Party Dress. Looking at these now with some of the other shades I have from their line I wish I would've picked some other colors maybe but none the less I really love these colors I just happen to own some that are similar. Henna is a gorgeous foiled type orange/copper shade but it reminds me of China Rose a little only way more intense and darker somewhat. Prussian Blue is a super pretty foiled blue shade, it reminds me of Mermaid and Dragon Fly though but more of a true blue. Macaroon is my jam. It's a foiled lavender/mauve shade and it's stunning. I would say it's kinda similar to Pink Champagne but this is definitely more lavender and better formula. Last but not least I got Party Dress which I wasn't really enthused about but it's actually really pretty it's neutral/nude with flecks of glitter in it that you can actually see instead of being all shimmer, this is more matte with glitter the tone of it is similar to Bengal but with glitter. Which makes that shade very unique and cool. The quality of these are amazing. They're even better than the first shadows they released that I have and I'm still a big fan of those. The Titanium line had a lot of fall out originally but the new foiled style shades like Henna, Prussian Blue and Macaroon adhere better to the eye, keep their intensity, and are more opaque it seems. Where as the Titanium shades like Pink Champagne and Metal needed to be layered over another shadow I found. Not that I didn't love those anyways these are just even better. Another really awesome thing is that before you got a discount if you done an 8 well palette. Now you can do a 4 well palette for $40. Making these $10 a piece when, I believe, regularly they're $12 a piece. So that's actually really awesome. They have said that their shadows and other products besides brow products are coming to Ulta, Sephora, etc, sometime in early spring I'm guessing. So if you're someone who needs to see things in person (I'm looking at you, Savannah.) You will be able to do so. In this picture above I'm wearing Henna in the center. Bengal in the crease and some Red Earth as well. Then on the outer and inner corners I'm wearing Noir, layered over Deep Plum, over Smoke which is over Red Earth. So if you were to apply it you would Bengal in the crease first, Red Earth on the inner and outer corners and buffed into the crease, then Smoke on the inner and outer corners, then over that you'd do Deep Plum and finish with Noir. Although you could finish with Deep Plum and it look awesome as well. I took a little Deep Plum into the crease as well, just a smidge to carve out the crease. I loved this so much that I didn't want to take it off at night and it's been a while since I've loved a look that much. In this picture I'm wearing Macaroon as the star of the show. It's beautifully frosted and lavender. I applied it with my finger to the center of the lid.
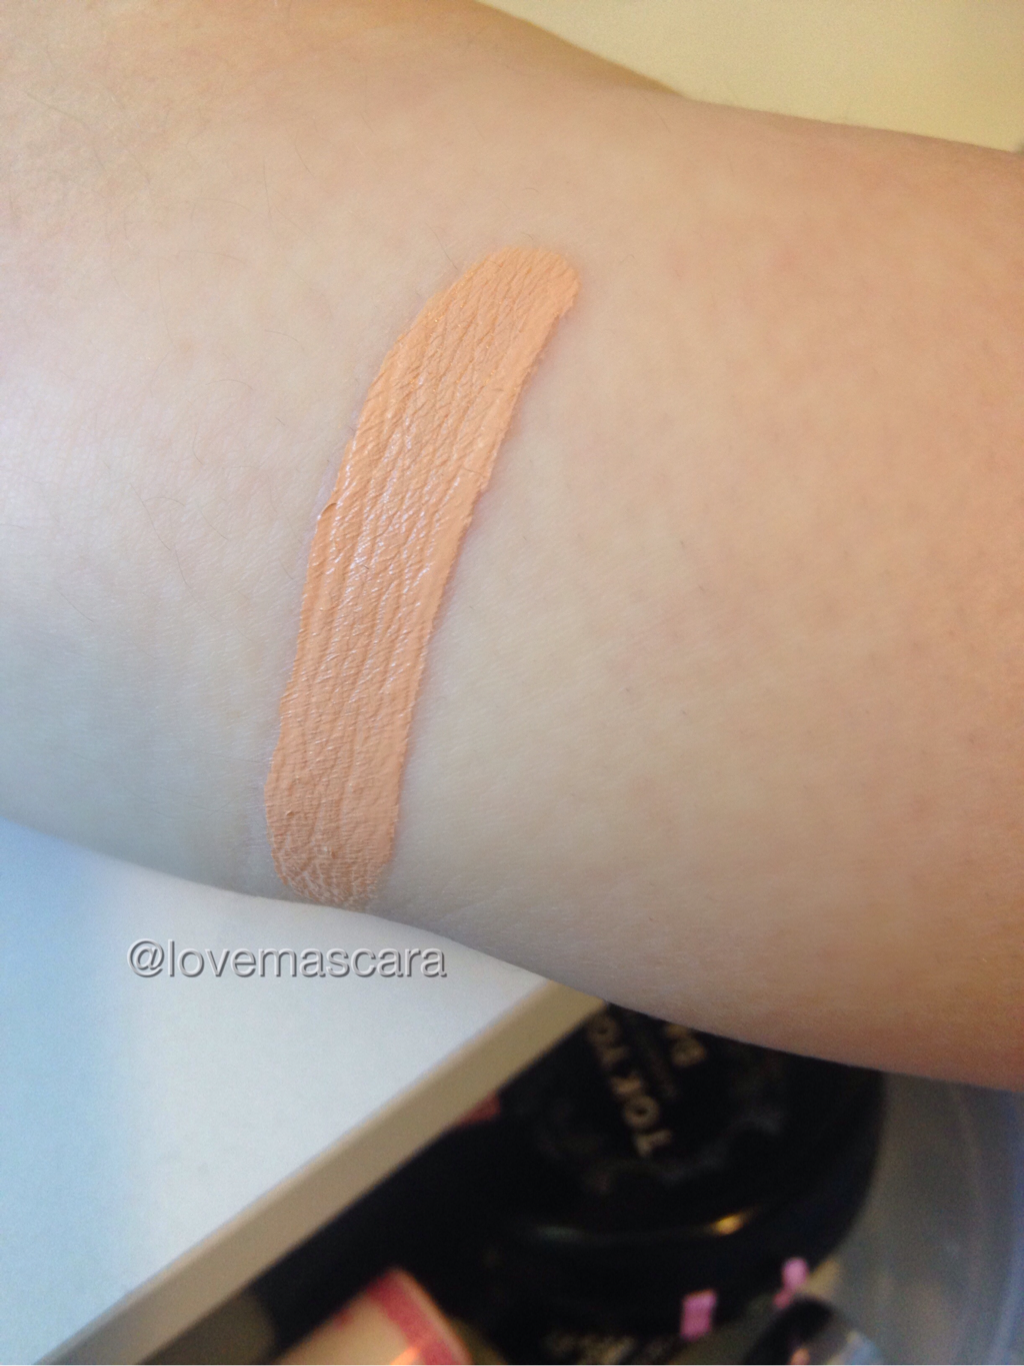
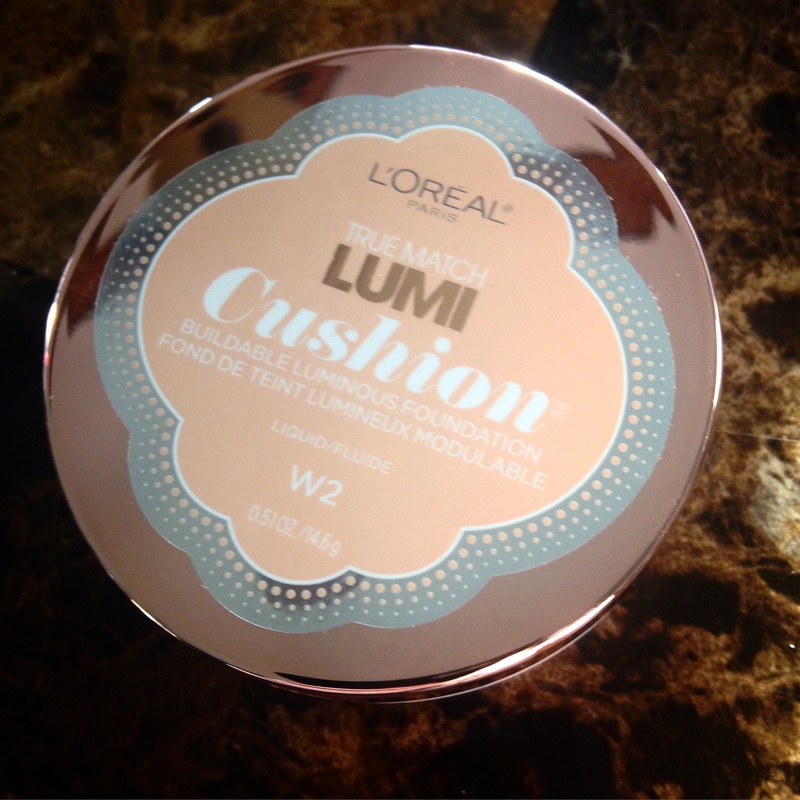
Also using the Brow Definer as well for my brows. And that was the only thing I used to fill in/sculpt my brows. So here is the elusive L'Oreal Lumi Cushion foundation, I say elusive because it's sold out everywhere around me. I had to order this off Ulta. I got shade W2 because in the regular Lumi I wear W3 but I typically wear that in the summer. So I went a shade lighter to wear now, but really I was just shooting in the dark. Unfortunately when I swatched this first it seemed a bit dark and even more so when it dried. This is a more expensive drugstore foundation as well! I paid $17 for this and price checked other places to make sure I wasn't getting ripped off. I wasn't, it was $16.99 everywhere I seen it. So I bought it from Ulta because I had points to use and plus I used $3.50 off $10 coupon at Ulta so I actually got it for a lot less. Also Walgreens is really good to have coupons to use on their beauty products as well. So I feel like you could get this for less if you were smart about it. So that's my advice if you want it, buy from Ulta and get $3.50 off if you have free shipping or buying it in store. If you can't get free shipping or go to a store, then try to find some coupons you can use at other places. The regular Lumi is $8-$10 and True Match is $7-$10. There are 12 shades I believe and a really good range actually from fair-dark skin tones. It's .52 oz and it is a liquid that comes out of the cushion. That's kind of a bummer because most foundations are around 1 oz. The regular Lumi is 1 oz with 15 shades and the regular True Match is also 1 oz with 24 shades. Both of those being quite a bit cheaper than this. I understand though it being less product because of the cushion packaging. If it had an entire ounce it might be super messy or really big packaging which wouldn't be convenient. The difference I feel between the regular Lumi and the Lumi Cushion is that: the original Lumi focuses mostly on hydration and luminosity with 40% pure water and vitamins to not only hydrate you but give you a healthier look. Which is great, but not great for oily gals. The Lumi Cushion is mainly marketed for it's different packaging it seems, but to me it's not necessarily a luminous finish but rather a natural finish initially which I really prefer. The plus side to this also is that the cushion seems to control the amount of product that comes out so you won't waste as much as you would with a pump possibly or an open top. Which for some people that might irritate, but to me I think that's pretty smart because you aren't wasting product. 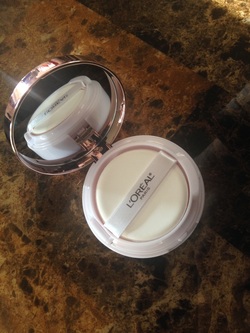 This is what it looks like initially. The little pouf on top is something I probably won't use but it does seem like decent quality if you wanted to take this with you somewhere. Though I'm not sure it's gonna be best with travel and I'll explain below. 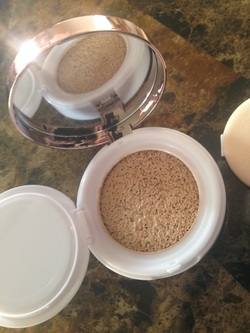 So this is what the product looks like. As you can see a lot of product is already out of the sponge (or cushion). This was how the product arrived. It had a little sticker over it to keep it from running out which I really appreciated because there was a lot of product on the sticker too when I pulled it off. This is where I'm not sure if it's travel friendly because a lot of product came out with out me even pressing it. So if it were to be turned upside down then I'm afraid it would run out the sides or be super messy when you opened it. Other than that, I think the packaging is super cute and neat. **update: when I opened it, it had a lot of product already out, I'm assuming from transit. Once I used that excess foundation, it really didn't over produce product by just pressing on the cushion. Not to say that I would store this upside down or in my purse though. 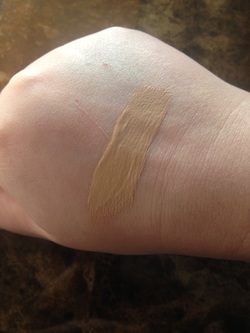 This is the swatch in W2. Like I said earlier its a bit darker than what I wanted but I think I can make it work, hopefully. What I'm really gonna be testing is to see it's coverage and if it oxidizes because it seemed like the swatch got darker once it dried. Quite a bit darker actually. So we're putting it to the test to see if that is indeed the case or if it actually wears better than it swatches. How I applied this was just pressing the cushion with my finger and dotting the product on the face. Not a ton of product comes out upon pressing on it which I really like. So hopefully it won't turn into a huge mess, like I originally thought. I used a kabuki brush from Morphe to apply it (M439) and it blended really really well and didn't break up any while blending. It had a really nice satin finish. Natural to satin finish I think but I lean more toward satin. The coverage on this is pretty good. It's medium coverage. I think if you build this up you could get full coverage. I had some redness around my chin and my forehead and I could still see that somewhat so you may want to color correct before hand or use a color correcting primer or BB cream. It wasn't that big of a deal to me though because my skin looked soft and smooth but not like a mask where it's one flat color. I would stick with a brush to apply it because I'm afraid a sponge or beauty blender would sheer the coverage even more and change the finish to a more luminous finish right off the bat, and the finish is what's really doing it for me right now. Upon applying this the color wasn't an issue. By blending it out and into the skin the color worked really well. I do think if you got too much product and it was also the wrong color you might would have an issue. I actually swatched it next to the regular Lumi I had in W3 and it's several shades darker than this one which is W2. The color chart may be different though for the Lumi Cushion and regular Lumi. So upon application I really am liking this and thinking that my previous negatives about the product aren't that big of a deal now seeing how it works on the skin. Tomorrow is the true test though. So we'll see. **Next Day Update**
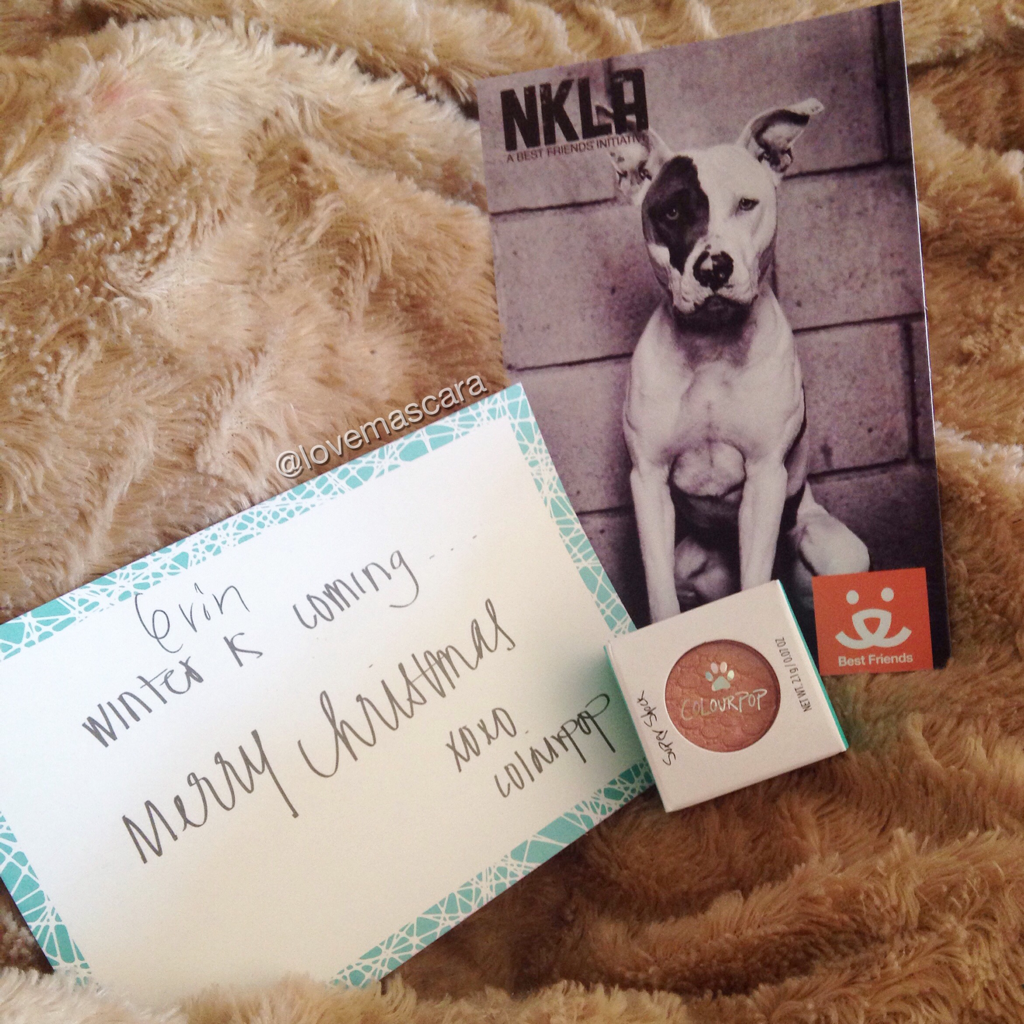
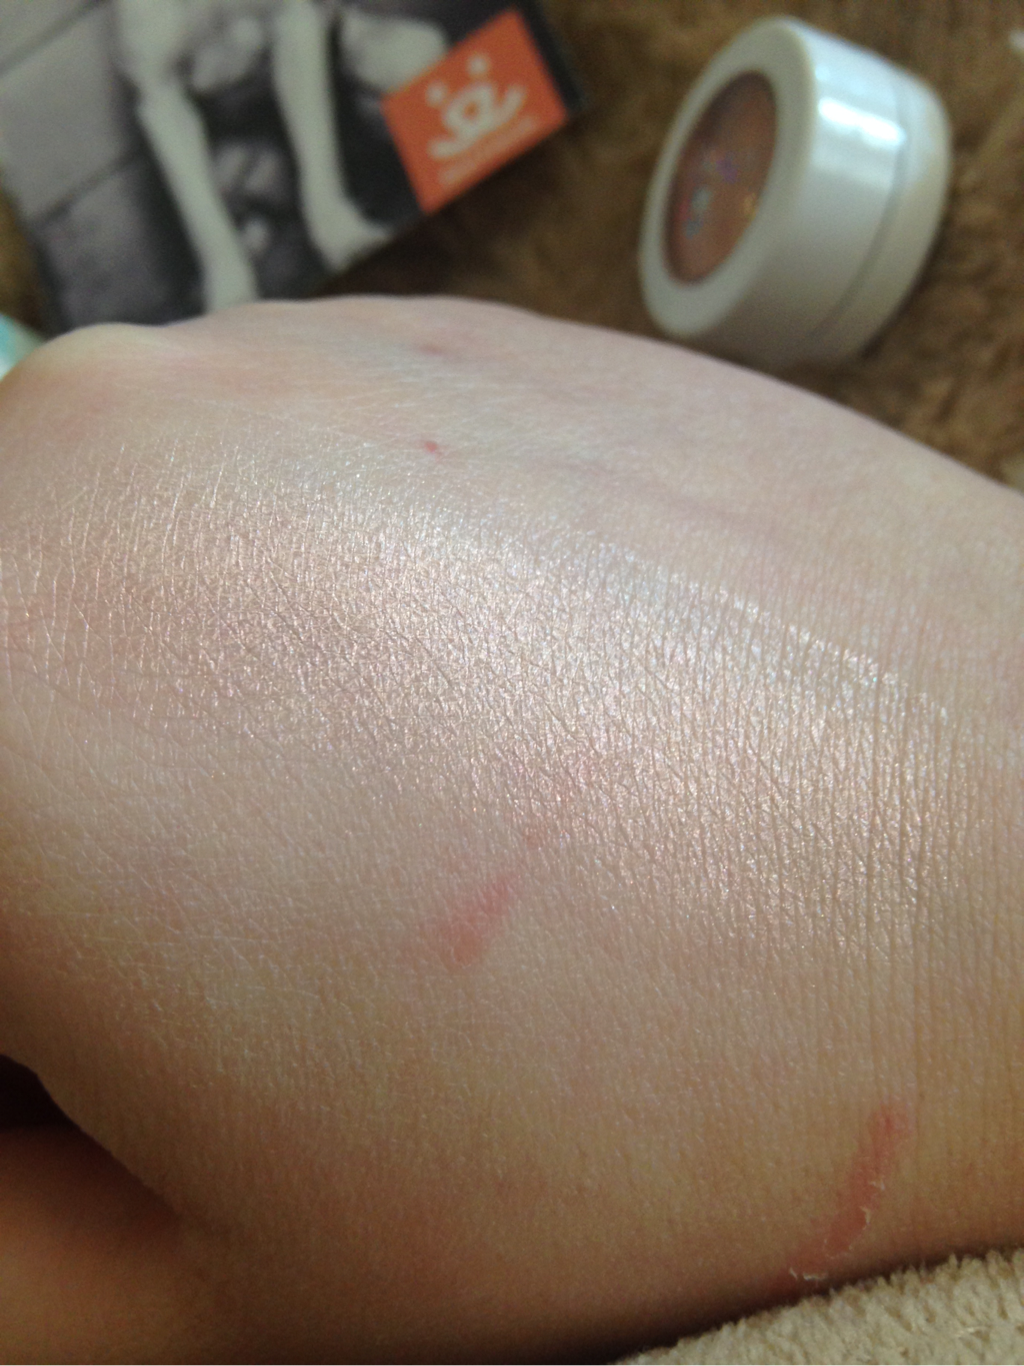
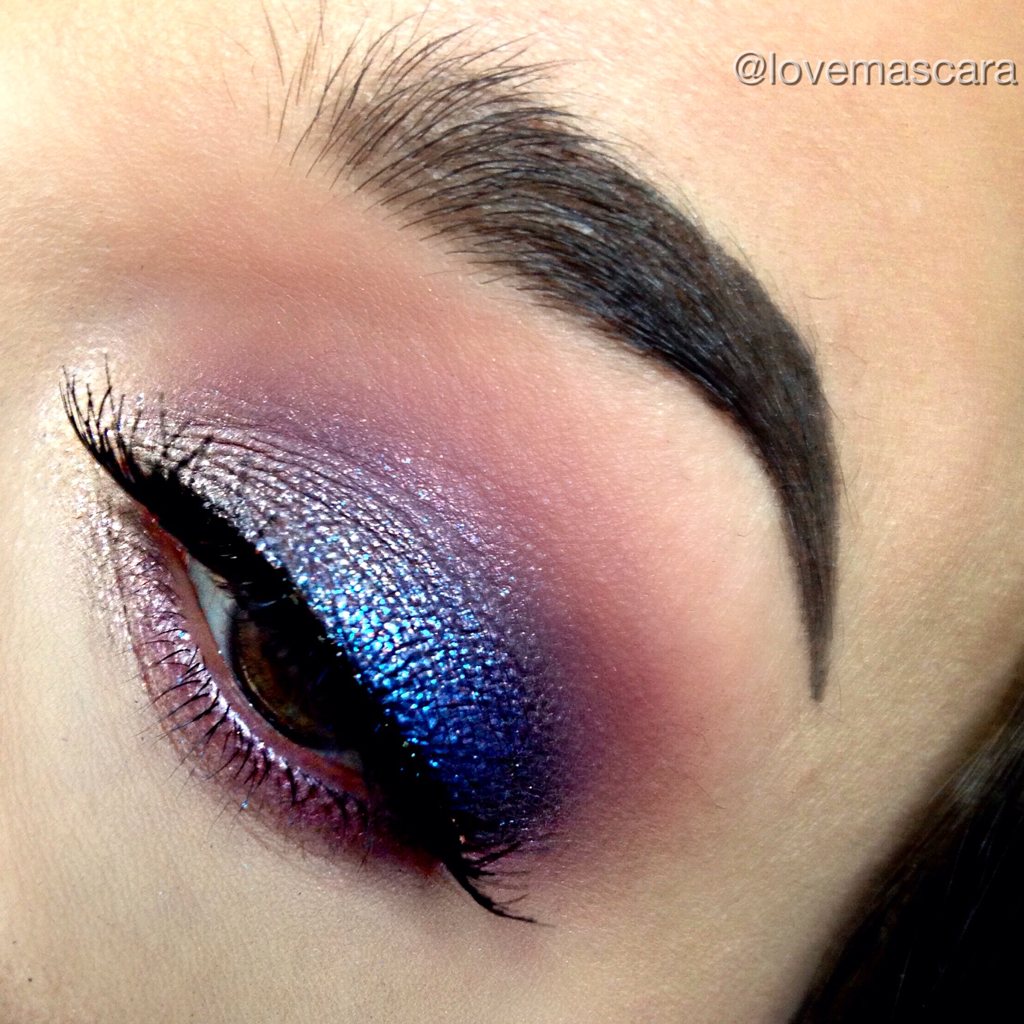
So I applied this around 10 in the morning in the top pictures. I did some color correcting underneath the foundation because it wasn't gonna cover some redness I had. I used Makeup Forever Ultra HD Concealer in Y23 under my eyes and around the sides of my nostrils. We went to eat, I got my nails done, came home took down some more Christmas decorations and checked it again around 3 and it was super dewy and if I touched my skin it transferred to my fingers. So I took a clean flat top kabuki and just pressed the foundation in to absorb some of the oils and also buff out any streaks and what not, you could also use the pouf it comes with to do that. I didn't set mine all over just under the eyes and around the nose. It still got really dewy though even with setting it and using a mattifying primer. So while initially this applies really nautral and satiny it didn't really stay that way for more than 4 hours without needing to be touched up, to avoid getting super dewy. Then again it is a "Lumi" foundation so that's to be expected somewhat. If you're dry, then I think you would really like this. If you have a lot of redness or discoloration I think you're gonna need a BB cream, or color corrector underneath this. It says it can be built up but if you applied it like I did by just dotting it on with your finger then I think it would be time consuming. Not that it's not possible to do. As far as color and oxidation. It only got slightly darker, which I'm really happy with and once I used a clean brush on it to buff it some and absorb some of the oil it looked really nice again. So if you're wearing it just take a pouf or brush with you and it's easy to fix if it get's too luminous or if it were to break up. So my final thoughts are that this is a really good medium coverage foundation. It's less luminous (more fresh) than the original Lumi which I like. If you have relatively good skin, normal to dry, and don't want full coverage that looks like a mask, this is an ideal foundation. My main issue is that I really feel like this is expensive for a drugstore foundation. I feel like it should be around the $12 range at most. I understand packaging and what not is probably the cause for it being $17 but when I go to the drugstore or buy a drugstore foundation I don't intend on spending almost $20 on it, even though it is really cool packaging. Especially when there are some really good ones out there that are around $7-$10. So far I've only seen this at Ulta, Drugstore.com, CVS website, and Walgreens website (it says it's not sold in their stores). I didn't see it in store at Walmart and it's not on their website either. Let me be clear though, I do like this. I think it might be a dry girls dream come true in a foundation. My only real issue is the regular price of the product, but as I stated earlier there are coupons out there and sales so you could get this cheaper I think. This is the new shade from Colour Pop. It's called Puppy Love and all proceeds go to Best Friends Animal Society and "their No Kill LA effort" (NKLA). The shade itself is gorgeous. I love the shade Too Soon from Colour Pop that was only available in a Valentine's day set and this reminds me of that shade some. It's a very pretty peachy pink duo color but with a golden sheen. It's kinda sheer but used over a base it's much more apparent and the duo chrome shows up beautifully. So like I said all proceeds of this shadow go to Best Friends Animal Society. The shadow is regular priced $5 like all other Colour Pop shadows. It is limited edition so if you want it I recommend you go ahead and get it. This look is using all Colour Pop mainly.
Using Puppy Love on the inner corner Lace on most of the lid Too Shy on top of Lace on the outer half Using Mango Tango and Chickadee in the crease from Makeup Geek. |
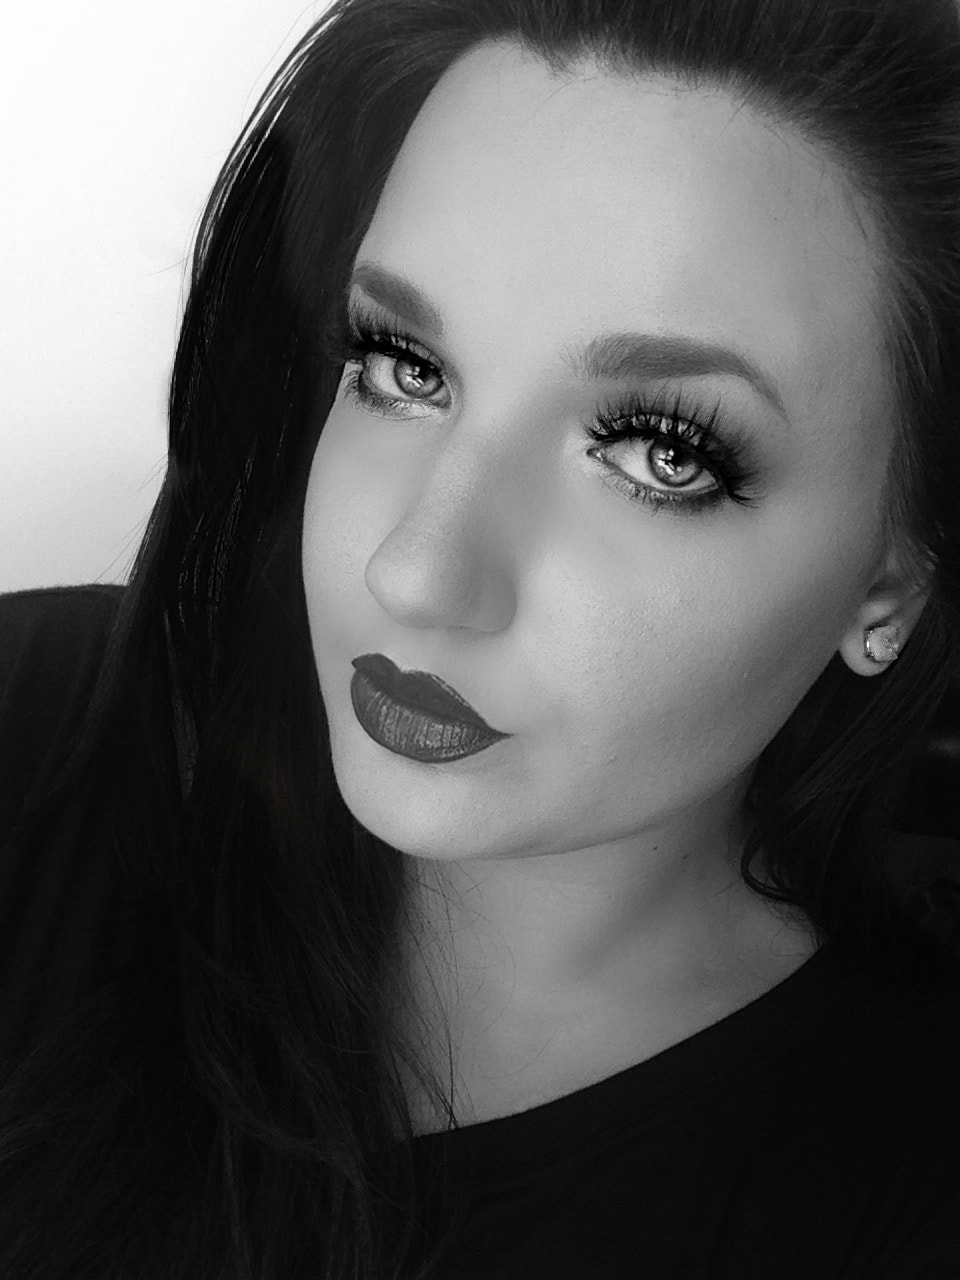
ErinI'm from Tennessee. I'm a makeup and skincare lover. I have always enjoyed creating looks but I love to help people with product knowledge and application even more. I've been able to start blogging and do these things I love because God has seen fit to bless me with the opportunity. Thanks for stopping by and visiting with me! Categories
All
Archives
January 2022
|



 RSS Feed
