|
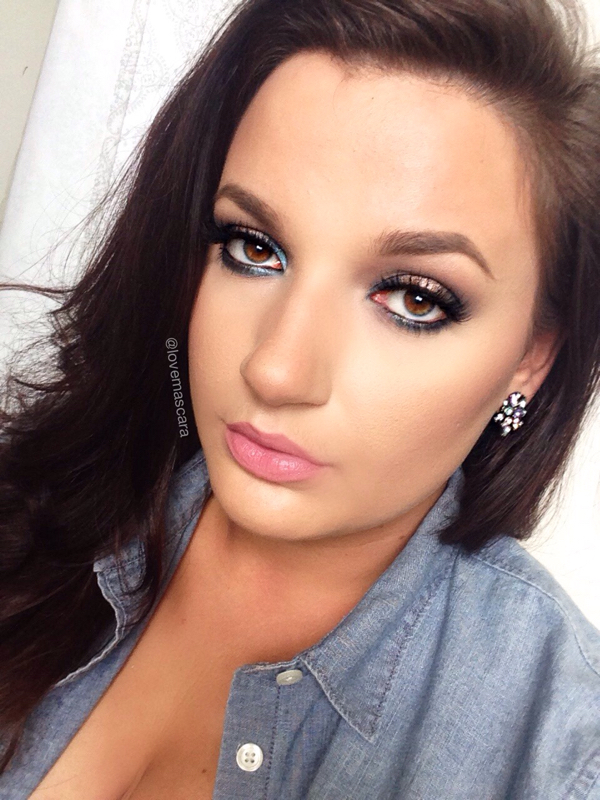
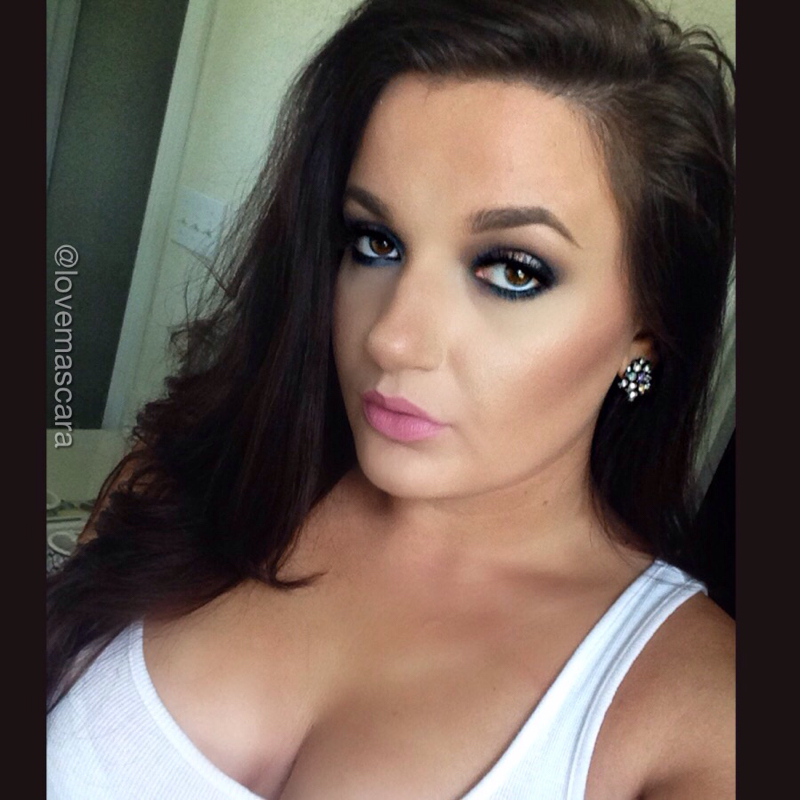
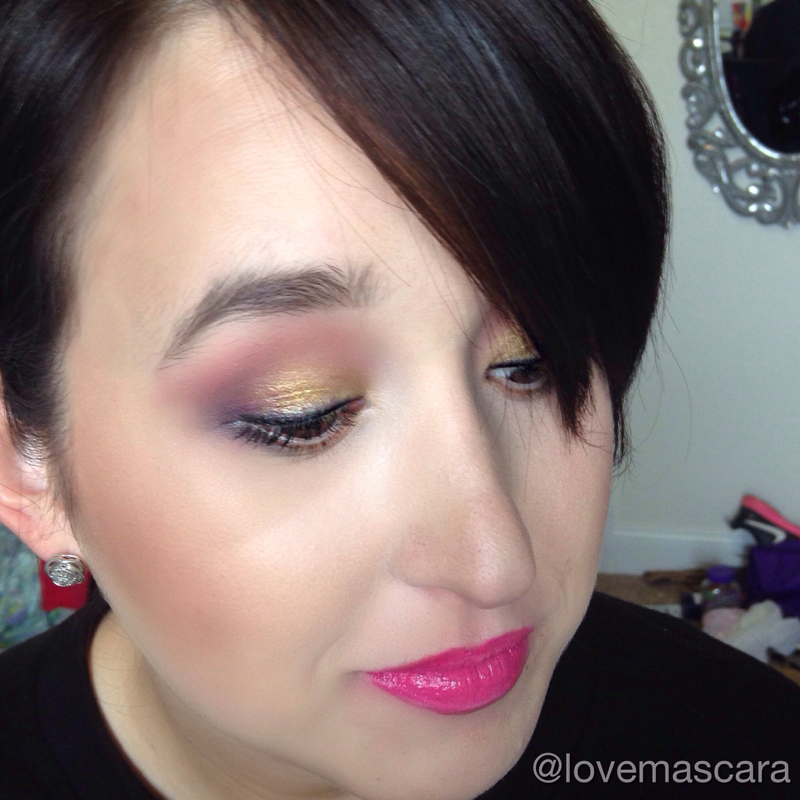
This post is my go to face routine, not my go to eye but my go to face routine for sure. I'm the type of person who doesn't change things up too much as far as my base makeup, if it's not broke don't fix it is what I say. Forgive the pictures for being kinda grainy my camera was just not hardly working like I wanted today. First up: Makeup Forever Step 1 Equalizer Primer in the Oil Control one (Sephora online offers these as full size for $32 or half size for $16) I'm not particularly oily but this primer is amazing and foundation goes on so nicely over it. Next is NARS Sheer Glow. I got this a few months ago and I've not put it down. It's full coverage in my opinion. Remember is a sheer "glow" not a "sheer" foundation. Concealer I use Urban Decay Naked Skin weightless concealer. This is incredibly weightless and very full coverage. I love it for under the eye brightening that whole area or using it for highlight in general. Contour/Highlight I use Kat Von D Shade Light Contour Palette. In love with this, I have several other contouring things and I won't use anything but this. Blush: when I don't know what I want to use I reach for MAC Warm Soul it's simple, it's glowy, its healthy looking. I absolutely love it. It's what I travel with and everything. It's just a no brainer. Highlight: In this I used Colour Pop Highly Waisted which I love. My normal go to ones would probably be Becca Opal and The Balm Mary Louminizer. For a more subtle look Laura Mercier Baked Highlight 01. Powder: To set my under eye I use MAC Emphasize and to set my face I typically use Hourglass Ambient Lighting Powder in Diffused Light This Navy Eye Look is:
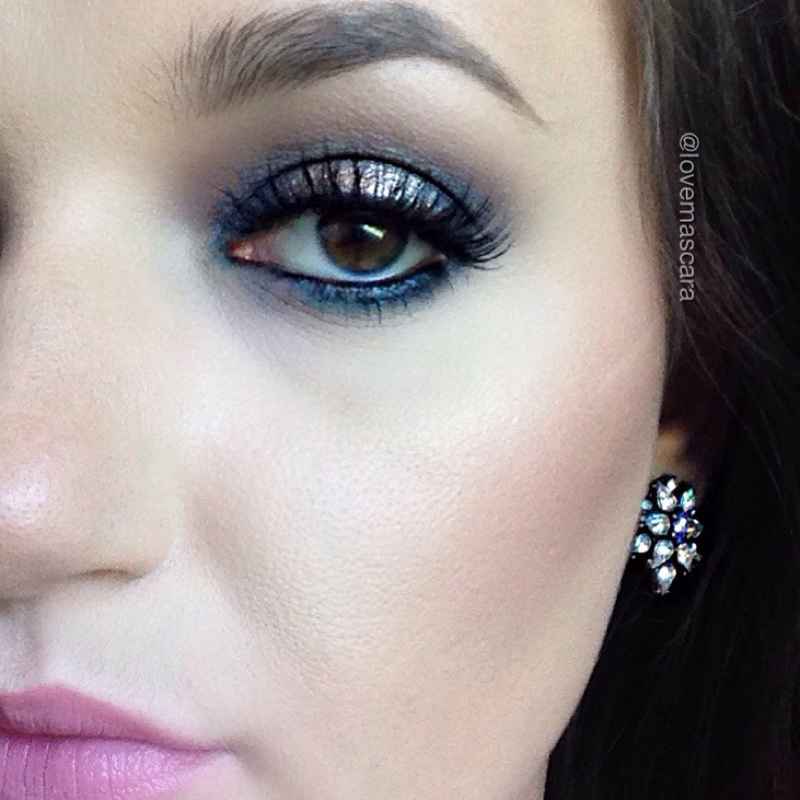
ABH Dragon Fly with Noir over it on the inner and outer corners (also lower lash line) and some Smoke in the crease slightly Makeup Geek Peach Smoothie in the crease MAC Tan pigment center of the lid Lashes are Lena Lashes in Bianca (amazing) Brows are NYX Tame and Frame pomade in Brunette Lips are Gerard Cosmetics Rodeo Drive and Spring Fling gloss **earrings are from Bauble Bar
0 Comments
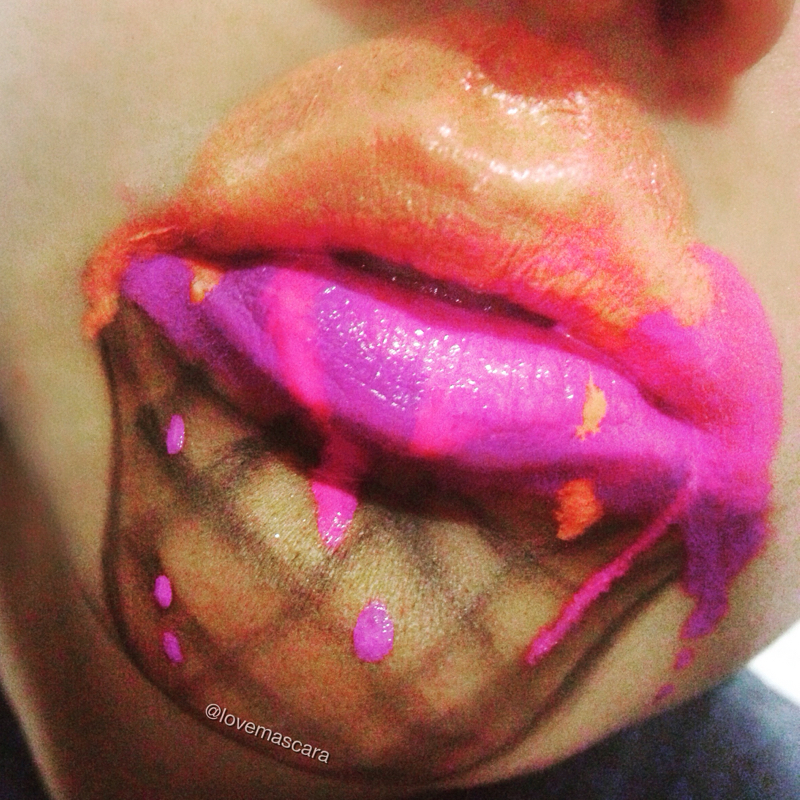
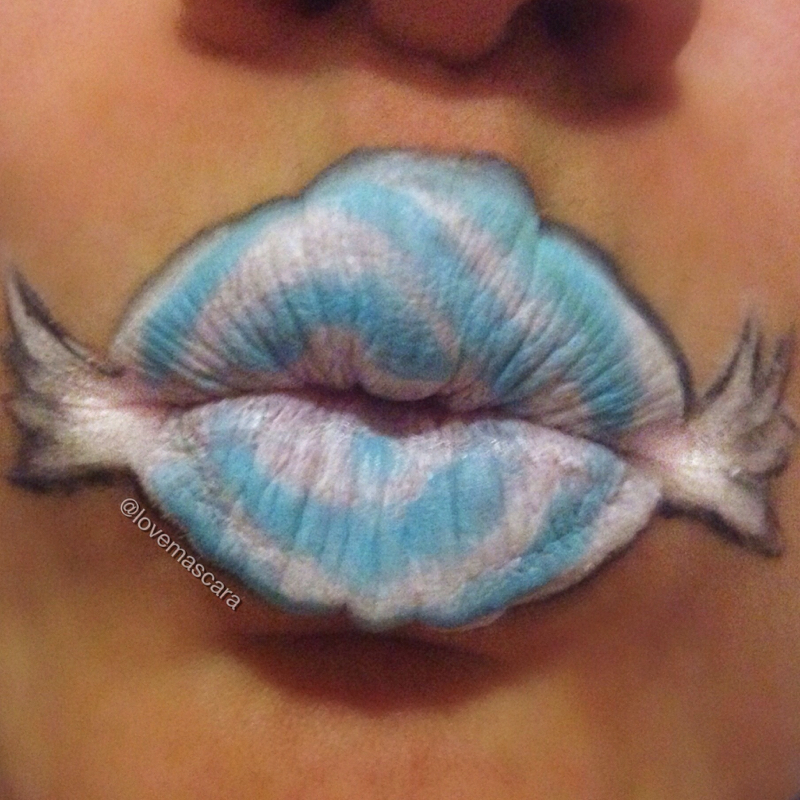
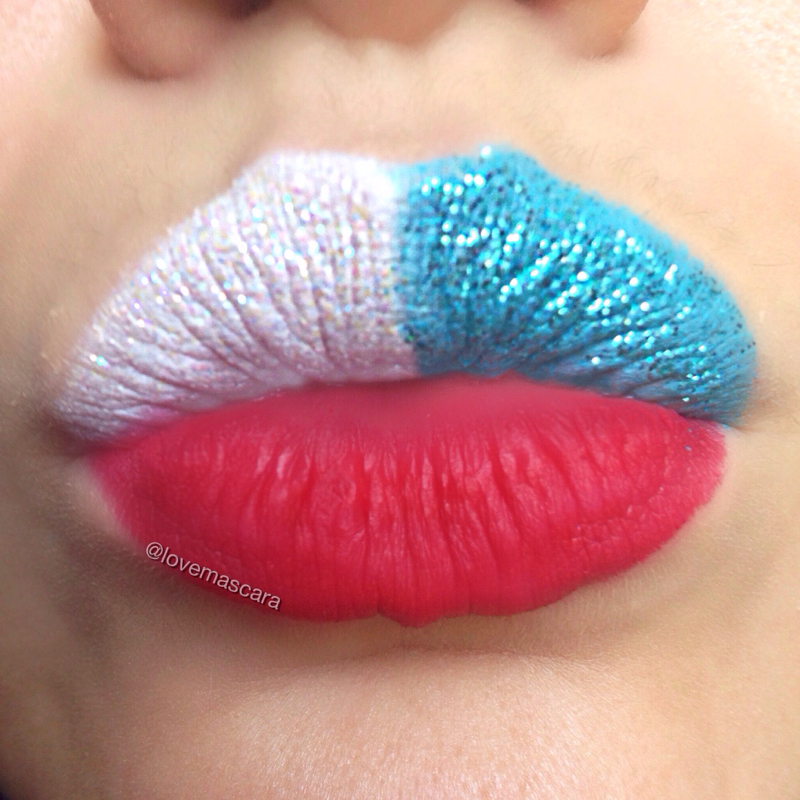
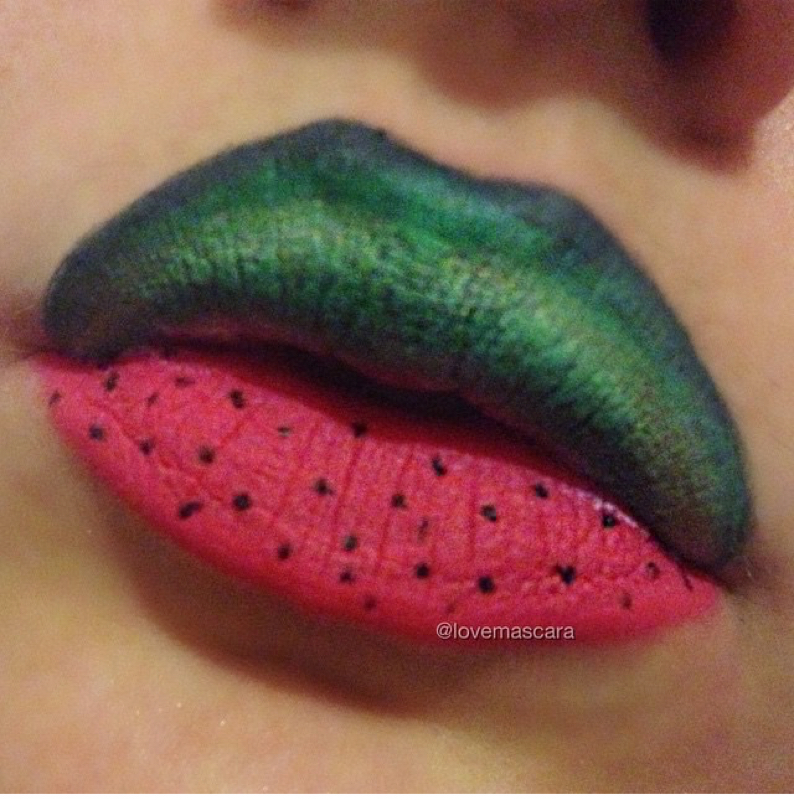
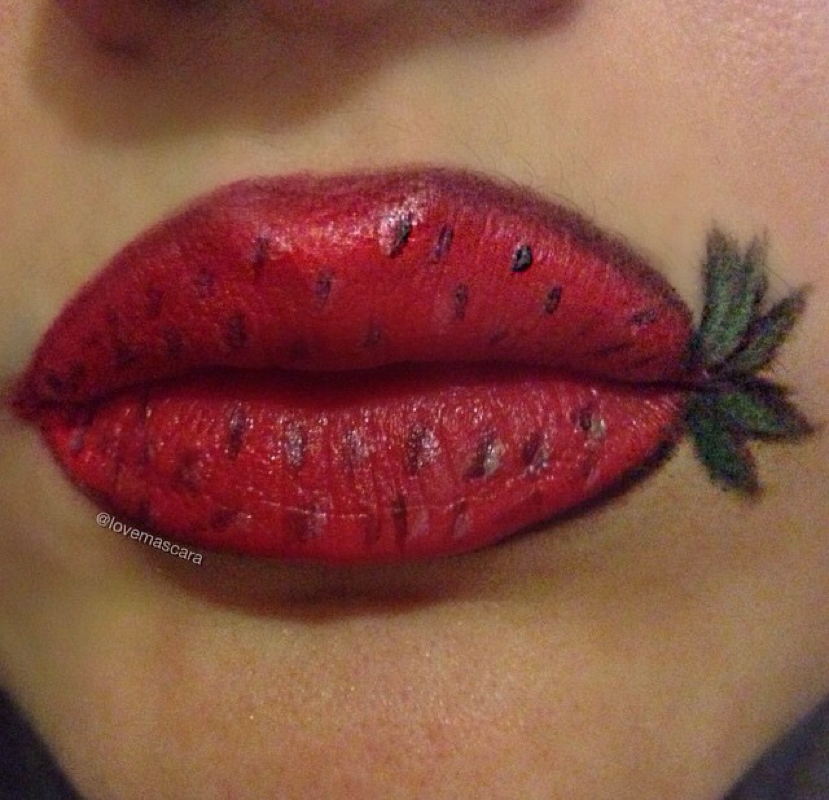
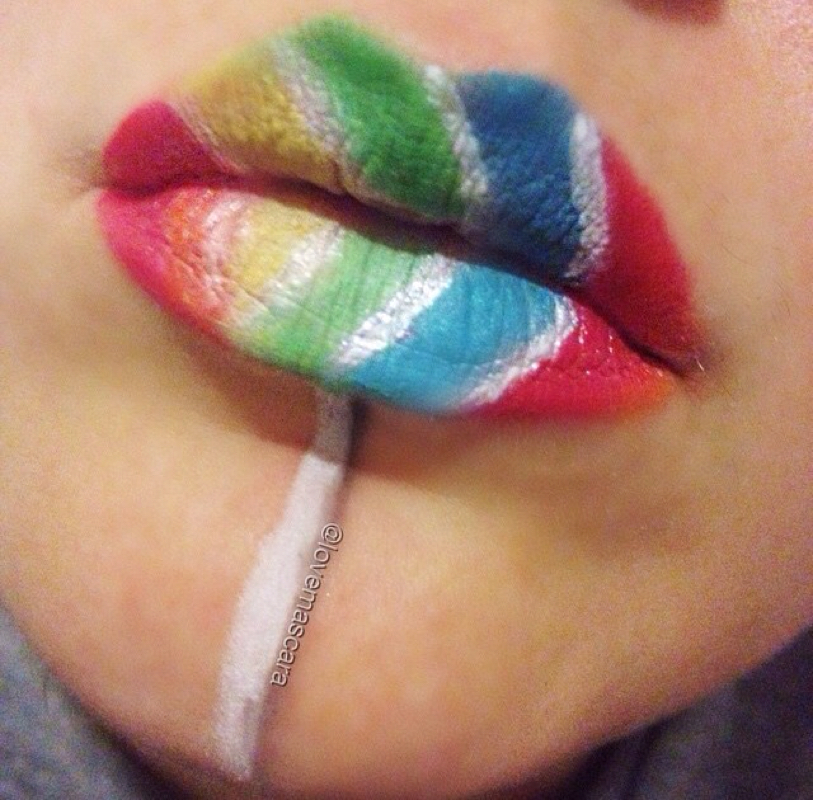
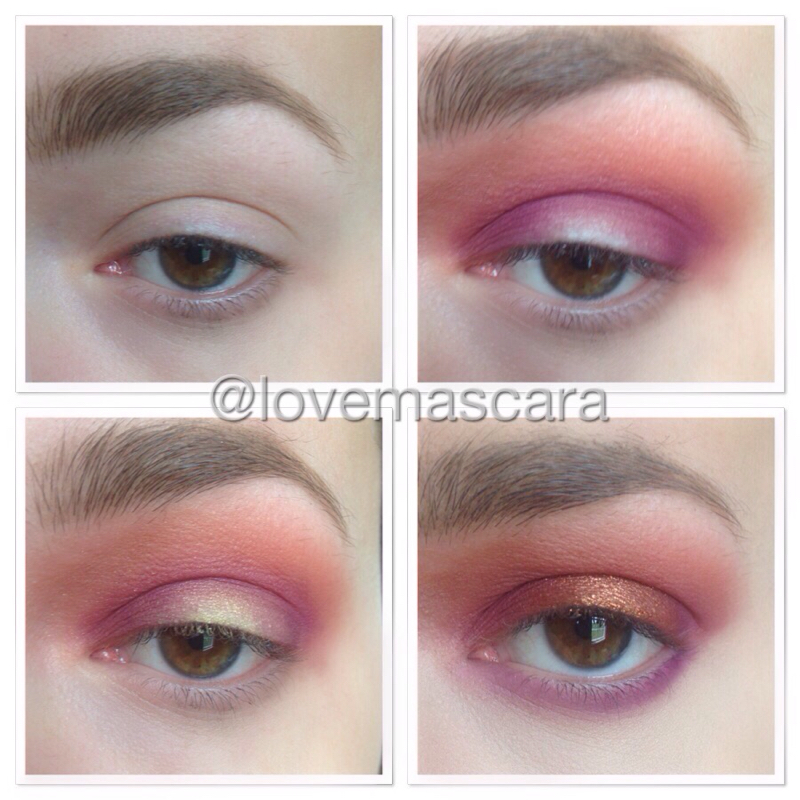
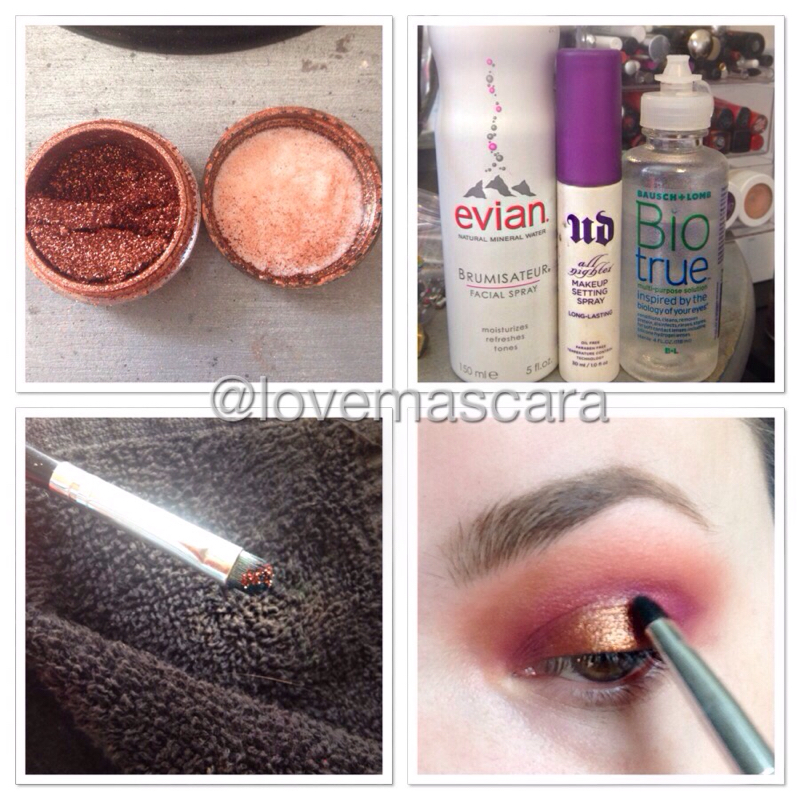
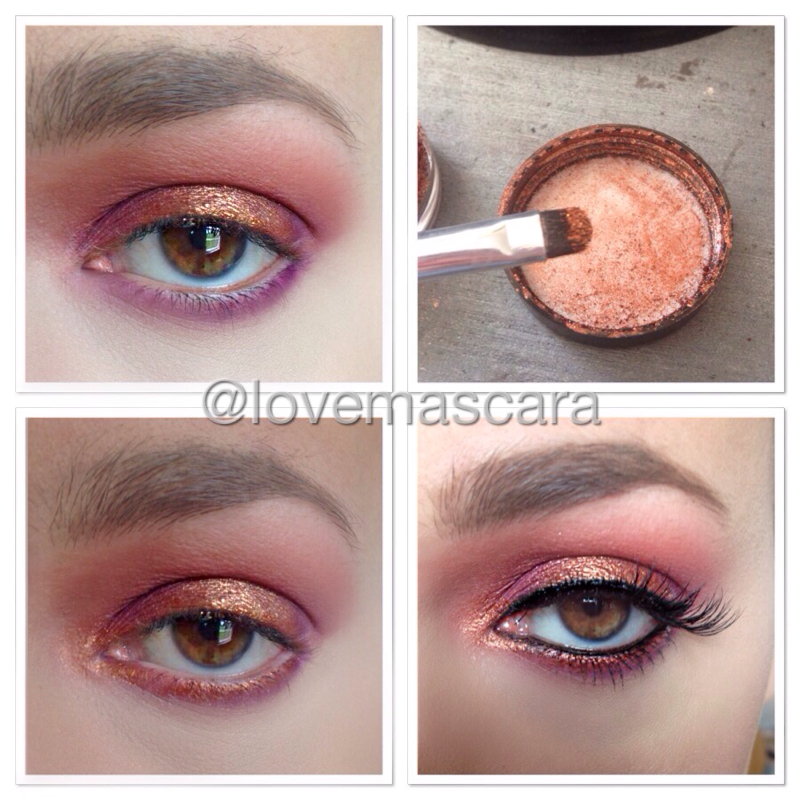
I got creative lately. So as makeup is my outlet obviously I done some lip art. Which mostly turned out to be food inspired lol. Neon Melted Ice Cream Cone. Using OCC Liptars in ChaCha, Nylon, and Hoochie. And brown shadows. Candy Kisses. Using OCC Feathered and Poolboy lip liners Memorial Day/ Patriotic Lips. Using occ NSFW lip liner, Pool Boy lip liner, and Feathered. With Violet Voss glitters in Wendy and Teresa. Watermelon Lips using ABH liquid lipstick Sweet Talker and shadows for the green part shaded with black lip liner. Strawberry Lips. Using OCC Harlot liptar and shadow for the leaves. Lollipop lips. Using nyx jumbo stick in milk as a base. Occ lip liners and liptars for the swirls and stick and also some shadows. Pigments or "loose eyeshadows" are one of my favorite, if not my favorite, parts of makeup. A pigment comes in a jar and it's loose (obviously) instead of pressed into a pan like a regular shadow. Because it's loose you are able to actually apply a much thicker amount instead of actually a sheer amount that's usually applied when you're trying to apply a regular shadow. The only way I apply pigment is wet. It adheres to the lid better and is way more intense. You could use your ring finger too but I just like using a wet flat stiff brush. This also prevents fall out for the most part. In the pictures about I'm just showing you in what steps I apply pigment. Basically it's the last thing I do, on the lid that is. If you aren't used to pigment I recommend just using it on the center of your eye for a "pop" of intense color or a foiled look. That's the easiest way in my book. I apply my eyeshadow before I do my face makeup that way if there is any fall out then it can easily be cleaned up without messing up your foundation or under eye area. In the set of pictures above I'm showing you what pigment looks like, I used Makeup Geek Vegas Lights pigment for this look. I'm showing you the types of products you can use to wet your brush that work best. Makeup Setting Sprays, Facial Mists, and contact solution (saline) are the best. I use contact solution the most since it's less expensive. MAC Fix Plus is great for this as well. Next I'm showing you what brush I use. I always use a flat stiff brush. Mainly synthetic. Synthetic doesn't cling onto product like other brushes. It needs to be stiff so that it firmly packs the color and doesn't sling it everywhere. You want very controlled movement. I'm also showing you how little amount of product is needed. With pigments a little goes a very long way. A VERY LONG WAY. You'll probably never run out of a full jar of any pigment you get. That's why I really like companies that offer sample jars because that is plenty of product. I also like the MAC Travel Size pigments they done. Way more practical. Lastly I'm showing placement. I bring it right up to the crease but not actually in it. Pigment is the star of the show it's not for blending and smoothing it's for drawing attention. I also hate shimmer in the crease in general but I definitely wouldn't apply wet shadow into the crease anyway. This last set is optional. I'm showing other areas that look nice with pigment. Corner of the eye, center of the lid, and lower lash line. Another neat trick to avoid picking up too much product is to get the product from the residue on the lid of the jar. It's usually just enough especially for the lower lash line, and with a wet brush it picks it up like a magnet. You definitely need your brush to be wet for doing the lower lash line and corner of the eye that way the pigment will go exactly where you touch your brush and you can make it as thin as you want without it going everywhere. As far as how wet your brush should be one spray or one drop of saline is usually good for a small brush I usually dab it against a towel or tissue before I pick up pigment with it because if it's too wet it'll only sheer out the product. You can always apply more so start small and build from there.
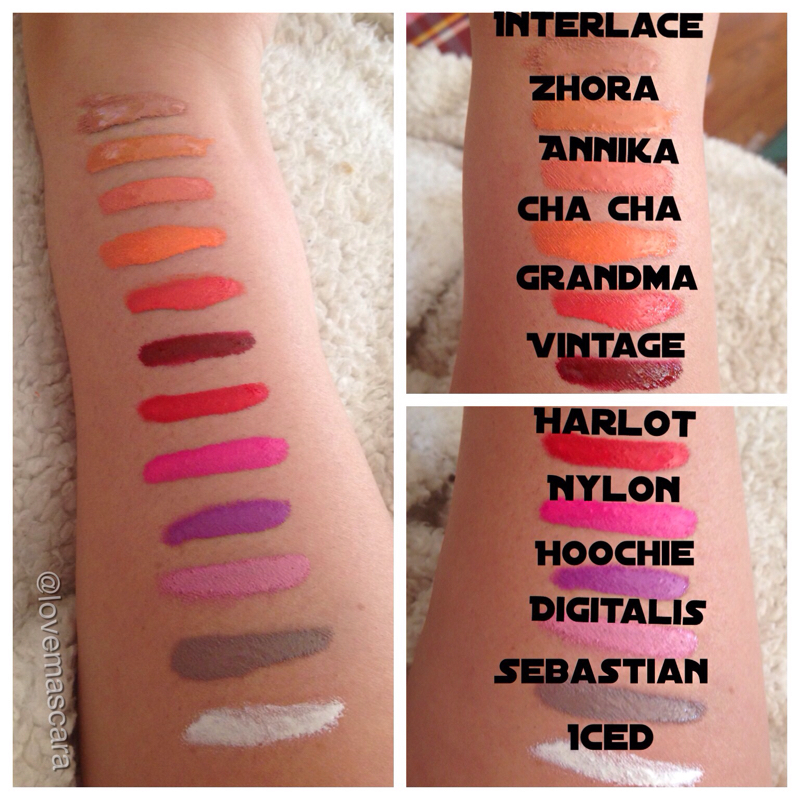
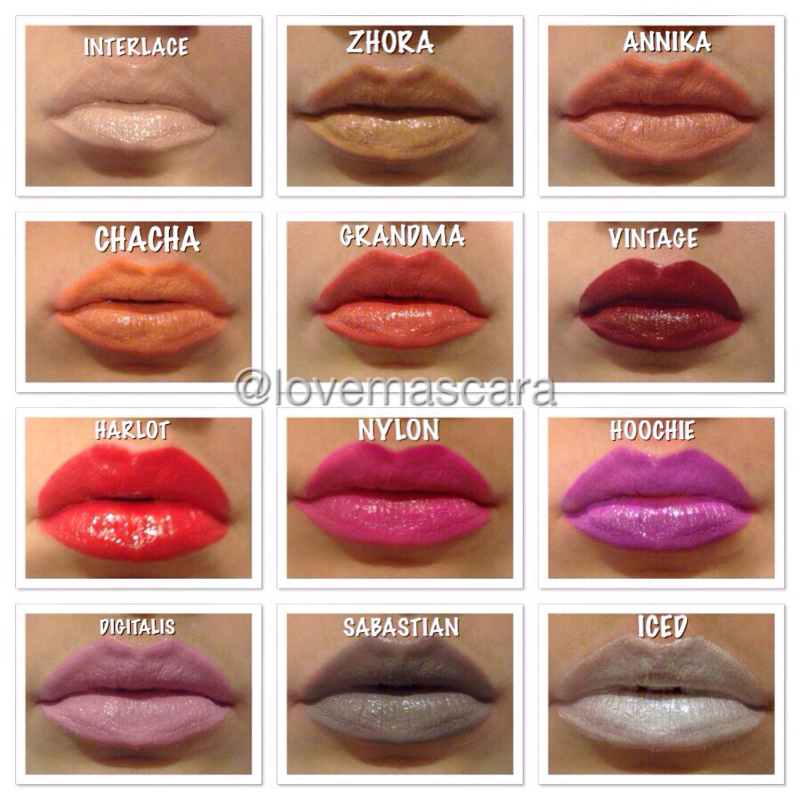
Another thing to remember which I hope you already know is to use eye primer. You should do this before any eyeshadow application for smoother application, less creasing, and better pay off but you'll want to do that for sure if you're adding pigment. Pigment will make your eye lid crease more if you don't. I hope this was helpful. I've had some people asking me about how I apply pigments because I use them so much so I thought I'd do a post. It's not for everyone there are some people that don't want to deal with pigments and I understand that but I think they add more to the look than anything else. Last week I received an order from Sephora. They had placed some new stuff in their sale section so as I was getting what I really was meaning to order I took a look at the sale section and seen that the OCC Test Tube 12X Pro Picks set was marked down even more. It was $60 before and marked down yet again to $29. I have a few liptars and since a small amount goes a very long way a test tube which is smaller than a full size product would be plenty of product. I thought this would be a great thing for my kit too. What I like about Liptars are that they were designed to be mixed so you could customize your own color. They're also great for lip art. They come in different formulas such as Matte, Metallic, Stained Gloss and so on. I don't care for the Stained Gloss formula. This set is mostly matte with two metallic shades. It also came with a full size lip brush and I love their lip brush it's the best I have and all I use. You get: Interlace: Matte pale nude peach Zhora: Metallic yellow toned peach with pink shimmer Annika: Matte pale coral Cha Cha: Matte beautiful sherbet orange color Grandma: Matte surprisingly pretty and wearable 50's style coral Vintage: Matte deep red Harlot: Matte MY FAVORITE COLOR bright neon red Nylon: Matte neon hot pink Hoochi: Matte neon medium purple Digitalis: Matte cool toned pale bubblegum pink Sebastian: Matte medium grey Iced: Metallic frosted white I didn't expect to like as many colors in this as I do like I said it was more for my kit. However I'm so beyond impressed. The shades I thought I wouldn't like I love and the shades I thought I'd really like I'm not crazy about.
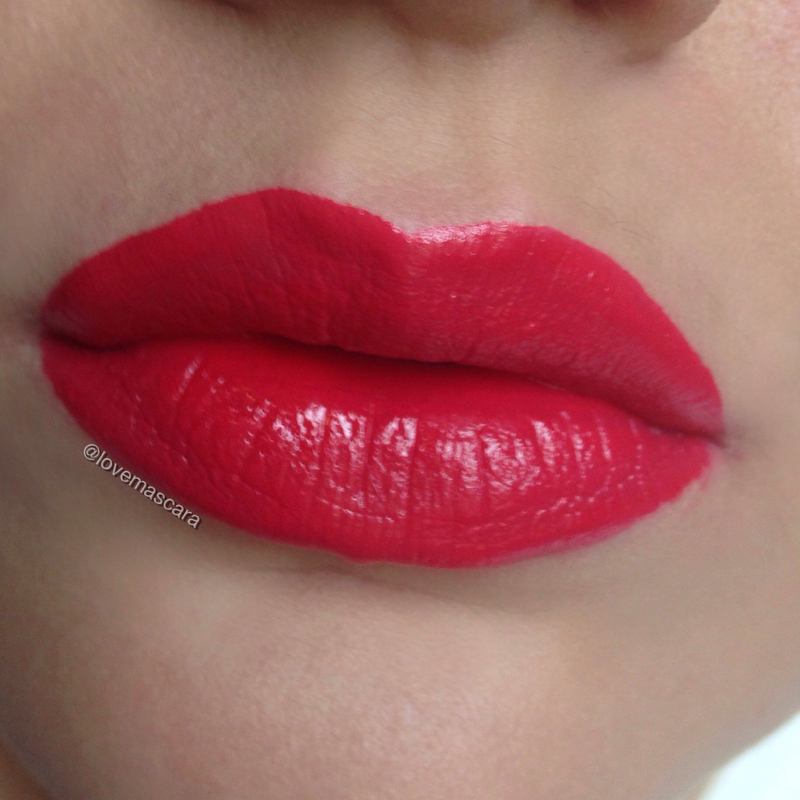
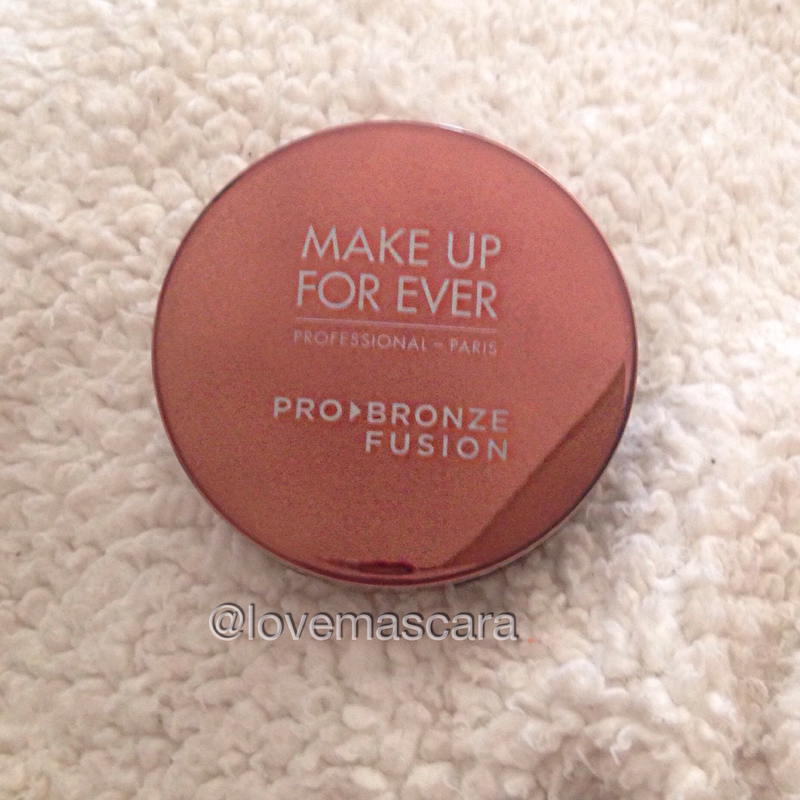
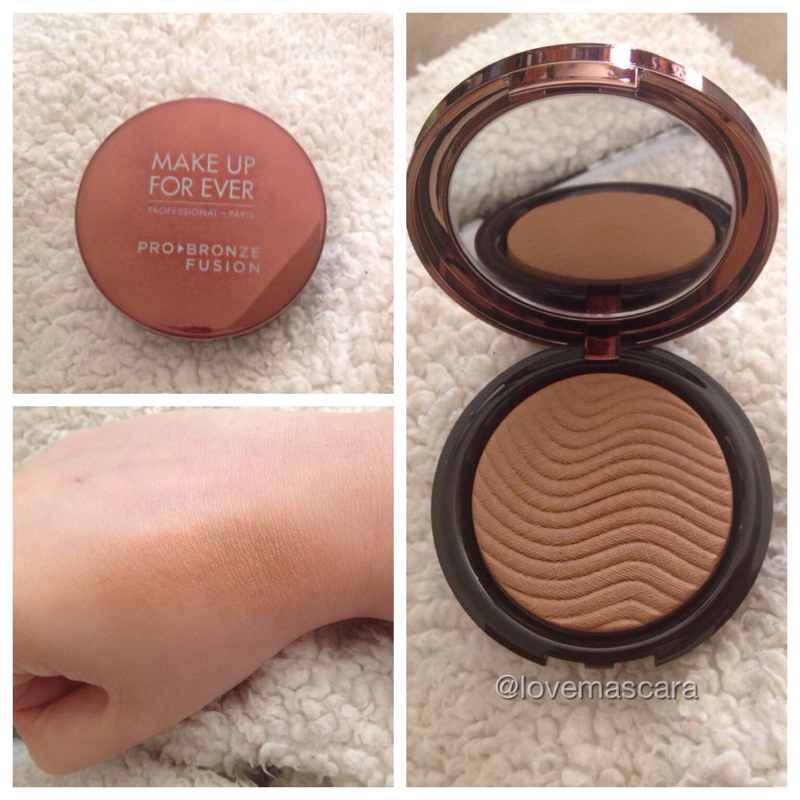
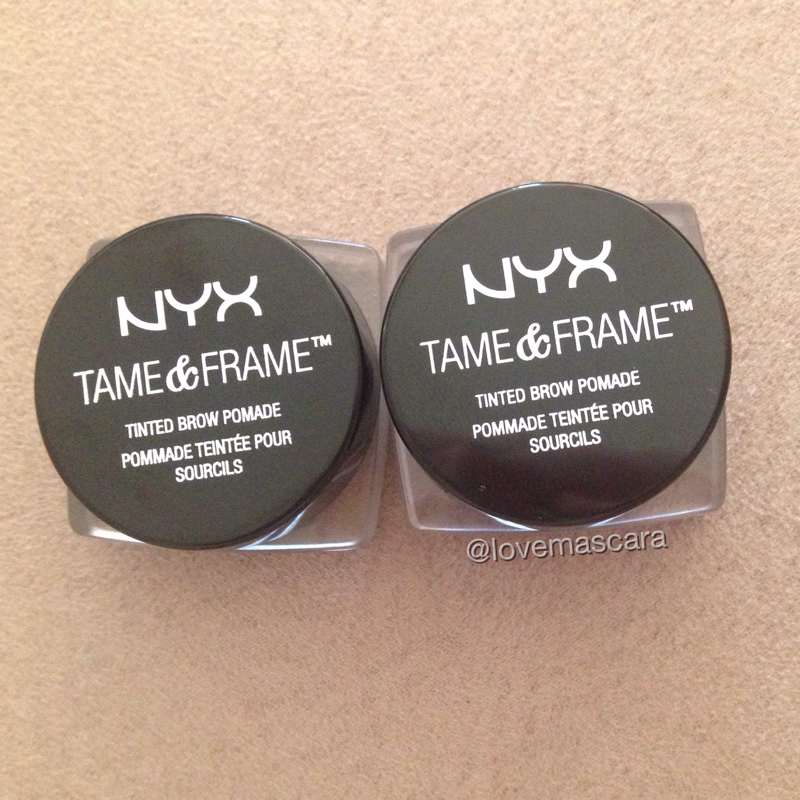
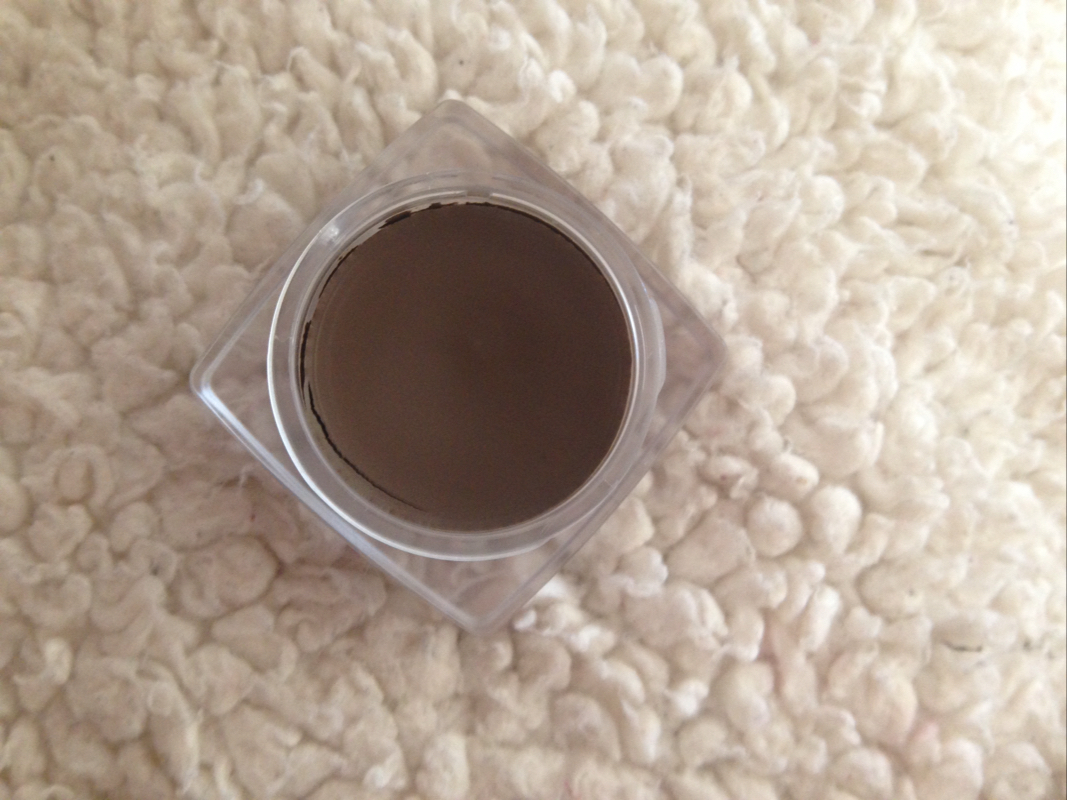
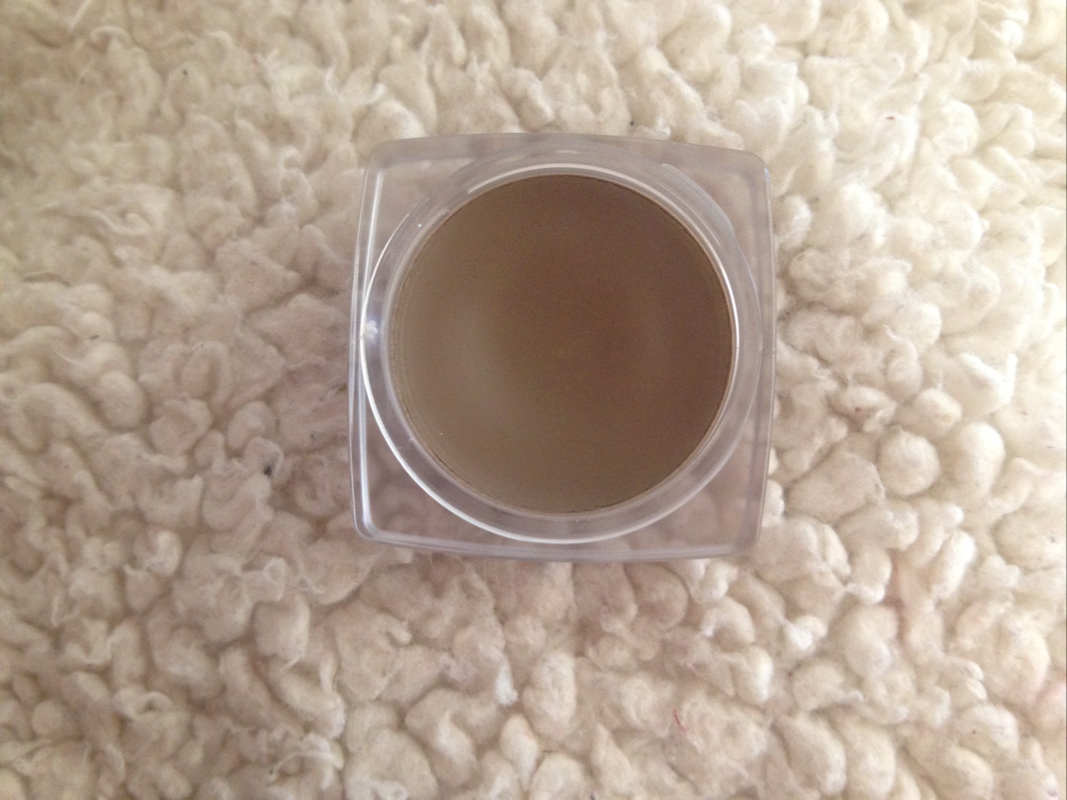
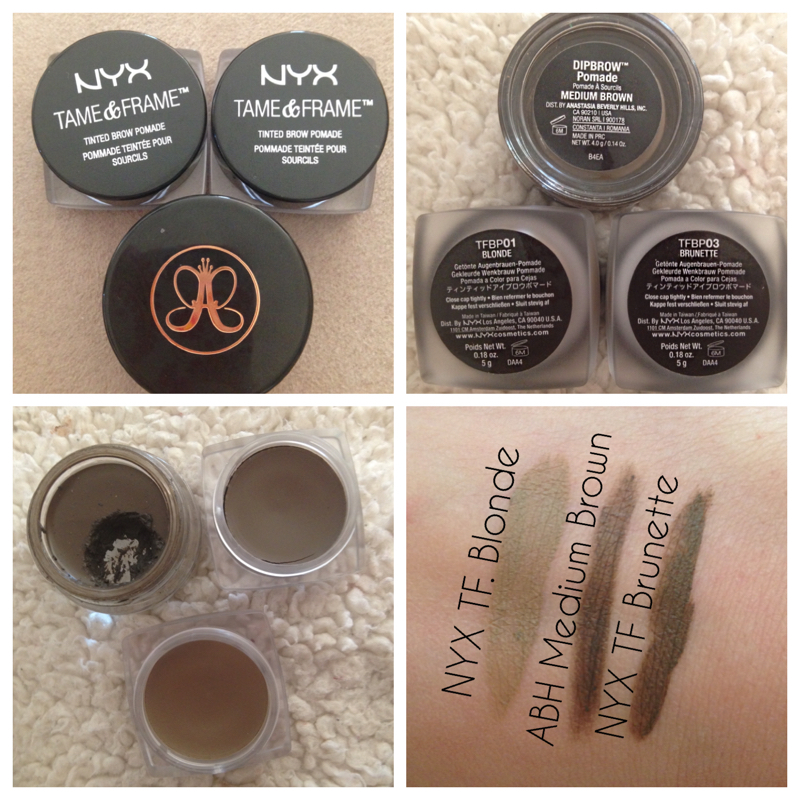
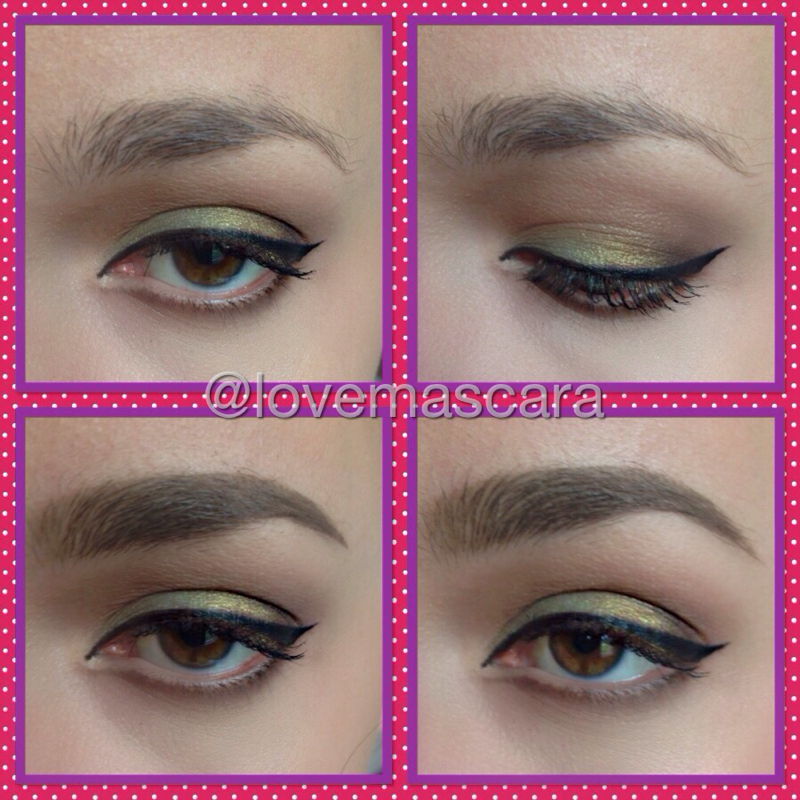
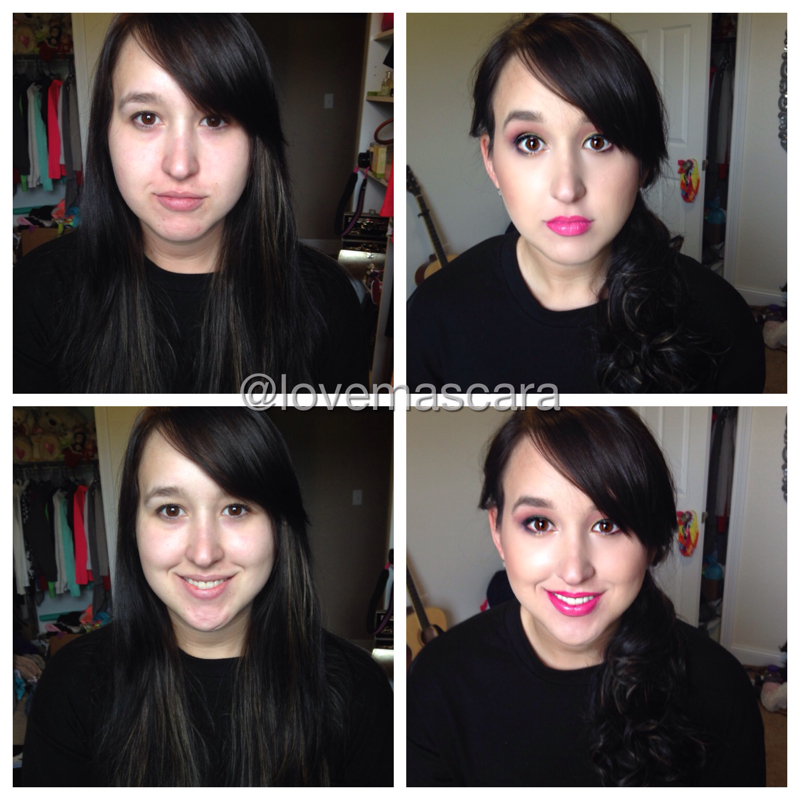
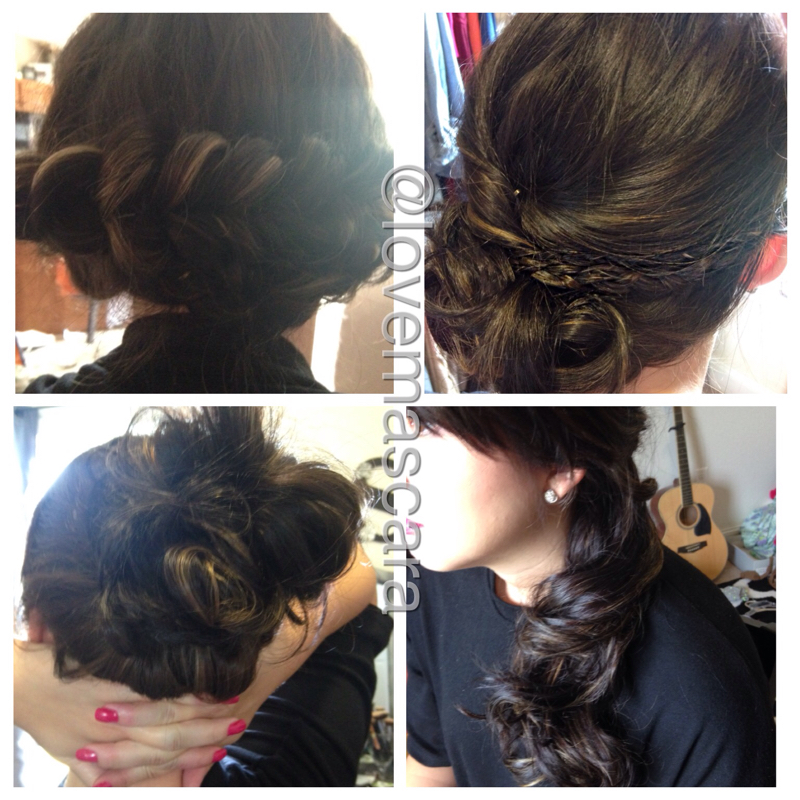
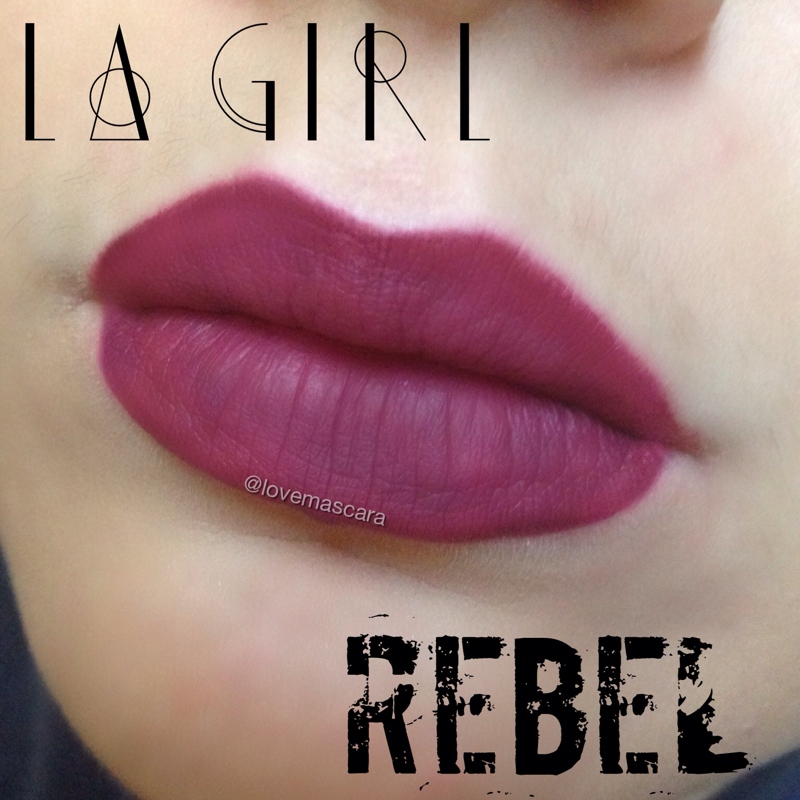
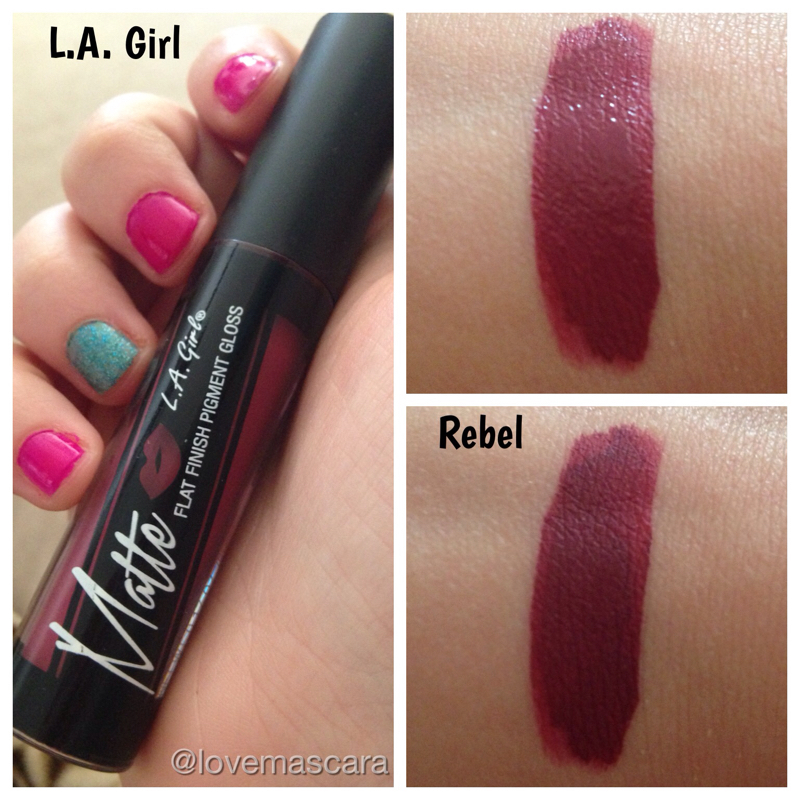
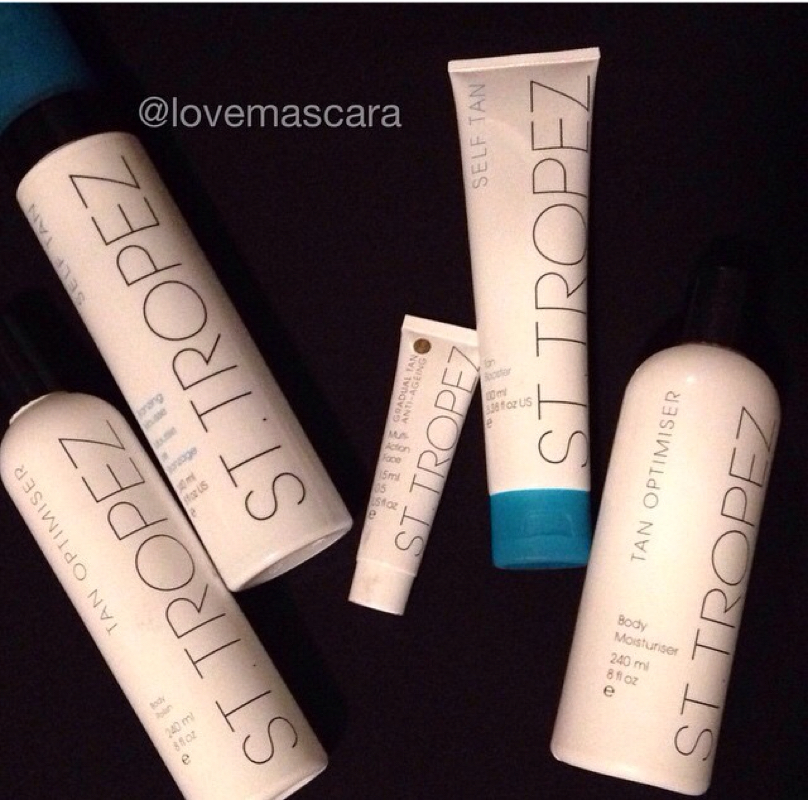
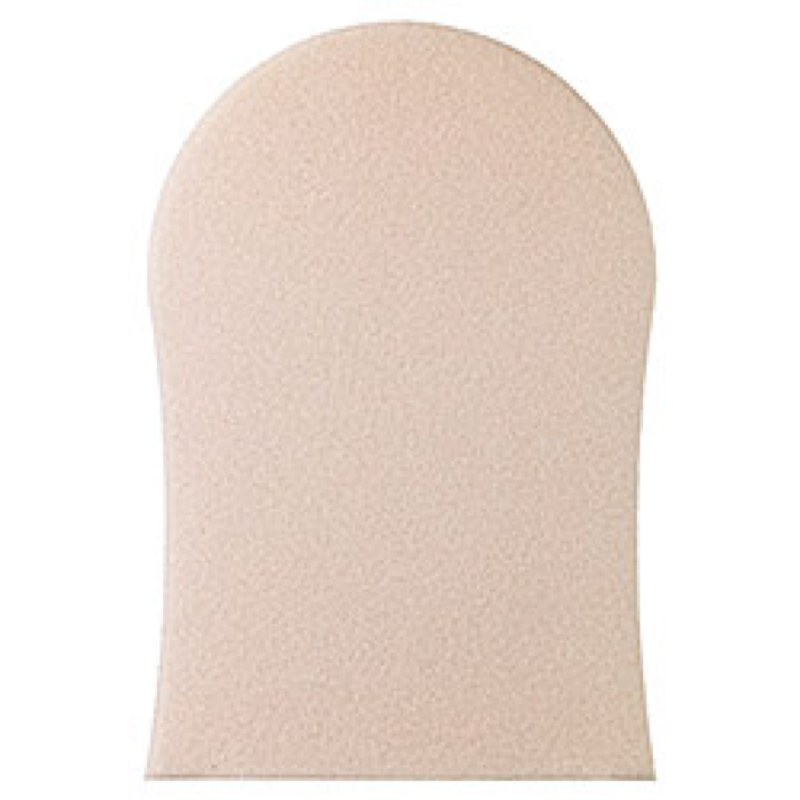
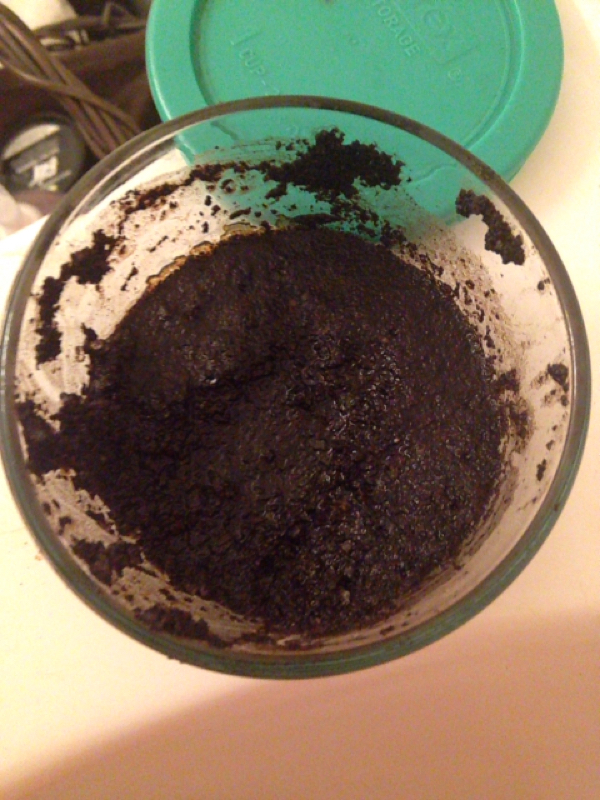
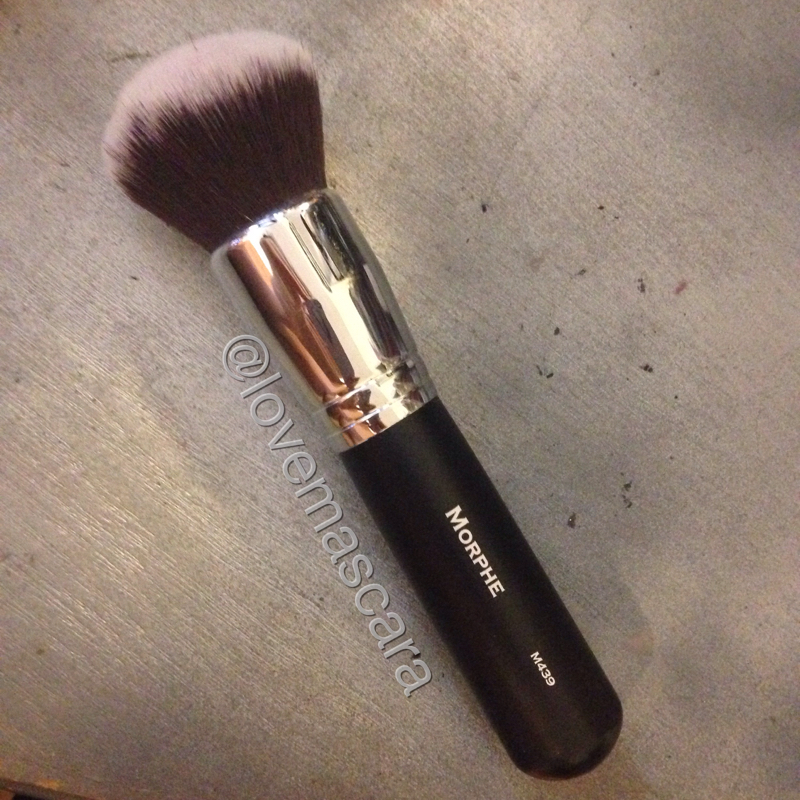
My favorite colors are: Harlot Cha Cha Grandma Hoochie Vintage Colors I'm not fond of: Zhora Iced Digitalis Interlace The others I've not made up my mind on just yet. I will say that while most of these are matte they don't act like it nor look like it all that much. They tend to stay glossy. Which I don't mind. If you're wanting that though you may want to try this in a store and go from there. Like any product and any line you will get some duds. This is no different. There are some that I feel are a little less quality than the others. All in all though this is a hit. This particular set is no longer available on Sephora but they always have sets out some full sized and some test tube size. Full sized is .33 oz and Test Tube is .08 oz. Remember a little goes a very long way. Full size can be bought individually for $18. I don't believe Test Tubes are available individually only in sets. This week or past week, my stand out product is Harlot liptar from OCC Makeup. I've finally found the shade of red lipstick that I like and don't mind wearing. It's a beautiful summer color too. Very bright. This is a matte formula although I don't feel like it gets very matte. Have a great week! Ok so I got the new Makeup Forever Pro Bronze Fusion that everyone has been raving about. I have mixed feelings about it. I love the packaging I love the detailing in it. I just don't like the little amount of pay off that comes with it. It supposed to mimic a natural sun kissed glow. I would say it does do that it's incredibly natural looking. You get a very subtle color with it. Which is great if that's all you want. I just feel like that is a lot of money for only a slight amount of color. I got the shade 20M. When I got it I thought it was perfect because it looked cool toned and dark enough. When swatched I had to add three layers for it to show up and it also was more golden but I like golden bronzers too. So my advice is buy it in person so you can test it and if you're ordering consider getting a shade darker than what you initially want. I'm not saying it doesn't show up at all it does give a sunkissed glow when using a dense brush it's just hard to tell really. Which I guess would be the point, can't tell if it's bronzer or if you've got a touch of sun on your skin. In that "you've got a glow" type way. That's not what I like though and I feel like I can do that with other bronzers and with a light hand and smaller amount of product. This is a gel to powder formula. So I thought it would be softer and more creamy but it's actually quite hard in the pan but that's good cause it lets you press harder and get as much product as you want. There's 6 different shades they're $36. They come in really beautiful extremely natural shades. Recently I picked up some new brow products from Ulta. I got the NYX Tame and Frame brow pomade which is along the same lines as Anastasia Beverly Hill Dip Brow. So I already owned the Dip Brow and I wanted to try these because they were buy 1 get 1 50% off. They're about $7 a piece. Which is way better than $18 for the Dip Brow. So I got Blonde and Brunette. I thought that would be good for my clients and it was a great deal so why not. First thing is: they're really good. Like impressive. They are almost like a mousse consistency instead of a cream. Or just incredibly creamy whatever you prefer. They are very easy to work with. I honestly think I like them a little better than the Dip Brow. The only possible negative thing is they might could smudge possible if you used too much. However, work with a little product and build from there is what I would recommend. Tame and Frame in Brunette Tame and Frame in Blonde The Tame in Frame is actually more product than the Dip Brow. Dip Brow is 4g and Tame and Frame is 5g. So that's definitely a plus. They're used the same way. A pomade or cream is going to really sculpt the brow better than a pencil or powder. If you are going for something subtle I recommend using a powder. If you don't have a lot of experience with your brow shade then pomade and creams can get over done or tooooo sculpted. When you're a brunette like me that's easy to do anyway because you almost always look boxy and sculpted. I've just came to accept it. The way to avoid that is to brush through the hair with a spooly brush continuously to avoid getting boxy and looking too sculpted. I used the blonde in the front of the brow and the brunette through the rest. The brunette is what's going to give it its shape and define it but the blonde is going to subtly fill in the sparse areas in the front without getting too boxy. The brunette is not the exact color of the Dip Brow Medium Brown but it's very close. It's just a little lighter I would say. This is a before and after of my unruly brows and then after I've filled them in using both Blonde and Brunette Tame and Frame. I give this two thumbs up. There are 5 shades and they are $6.99 at Ulta and buy one get one 50% off. I hadn't done a Bridal look in a while and it's now in the prime of bridal season. So I got my friend Jamie to let me do some fun makeup on her for a bridal look. We did some hair as well. Easy updos and messy hair. Top left: Pull Through Braid. Low style up do. Top Right: Side Bun with Two Braids. Bottom Left: Messy Updo Bottom Right: Cascading Twisted Side Ponytail For her makeup we done Eyes: Makeup Geek: Pixie Dust, Mango Tango, Razzleberry, Corrupt ABH: Violet MUG Immortal Gel Liner Loreal Voluminous Carbon Black Waterproof Mascara Face: NARS Sheer Glow Becca Songbird blush Stila Kitten Highlighter Kat Von D Shade Light contour kit Lips: LA Splash Smitten Liptint in Enchanted mixed with Stila Bellisima liquid lipstick And Buxon Jennifer gloss over top The other day I seen the LA Girl matte liquid lipsticks. Actually I seen the color Rebel was a good dupe for Dose of Colors Berry Me. So I ordered it off Amazon because LA Girl sells on there too and it's just easier for me to order off Amazon since they have my information. It was around $6 I think. When I got it I noticed how much bigger it was than what I was expecting. It's a little bulky but I actually like that. Especially when you think about how much the price is. So I liked that a lot. It's like a dark cranberry color. The formula is really like a liquid. It's quite thin and runny. It reminds me of LA Splash Lip Couture. I like it a little better though because it doesn't crumble once it dries it kinda stays sticky. Which if you don't like that then you won't like these. . They stay on well. The color goes on even. I'm impressed. I prefer Anastasia Beverly Hills formula more so but for the price I think these are fantastic. Summer is upon us and most of us, with the exception of my pale husband lol, want a tan. Most of my tan comes from a bottle. Especially right now. Not saying that I don't enjoy laying by the pool or swimming with my friends but I always have on some form of SPF usually 35 on my face and neck and then 15 or 30 on the rest of my body. I don't lay in tanning beds. Not that I never have. When I was a teenager and shortly after I graduated tanning beds were the best thing ever. Even then I couldn't really dedicate myself to them though because I hated the way they made me smell and I just don't like getting hot folks. Spray tans came along and changed the game and once I got one I never really used a tanning bed ever again. Of course like I said I was never a religious tanning bed person they honestly didn't make me feel like I was tan but I would see these people who would lay every day sometimes twice a day and they literally looked like their skin was leather. This was people my age and younger and they always smelt like a burnt tanning bed. Definitely not appealing and that's not even scratching the surface when you think of all the skin cancer and complications arising now that are linked to tanning beds. Which scares the bejesus out of me. So like I said spray tans and self tanner at home is mostly where my tan comes from. So I thought it was worth writing a post about. I'm gonna talk about my favorite tools and products that I use that I feel make a world of difference in tan application. Not really gonna talk about sun protection in this post just mainly gonna focus on how I achieve that summer glow. First thing I want to discuss is: Mousse. I use mousse instead of Lotions, sprays that you use yourself, and gels. For years I used Loreal Sublime Bronze gel with gloves. Then I stumbled upon my current favorite with is the St Tropez bronzing mousse. I use this with a mitt. I have the St Tropez mitt but Walmart also sells foam mitts. I feel like mousse with a mitt is just easier, it's more even as far as application, it dries faster, and St Tropez specifically has a really nice color to it. It's not orange in the least its golden I think. I get the regular formula, there is a dark and an express but I just get the original. Sephora does a lot of of value sets too. So it's the best option I think as far as trying their products. Through the years I've probably been able to try everything but buying value sets, that are sometimes cheaper than a bottle of mousse anyway or the same price, is a better option. Next up is exfoliating scrub. I have a St. Tropez body scrub but I also have a homemade body scrub. They both work well. The one I prefer is actually my homemade one. The St Tropez one is so heavily scented it almost gives me a headache. My Homemade Scrub is: 1 cup of coffee grounds 6 tbsp coconut oil 3 tbsp sea salt (you can also use sugar) So the reason I like this one is because I like the larger more rough exfoliation that sea salt gives and also coffee is supposed to reduce cellulite while coconut oil makes the skin soft and moisturized. Now some people may not want to use this on your chest and arms but I don't really care. It is messy though so be prepared for that. I don't mind the mess though if it makes my skin looks smoother and better. Next using a makeup brush for your face and neck. Keep in mind that a synthetic kabuki brush is probably your best bet. Synthetic hair tends to work better with mousse, cream, and liquid products. I got a brush to use specifically for tanning so that I wouldn't get it mixed up with foundation brushes. I use the Morphe M439 brush. It's larger than a regular face kabuki brush. I use it to apply tanner to my face, neck, and chest. For the rest of my body I use the mitt. I do feel like there's a little less color pay off than when you use a brush than a mitt but you don't have any streaking issues with a brush at all. Keep in mind when you apply tanner to your face it will not last as long as it does on your body because of constant washing, and makeup removal and just touching your face in general. Moisturizer. For moisturizer I don't always have to use one especially if I use the scrub with coconut oil. If I don't then I usually use Jergen BB Body Cream. I have the St Tropez moisturizer too but I like the Jergens if I use a lotion. Like I said I normally just use my homemade scrub. For the next few days I try to remember to moisturize to extend the tan but I don't always cause I hate lotion. So I have a moisturizing shower oil from L'Occitane that I use in its place. I'm not saying it's better than lotion but I literally can't stand many lotions so it'll have to do. My other option for fake tanning is Spray Tans like Versa Spa and Mystic Tan booths. I prefer Versa Spa but Mystic Tan is ok. I get a spray tan for events like weddings or pictures or anything I want to feel extra confident about. They last pretty good and they even everything out as well as getting all the hard to reach places like your back. Also you don't have to do anything but stand there so they're less hassle. You let them set about as long as you would any other tan which is usually 6-8 hrs. I apply tanner at night or get a spray tan in the afternoon and shower the next morning so that it has the maximum amount of time to get as dark as its gonna get. So there ya go. That's my tips and tricks with self tanning. Grab a mitt and have a time. |
ErinI'm from Tennessee. I'm a makeup and skincare lover. I have always enjoyed creating looks but I love to help people with product knowledge and application even more. I've been able to start blogging and do these things I love because God has seen fit to bless me with the opportunity. Thanks for stopping by and visiting with me! Categories
All
Archives
January 2022
|


 RSS Feed
