|
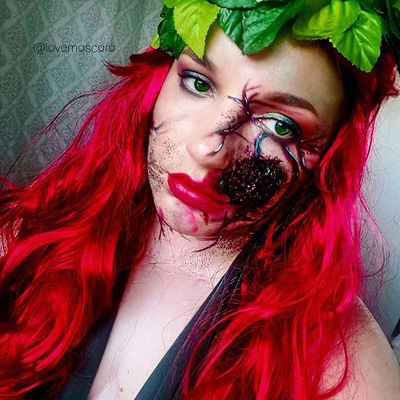
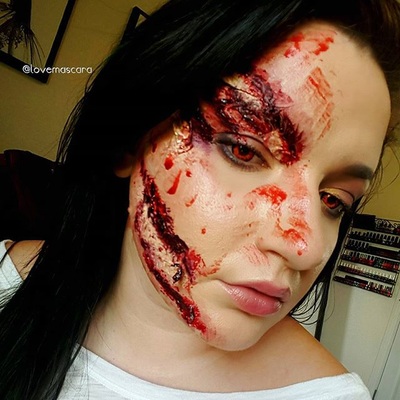
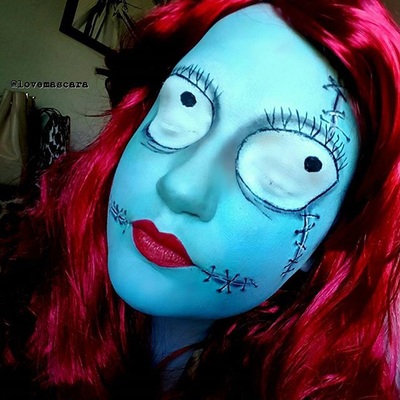
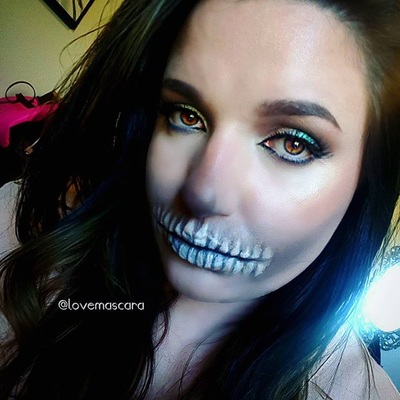
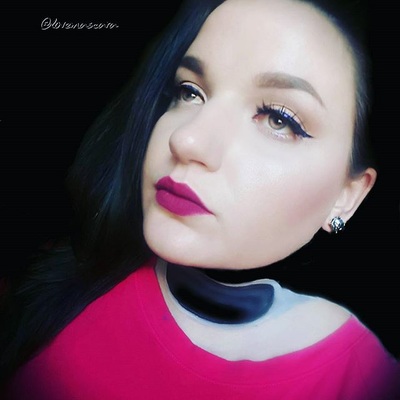
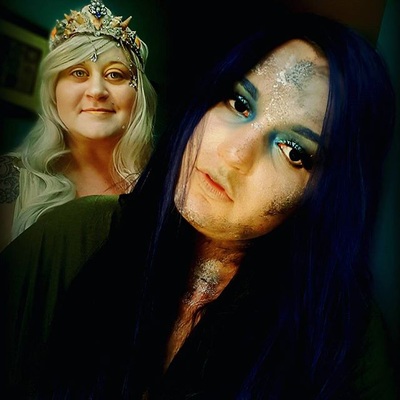
Halloween is over. I'm slightly sad but also really enjoying the break my skin is getting from all the paints and liquid latex. I really tried to challenge myself more this year. This one up above is specifically inspired by Vicky Mon (@vickym0n on Instagram) she's amazing.
0 Comments
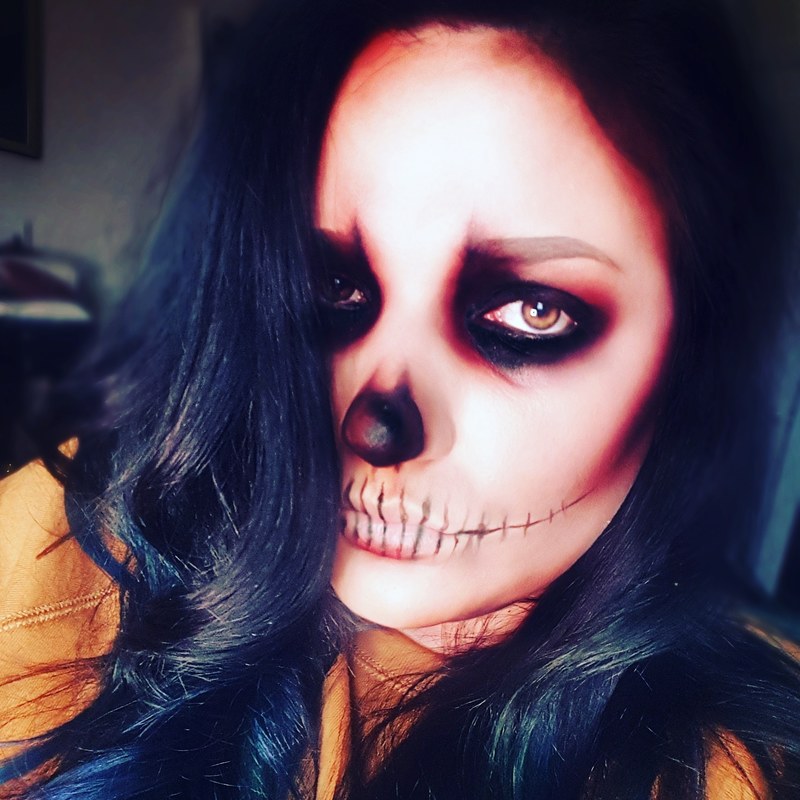
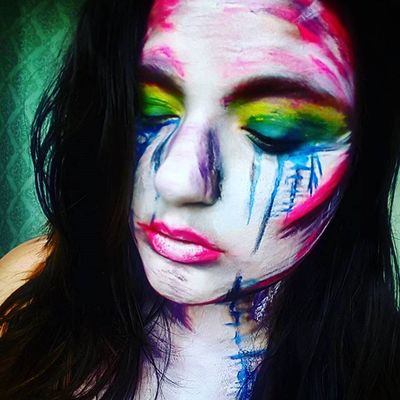
With Halloween getting closer (yes!) I think it would be a good idea to tell you how I take care of over stressed skin. Last Halloween I believe I done around 20 looks as part of a campaign for a company. Super stressful on the skin especially toward the end of the month. I use SFX makeup, fake blood, liquid latex, an assortment of paints, etc etc. We're not talking one base color we're talking maybe 3 to get it opaque. I'll drop in some photos that I've done both last year and this year so you can see how detailed it can get.
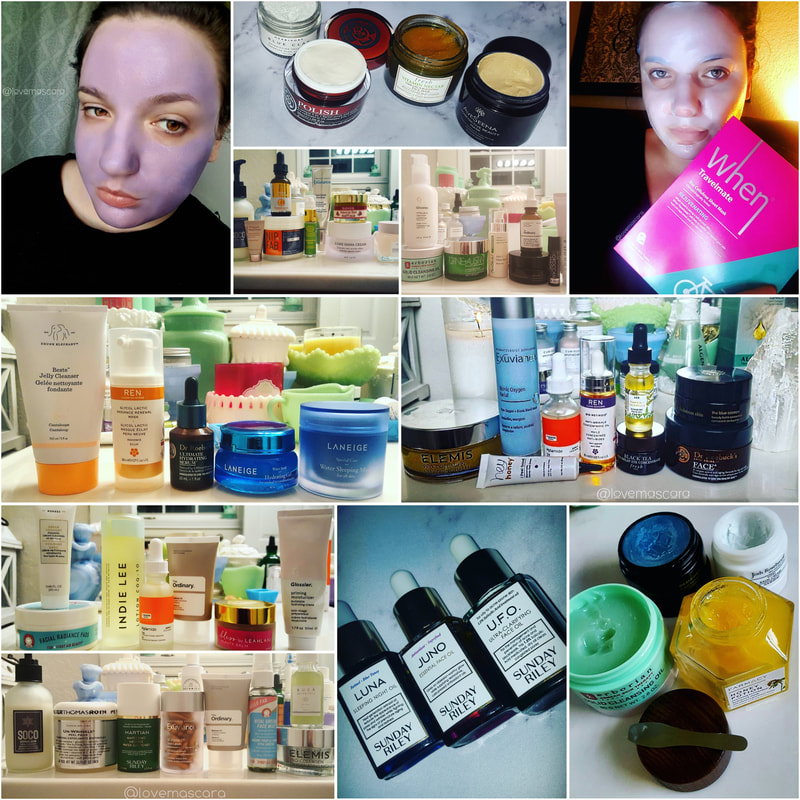
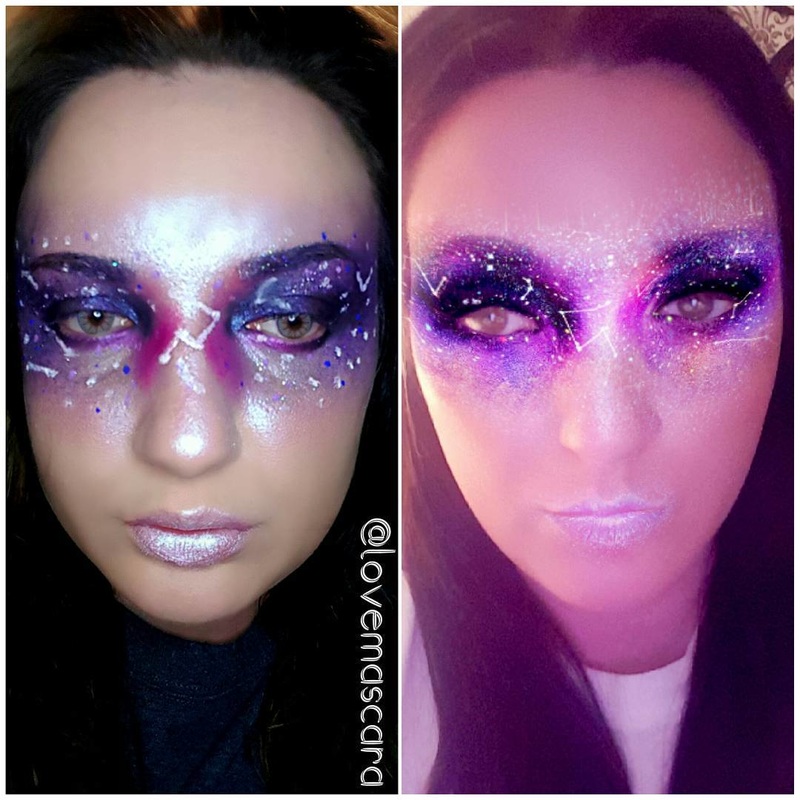
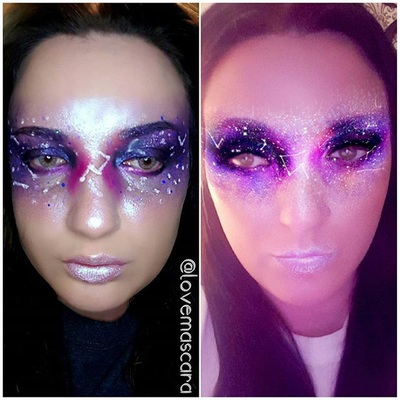
By the end of the campaign last year I was toast. My eyes were tired and sensitive. My skin just kinda hurt. However, I was not doing the extra steps to replenish the skin and take care of it while scrubbing all the paint off. So of course it was sensitive, dry, a bit chapped to be honest, and red. It took a week of no makeup and gentle skincare to get it to feeling better but since then I've learned what my "go to" routines are. (maybe I'll make that a series) I have one for breakouts, I have one for stressed skin, I have one for reactive skins. This would be the stressed/tired/sensitive skin routine from constant abuse with paints lol. So lets get into it: Right off the bat....double cleanse (Thank you Caroline Hirons for coining the term). Please just do it. For any makeup not just face paint. I prefer a balm for that instead of an oil. That's just me. I do however like the Dermalogica Pre Cleanse but that's really the only one. I love the Elemis Pro Collagen Cleansing Balm and Farmacy Green Clean both are very different. A more affordable option is Botanics Cleansing Balm. I feel like it's better suited for oilier skin types. It takes a bit to get the eyeliner off your face with this specific balm so it does have it's draw backs. For the 2nd cleanse I use something very gentle like Youth To The People, Kate Sommerville Gentle Cleanser, Soco Botanicals Citrus Gem cleanser, etc. Anything gentle will work. I try not to use my Clarisonic too much on sensitive skin. Even with the softest brush it can be too much for my skin at the least amount of pressure. So a warm face cloth is my best bet for this. Next I go in with my usual treatments of serums, oils, and sprays. I tend to leave out Acid toning and Retinol during the most intense times unless they're very mild. I love using Martian Water Gel Toner from Sunday Riley when my skin is sensitive. It's meant to be calming and soothing for problematic skin. I don't have problematic skin but it's definitely beneficial for tired and sensitive skin. I always go in with Vitamin C though, everyday. I use a milder version usually a 10%-15%. Keep in mind this is for the times when the skin is very sensitive and tired. Not an everyday routine for me. Next I tend to go in heavier with oils. I like anything with blue tansy or carrot in it. I'm a big fan of the Mahalo Balm which is more like a concentrate, I love Juno from Sunday Riley because it's packed with antioxidants. May Lindstrom Blue Cocoon balm concentrate is lovely for inflammation and really "feeding the skin" with blue tansy. The serums from The Granola Goat like 24 carrot, and Seeing Clearly. Seeing Clearly has Blue Tansy in it and obviously 24 Carrot has carrot. I like oils that are super rich and thicker feeling because they seem to be the best for replenishing tired skin or dry skin. After oils I use a refreshing spray. My preferred one is First Aid Beauty Vital Greens Face Mist. It's cooling and feels amazing. I also really like the Clinique Moisture Surge Face Mist. Very hydrating and helpful. Lastly I go in with creams to lock everything in. I like more rich creams instead of water creams or hydrating gels. I love the Dr. Roebocks FACE cream it's very light weight. It's certainly rich in texture. I love it. Some others that I like are Lala Retro Whipped Cream from Drunk Elephant it has 6 different oils in it. Fresh Corset Cream is another good choice because it's very light weight as usual. Also Cicapair from Dr. Jart is fantastic if you notice you're having a reaction/itchiness or inflammation and redness. Now this step is imperative. A sleeping mask. My absolute favorite is Exuviance Overnight Recovery Masque which you actually use before moisturizer, let it sit for 5 minutes and then put on your moisturizer. The others go on last. For those Laneige Water Sleeping mask. It's like a blast of cold air and feels so wonderful. Fresh Black Tea Firming Overnight Mask is also lovely and has soothing qualities specifically. I tend to use actual masks more than I normally do during this season. So like maybe 3 times a week but I mix it up between sheet masks, hydro gel masks, and mud masks. I love the When gel type of sheet masks, as well as the Miss Spa masks. I like Biobelle sheets masks and Ebanel. For mud masks I like to detox with May Lindstrom Problem Solver, Shea Moisture Charcoal mud mask, etc. I also like anti-oxidant rich masks like Youth To The People mask, Aveseena Honeyactive Mask, and Farmacy Honey Potion. The next installment of my Snapchat Filter Series is the Galaxy Mask. This isn't one that everyone would choose I'm aware but to me it just looked cool. Granted unless you've seen the filter people might not know what you are. So keep that in mind.
Getting straight into it. I use Milk Makeup Holographic Stick as my base. Which is a duo chrome cream. This whole look is going to rely on duo chromes, gliter, and pressed pigment shadows. You could actually do a lot more glitter than what I did. I just don't like putting too much glitter all over my face because it can be quite scratchy and also hard to get all that off. So I kept it on and around the eye lid. The shadows I'm using in this are actually called Galaxy shadows from JD Glow. Pretty much all the shadows I'm using are from JD Glow cosmetics. So for the pink and lighter areas like down the center of face, the forehead, and the outer areas of the mask is Pink Opal. Pink Opal is on the lips mixed with some gloss. For the purple I'm using Haze and Anomaly. Anomaly is mainly on the lid and Haze is around the eye. Atomic Pink is the pink on the sides of the nose and on the lower lash line as well. For the constellations and starts I used a white gel liner. When in all actuality I should've just used my Ben Nye Aqua paint. Which would've made all the constellations thinner and not as large as how mine turned out. Of course if you had a super opaque white liquid liner that would work wonderfully. My brows are basically not that defined, I just lightly filled them in with a brush. For extra sparkle I used MBA Cosmetics pressed glitter in Amethyst Moon, which is just a purple pressed glitter. A loose glitter would look great and work well but also other shades of glitter would look really good and more like stars like MAC Reflects Pearl, Violet Voss Wendy, so on and so forth. If you wanted to be extra you could also use really small rhinestones as well, sporadically. I also used some NYX Vivid Bright liquid liners in a lavender and cobalt shade for more dimension and extra "stars". This one is easy if you have the correct shades, you definitely need some sort of duo chrome for the base of the mask and then just shimmer shadows will work after that. So even if you just have a duo chrome pigment or eyeshadow, as long as it's over a cream base and a light shade, it should work just as good. I definitely recommend using a gloss that either is 90's Clueless frosty or just a regular gloss and then mixing in a frost eye shadow. So stay tuned for some more looks in the Snapchat Series! I am in no way, shape, or form, an expert or pro at Special Effects makeup, makeup artistry, Halloween Makeup, or Body Painting. HOWEVER, the plus side of me being not a pro is that I know what it's like to be a beginner and wanting to venture past the face paints in the Halloween aisle at Walmart (not hating, because some of them I do use as a base). So really just in the last two years is when I started looking at other brands and places and figuring out what does the best for me. So I do have some tips and tricks that I've picked up along the way.
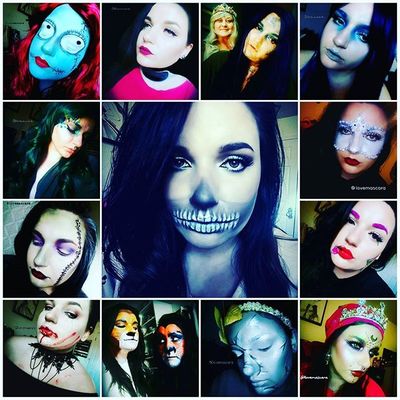
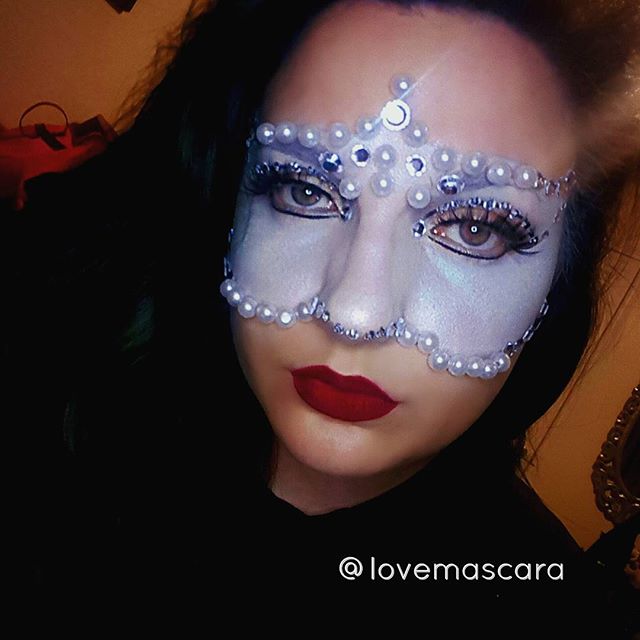
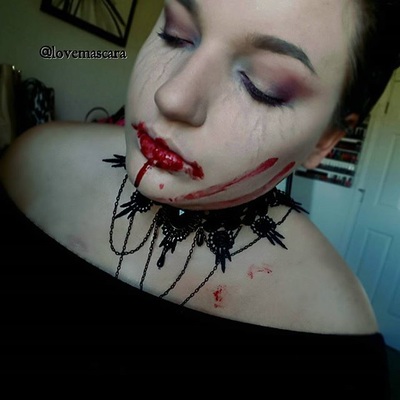
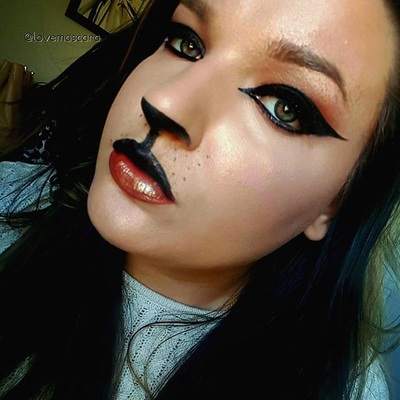
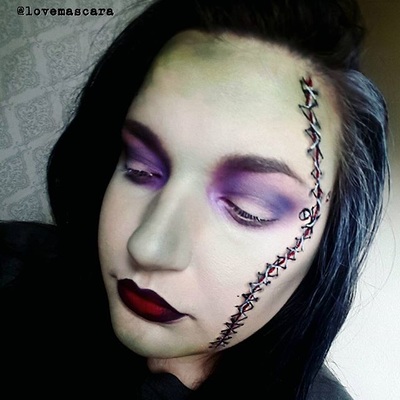
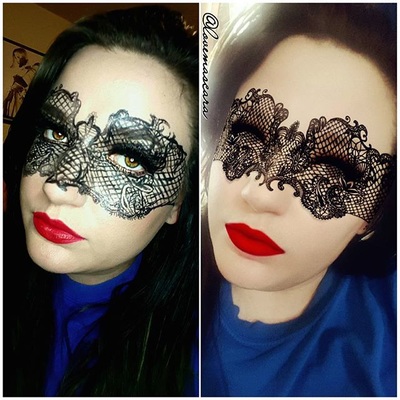
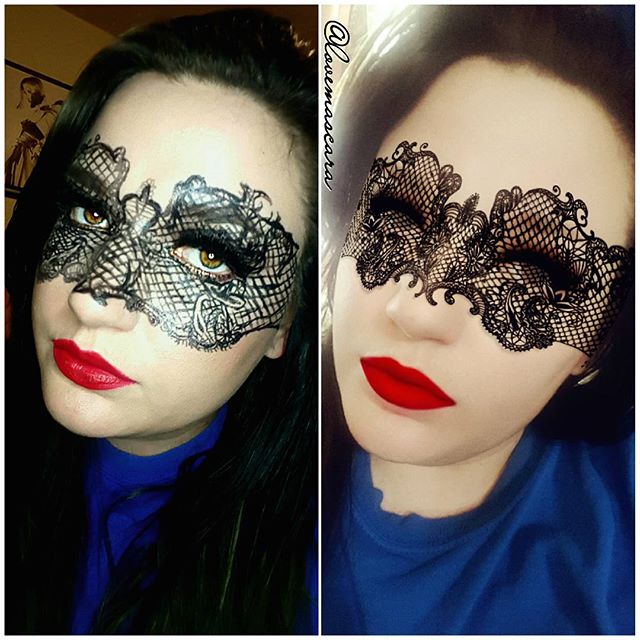
Tip 1 Don't disregard how useful actual makeup can be. For instance the NYX Jumbo Pencils are really good bases and there have been several times that I've used NYX Milk Jumbo Pencil as a white base for my entire face just make sure you set it with powder though heavily because it is a cream, it will heat up and smudge and move. So when they go on sale for buy 1 get 1 half off or whatever at Ulta I jump on that. They're great bases for eyes but also good from an artistry stand point. Also my go to, ride or die, ace, number 1, thing I use for detailing is liquid liner and my preference is Ardency Inn Punker Liner that is waterproof. I have an affiliate code I'll leave it below if you want to use it in the future to save some money. They are so good to me they know how much I love it and keep me STOCKED. I believe I have 3 right now. Keep in mind I use it EVERY TIME I do a themed look for Halloween, Snapchat Filter or whatever. Plus liquid liner is the absolute best for Leopard or Cat looks. It makes life so much easier in my opinion. Another thing I really like is contouring, no matter what color you need, with eyeshadows and a tapered contour brush. Also for shading and bringing dimension to things you've drawn to make them appear to be "on top of the skin" it's easier to use matte eye shadows that you have and brushes to shade. A really good person to watch for stuff like this and all around general bad ass-ness for Body Painting and Makeup Artistry is Jordan Hanz. She does 31 days of Halloween tutorials, she's a stickler for details and she's honestly taught me so much because she explains why she does this and that. I'll link her youtube channel here. Tip 2 What to buy. I'm gonna tell you if you're going into this as a person who's gonna do this more than just once a year buy some palettes. Get a Mehron palette. I have one that I got off Amazon from Mehron it wasn't expensive I think it was just $25 at most. It has 8 really good sized water activated paints. The second thing is a grease paint palette, or cream paint palette. Whether that is the Make Up For Ever flash palette, Color Wheels from Ben Nye are also a good choice and much less overwhelming and more cost efficient, iMagic also has a flash palette that I actually have as well and I have no complaints about it. It's available on Amazon and it's definitely the cheapest but looks dead on for the Make Up For Ever flash palette. I prefer to buy palettes that are primary and secondary colors which is bright colors like your basic blue, green, red. white, black. purple, so on so forth. Then if you want to get into flesh colored ones later you could but I'd rather buy those as singles or just use my RCMA palette. That's just me though. Now if you aren't sure you'd use that and don't want to have palettes just kicking around not being used I recommend getting single paints from Frends Beauty by brands like Global Colours, Ben Nye, Kryolan, etc. They have plenty of options and you're probably looking at like a $7-$12 price for one single color. If you don't already know you can sign up for a free membership with them and always get 10% off your purchase (no I'm not affiliated, I just try to save you all some money). Also Snazaroo has even more afforable single paints and palettes on Amazon. Tip 3 Water Activated vs Cream Paints. THIS..........took me a while to figure out my preference. I went for cream when I first started because I was more comfortable with that and I knew they would be full coverage. HOWEVER, I found that I prefer "water activated" paints much more because they can be very full coverage, the products lasts longer, and they dry down matte and don't have to be "set". You can also go over any patchy areas with a cream paint if you want more coverage. Or a lot of times you can "highlight" with a cream paint. Like if you painted you're whole face or body a cobalt blue, you could go over it messy like with a sky blue or a paler blue cream shade and that would bring your look from a flat one shade, to a more dimensional base without really having to do much like shading and what have you because you would already have that going on somewhat. It's all personal preference though, just remember to set the living crap out of cream paint with powder. Preferably a powder that is the same color as your cream paint. Just for that added color. Tip 4 Reference Picture. Whether you're re-creating an artist's work (by the way always give credit for that, it's just polite), or a drawing, cartoon, comic book, what have you. Have a picture nearby, pulled up, so you can look at it quickly and look often so that you know you're on par with what you're doing. Also, it'll make it easier for you to find places or ways to make the look you're own if you want to change it up, if space is an issue. For example I just did the Bride of Frankenstein and I had a reference picture for the stitches but it didn't mean that I did every single detail like the picture. I made it my own by choosing to add in eyeshadows, a sculpted brows, ombre lip but still keeping to the traditional stitch line, screws on the temple and the major identifiers that signify that "yes, that is a Bride of Frankenstein look". Tip 5 Buy separate brushes for artistry and special effects like blood or whatever. This isn't exactly necessary it's just my preference that I find has made things easier for me. I buy actual art brushes and I also buy separate sponges. I get the sponges on the stick in the craft section even. They make for really great "texture looks" with water activated paints. The synthetic artist brushes work really well with fake blood but it's almost like a putty so it can ruin a brush if you aren't careful to wash it pretty quickly. I don't use these brushes for blending or shading with powders just when I'm dealing with water activated paints or sfx products like blood, dirt, mud or whatever. Tip 6 Using adhesive. I apply adhesive with a disposable wedge sponge. If I didn't have liquid latex or something I've used eyelash glue several times and it works really well for minor things. It's not gonna hold very heavy things but for my Pearl Mask I used eyelash glue and it done well. Liquid latex is a bit more stout. If you are allergic to latex you can use gelatin, makeup wax, spirit gum. Some people use Elmers Glue or white glue. To each their own I guess. Also when using it, try to work in small sections. For instance if you want it to look like skin is peeling or whatever take tissue paper and tear it into little pieces, then glue it and then paint it. You may have to add glue over top of it before you paint it. For textured looks or building up features like more prominent cheek bones, or a large swollen bruise use torn cotton and work in layers: glue, apply, glue, apply, glue, apply till you get the shape and height that you want. Tip 7 Don't be afraid to use blood. Blood is very cool to work with and it can take an "ok" scary/gory look and turn it into a more detailed real like effect, that looks far more detailed and complicated than what it actually is. The best thing I ever bought was Ben Nye Thick Blood that I got from Frends Beauty, it's very much like a jam/putty texture and I love it. I also use regular ol' vampire blood from the halloween aisle at Walmart when I need a thinner blood to run, or splatter, or whatever. If you don't want to go that route another thing that I used to do is start with a black shadow for the center of the cut or whatever, then use a burgundy shadow around it to show irritation to the skin, then start adding red liquid lipsticks in different shades, red cream lipsticks to add different texture and then glosses to give the bloody effect and it worked just fine. So those are all my tips. I hope you have a happy and safe Halloween. I'm gonna leave some of my fave looks from this year at the bottom. Enjoy!! **Affiliate codes:** Ardency Inn "LOVEMASCARA" FOR 15% OFF Be Biotin Hair Vitamins "LOVEMASCARA" for 25% off The next part in my Snapchat series is The Lace Mask. This one is quite time consuming. The easiest way I can tell you to do this is to start with the outlines of the lace mask and making sure they're even on both sides. Then little by little drawing the outline and edges. I use a waterproof liquid liner for this so, Ardency Inn Punker Liner (you can use code LOVEMASCARA for $$ off your purchase) a felt tip liquid liner is the easiest to use in my opinion. Gel liner can be water proof but it's not easy to do small detailing with it.
I draw on a matte oil free face. So it's imperative to do your base, and then immediately go into your Lace Mask. The oil on the face even if you're dry will work against the waterproof liquid liner. So bake the face with loose powder is my solution, then once you're done set the face with a setting spray. Preferrably Blue or Green Marble setting spray, but Ben Nye Final Seal would be ok as well. Back to the mask: work on the detailing and drawings in the mask, then work the netting in around it. Don't stress over it being identical. It won't be identical to the filter but it can look like a lace mask none the less. Don't bother drawing on the lids it will smear. Do a super smokey eye on the lid and intense lashes that way the netting just runs into it. For the red lip I used Lovecat from Ardency Inn but a liquid lipstick would be lovely. KVD Santa Sangre would be a good one or any red liquid lip honestly. Stick around for more Snapchat Filter makeup, as I have much more on the way. So, I know that people have been re-creating Snapchat filters as makeup some. Nikki Tutorials has done some, I seen in Glamour where a whole fashion show used Snapchat Filters as their makeup inspiration. I thought it was so cool, and even though I'd done a few in the past I really wanted to step it up though for Halloween. Mainly because, these would be so cool for a group of friends to do for a party or maybe an at work theme for you and your co-workers to do for Halloween if you get to dress up. A lot of them are really easy to do. So I wanted to do this, then I asked my friends to let me make them into some filters as well, and then I tagged some of my makeup friends to try it too.
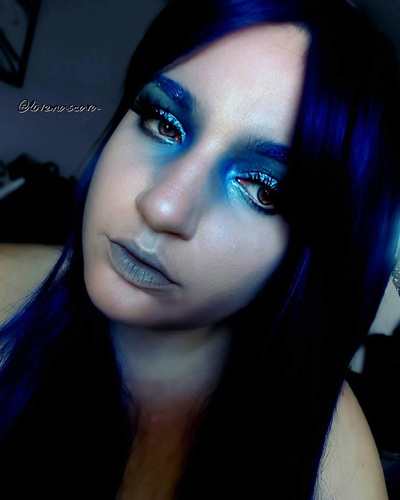
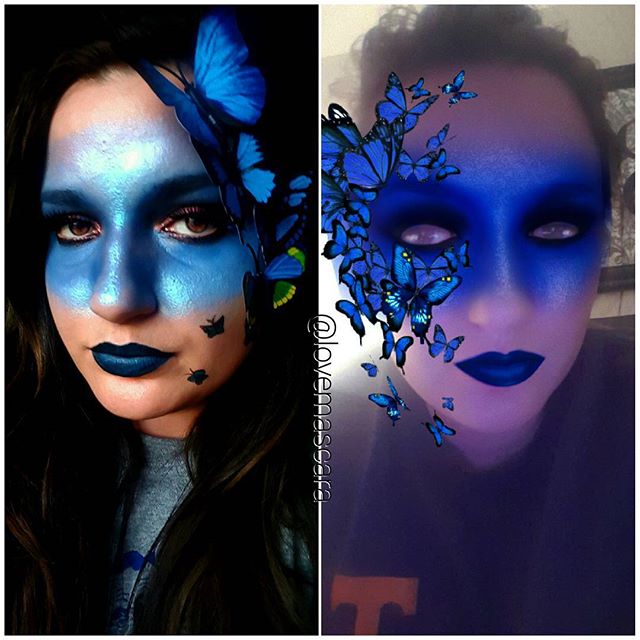
So I'm just gonna start with the actual ones I done for Halloween, not the ones I had done previously. My first one was the Blue Butterfly mask filter. I actually went a little extra though and bought some blue butterflies to stick on my face. Which made this super easy. Plus they were super inexpensive, I got them off ebay. So for the blue mask. It was so easy and you didn't have to be really careful and detailed with it. I used Ben Nye cream paint in blue with a regular wedge sponge and applied it all over the face as the base. Then I set it with Neptune shadow from Makeup Geek. The mask also has a super highlighted and shiny look. so I used a few different duo chromes. Starting with the Milk Makeup Holographic Stick which is a duo chrome it self. I went over it with Makeup Geek duo chromes in Sugar Rush that has a teal duo chrome, and then Black Light duo chrome that has a purple-y blue duo chrome. I mainly went around the edges and then down the nose with this. Around the eyes is super smokey with black shadow. Not precise at all. Just very blown out. I actually already had a shadow on so mine doesn't look as black as I wanted but I did use Corrupt from Makeup Geek over top of it. Plus, I added lashes. I didn't even worry that much about brows. I kinda defined them some just so they wouldn't get lost but I didn't sculpt them. Next up, I used Tarred black lip liner from OCC to darken the the outer parts of the lip. The only blue lip color I had was Bondi Beach from Ofra which is a bit brighter of a blue. So I needed a darker lip liner to make this work. However, if you have Echo from KVD that would be perfect. I used Ardency Inn Punker Liner for the two little butterflies that I drew myself. Use my code "LOVEMASCARA" for $$ off your purchase if you want to. Then I just glued on the butterflies for the final 3d effect. This was super easy. I love messy looks that don't require a lot of thought, or precision with them because it's very hard to mess those up. You could use blue paint from Walmart Halloween section even. I get my Ben Nye paints from Frends Beauty because they offer so much for SFX, not just Ben Nye. They have Mehron, Kryolan, Temptu, etc. So depending on how much you want to invest you could get a few colors, a color wheel or even entire palettes. Sign up for their free membership and you get 10% off your purchases. So stay tuned for more Snapchat Filter Makeup and if you re-create any then feel free to tag me because I'd love to see it! My Instagram is @lovemascara and my Snapchat is: loveandmascara follow me on there as well, I do a lot of tutorials and mini reviews. I hope to see you try some of these and keep an eye out as I add to the series through out the month. It's football time in Tennessee!! Time for parties, cookouts, and tail-gating. Which means you, my friend, are gonna need makeup that will hold up through all the festivities. So I'm bringing you some sweat-proof, cheer proof, food proof, drink proof, etc makeup that will last you to the after party.
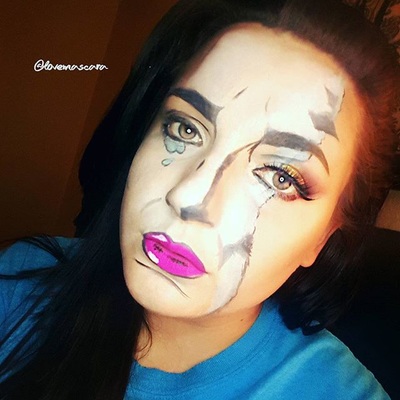
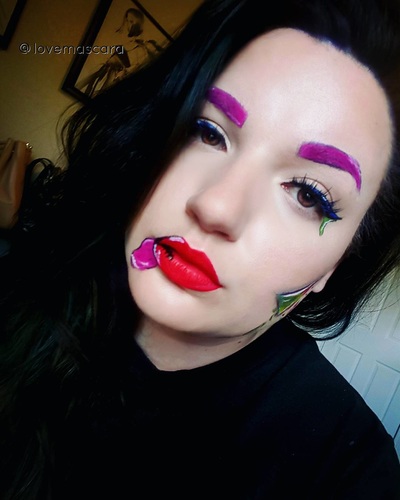
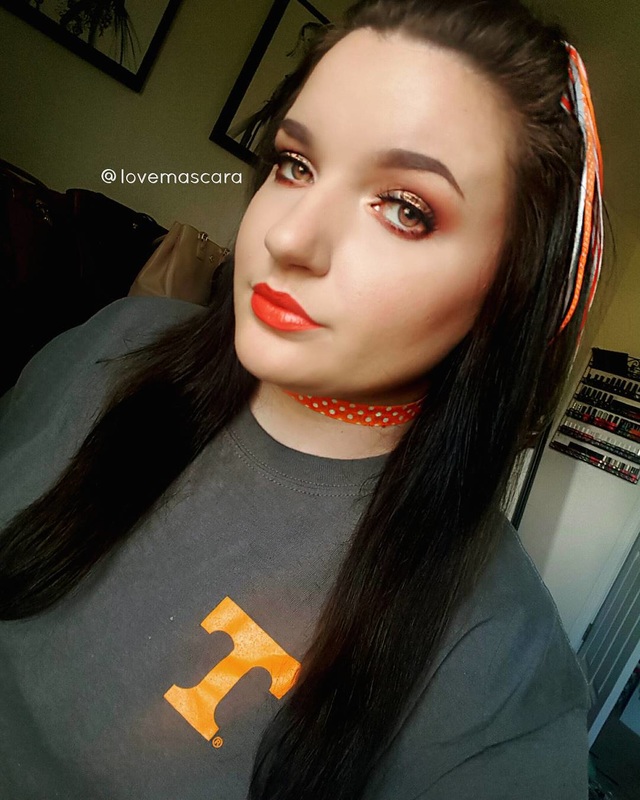
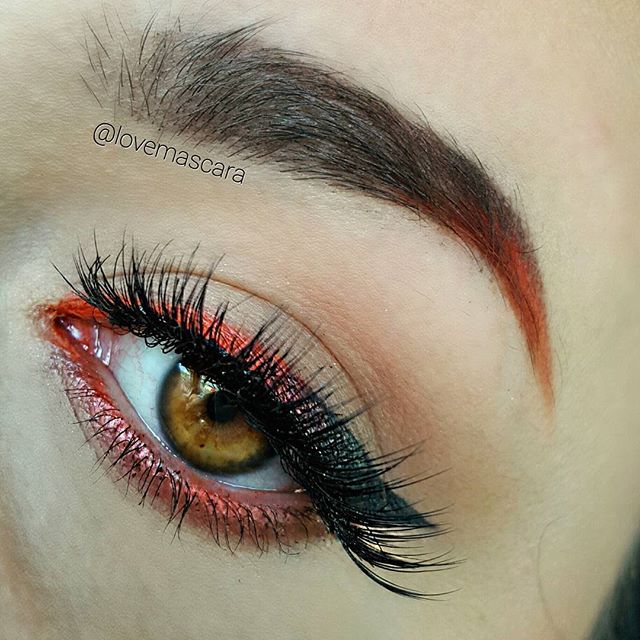
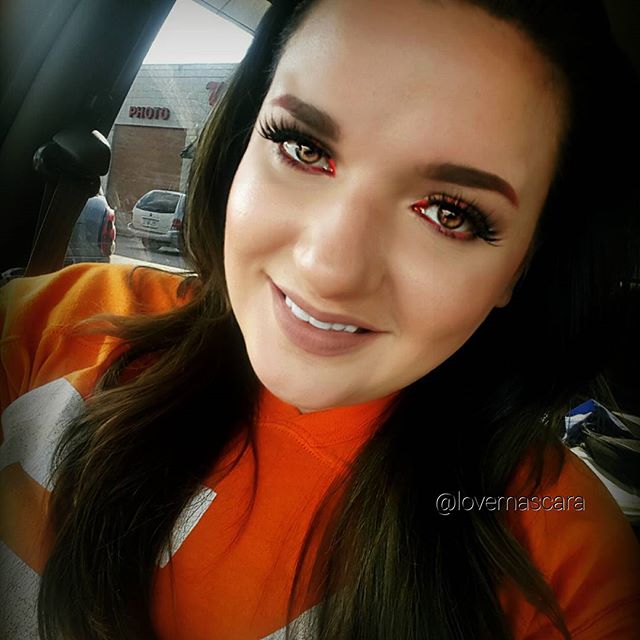
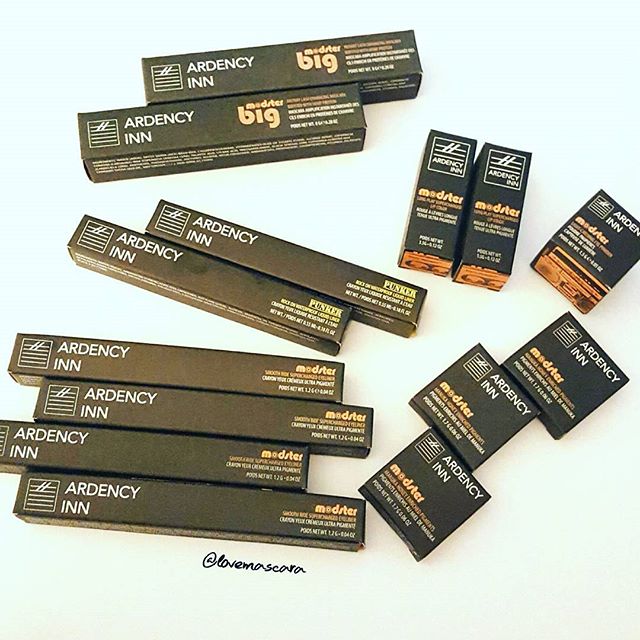
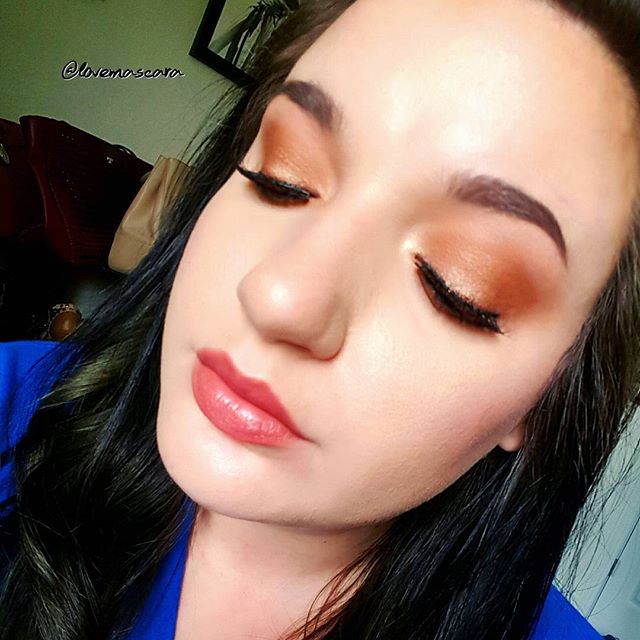
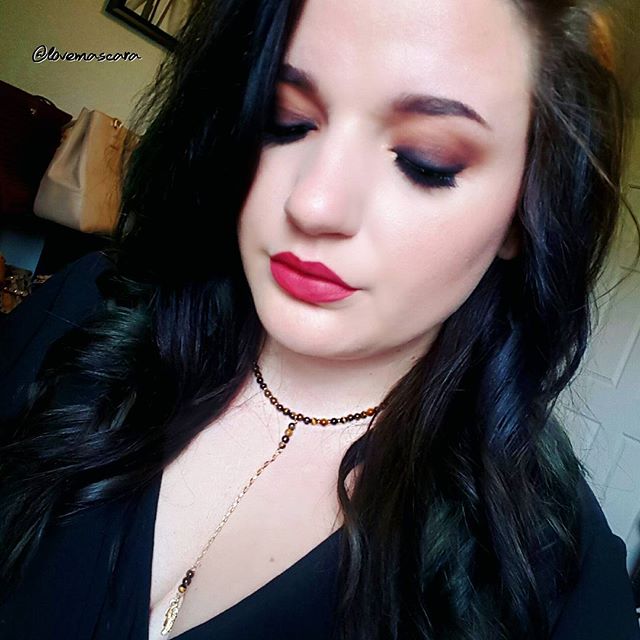
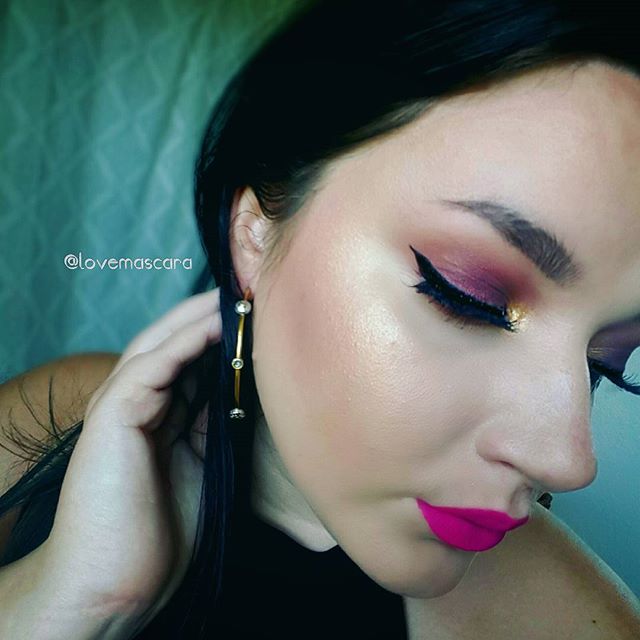
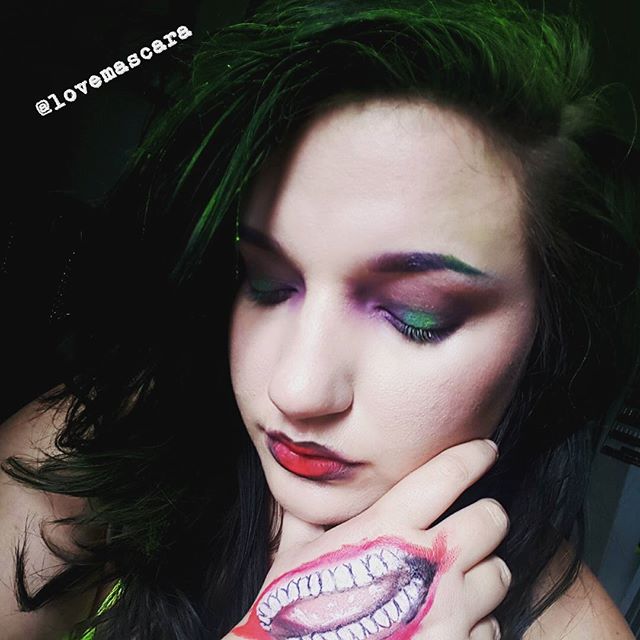
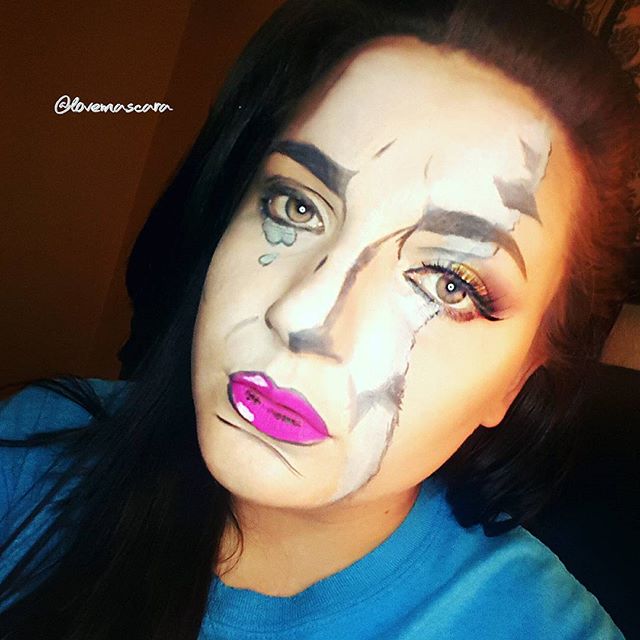
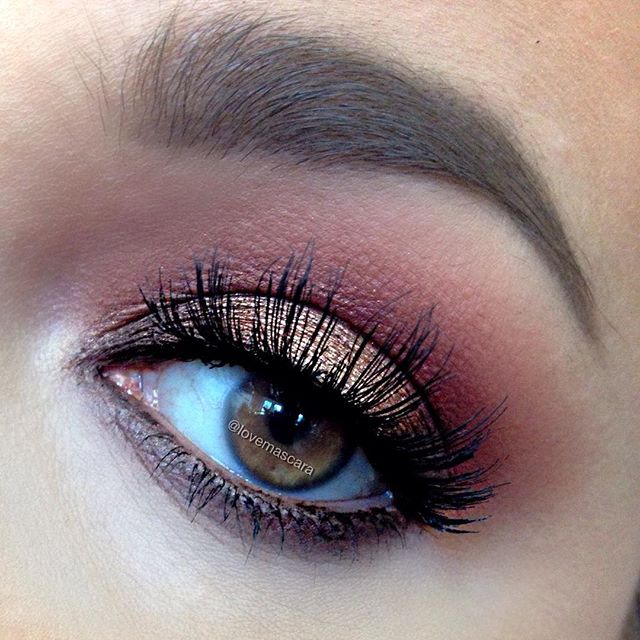
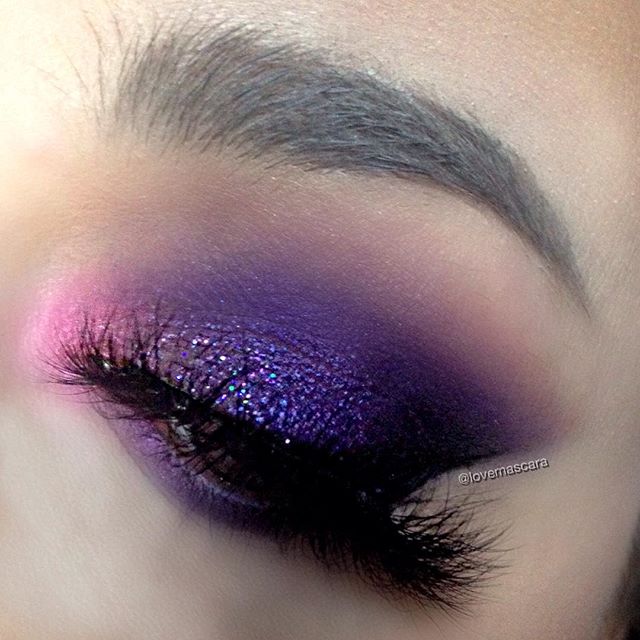
First up you're gonna want your base to be prepared for a full day of talking, cheering, hugging, possibly fighting (just kidding that's bad sportsmanship), and so on. So I would choose a great basic moisturizer with no extras and for that I go with Sanitas Oil-Free Moisturizer. This works for all skin types including dry. It's not going to add extra oil to your foundation or change the finish of it and that's why I like it. Next is primer, obviously. However, picking the correct primer is essential so there are two that I'm gonna include. First is the Make Up For Ever Mattifying Primer if you have combination/oily skin. Second is the Make Up For Ever Smoothing Primer if you have normal, dry, or noticeable pores and texture. I don't recommend it for the oily skin types because the silicone in it can cause the oil production to be more noticeable in my opinion. For foundation I have two as well. For combination/oily and also normal skin I would go with ABH Foundation Stick. It's super light weight. It's a drier formula that doesn't get super dewy or transfer and it's good medium but build-able coverage. For those who need more coverage I would totally go with the Milani 2 in 1 Conceal and Perfect foundation. It super full coverage and it looks beautiful. It's quite thick in formula but it covers nearly everything so you won't have to touch up near as much and you won't need a ton of concealer either. Speaking of concealer there's really only one I recommend and that's the Lancome Effacernes Waterproof concealer. This is specifically for the under eye but I would think it could be used on the rest of the face as well. It's waterproof and it does not budge guys. It's not thick and cakey, it looks beautiful. I recommend this for anytime you need your concealer to do work for you all day long. For powder I really recommend baking and for baking I only use RCMA No Color Powder. It's the best, it's affordable, and by baking your makeup it just locks it in even more and makes it nearly bullet proof. For eye shadow primer there are a couple I like which is Wet n Wild Photo Focus Eyeshadow Primer and the Benefit Stay Don't Stray eye primers. For glitter I use the NYX Glitter Glue. I think game day's are always appropriate for glitter, by the way. As far as shadows go I like super pigmented shadows that won't have fall out as the day goes on, so you don't have to worry about cleaning it up all the time. So Makeup Geek is my first choice and then Juvia's Place. For liner definitely get a smudge proof and waterproof liquid or gel liner. I love MUG Immortal Gel Liner, Ardency Inn Punker liquid liner (my code LOVEMASCARA will get you 15% off), and Colour Pop Swerve gel liner. I don't recommend crayon liners or putting it in your water line because it'll end up in the corner of the eye in no time flat. If you are going to do that though take a mirror and the liner with you because you will need to touch it up often. For mascara use a smudge proof and preferably water proof one (keep in mind that waterproof mascara is quite hard on lashes so I don't wear it unless it's an event). My fave is the L"Oreal Carbon Black Voluminous mascara. Go easy with highlight unless you are incredibly dry with no texture issues at all and then...go hard if you want. I find that as the day wears on the more intense highlight can look and while that's cool it can also magnify pores. So I would go with a subtle highlight, if you want to highlight at all mind you. I would probably use Laura Mercier Baked Highlight in 01. You could also go for a matte highlight which doesn't "glisten" but still gives that "lifted" effect and use Benefit Dandelion Shy Beam. As for bronzer/blush/contour. Use whatever doesn't oxidize on you and keep it pretty neutral. Again though, baking will really help lock in things like contour and what not. It's never a bad idea to take a brush so that you can blend out any patches you make get from touching your face in despair or stressful times during the game, etc. For lips you can go two ways, 1). liquid lipstick that is a neutral color that when it fades off (cause it will) it won't look nasty or crumble while you scream at your team from afar. I recommend Tarte Nameste or ABH Stripped possibly. 2) go for a sheer tint that will wipe off easily but never noticeably. For this pretty much any of the Lancome Juicy Shakers would work, the YSL Tint Oils are also good or pretty much any tinted balm or sheer lipstick. However keep in mind if you are out in the heat, balms or lipsticks will melt. Even liquid lipsticks get more messy and even more liquid in hot packaging. Remember to set your face, even if you don't think you'll need it, just do it. I like Ben Nye Final Seal, Blue Marbel Setting Spray and also the Urban Decay setting sprays in All Nighter and Chill. If you're super dry and get very patchy I would choose Chill from Urban Decay. Some of my oiliest friends though swear by the All Nighter and the Ben Nye. Blue Marbel and also Green Marble is often what drag queens will use and lets face it they're always fierce. So as for makeup that's all I can offer you but whoever you're cheering on be safe and have fun! Last week Ardency Inn sent me an awesome package of everything up above. They also made me an affiliate with them which I'm very honored that they wanted to do that. Basically I just wanted to give you an overview of their products because I've been using them for about 2 years and I really do love them. I honestly don't even know where to start. So I guess I'm gonna start with what I know the best which is their eye shadows. They are Manuka Honey Enriched Pigment shadows aka: super intense. I have 5 shades all together. My favorites being Royal and Rose Gold. Royal is a gorgeous Royal Purple. It's a true purple not so dark that it looks black. The shade Rose Gold is a darker rose gold in my opinion with not a ton of pink in tone. The other shades I have are Peacock (duochrome of teal and red brown), Copper, and Sunday. Copper needs no description its straight up copper a light toned copper. Sunday is a true gold. All of these are wonderful, I've not been disappointed by a single shadow yet from them. Next Punker Liquid Liner. I was running out of mine so I'm so glad they sent back ups. Not only is this a waterproof but it's jet black and very pigmented. Some liquid liners are not as opaque black they're almost sheer or too thin in liquid to where they run on you. So this doesn't budge, it makes a fierce wing, and I also use this in artistry for detailing or drawing for costume makeup or sfx makeup because this gives you a lot of control. It's also more of a matte black finish and not shiny black. Which I like. They sent 4 Modster Supercharged Eyeliners. The colors are: black, gold, blue, and brown. I definitely wanted black to use in my water line. Everyone talks about how great it is in the water line. I find it is definitely the creamiest for the water line but it doesn't stay there. So if you're gonna use it for that then take it with you for touch ups much like you would with other eyeliners. Next is the Modster Big mascara. I actually really like this! Typically I don't like many mascaras. I do like this one though. The brush is curved and quite big but I like how it builds up the lashes. I have short, thin lashes and this isn't clumpy or messy at all, at least for me. I have two Modster lipsticks in shades: Valentine, and Love Cat. Valentine is a great warm rose neutral shade. Love Cat is a classic red. They feel great. As with any lipstick you'll need to re-apply as the day goes on but I love them, they're very pigmented and creamy, which is all I ask in a lipstick really. Lastly I have a loose pigment in Friendly Fire. It's a white duo chrome sparkly shade. I love loose pigments, this is no different. It has a sifter which makes life so much easier. I'm SUPER pumped for this. I'm gonna leave some pics below of me wearing some of the products. You won't be able to really tell with the mascara but hopefully other things you will. Some products I haven't gotten to use just yet but I will, trust me. Here I'm wearing Copper on the lids and Valentine on the lips. Here I'm wearing Modster Supercharged liner in Black and it's smudged out. I'm using Punker liquid liner for that ferocious wing you see right there. I used Punker liner for the drawing and also Royal eyeshadow for the purple in this "Suicide Squad" Joker look. I used the Punker liner for the detailing and drawing of this "torn comic book" look. Here I'm wearing Rose Gold shadow in the center of the lid. This is basically all Royal shadow with some glitter over top.
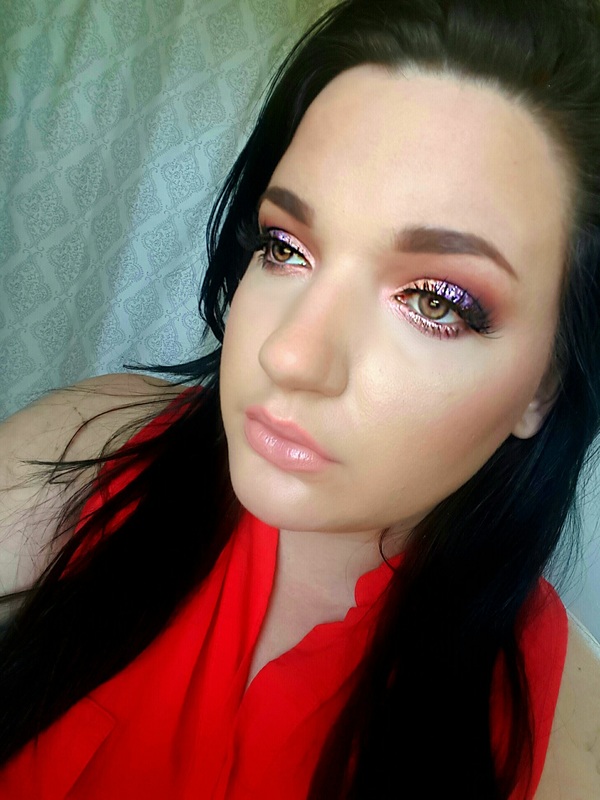
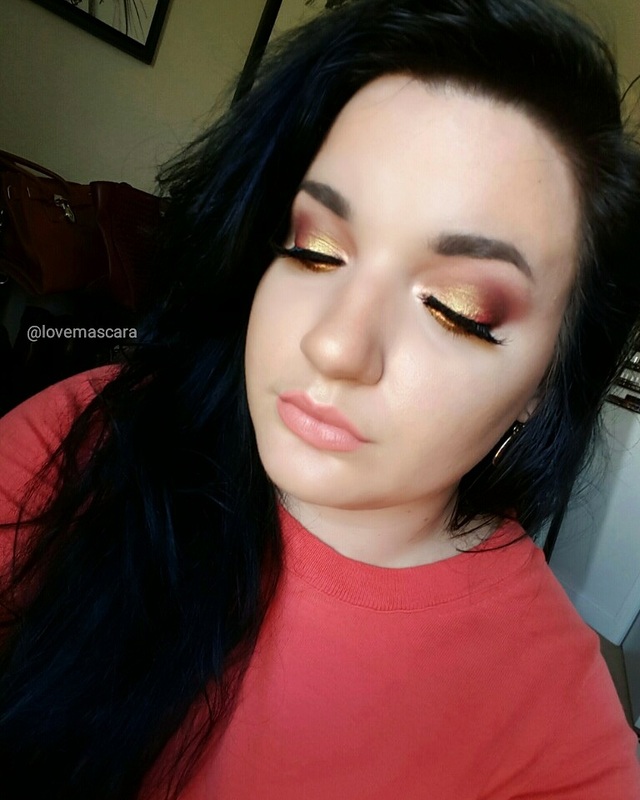
As I said earlier, I am now an affiliate with Ardency Inn so if you use my code "LOVEMASCARA" you will get 15% off your entire purchase on their website. 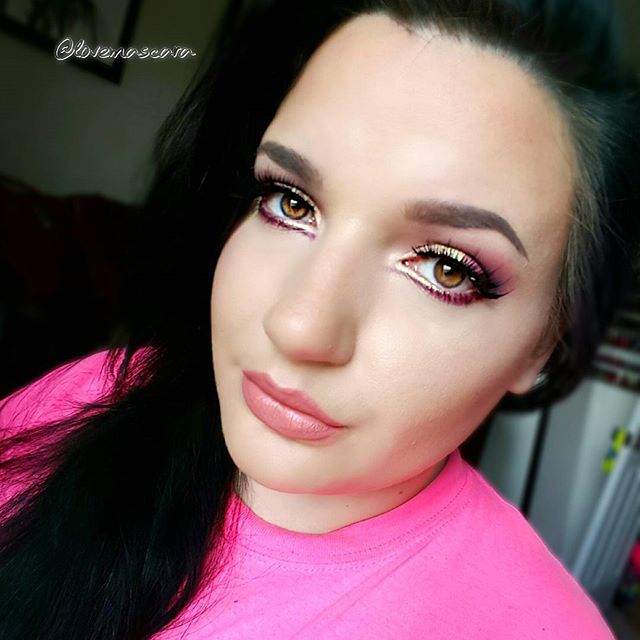 Summer has arrived. It's in full swing here in Tennessee. So naturally I'm sporting some colorful, down right neon looks to welcome it. Starting with the one above. Strawberry Lemonade (all Makeup Geek shadows): Crease: Tuscan Sun first and the Poppy Lid: white base, outer half is Fashion Addict taking it into the crease as well. Touching up the crease again with Poppy. Then Hologram Pigment on a flat stiff damp brush on the inner 2/3rds of the eye. Lower Lashline: With a pencil brush the outer half is Poppy first and then Fashion Addict. Then with an angled brush I'm using Fashion Addict to trace the bottom of my tear duct. Not connecting it with the lid. Then applying Hologram with the same angled brush only wet. Angled brush needs to be thin so that the pink doesn't go too far down and make you look sick. Lips: Bare With Me from Dose of Colors I'll leave a video for it here. This one I'm calling "Cantaloupe" All MUG shadows again Crease: Tuscan Sun and Chickadee Lid: Voltage over In The Spotlight. Americano on the outer V Then Light Year Sparkler applied with a glitter glue base. Liner: Ardency Inn Punker liquid liner Lower Lashline: Tuscan Sun and Voltage Link for the video is here. This one I like to call "Fruit Salad" for it's array of colors. It has more colors to it than the others. All Makeup Geek of course except the glitter. Crease: Tuscan Sun, Fashion Addict, Poppy Lid: Fortune Teller and Mai Tai. 24k Roseate glitter from Star Crushed Minerals. Lower Lashline: Poppy and Black Light on the inner half for the purple cast Lashes: Vamptress lashes from Violet Voss Video for this one is here. This look is more bold and intense. The lip option can easily change though. There is no video for this one. All the shadows are Makeup Geek as well. I call it "Blue Hawaiian Cocktail"
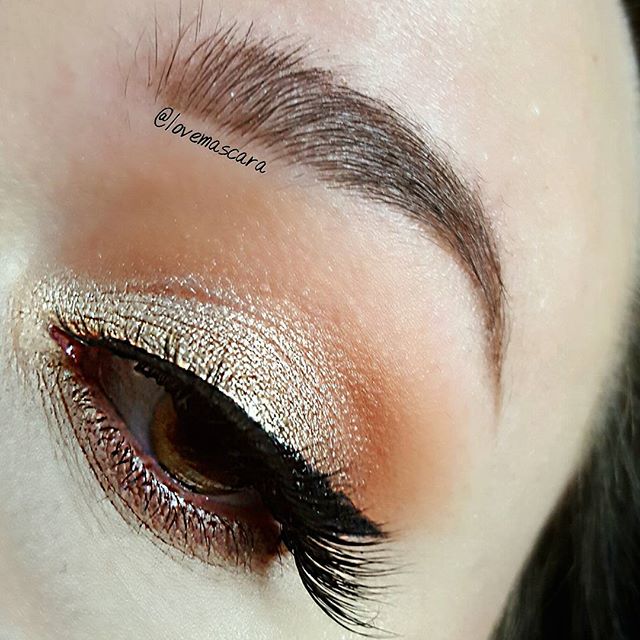
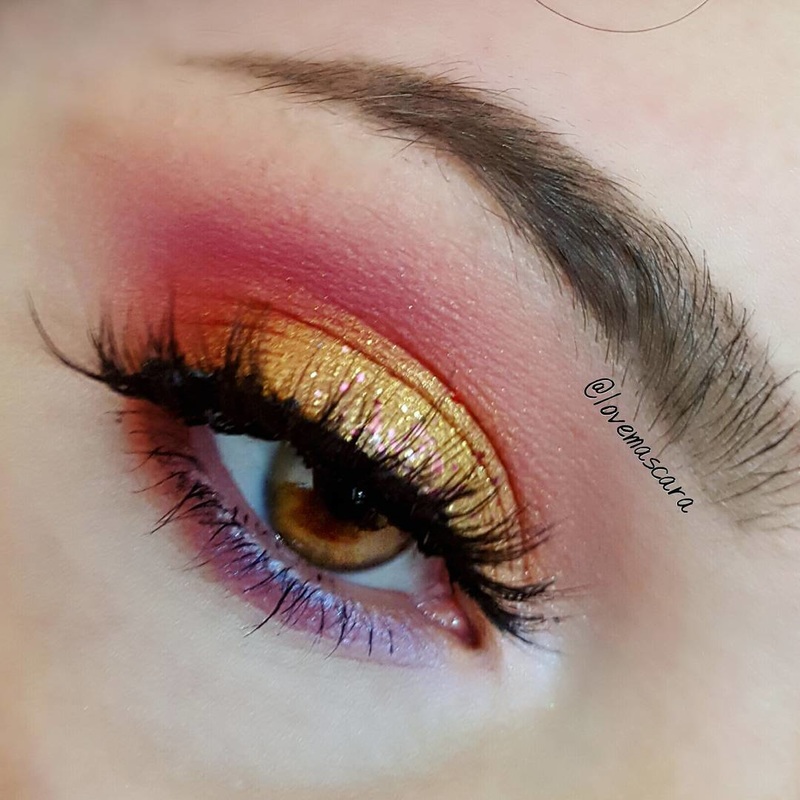
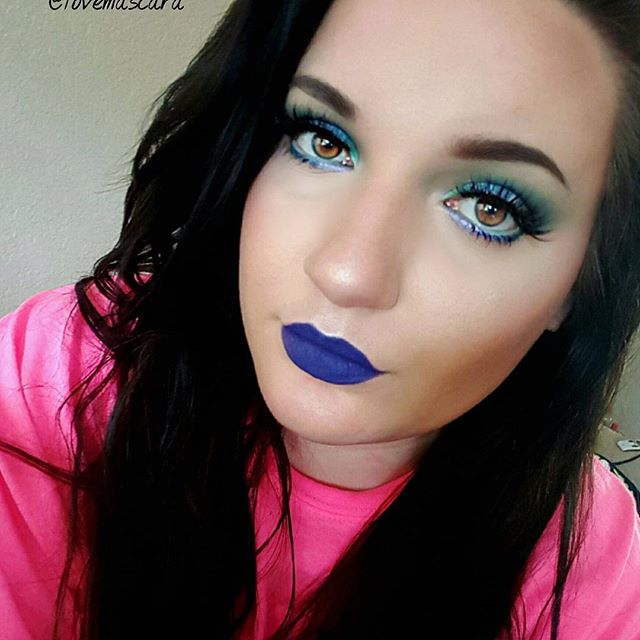
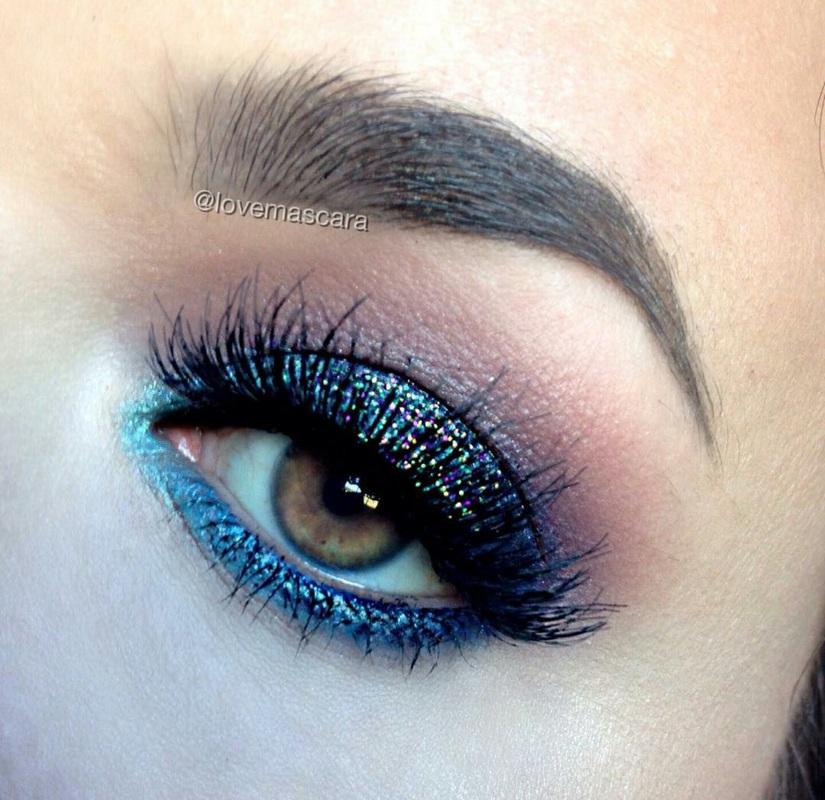
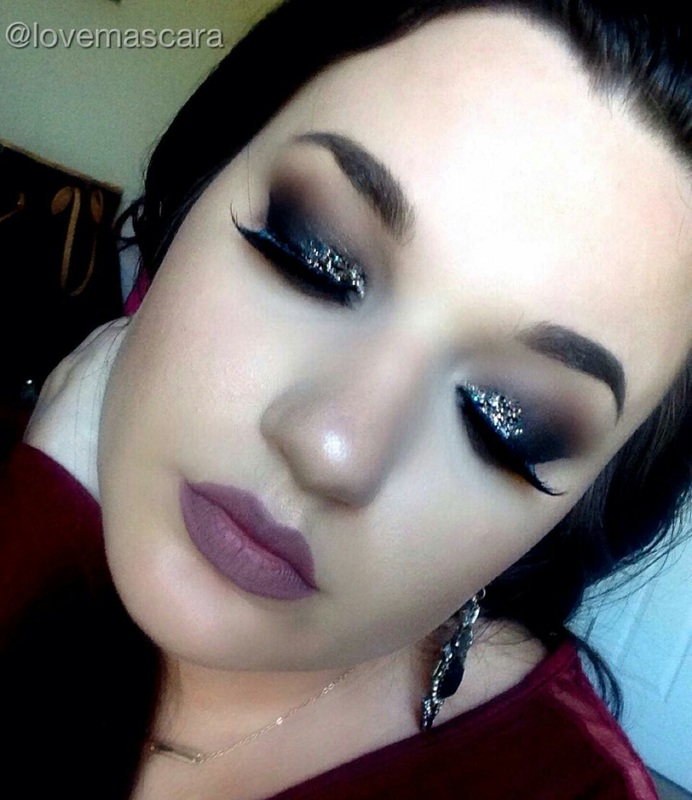
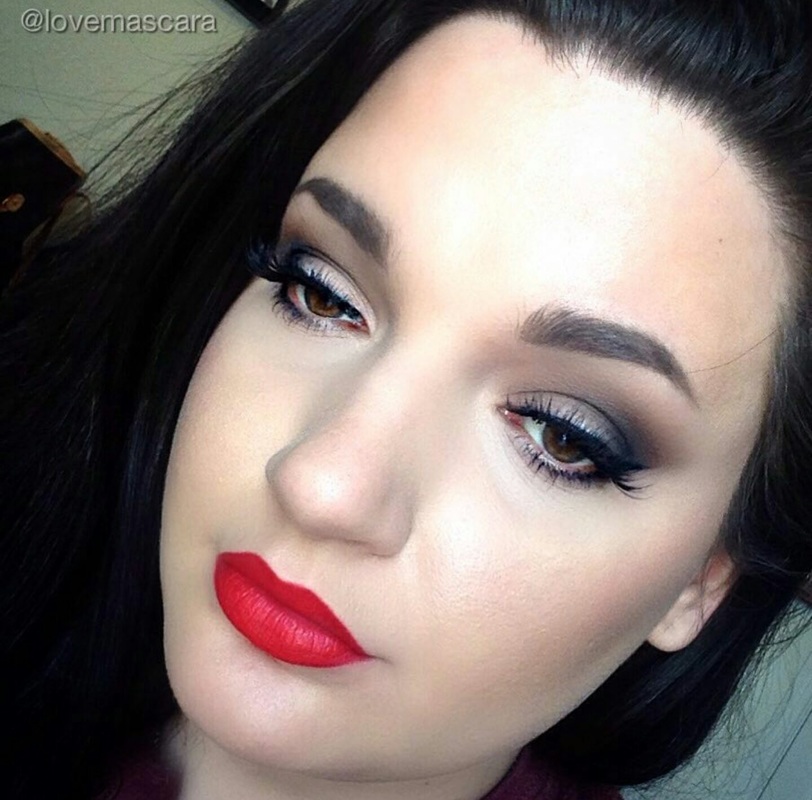
Crease: Dragon Fly and Sharkbait Lid: Dragon Fly on the inner corner, Chit Chat in the center, and Houdini on the outer lid Lower Lashline: Chit Chat on the inner part, Sharkbait on the outer part Lashes: Vamptress lashes from Violet Voss Lips: Climax Matte X lippie stix from Colour Pop. Prom season is here and I've put together some looks that should suit most everyone. From intense color, to classic makeup, smokey eyes, and of course glitter! This look is a blue smokey eye with glitter. You could of course not use the glitter though. It's warmed up in the crease with orange tones to keep it from looking like a bruise. Products are as follows: Makeup Geek: Boo Berry as the navy base. Pegasus in the inner corner. Corrupt as definition in the outer corner. Curfew a purple in the low crease, then Poppy an orange shade for warmth with a big fluffy brush so that it's just a touch of warmth. Poolside is the lower lash line and then Boo Berry on the outer half. Glitter is Glitter Injections in Peacock. You could use almost any glitter though that has blue along other colors of glitter in them. House of Lashes Smokey Muse lashes. This look is super dark with chunky glitter and a harsh wing. You could use tape to get that harsh line but I don't like that method. I prefer to sketch it out with an angled brush and then liner. If there are any mistakes I use the angled brush to clean them up by dipping it in makeup remover. Products: Makeup Geek Corrupt on the lid. Mocha and Cocoa Bear in the crease which are browns and then Chickadee which is a very light orange is the transition shade. Beauty Bar Baby glitter in Champagne Cocktail on he inner part of the lid. Lips are Colour Pop Rayezor This is a timeless, classic look. With the red lip and matte grey smokey eye. It's beefed up some with the winged liner. Products: Smashbox Cosmetics Art. Love. Color. (I think that's how it goes. lol) all matte grey shadows. Colour Pop gel liner in Swerve Violet Voss Vamptress lashes Colour Pop Succulent on the lips This look is a smokey neutral halo eye. It's dramatic but not incredibly uniform and clean cut. There is no liner with this and you don't have to be so careful blending because not a lot of colors are being used. It's still a great neutral brown smokey eye that works for anything. You could easily change the center color to whatever you want like a more yellow gold, a duo chrome peachy pink, an orange. Something foiled would also be very pretty. Or even glitter. Products: Makeup Geek: Americano on the inner and outer corners and up in the crease some. Preppy as the blending shade in the crease and transition shade. Light Year Sparkler in the center of the lid. Which is a pigment/glitter hybrid that has a peachy pink opalescent color to it. House of Lashes Boudoir Lashes Dose of Colors Stone on the lips This is a very colorful peach, pink, orange and purple. It's super foiled and bright looking which I love and then glittery with the purple. With a nude pink lip. Also the skin is much warmer as well. Products: Makeup Geek: Chickadee as the transition shade in the crease. Poppy heavily in the crease for it's orange color. Cherry Cola low on the outer crease for definition. Mai Tai on the majority of the lid, inner corner, and lower lash line. Light Year is then put over top of Mai Tai to make it pop more and look more foiled. MBA Cosmetics Pressed Glitter in Amethyst Moon on the outer half of the lid. Pressed Glitter is tricky you have to make sure you have the look exactly where you want it because once you add he primer and pressed glitter (which is more opaque than loose glitter) there is no changing it. Lena Lashes Monroe lashes Melt Cosmetics Sext lipstick Urban Decay Beached Bronzer in Bronzed. Ofra Cosmetics You Dew You highlight The last and final look which is like a sunset. It'd be gorgeous with red, orange, yellow and maybe even a warm pink dress. It's mainly foiled which I love.
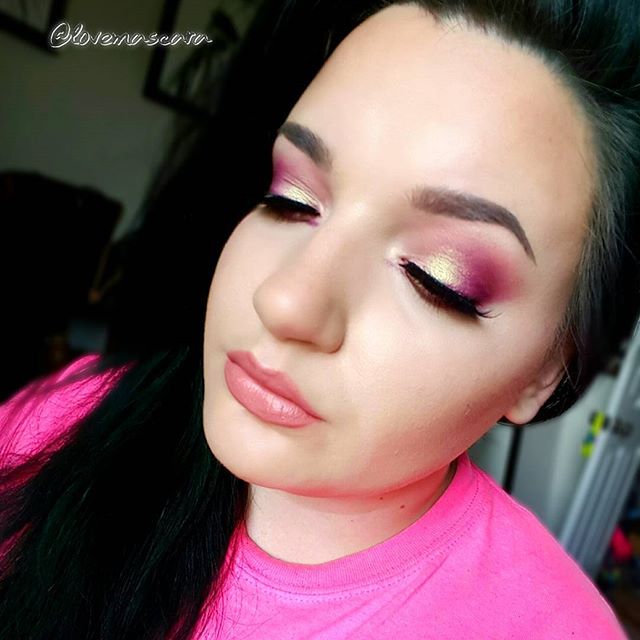
Products: Makeup Geek: Poppy in the crease, Bitten lower in the crease and outer corner, Razzleberry in the center, Fortune Teller foiled shadow inner part of the lid and on the lower lash line. Hologram on the inner half over the shadows. Light Year in the inner corner. Violet Voss Sexy and Eye Know It 3d Faux Mink lashes Color Pop Cake on the lips So these are all looks I think would be great for prom. Hopefully I've put something in for every color dress or ensemble out there. I hope you find one to your liking. If you're doing makeup yourself be sure to play around about 2 weeks in advance to perfect and find what you like. If you're on a budget check out etsy for glitters like Beauty Bar Baby, or Fairy Vibez for pressed glitters. Also the drugstore has come a long way as well. NYX has a great concealer out right now called Gotcha Covered which is full coverage as can be. Milani 2 in 1 foundation is a great full coverage foundation. Lashes are super easy to find, I recommend Ardell Wispies everytime or a half strip of lashes. Physicians formula has good bronzers and of course NYX contour kit is good as well. Good luck and be safe!! |
ErinI'm from Tennessee. I'm a makeup and skincare lover. I have always enjoyed creating looks but I love to help people with product knowledge and application even more. I've been able to start blogging and do these things I love because God has seen fit to bless me with the opportunity. Thanks for stopping by and visiting with me! Categories
All
Archives
January 2022
|


 RSS Feed
