|
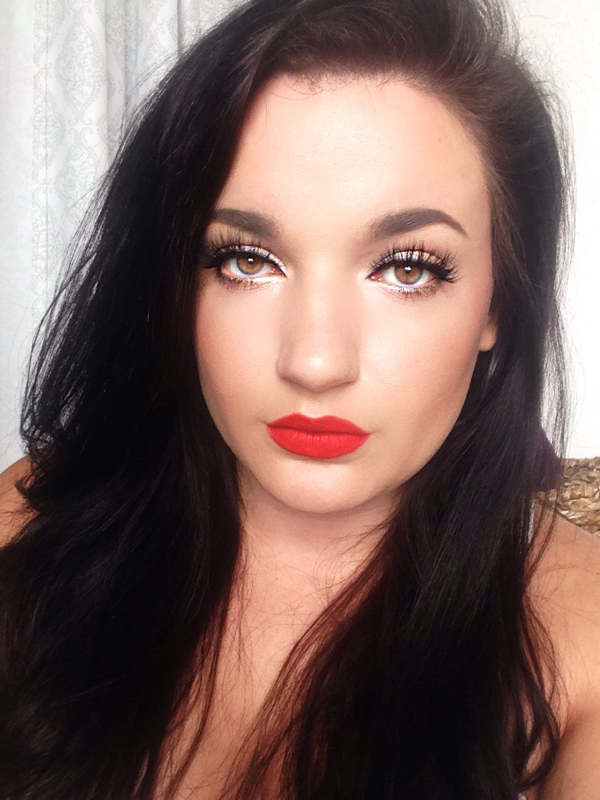
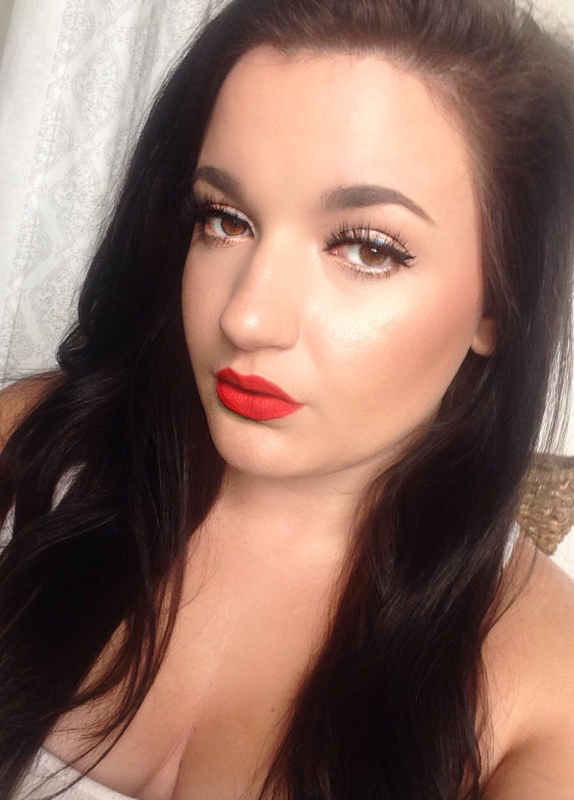
The newest "trend" that's taking off in makeup is "strobing". Contour is "like so last year" and now highlighting the bejesus out of your face is what's in. I, who am not usually the biggest fan of highlighters, am actually really loving this. Mainly because highlighters have become so much better the last few years. Thanks to Becca Cosmetics, I personally feel. So I done this new trend and now I can't stop doing it. You basically highlight the highest planes of your face which is what you would normally do. Most people do it with liquid or cream highlighters to really get that intense "glow from within" look. I use both though. You're gonna focus your highlight on the: Cheek Bones, Nose, Cupids Bow, Brow Bone, and Inner Corner of your Eye. These are all areas that naturally catch the light more. I tend to go a little further than this and I'll explain on down. The first thing you need to remember is to get this in the fullest effect you'll need to start with your skin. So use a really hydrating moisturizer, or a moisturizer that has some shimmer in it. I use Sanitas Oil Free Moisturizer because it just works best on my skin. Don't let the Oil Free part scare you away, it's still incredibly moisturizing. However, keep in mind to have very luminous skin you'll need to use products that will get you there at night too. So I use Caudalie Grape Water facial spray toner, it's moisturizing, as my toner so it doesn't dry out my skin and I used Josie Maran Argan Oil nightly to keep it luminous and glowy instead of dull and dry like some overbearing products can do. For foundation I will use a luminous foundation, which isn't necessary really but I like to do it. So I use Loreal True Match Lumi, NARS Luminous Weightless Foundation, NARS Sheer Glow you get the drift. You don't have to use luminous foundations that's just my preference. I always prime though, I use my Makeup Forever Mattifying Primer just so my foundation doesn't break up or move. I still look luminous but it doesn't move. Now if you're incredibly oily you may not want to do this. That's fine. You can skip straight to highlighting if you want. However, for myself, I tend to be Normal to Dry with my skin so I get a little crazy with my strobing. Products that I really feel make a difference are:
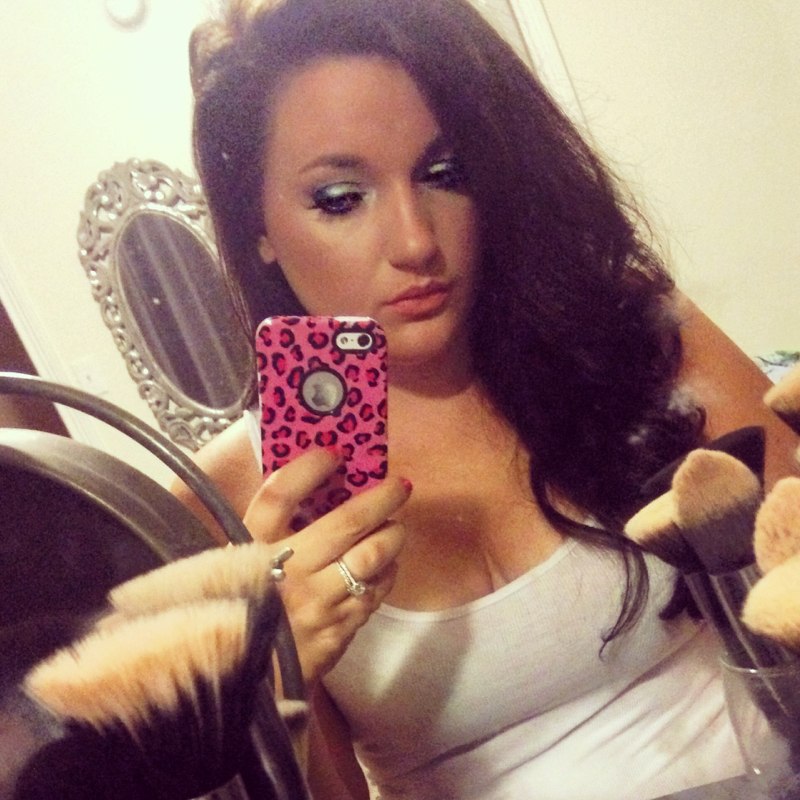
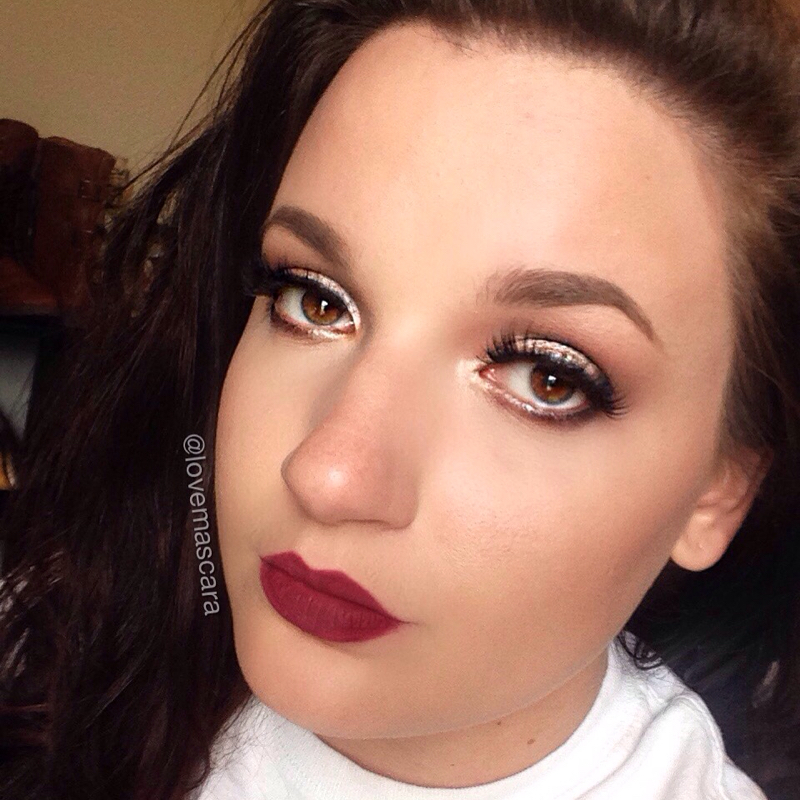
I like to go in with luminous blush as well. Some say don't, I say why not? You can absolutely use matte blush if you want. I apply the highlighting first then I do blush and bronzer. I want the over all look to be sunkissed and have a summer vibe, I'm not looking for an intense pink or peach cheek or intense contour. I want it all to blend into a warm healthy deep glow. So some blushes that I've really loved are: NARS High Intensity Blush Duos applied wet are super watt sheen, almost foiled looking (Fervor is my fave) Becca Blushes (any of them will work, Songbird is my favorite but it's pretty dark) Milani Luminoso blush (very shimmery peach) Makeup Geek Romance (Very shimmery pink/peach) MAC Warm Soul (subtle coral blush with golden sheen) Bronzer that I use last, have been: Makeup Forever Sculpting Duo in 2 Chanel Bronze Universal MAC Careblend Pressed Powder in Dark I did a little contouring today, but I went over it with a "warm" toned bronzer so that it wouldn't look too "contoured". I feel like warmer tones suit this look the best. I don't like a really cool toned harsh contour with this super highlighted look. I would say you don't even have to contour if you don't want to just bronze. I contour because I like it to slim my face and give me cheek bones. So cream contour would be much more natural but you can still use powder contour lightly if you want. The later in the day it gets the more your highlight shows up. It's great for dates, or cook outs, you best believe I'll be rocking it for the Fourth of July festivities. This picture taken above is at about 11 o'clock at night as you can see it's super intense and glowy. You can make it as intense as you want. So add or take away what you want from these tips. It's just makeup.
0 Comments
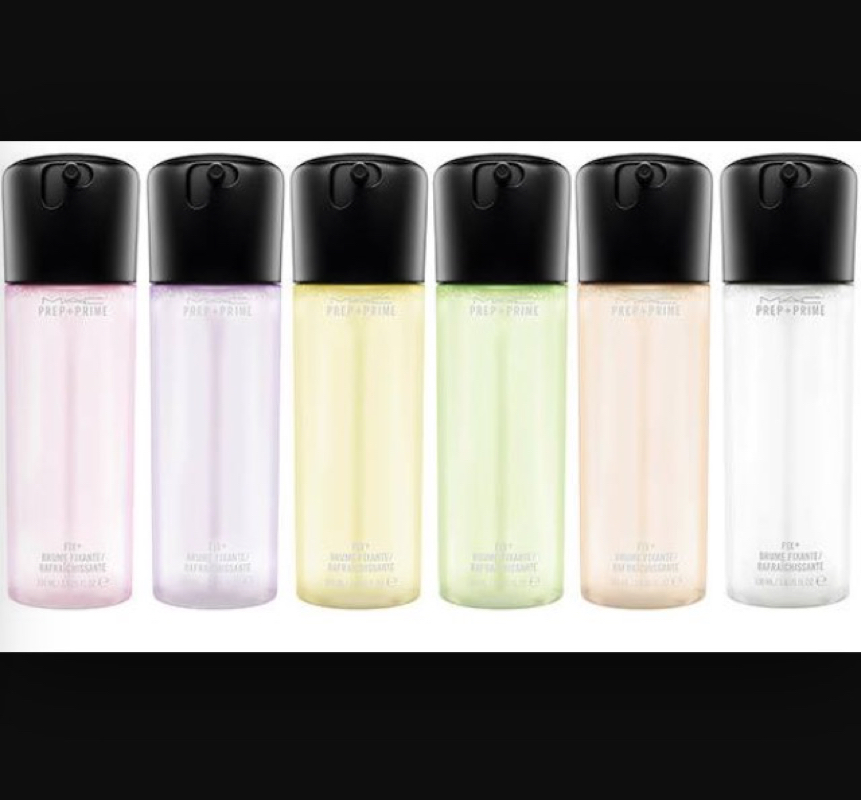
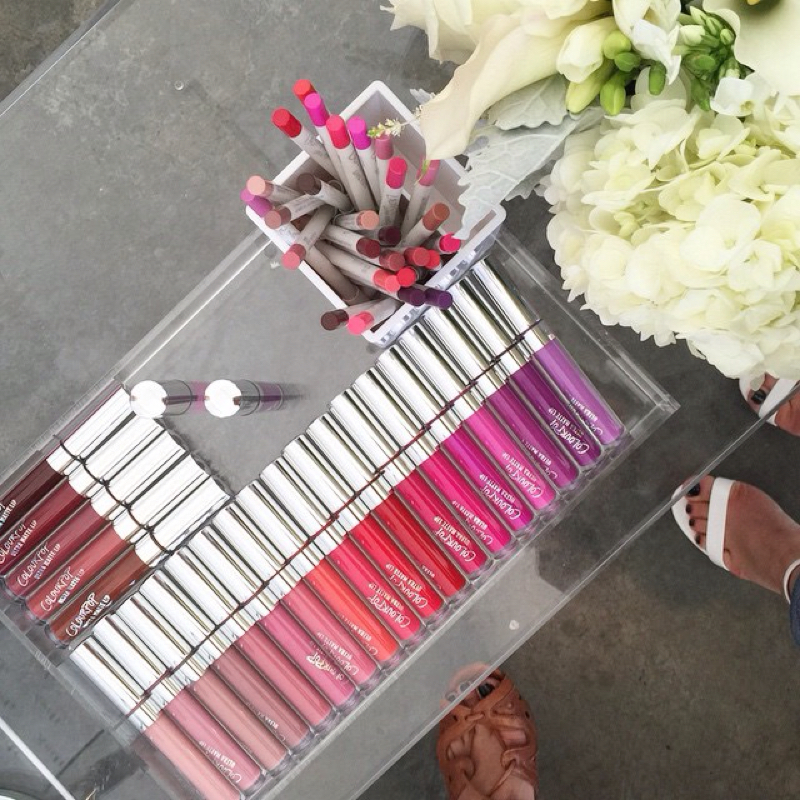
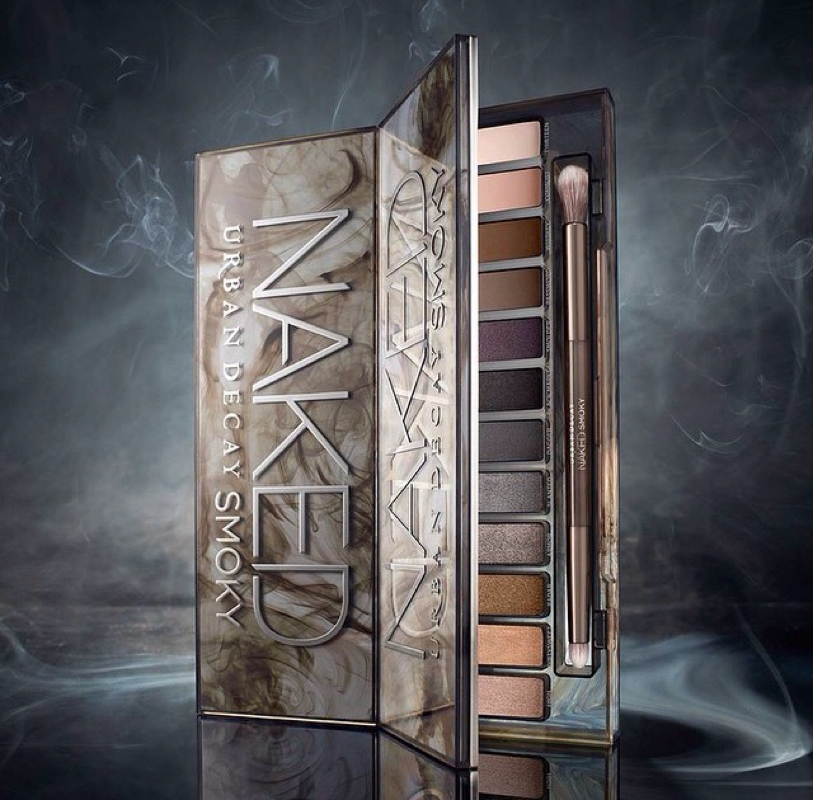
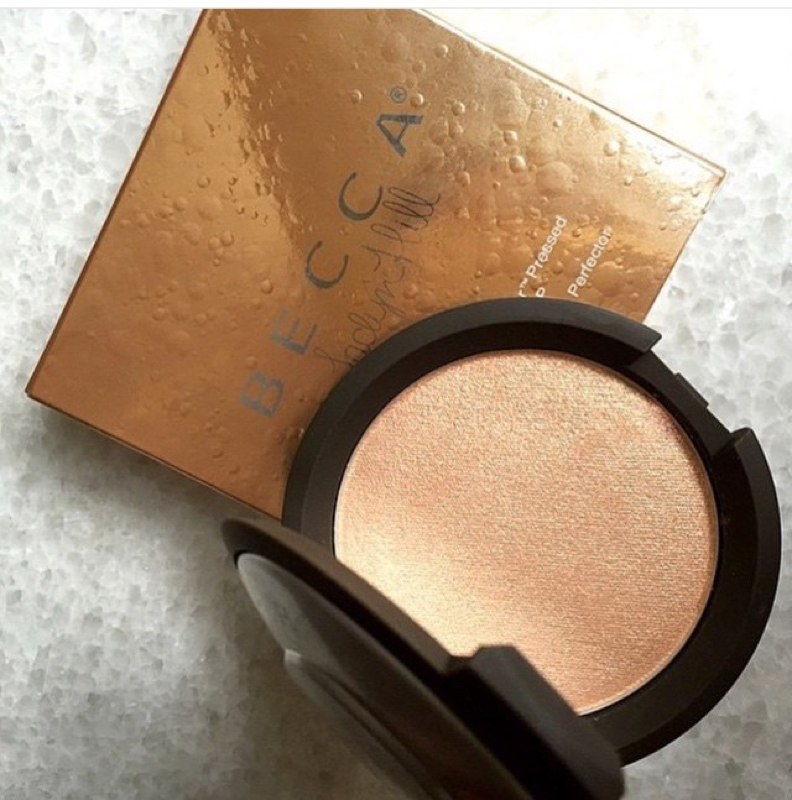
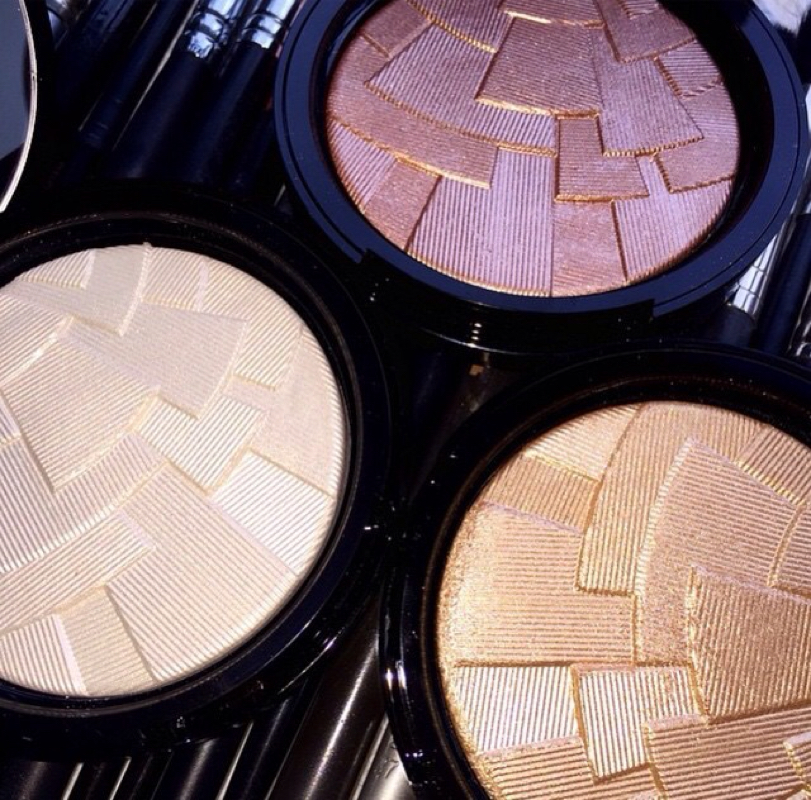
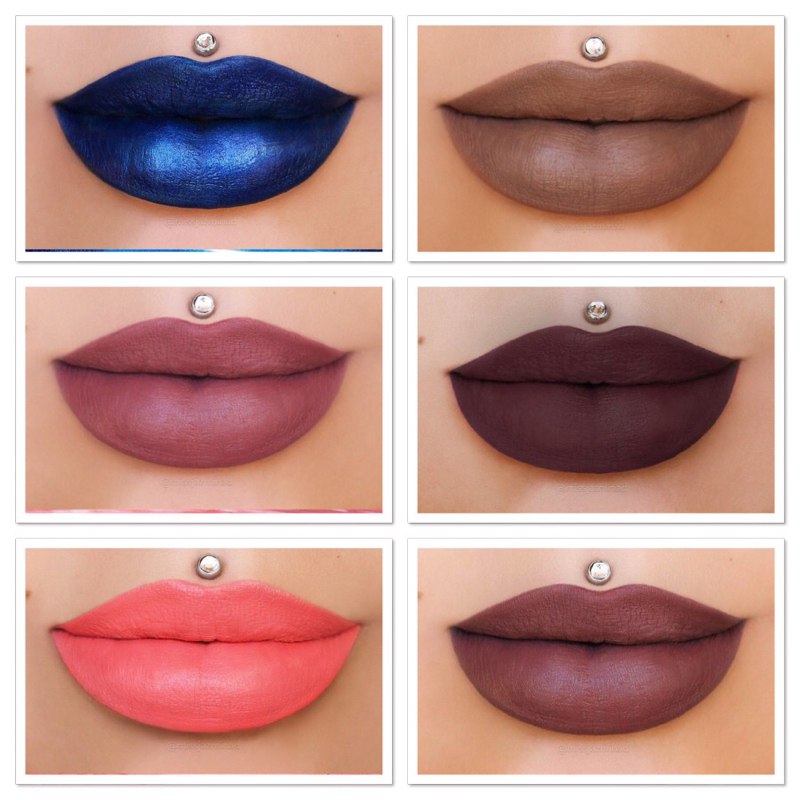
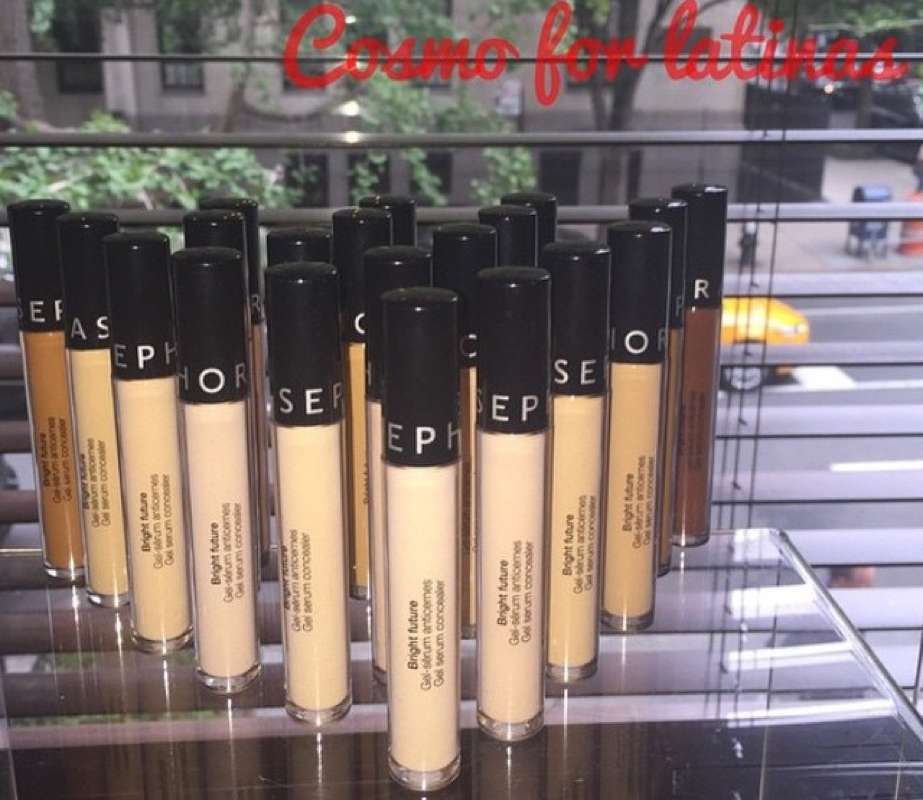
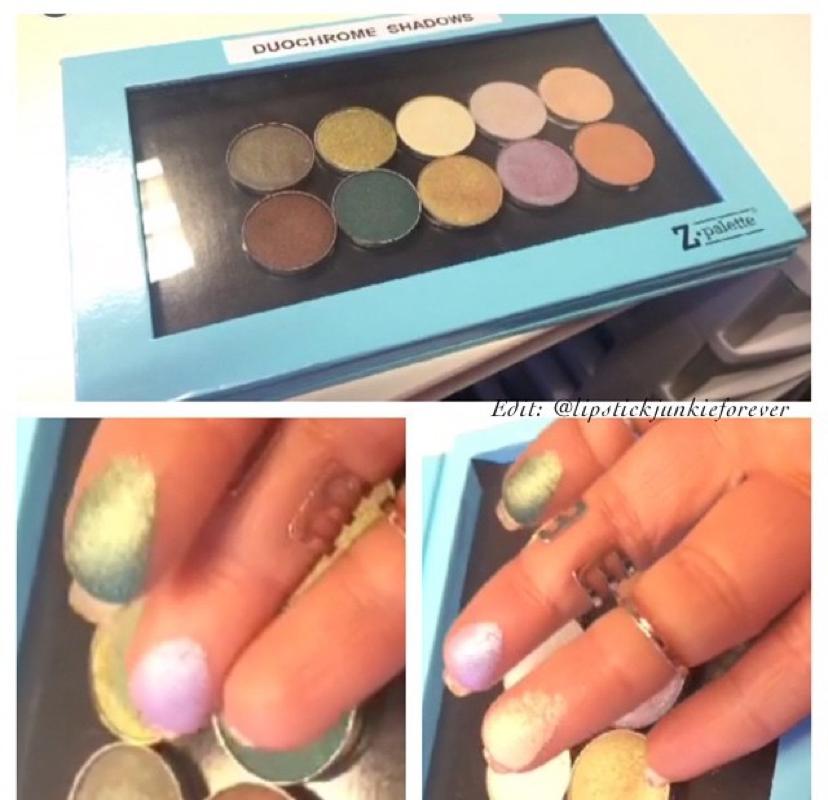
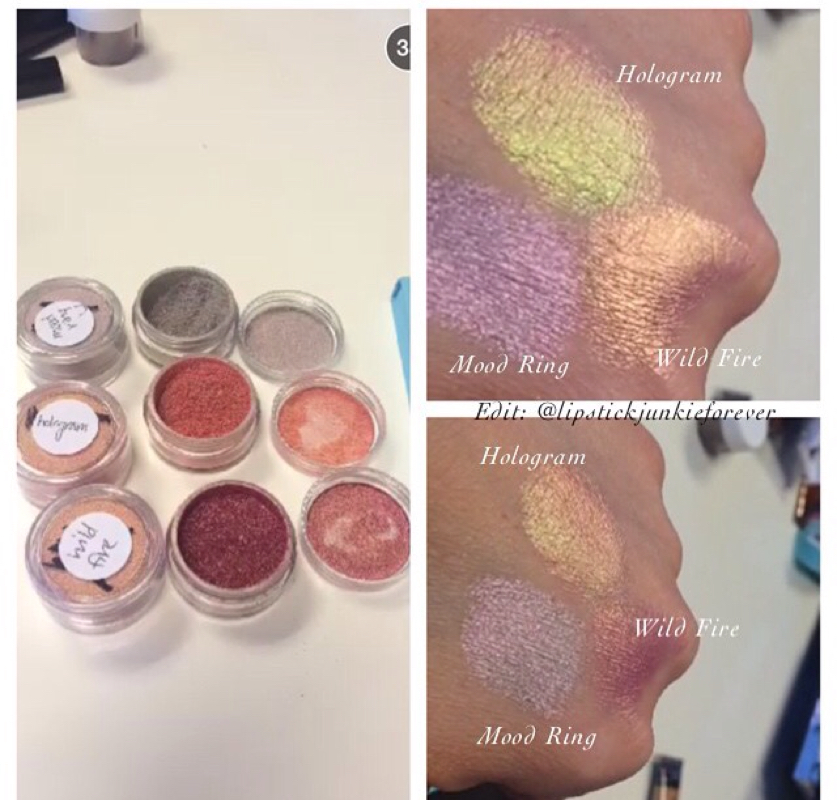
I'm just gonna get right into this. There's a ton of new products being released, or are already released that you need to know about! Lots of interesting and down right exciting stuff. So lets hit it. First up the new Limited Edition MAC Fix+ facial sprays. It's always available in classic scent which I love. I think it smells amazing but they're offered some more scents. Most are already sold out online (of course) but stores are your best bet for finding some. They come in scents of: Rose, Lavender, Yuzu, Cucumber, Coconut, and then of course classic which is always available. I would get the Rose and Cucumber if it were me. These are $22 I believe. Colour Pop released Ultra Matte Liquid Lipsticks on June 25th at 5pm. Holy crap! They sold out needless to say. Which with liquid lipsticks being so popular and with Colour Pop getting a massive recognition and growing fan base (up to 500+k) it was no surprise they would sell out especially only being $6. Yours truly diligently refreshed her browser for an hour and a half to get a few to review for you guys. I got Trap, Donut, Zipper, and Pacific. These will be restocked in due time. Urban Decay is releasing yet another Naked palette. This one is the Naked Smokey palette. It will be released on July 8th I'm not sure if that's online first and then in stores later or both. There are a few reviews out on it already. Samantha from Batalash has one out. I think the Urban Decay Naked Smokey palette will be a great palette just like the other ones. I have the other 3 so I will be waiting it out before deciding if I'm going to get it or not. If you don't have any though this is probably the one I would choose. I always wanted them to do a Smokey Palette from the Naked line so I'm glad they did. I believe it's $54. This is exciting! Jaclyn Hill teamed up with Becca Cosmetics and created her own highlighter called Champagne Pop. It's closest resemblance I think is to MAC Whisper of Gilt. It's a Golden Peach. It will be available on July 2nd online exclusively at Sephora at 9am. If you want this you should act fast. Like be sitting by your computer at 9 because I have a feeling it will sell out fast. They've already said that the quantities are very limited. It will be $38. This picture is from Jaclyn Hill Instagram. Anastasia Beverly Hills will be releasing new liquid lipsticks along with some cheek highlighters which is a new area for the brand. They've already been releasing a couple liquid lips here and there with their summer collection and what not but I believe at least 7 will be releasing around July 15th at least some are limited edition though. From Top to Bottom on the Left Paint Dusty Rose Sorbet Top to Bottom on the Right Sepia Trust Issues Veronica There is another red releasing called "Sarafine". The swatch is up on the ABH Instagram. The Illuminators will release in August I believe and there is 4 shades I haven't heard the price though. The picture of the highlighters are from Amrezy's Instagram I believe. Liquid Lipsticks are around $20. The lipsticks are modeled of course by MizzJazminad. Sephora will be releasing some new concealers for the Sephora Collection. They look similar to the Naked Weightless concealers from Urban Decay which is what makes me interested and excited for them. They are gel serum just like the Urban Decay. There are 20 shades and they should be available in July. I don't know the price point yet. ( This pic is from Trend Mood on Instagram and edit was by Cosmo for Latinas) Makeup Geek is releasing some new pigments and shadows (along with highlighters, contours, concealers and foundations possibly this year. Way to go Marlena) they should be released around August as well hopefully. These are edited by Lipstick Junkie Forever on Instagram and came from Marlena's snapchat. They are releasing pigments, shown is three but there are more apparently. They have a duo chrome vibe or hologram vibe (considering one is actually called Hologram) they are what I'm most excited about probably out of all these is these pigments. I can not begin to tell you how much I love duo chromes and pigments. There are also shadows that are specifically a duo chrome line. As with all Makeup Geek products they swatch beautifully and without primer if I was guessing they are this pigmented. This will be the one thing that will be changing the game of eyeshadow I think. Sure there are duo chromes but Makeup Geek hits hard with their stuff and this won't disappoint I'm confident of that.
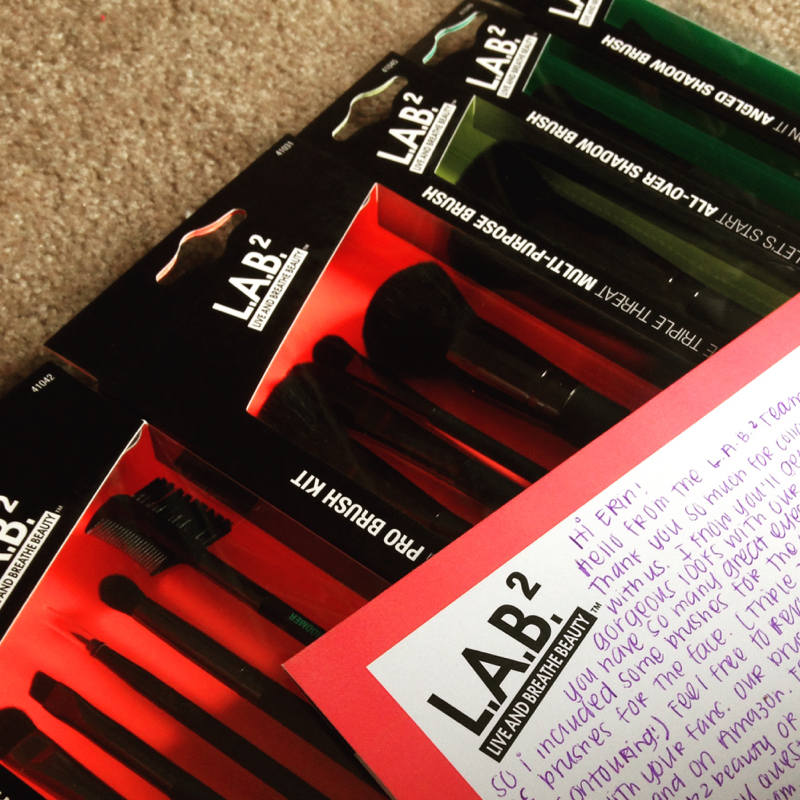
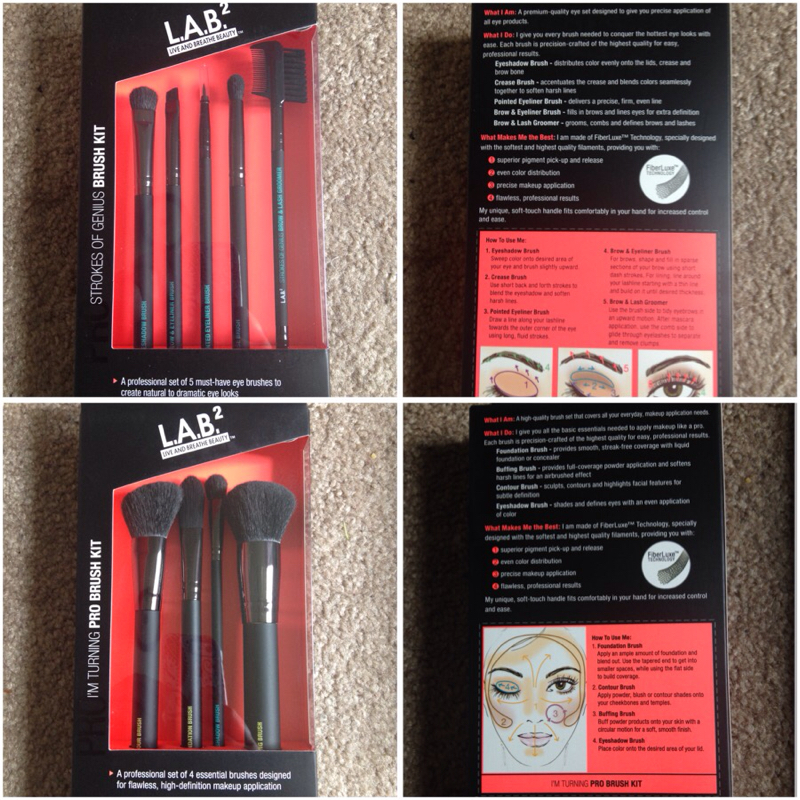
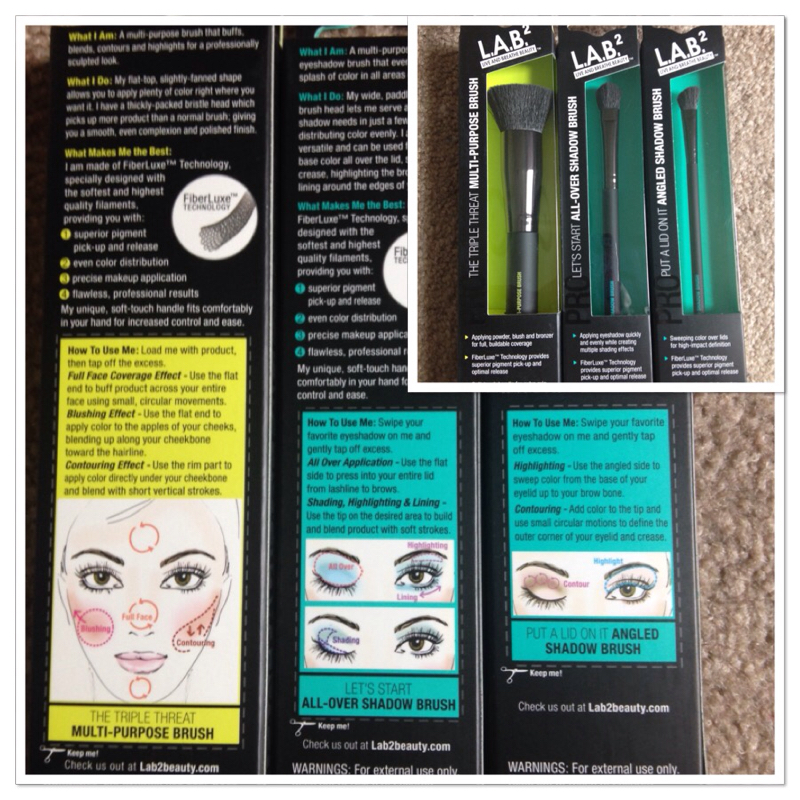
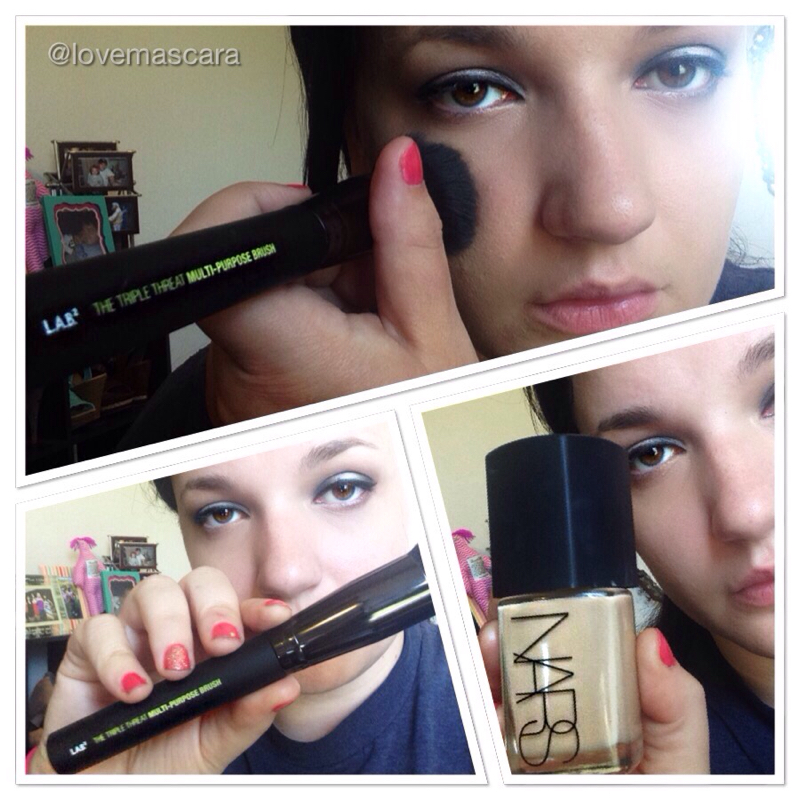
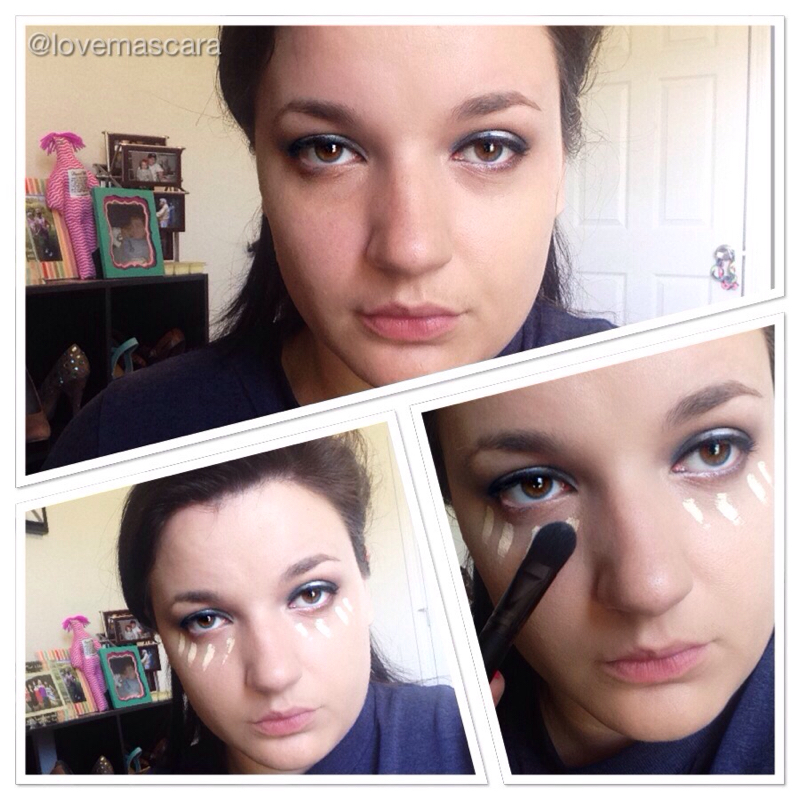
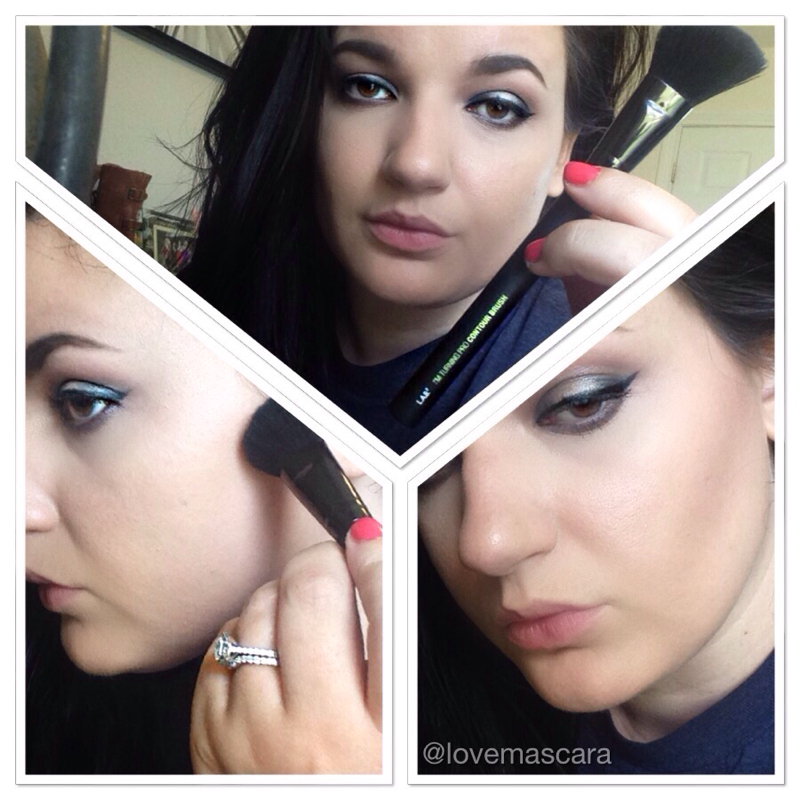
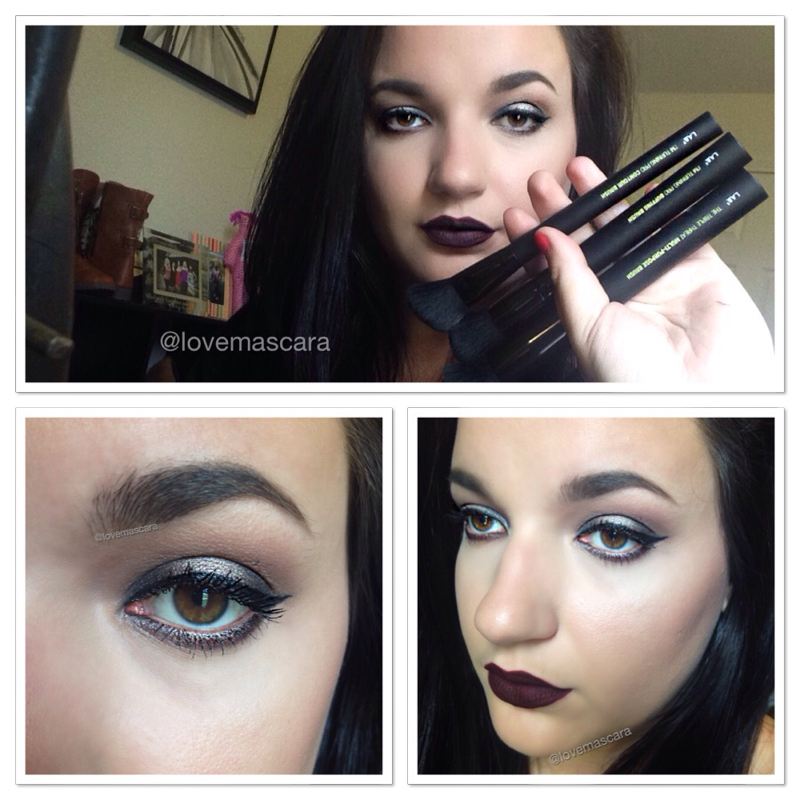
There's a new brush in town.......and they're pretty dang fabulous if I do say so myself. Let's talk about L.A.B 2 Beauty shall we? Alright. I was lucky enough to receive some brushes from the company this week and I must say I'm really impressed! These brushes are available at Walmart and Amazon. Which is one thing that makes them so great. I love Morphe and Sigma but it's nice to have good brushes at your closest Walmart. That way you know what you're buying. First I love the packaging. The brushes DON'T MOVE in the box, they're tucked into a foam like base so they won't get tossed around. That's really helpful, when you open them, open the bottom and press from the bottom to get the brush out of the foam without tugging the top of the brush and potentially damaging the hairs. The back of each box has a "How to use me" card that you can cut out and keep that has diagrams of how to use the brushes and where. I love how they are made, they are a soft matte black handle that's easy to hold and grip for better "controlled movements". The brush is soft on the skin. They're made with "FiberLuxe" Technology that make them transfer product easier, applies color more evenly, blends nicely, so on so forth. The first two sets are: Strokes of Genius Brush Kit ( $20 ) and I'm Turning Pro Brush Kit ( $22 ) In the Strokes of Genius Brush Kit you get 5 eye brushes: Eyeshadow Brush, Crease Brush, Pointed Eyeliner Brush, Brow/Eyeliner Brush, Brow and Lash Groomer. I used all of these today and they are really nice. I used the shadow brush to sweep an all over color from brow bone to lash line. The crease brush is really similar to the Makeup Geek crease brush. It's tapered and dense as opposed to a fluffy blending brush. It works great for really darkening up a crease as well as blending. Because it's tapered and more dense though you're going to get a lot of pigmentation with it, so be sure to wipe it off some if you're using it to buff out a color after you've applied it or use a fluffy blending brush instead. The pointed eyeliner brush is very cool! I like using an angled brush to do a winged liner but I used this today just for kicks and it worked really great. You can get the tiniest line or the thickest line whichever you prefer because it is needle point thin at the tip. This would also be great for "makeup art" using it to detail would be amazing. If you're into lip art using this for designs and precision detailing would be ideal. I'm very impressed with this brush. The brow and eyeliner brush is great for both. I used it today with my Dip Brow Pomade to sculpt my eyebrows and it was awesome. I used the Brow and Lash Groomer to buff out and blend the sculpting on my brows. Worked amazingly well. In the I'm Turning Pro Kit you get 4 brushes: Foundation Brush, Buffing Brush, Contour Brush, and Eyeshadow Brush. The Pro Kit is probably my favorite off all these. The foundation brush is a bit thin I feel to use for foundation so I actually used it for concealer under the eye and it was so soft. It was really more like an airbrushed finish. It didn't "pack on" a ton of concealer but it packed on just enough to leave a really light silky feeling. If you want more coverage then blend with your finger by tapping. The buffing brush is SO soft. I love this brush. It's great for the buffing technique I talked about a while ago, that Wayne Goss had spoke on. I used this to buff out contour, blush, to apply setting powder and buff that into the skin. The more you buff the more smooth and airbrushed your skin looks. It's quite impressive. The Contour Brush is my new favorite brush. It is angled, it looks like a mini blush brush but it's the perfect size for contouring your cheekbones. I used it with my Kat Von D Shade Light Contour palette. It deposited color nicely along with blending it out smooth and not patchy at all. You get a smaller eyeshadow brush in this that again, is great for sweeping a wash of color on the lid. These three brushes are: The Triple Threat Multi-Purpose Brush ( $12 ) Let's Start All-Over Shadow Brush ( I think is $8 ) Put A Lid On It Angled Shadow Brush ( I also think is $8 ) The Multi-Purpose Brush I used for my foundation. It's a flat top kabuki which, as you know, is what I love to use to apply foundation. It gives full coverage and packs on color. You could easily use it for contouring, blush, or powder. I really really liked this. I used a Sigma F80 flat top kabuki which is a little denser but this works just as well. The All Over Shadow Brush is a bit larger brush. You could use this to even set the under eye concealer if you used it lightly enough. It can be used for highlighting the brow bone or all over lid color. The Angled Shadow Brush is a smaller angled brush. I love these to do brow bone highlighting. They're a little denser so if you want a brighter highlight this is great. It's also good for outer V definition of the eye. I'm sorry I didn't get any pictures of me doing my eye makeup with these brushes but I actually filmed it and it wouldn't focus. All the eye makeup you're seeing was done by the eye brushes though, even the eyeliner and brows. I did use a pencil brush in it and fluffy blending brush from Morphe but other than that it's all L.A.B brushes. Here I'm using the NARS Sheer Glow foundation with the Multi Purpose Brush to stipple my foundation on. It was fast, soft, and worked perfect. I didn't have any loose hairs stuck to my face from the brushes shedding which is always a great plus! Here I'm using the Foundation Brush from the I'm Turning Pro Kit to blend out my concealer. I'm using Urban Decay Naked Skin Weightless concealer. It didn't pack on the concealer it blended it out very nicely. The top picture is no concealer and obviously the other ones are me blending it out. Like I said above if you need heavier coverage then use your ring finger and tap the concealer into the skin. This set of pictures is using my baby. The contour brush. I freaking love this brush. I didn't have to blend it barely at all. It done all the work for me. I didn't have on any blush, bronzer, highlighter, or anything before I used this. This brush fit's perfectly to carve out a cheekbone. I love it. I can't get over it. It's my favorite of allllllllll of them. It's not a harsh contour. If you want a harsh contour I would use the Multi Purpose brush edges. Here's the finished look. I used Urban Decay Naked 2 palette on the eyes for a gunmetal silver look. I used LA Splash Cosmetics lip couture in Vampire on the lips.
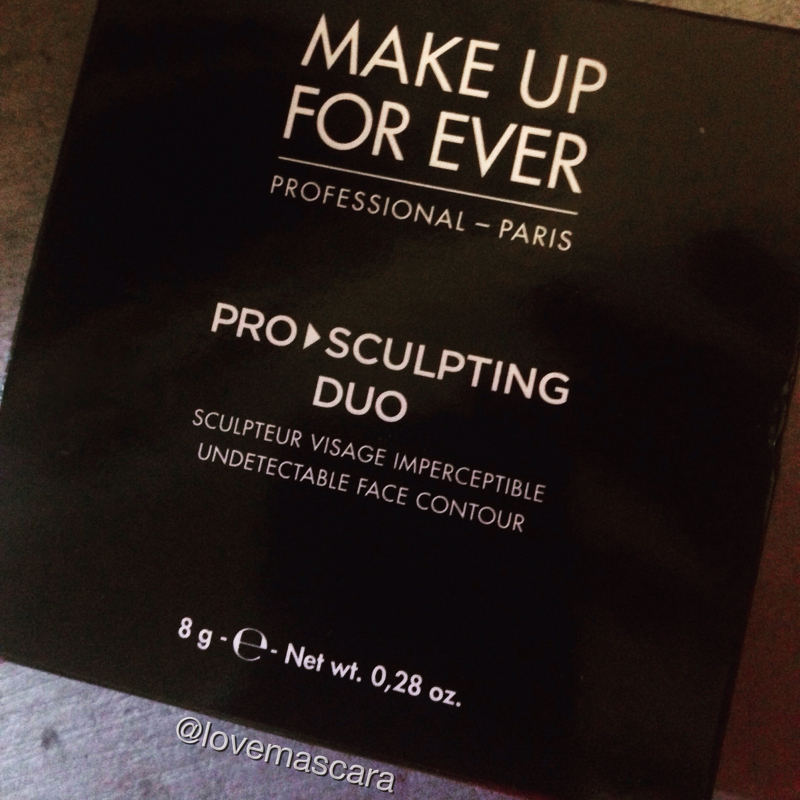
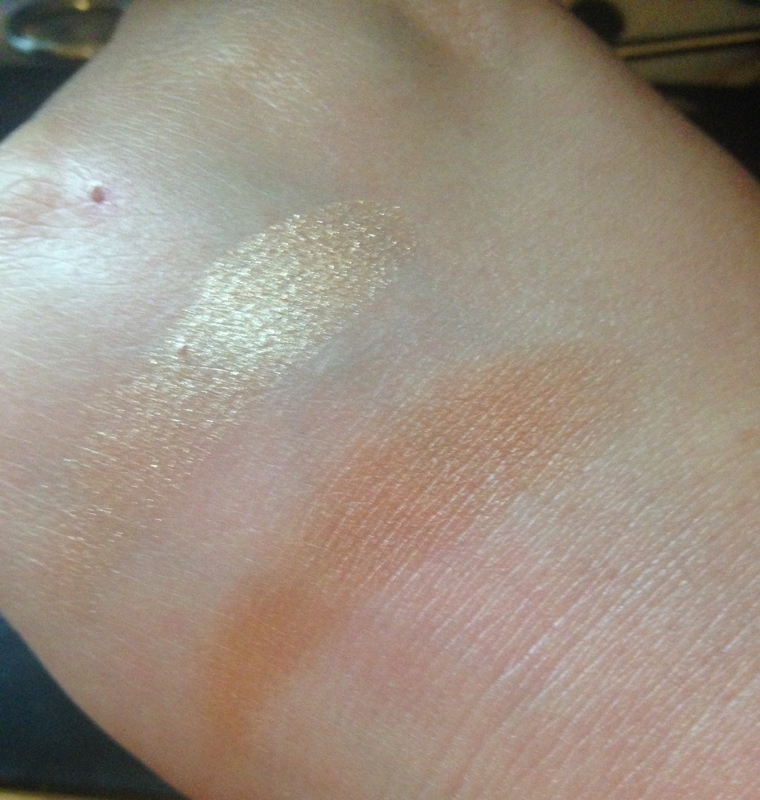
These brushes went above and beyond for me. I always get nervous trying newer brushes because I've had expensive brushes be a piece of crap before (seriously all the bristles fell out of one of my brushes all at once from a brand whose brushes shouldn't be doing that) but these delivered. They didn't shed, they blended, and there are more out there than just the ones I received. You can buy them at Walmart, on Amazon, and at L.A.B 2 Beauty. Check them out. I will be using them for my looks to come. I will also be using them for lip art and eye art. If you want my advice on what to choose, I'd definitely start with the face brushes they are my favorite. **I was not paid to make this post. I was sent the brushes but I wasn't paid to talk about them, and these are my honest opinions. Woo Hoo we hit 40,000 views kids!! Yay!!! As always I want to say thank you to my Heavenly Father first, for blessing me so immensely and I also want to thank those of you who have made my blog apart of your day or daily routine, weekly routine, whatever. I really appreciate it. We have some really awesome opportunities coming up that I can't wait to share with you. Now on to the review!! 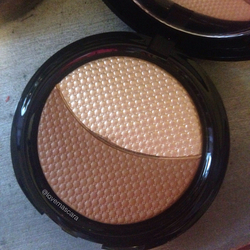 I recently caved and bought the Makeup Forever Pro Sculpting Duo in Shade 2. I got mine from Frends Beauty you can also find it at Sephora. It's been out for a few months now. All I've heard is good reviews so I was like "why not give it a whirl". What I can say is that, although I didn't care too much for the Pro Bronze Fusion that I recently reviewed, this was some better. It's not my favorite thing but I think it's just not something I'm into. It's not a bad product just not for me. So here's my issue with it. The highlight is very pretty but just like the Bronze Fusion which I can only assume is made in the same manner seeing as they have the same design, texture and both seem to be from the same line, it's hard for me to transfer this onto the face. It swatches just fine but to transfer it with ANY brush is an issue. It does transfer some, just not as I feel it should. The bronzer in this is actually WAY better than the Bronze Fusion. It transfers really nice even better than it swatches and my only problem is that it's quite warm. I wouldn't contour or sculpt with this product. I feel like that's not a good advertisement for it. I would simply highlight and bronze for a glowy summer tan look.
I can't say that this is a great product cause I'm just not the biggest fan of it for myself. I don't think the Pro line (if it even is a line) from Makeup Forever is for me. I LOVE Makeup Forever don't get me wrong but so far I've been less than impressed with the Pro Bronze Fusion and the Pro Sculpting Duo. Lots of people love them though and just because I don't doesn't mean they're bad, go swatch them and try them out for yourself.
Here on my blog, you see a lot of lashes. From expensive to cheap. Synthetic and mink. (hey that rhymed!) I love lashes because my lashes are thin. They're kinda short too but my biggest issue is that they're thin. Not that I don't embrace that and most days if I'm just running errands or doing this or that I'm not wearing false lashes. Maybe if me and my husband are going on a date or if I have an event coming up that's for my blog or makeup work I always try to look as good as I can and lashes are a part of that equation. I'm not saying they're for everyone or that you even NEED to wear them. Two of my friends have beautiful lashes that are so long and wonderful that false lashes would honestly take away from their real ones in an everyday situation. To each their own though. If you wanna wear lashes girl then hit it wide open. If you prefer not to that's completely fine as well. There are no rules in makeup, and if there are I break them on a regular basis I'm sure. On to the differences. Mink Lashes:
Synthetic Lashes :
These looks are with some of my favorite drugstore lashes. My favorite lashes ever are Red Cherry Lashes 213's. I can wear them everyday. People don't always notice them and when they do they're so natural looking that they think it's my real lashes. Ardell Wispies are another cult classic and a favorite of mine. Good lashes for a bride as well if you don't want minks. I use synthetic lashes on clients usually. Because the price is like $3-$5 tops. Where mink lashes are so much more. If I'm gonna wear lashes all day it's normally my 213's the band is shorter so my eyes never itch and I honestly can't feel them. They are super natural though. They're so natural that my best friend can't wear them cause her real lashes are the exact same length as they are. Which she was has gorgeous lashes so there ya have it. Also it's worth mentioning that I don't buy dramatic styles in synthetic lashes because they are too intense in my opinion. So here is a a few pairs of mink lashes with different looks. As you can see they differ in style some are thicker and heavier, some are more natural, some are cat eye looking. I've had these lashes for a while. My favorite brand is Lena Lashes. So those are the ones I'm showing for this. There are tons of other brands out there that are good though ie: Velour Lashes, Luxy Lash, Nubounsom, Flutter Lashes so on so forth. I'm showing Lena Lashes because they genuinely are my favorite but they run sales all the time on their lashes. Like for the entire month of June they are 50% off with code "save50". That's a great deal. Most mink lashes will run you anywhere from $25-$40 sometimes more. I love mink lashes. Especially for the final touch on a look. If it's a dramatic look mink lashes are so complimentary to it. Having said that, I can't always wear mink lashes all day long. They tend to be a little heavy or can really itch the corner of my eye. They also can come unglued through out the day. I blame that again on if they're heavy. They aren't all heavy. Some are light as a feather but the thicker more "stacked" ones are the ones that can weigh you down a little. Now there are some styles that I can wear all day no problem just not all of them. They look amazing though. Even the most dramatic styles somehow can look so in place, and fit the look so well. That is the part that makes them necessary. Especially for a wedding day or if you're a makeup artist just getting started. Get a pair and wear them a few times to get used to them . The thing you want to be careful about is when you're taking off excess glue from the band. Pulling to hard can rip the lashes out because they're handmade mostly. Glue doesn't come off a cotton band like it does a synthetic band either so keep that in mind too. It's a little more work. So here's my final thoughts: I wear synthetic lashes on the daily if I want to. I know they'll stay on I can't feel them to the point that I almost forget to take them off when I wash off my makeup. However for dramatic looks and especially for artistry, or for really special occasions where you want to really get that attention like "wow look at her eyes" I would choose minks any day. They are the best at doing that.
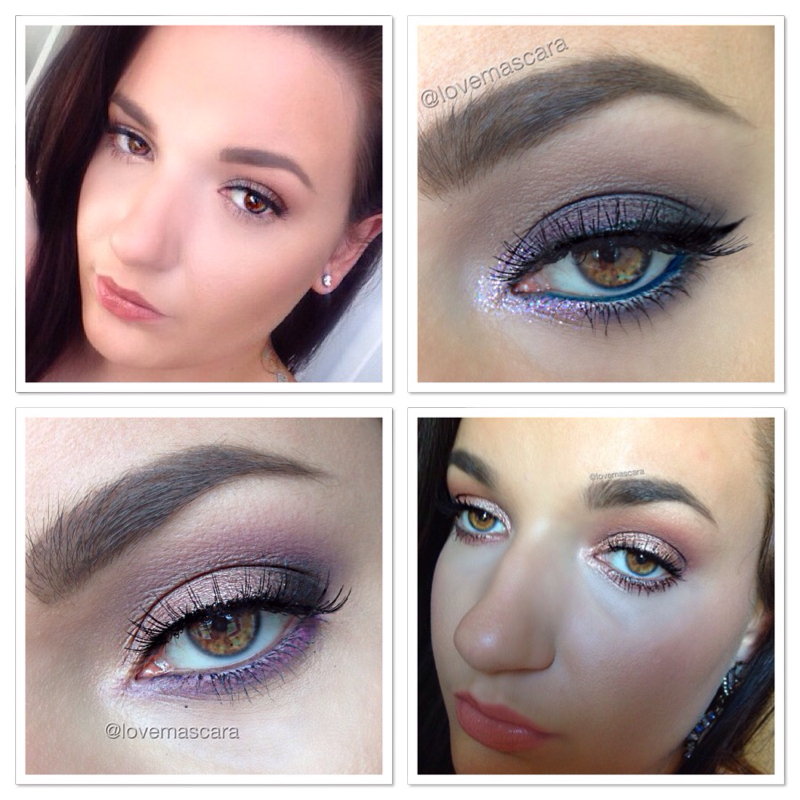
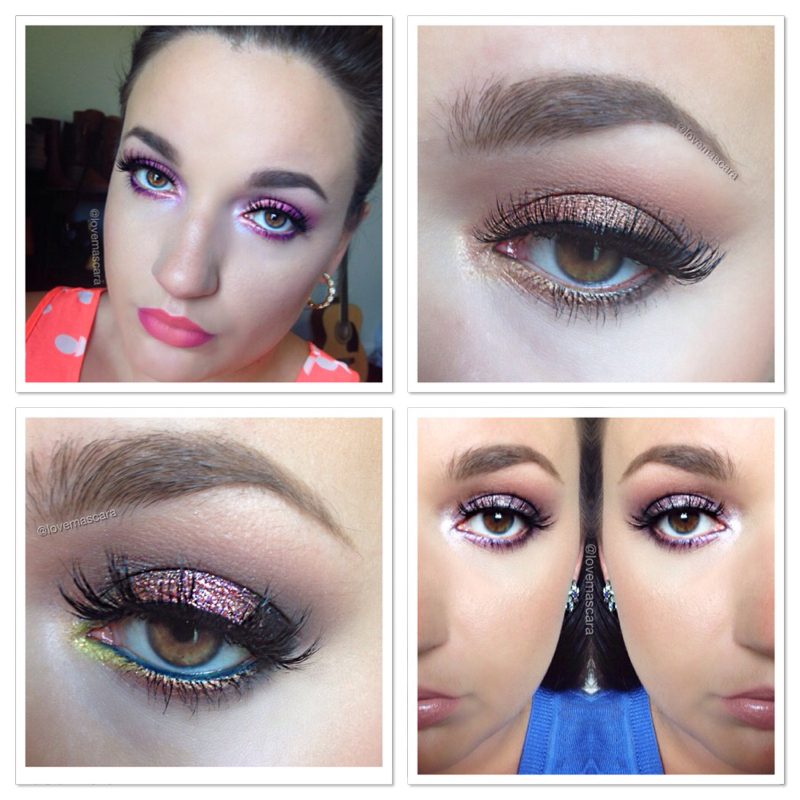
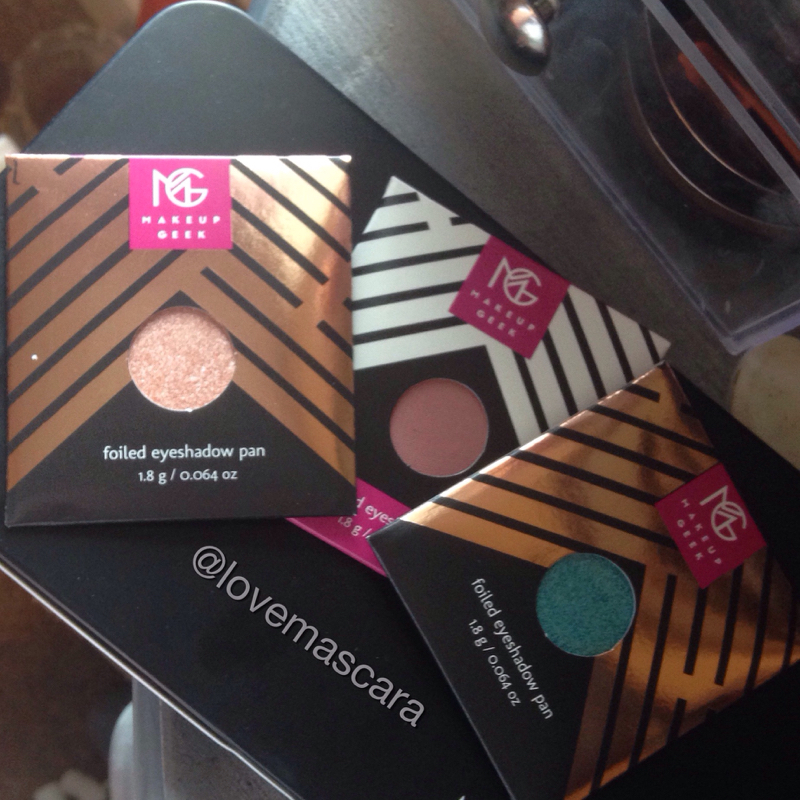
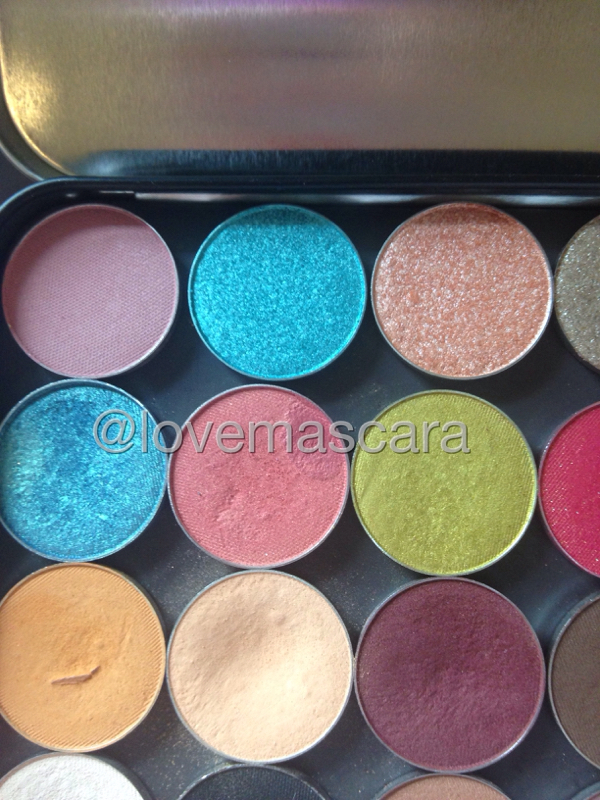
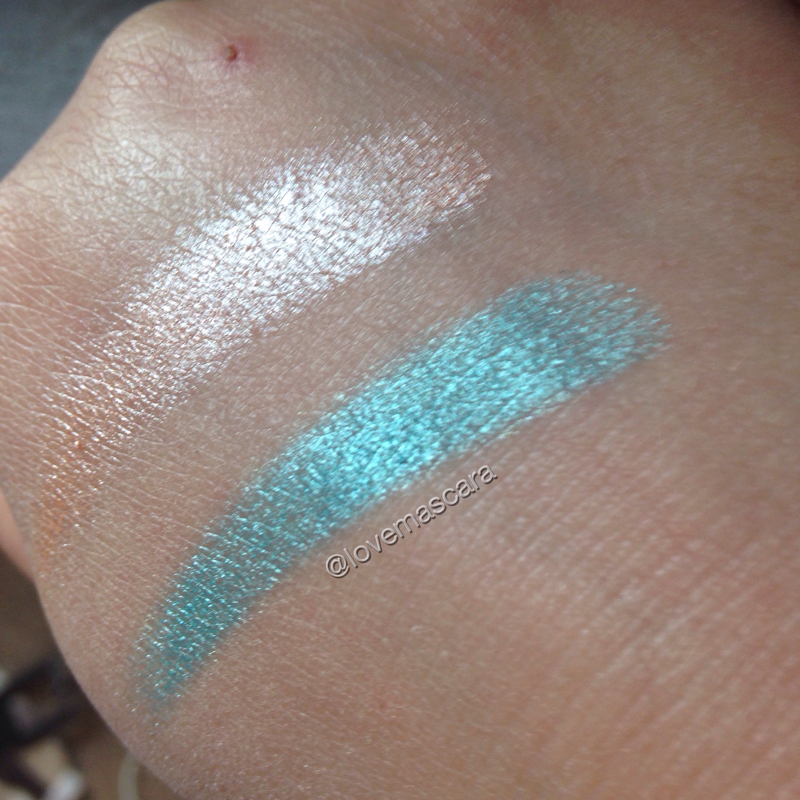
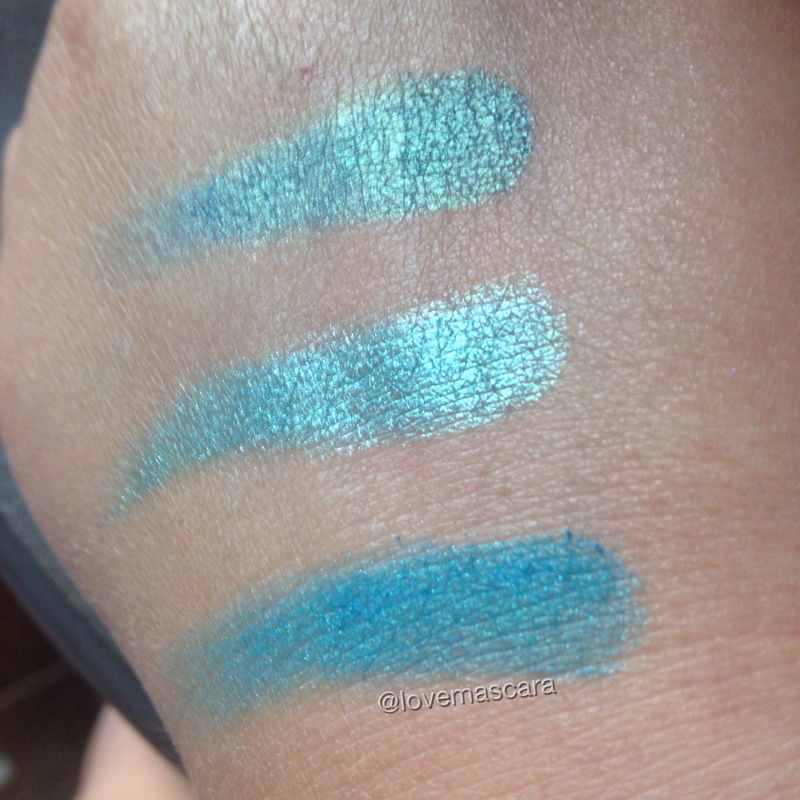
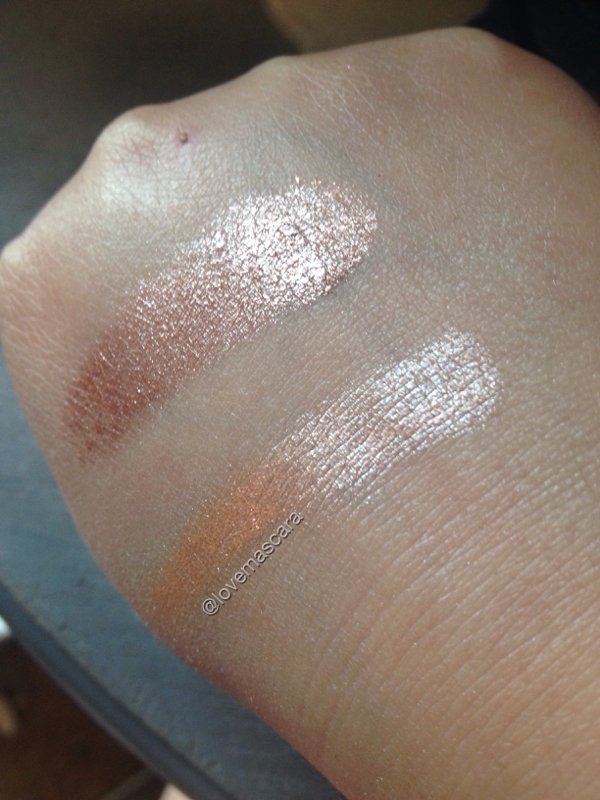
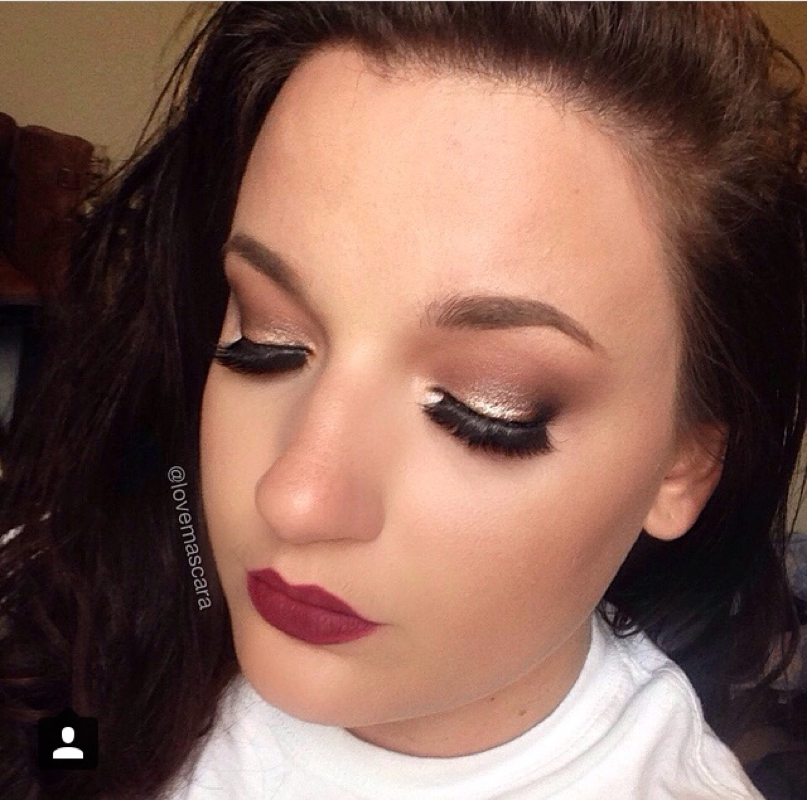
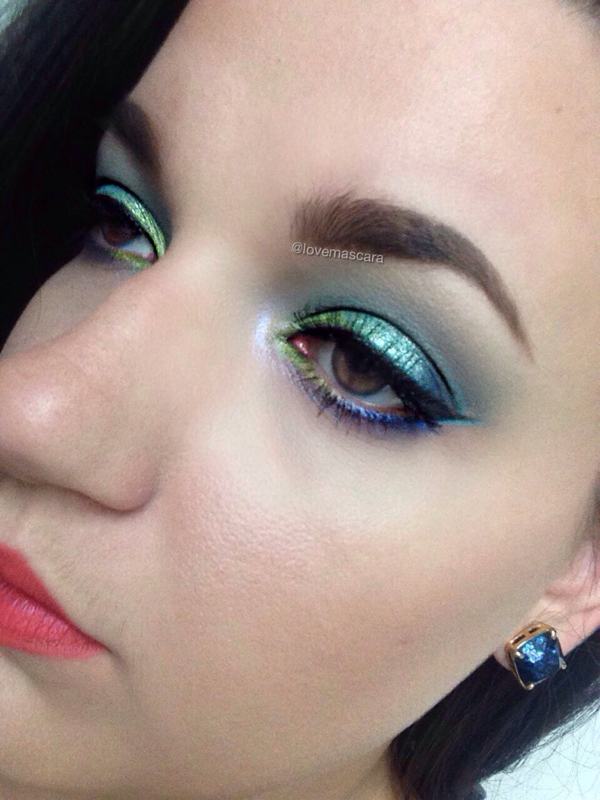
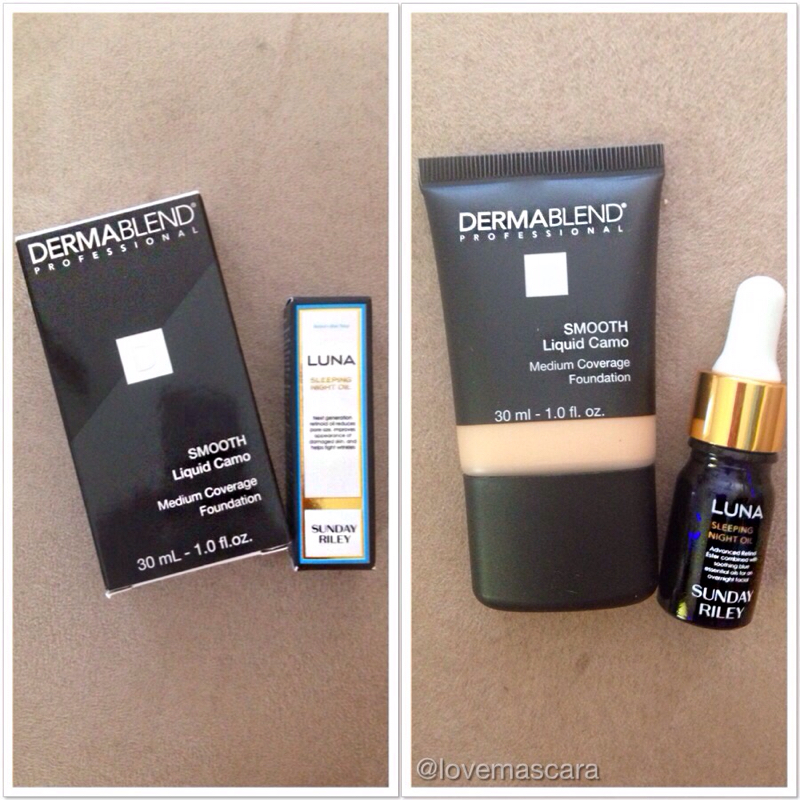
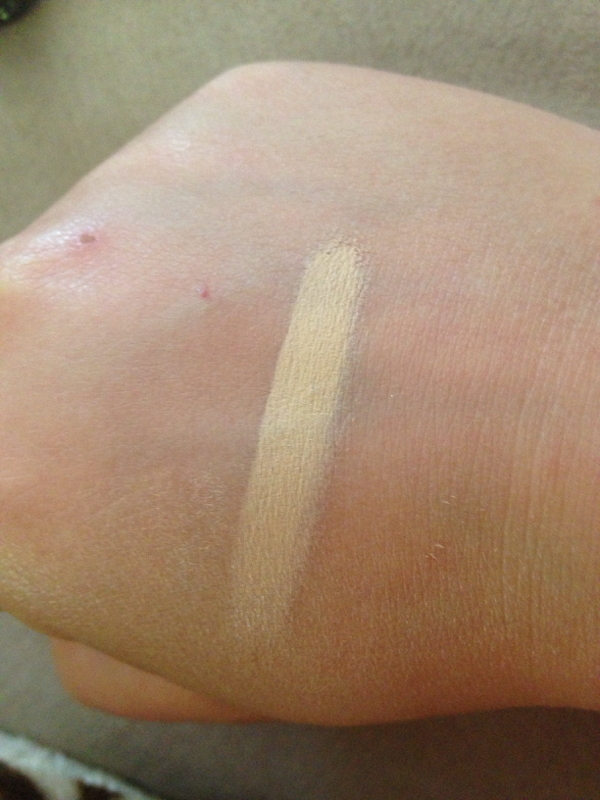
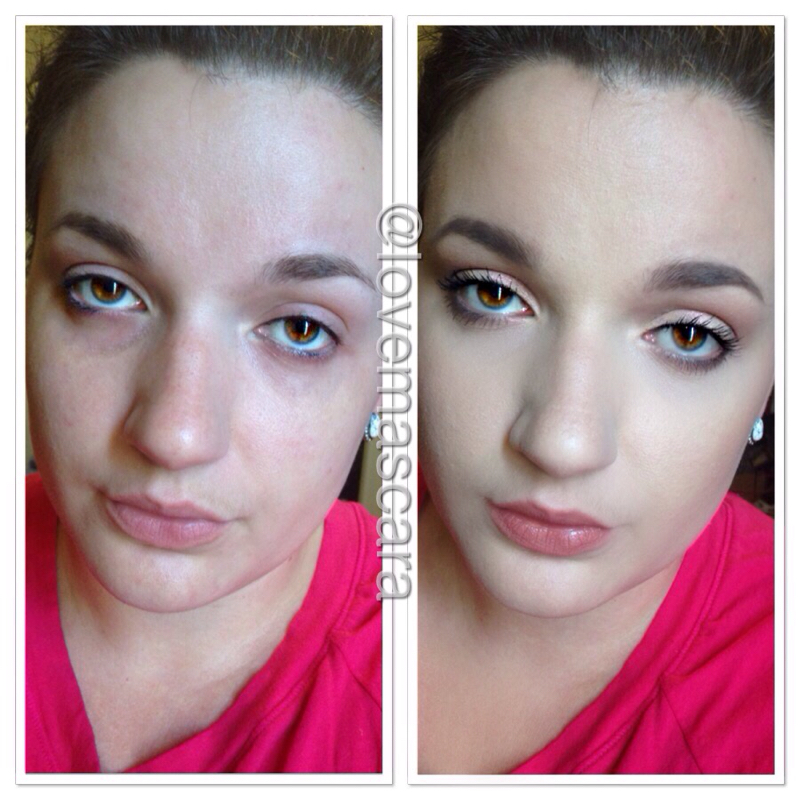
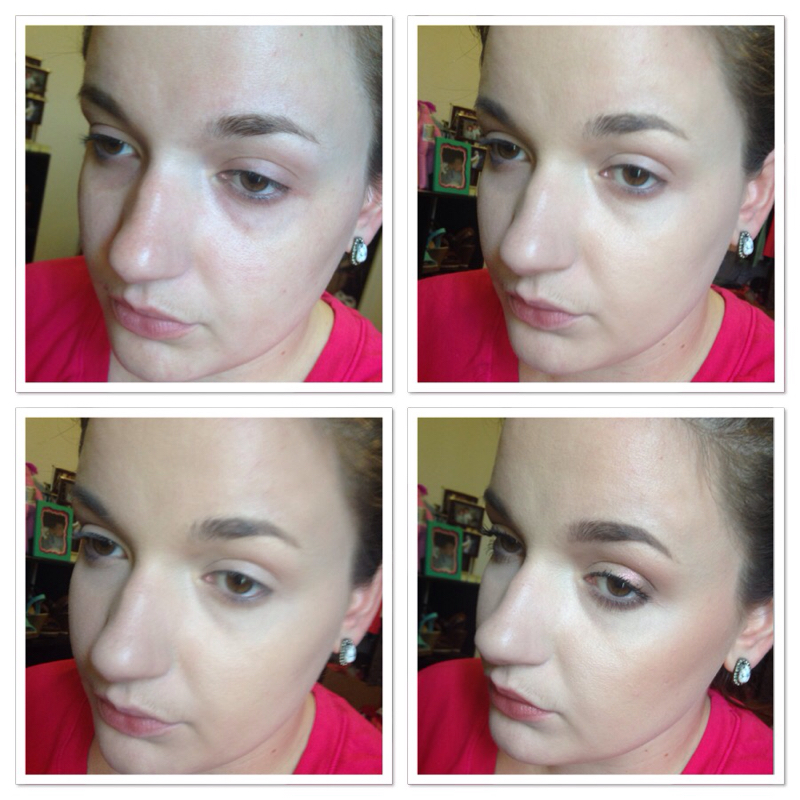
If you watch Youtube beauty vloggers, or are in on all the makeup looks on social media, you've probably heard about Makeup Geek's new foiled shadows. The foiled shadows aren't necessarily new but they just released new colors a few months ago and I finally picked some up. I avoided the first batch because they just didn't have anything I was DYING to have. The spring/summer collection though, was a whole different story. As you know I love color. Anything bright and bold is what my life is all about. So to see such bright and fun colors in this crazy formula I had to get some. The above picture is two foiled and one regular shadow. I'm still working my way to an entire palette of just Makeup Geek it's about half MUG half ABH right now. So I picked up another neutral shade that I had been wanted which was Cupcake. It looks very underwhelming but when I see it used in looks it makes such a difference. The foiled shades I got where In The Spotlight and Pegasus. You know I had to get that crazy blue. Here they are in the top row the first three: Cupcake, Pegasus, and In The Spotlight As you can see from the pan Pegasus and Mermaid (1st shadow, 2nd row) look so similar. In The Spotlight on top and Pegasus on bottom. This is without primer or any base for that matter and on unfortunately dry hands. I had just gotten out of the pool. Top to bottom: Mermaid, Pegasus, and Poolside. Now all three are different formulas, Poolside is kinda matte but with glitter/shimmer in it. I'm sure that someone would correct me on that. Mermaid is metallic with a golden duo chrome almost. Not sure if it's a duo chrome technically but definitely has gold in it. It has a lot of dimension none the less. Pegasus is like Mermaid without the gold and has the "foiled" look which mimics aluminum foil or what I think is a wet look. Super intense and shiny. So they're all similar in tone with Poolside being a little different I guess. Just different formulas. Which kinda bummed me out because when I was playing with them on the eye Pegasus was really really similar to Mermaid so much so that it almost looked the same just with no gold. However which the "foiled" action really kicks in that's what makes it different. My advice is choose one or the other. Choose Mermaid if you want something that's a little different since it has gold in it and is a unique shade of blue. Pick Pegasus if you want that bright bright turquoise pop, or super shiny look. These swatches are to show you anything remotely close to this color that I already have. The ONLY thing I had in my whole arsenal that could compare just slightly was Loreal Amber Rush pressed pigment. Sure there are shimmer shadows in this shade but none that have a foiled look to it. Amber Rush is darker though and not as creamy a formula as this is. In the Spotlight is more of a pale peach but it almost looks silver on the eye kinda depending on what it's paired with. The formula of these are very soft and buttery feeling. They are INTENSE. I compare them to the Anastasia Beverly Hills Titanium line. I will say thought that these are better. These stick to the lid better in my opinion and keep their intensity or "foiled" look instead of fading when transferred. I like the Titanium shadows don't get me wrong but these are better I won't lie. They're also comparable to Loreal Pressed Pigments. Again not as good a formula but close to the same price point. The Anastasia Titanium shadows are $12 or $13, the Loreal Pressed Pigments are anywhere from $8 to $11 and these are $10. So I would choose these everytime. I ordered these on Monday I want to think and I just got them Friday. That's actually kinda long for Makeup Geek. I normally get their stuff in like 2 to 3 days tops. This was actually more of a wait than I've had in the past. I don't mind that though. This look is with In The Spotlight. Cupcake is in the crease, along with Mocha and Chickadee. Corrupt is on the outer corner. Which is what I think brings out the silver in this color. Had it been all warm tones I think it would've been more of a peach cast. This look is with Pegasus. It's a lot going on I know but Pegasus is in the center of the lid. It's also underneath the wing. I used an angeled brush and wet it with a misting facial spray and applied Pegasus with it just underneath the wing. I got the new Dermablend Smooth Liquid Camo foundation the other day from Sephora. I was drawn to it first because of the price ($35) cause lately all I'm seeing is $40 and $50+ foundations. Secondly, I was drawn to the fact that is was "Medium Coverage" as one of the selling points. Now I think this is interesting because not many foundations will advertise that they're less than full coverage and if they do they use the word "sheer" or it's a "BB Cream". So I watched some reviews on it and looked up some swatches and seen that just like most Dermablend products it was highly pigmented. Which is what I think is so cool. It's medium coverage and highly pigmented. Which to most people highly pigmented is another term for full coverage. Sure it can be. This is legit medium coverage. It's more thin, it literally looks like your skin, it doesn't have a makeup look to it. The pigment is actually "Camo Pigments" which is apparently a real thing and not a term. On the box it says "Contains Camo Pigments, a high level of pigments in a super blendable formula for amazing coverage that looks like skin, not makeup." It definitely does that. Most foundations actually have very little color pigment in them actually. Some only around 10%. Kat Von Lock It Foundation has 21% pigmentation where as RCMA which is full blown "on set" makeup has 50%. I'm not sure what the percentage is in this but it seems very high for medium coverage which means less is more. This foundation is suitable for: Rosacea, redness, hyperpigmentation, acne scars, and birthmarks. It works on most skin types including sensitive skin. I'm not sure it would be best for oily skin. It provides all day hydration but it has a "matte finish". I feel it's more of a satin finish though because it really does look like skin and I've never noticed real skin to look "matte". The picture above it's pictured with Luna Sunday Riley sleeping night oil. I got a sample of it in my Sephora order so that's why it's in the picture. I got shade Cream. I like my foundations more yellow in tone. I just find it works best to counter the pink in my face. I love the color I'm very happy with how well it matches. Being medium coverage thought you can probably get away with a shade or two off what you need because it's very blendable. This might have been a touch dark when I put it on my face but after blending it, it was perfect. This is the before and after shot. I had a lot of redness that day and so it was a great time to test it. I used mine with a kabuki brush a Sigma F40 to be exact, but it actually says to use your fingers or a sponge. I do think a Beauty Blender would be amazing with it but I'm afraid would make it even less coverage. Maybe not, but in general damp beauty blenders soak up excess foundation and sheer out foundation somewhat as you apply it to make it look more airbrushed. These four pictures: Top Left: No Makeup Top Right: foundation Bottom Left: under eye concealer Bottom Right: the rest of my makeup (blush, highlighter, bronzer, mascara, brows, some shadow) This is today's look. It's my full blown makeup look. Some foundation you can use as apart of a natural makeup routine or a minimal makeup routine, then for more dramatic looks you require a full coverage foundation. This is a foundation that works for both. Above is a minimal look, this one is a more dramatic one and it works for both I think.
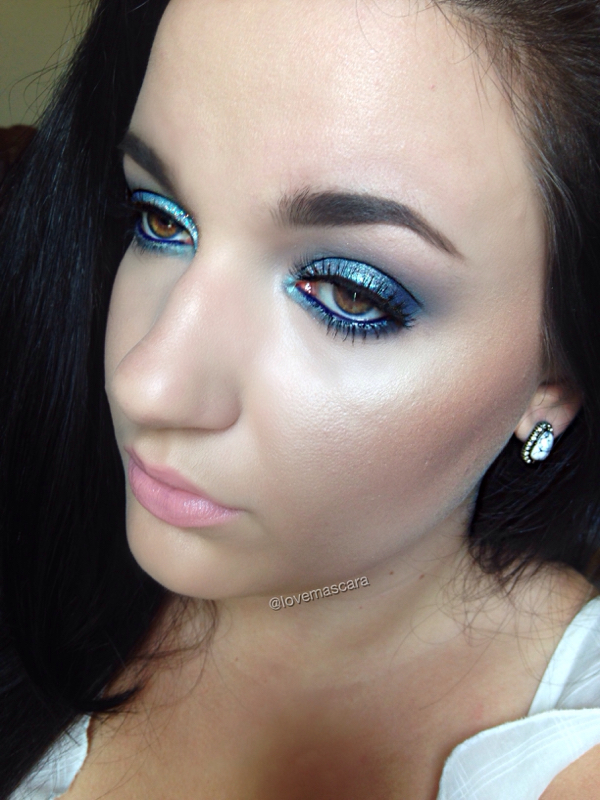
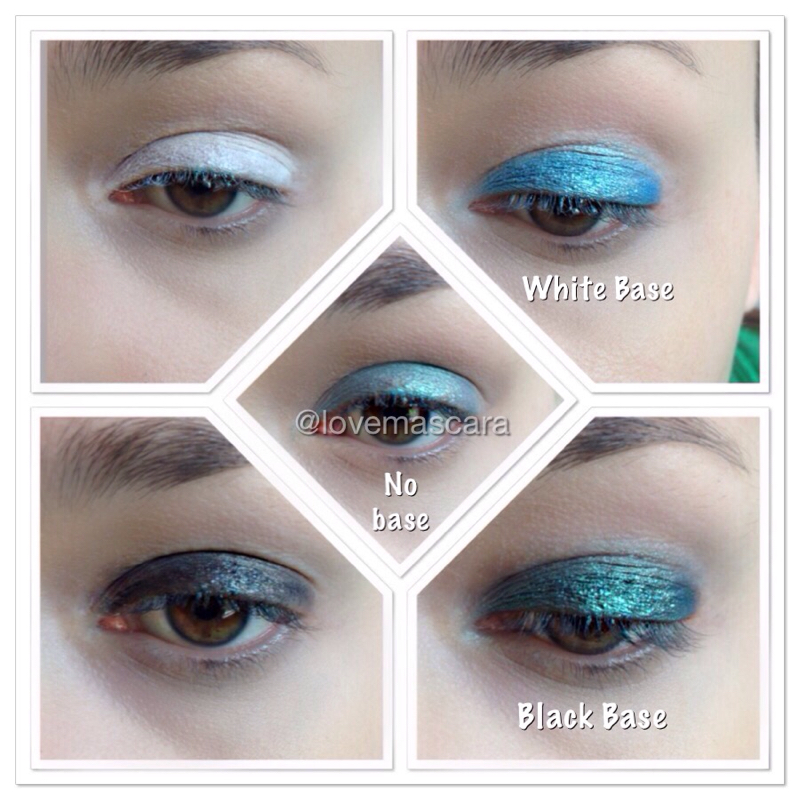
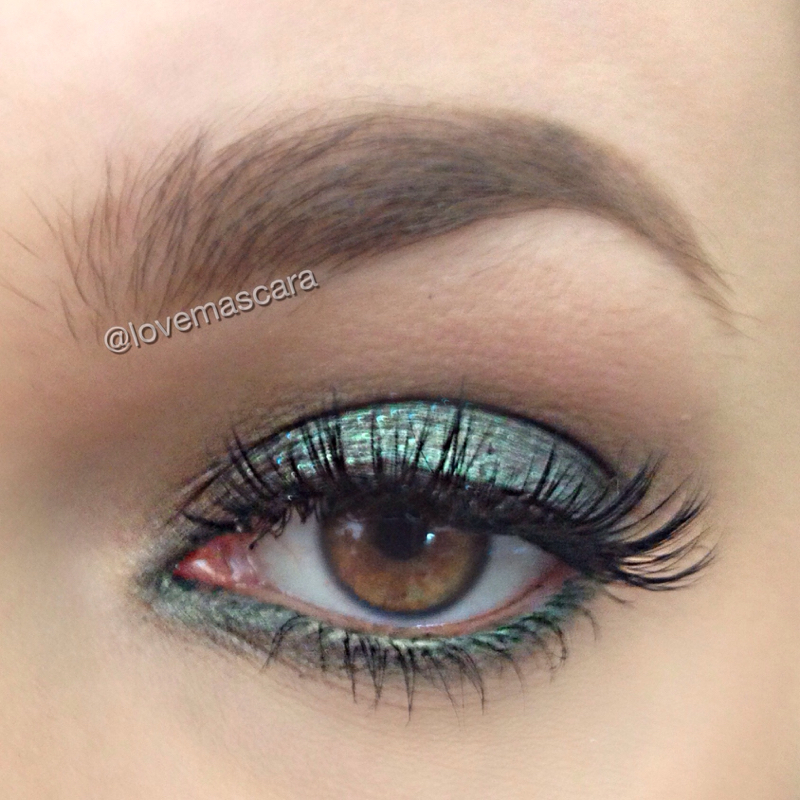
I think a really good makeup "tip" is using a "base" for your eyeshadow other than skin tone. I seen recently that Samantha from Batalash had mentioned it in a video what the difference was between using a white base or a black base. I had been wanting to do this post for a while but when I seen that video this week I thought now was as good a time as any.
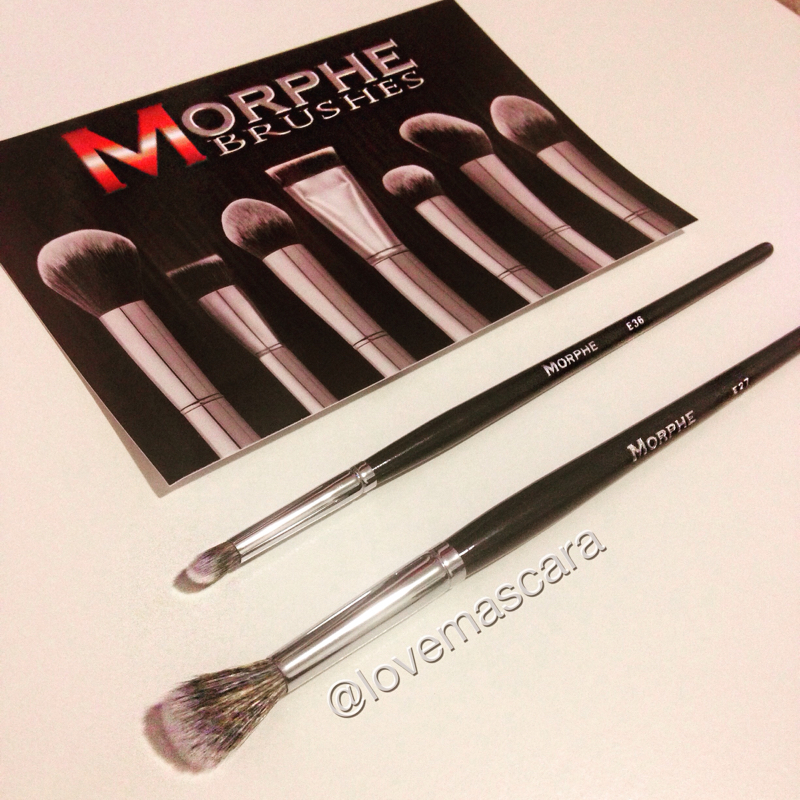
Obviously you don't have to use just White or Black, you can use what you want. White and black is just the most versatile Luxy Lash is having a killer sale right now. It's 40% off your order. I really like their lashes I thought I'd show you some styles. The first style is Woke Up Like This the second one is Hollyhood which is my favorite style. Looks like it wouldn't be that wearable but honestly I could wear them everyday. They're 29.99 regularly and with 40% off that makes them 17.99 which is great for mink lashes. Use code "summer" at checkout to get your discount. I was going to wait until I actually got a few more of these before posting a review but I just have to talk about them. Oh my gosh. I got these on the recommendation from Manny MUA. I wanted to try some Morphe brushes anyway but when I learned these were only limited edition I decided to get these asap. So I picked two of the ones he really loved. I always feel like you can never have enough blending brushes or pencil brushes. So thus, that's what I got. |
ErinI'm from Tennessee. I'm a makeup and skincare lover. I have always enjoyed creating looks but I love to help people with product knowledge and application even more. I've been able to start blogging and do these things I love because God has seen fit to bless me with the opportunity. Thanks for stopping by and visiting with me! Categories
All
Archives
January 2022
|


 RSS Feed
