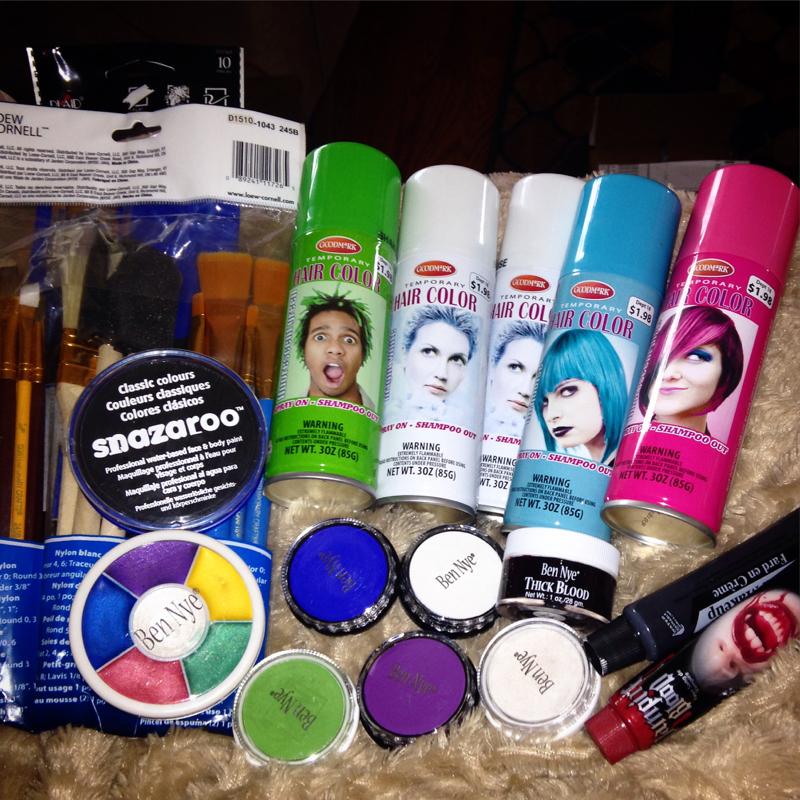
 I have been collecting Halloween makeup and what not for about 3 weeks or so. I had some from last year but this year I really stepped it up. Last year was my first time really experimenting with sfx or artistry, I wasn't sure how to go about it and so I just got a lot of Wal-Mart halloween makeup to just see how it went. I really loved it and it became a great outlet for me so this year I got some legit stage makeup and sfx things So I got artist brushes to not ruin any my actual makeup brushes. These are inexpensive. I ordered them from Amazon but you can get some in the craft section at Wal-Mart, at Hobby Lobby or Michael's. Or any craft store I would assume. I got several colored Hair Sprays from Wal-Mart again, you can also get them from Frends Beauty that are probably a little better quality. I got a bunch of Ben Nye products: Cream colors in Blue, Violet, and White. Aqua Cake paints in White and Lime Green. Thick Blood. A primary color wheel. I love the Thick Blood for SFX wounds it's amazing. I like the Aqua Paints really well too. The cream colors I'm on the fence with they tend to smear on me and I lose my coverage. I'm going to use them for a Corpse Bride look this week though so that will be the real test. I got all the Ben Nye stuff from Frends Beauty. Snazaroo face paint in black. This I apply with a wet sponge. I really like it. It's huge and it's not very expensive. I got mine from Amazon and I think I'll get the other primary colors in it. Vampire Blood and black cream paint from Wal-Mart. I use the Vampire Blood because it's thinner so to have a dripping look or to have smeared blood look. The black paint is helpful with sfx as for "charred" looks. It not good for actual face paint though. Way too patchy and sheer. 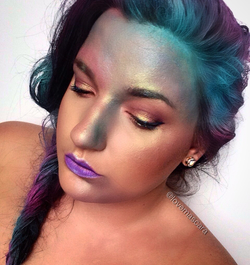 This look is using the hair sprays. I used white first on my dark hair and just hit it with the colors over top. I didn't want it to entirely cover up my dark hair but I wanted the colors to stand out I used White, Blue, and Pink.  This look is a broken doll. I used Ben Nye cream paint in White and Aqua Cake in white over top to make it more opaque. Snazaroo black paint for the broken part. Liner for cracks and detailing. The blue eye is just an app because I didn't want to get actual contacts. I'm afraid of unknown contact brands, contacts in general make my eyes burn and water.
0 Comments
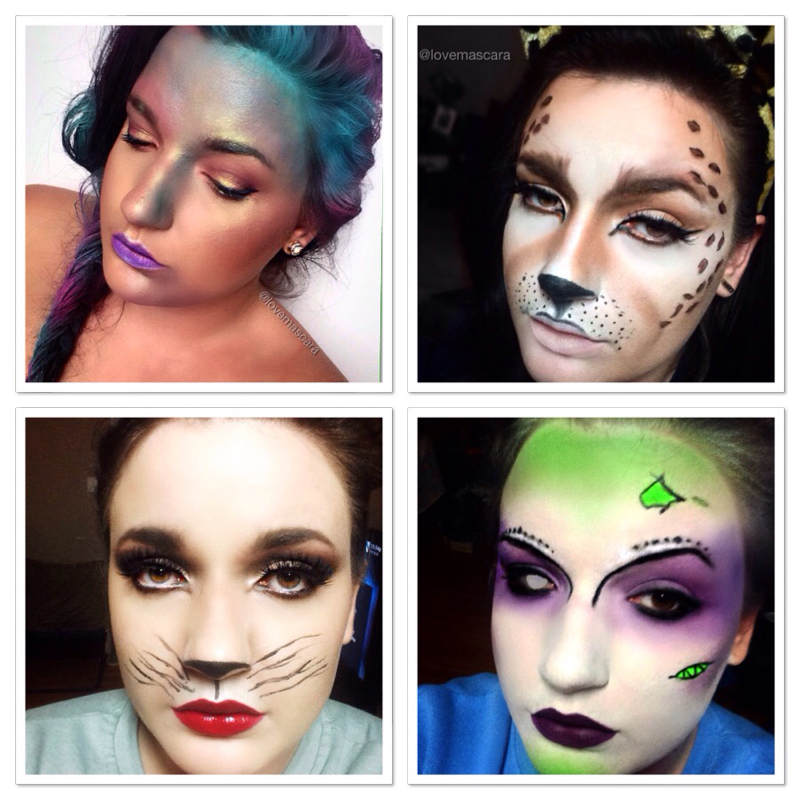 ITS TIME!!! Thursday is the first day of October!!! I was going to wait until October 1st to officially start doing halloween looks butttttttttt as you can see that didn't happen. I'm too excited and honestly it's a good outlet for me, I thoroughly enjoy creating and re-creating looks any time of year. So some of these are inspired by Pinterest and some are looks I just threw together. So top left: Mermaid Barbie. This is actually using a lot of duo-chrome and foiled shadows. I didn't do scales or anything cause I wanted her to be iridescent and majestic. I used colored hair spray. I sprayed the braid first with white spray and then went in with pink and blues. It was actually really easy just pile on the blues, greens and purples.....lots of highlight. Top Right: Leopard/Cheetah Cat This was a little more difficult. More detailing there are alot of different variations of this online to look at. Basically lots of contour colors, browns, and liner. White paint was laid down first on the face before anything else. Bottom Left: Cute Kitty This was actually on Pinterest. I loved it super simple and great if you want to be a cute little cat for a party. Red lips was a fun turn to it as well. Liner for detailing and whiskers. Fluffy lashes and a really heavy brown smoky eye. Bottom Right: Beetle Juice inspired. This was a look I found on pinterest although that one was far better. It's from an artist Alana Dawn on Instagram. It was an amazing feminine Beetle Juice look. Requires lots of white paint, purple shadows, neon green, a dark lip and liner for detailing. 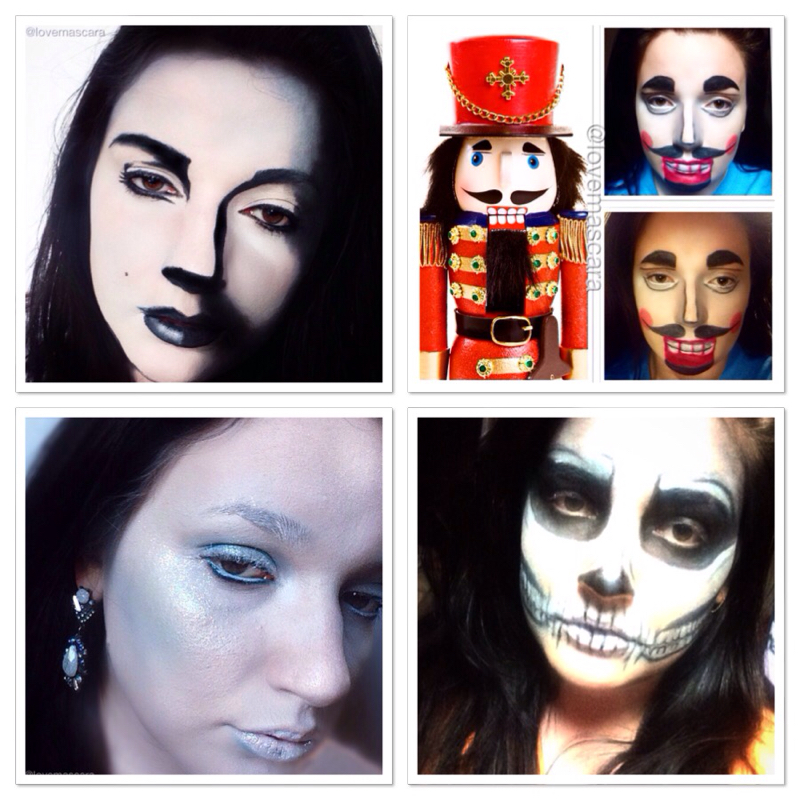 Top left: Drawing/Sketch This was something I seen on Pinterest. The had done Marilyn Monroe. I obviously don't look like Marilyn Monroe. This is lots of white paint and black shadow and gel liner. It's pretty easy. You just look at a picture and where the dark areas are like shadows, or whatever on the picture you just shade your face in that area as well. If that makes sense. Top Right: Nutcracker This was something really cool. I don't know why I wanted to do a Nutcracker look but I liked how it turned out. It's a lot of strategic and symmetric detailing. It has to be very neatly done so that makes it difficult somewhat, however if your comfy with that then it's easy and fast. Bottom Left: Ice Queen You always see a lot of Ice Queens or Frozen queens. Nicole Guerriro done one a while back that was beautiful. I wanted mine to be completely frozen. Everything about her just cold and statuesque. I added glitter to this one for extra and sparkle like ice statues. Pale blue shadow as contour or blush, which ever. Bottom Right: Skull You see a lot of skulls around this time. Skulls are hard in my opinion. It's a lot of detailing and time consuming. This was inspired by a male artist who does insane SFX makeup. I don't remember his name but it was amazing. 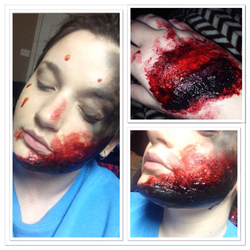 For gory looks I use Ben Nye Thick Blood and tissue paper for texture. I also add in some black paint or shadow before hand if I want it to look charred or burnt. Pink if I want it to look fresh and I also use liquid blood from Walmart if I want it to be runny. These are actually really easy to do but messy. So if you want to just be something scary and gory get some Thick Blood or Fresh Scab and you can have a look in no time. I'll be coming up with some looks for you to do. Like deers, scare crow, so on so forth. I'm so excited. Get ready for Halloween overload.
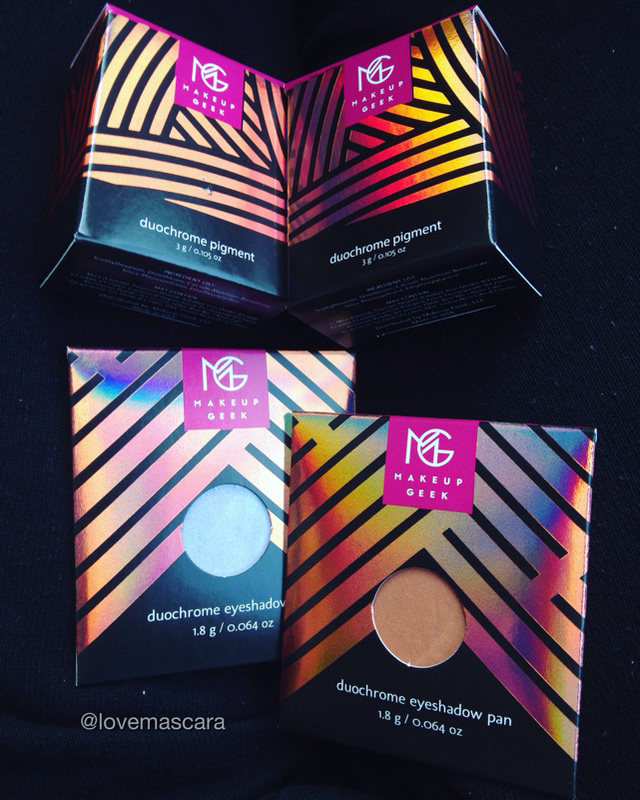 The day has finally arrived. I now have some of the Makeup Geek duo chromes. These released on the 17th I believe, and I got mine today the 24th. I already had one (Insomnia) which is a permanent pigment but they added it to this line as well. I didn't swatch it though and I meant to. So the duo chrome line is 12 pressed shadows and 8 loose pigments. The shadows have stayed in stock pretty well but the pigments have been selling out like crazy. They've been really good about restocking them fast though. I got two pigments and two shadows, to test them out. The shadows are $6 the pigments are $12. 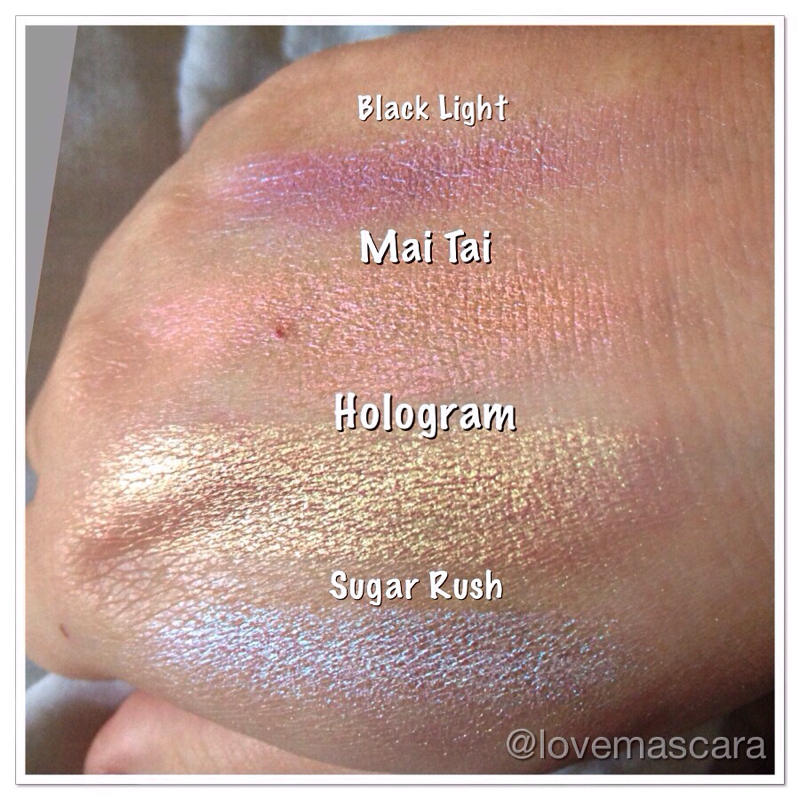 The top two swatches are the shadows and the bottom two are the pigments. So far my favorite color is Hologram which I wanted from day one, so no surprise there. Sugar Rush I haven't yet found out the best way to use it. Using it on it's own is very pretty but very bright and white cast so the duo chrome doesn't hardly show through as good. However using it over another color like Pixie Dust makes it look very very cool. So it's all in what you pair them with. Mai Tai is really really wearable and beautiful, you almost don't realize it's a duo chrome. I think this would look so pretty on brides. Black Light is not as intense as I thought it would be, I was expecting like neon glow sticks type color. It's actually a really pretty blue-ish purple. I think this paired with Sugar Rush could be really neat. Hologram is in your face gold and coral and that's why I love it. The name is perfect for it. As of right now all the shadows are in stock but two of the duo chromes have sold out. Some other colors I'm interested in is Secret Garden, Wildfire, Chameleon, and Prism. If you want something that's not as intense then I would try the shadows, if you want something that is really gonna get people's attention and be the center of the look, get the pigments. 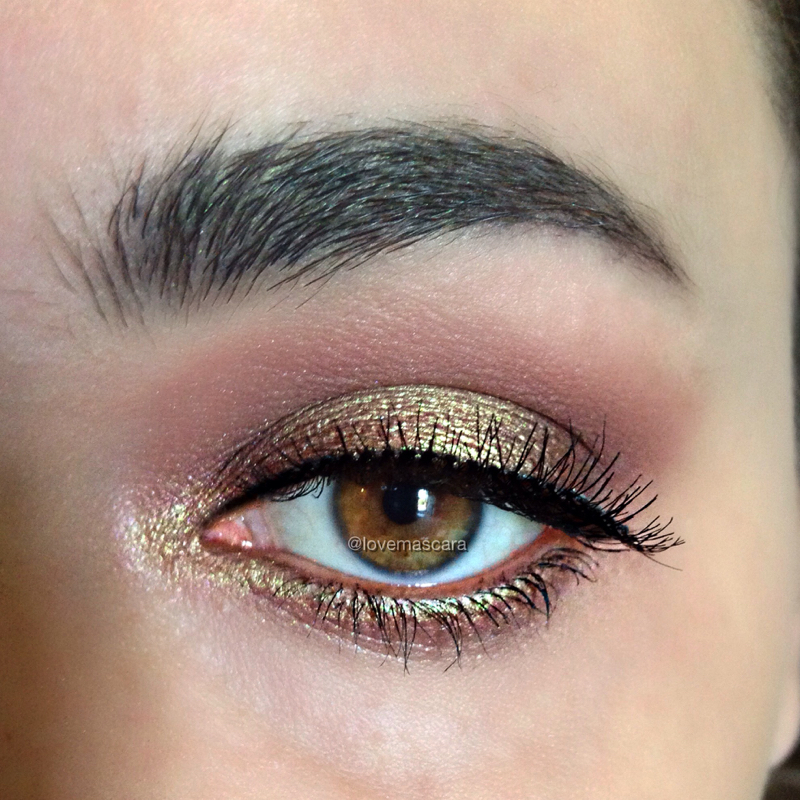 In this look right here I'm wearing Hologram with Mai Tai on the inner lid although you can't really see it because of the pigment. Not that I'm complaining. 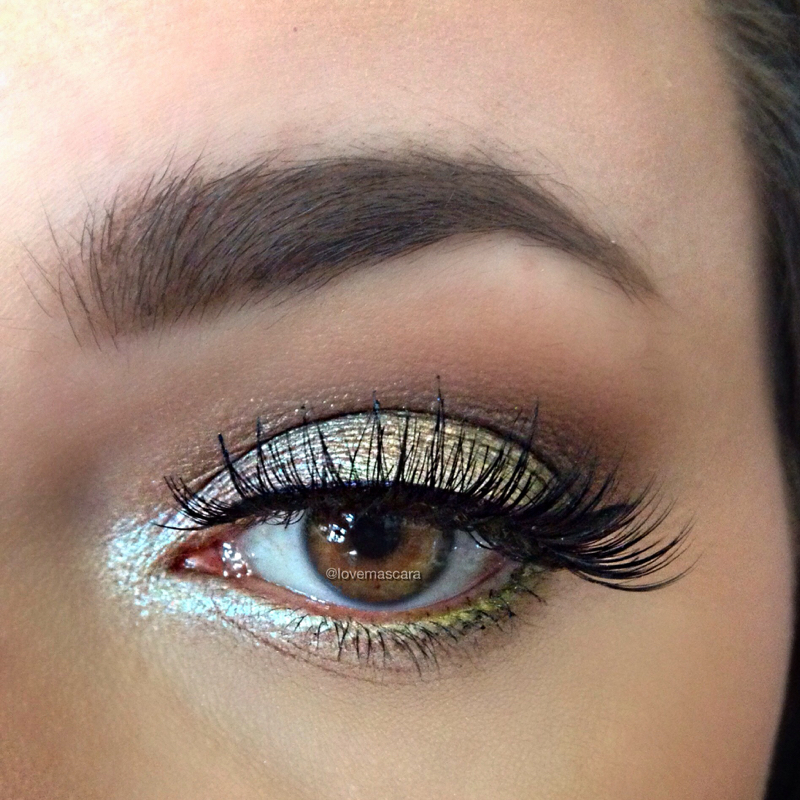 In this look I'm wearing Pixie Dust, Envy, Mocha, Peach Smoothie and Sugar Rush on the inner half of the lid it was too bright and not hardly as colorful as I was wanting so I added Hologram to the center over Pixie Dust. I will say that I applied these wet. You don't have to but I always apply my pigments wet. It does get far more intense that way though. I actually had to re-apply Pixie Dust over part of Hologram because it had completely covered up the colors underneath and didn't look blended. So keep that in mind as well. 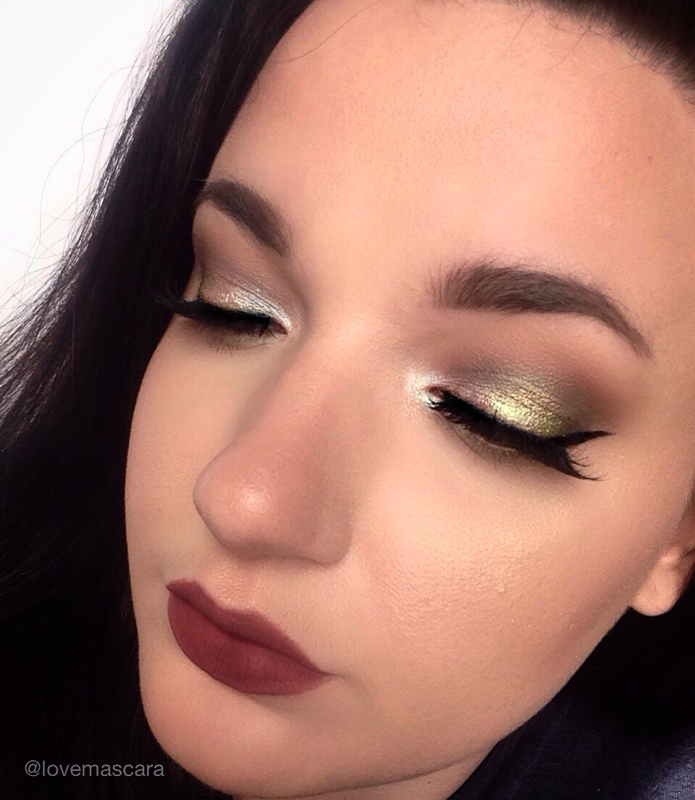 This picture I love because it looks like I'm wearing two different eye looks when I'm really not it's just the light catching the duo chromes. So as you can see they've done really well with the duo chrome effect.
I can say that I genuinely love these. I like the pigments more, but in general I do like pigments more than shadows most of the time. If I'm wanting that pop of color that is. If I want everything to be soft and even, then I stick to shadows. It's all in personal preference. I also used a little of Hologram on my Cupids bow but you can't really see it in this picture. So there you have it. That's my first impressions of these. There is a video of them on my Instagram @lovemascara so check that out if you're interested. 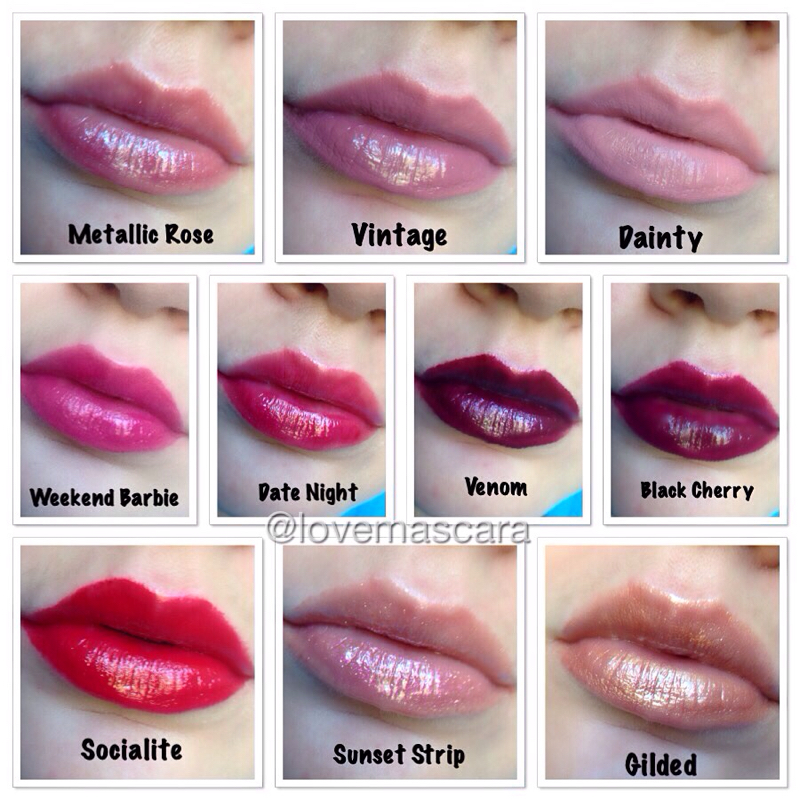 I recently got some of the Anastasia lip glosses. I know, I know, I'm late to the boat. I usually am not the biggest fan of lip gloss but right now I am. These are amazing, they smell like cup cakes. I will say that I like the more opaque ones as opposed to the lustrous ones. There is an awesome set available right now at Macy's you get 8 for $40. That's $5 a piece for full sized lip glosses that are usually $16. So check that out.
My favorites are:
Venom and Black Cherry are both very similar. Gilded is a really neat metallic gold. Metallic Rose and Sunset Strip are both very glittery and sheer. They would be your ideal gloss to go over a lipstick. As with everything Anastasia, these are very nice and I really like them. The formula is creamy, not thin and runny, but also not thick and clumpy so it's perfect basically. Vintage and Venom are not in the Macy's set, just FYI. So this was short and sweet wasn't it? It's just simple they're really great. 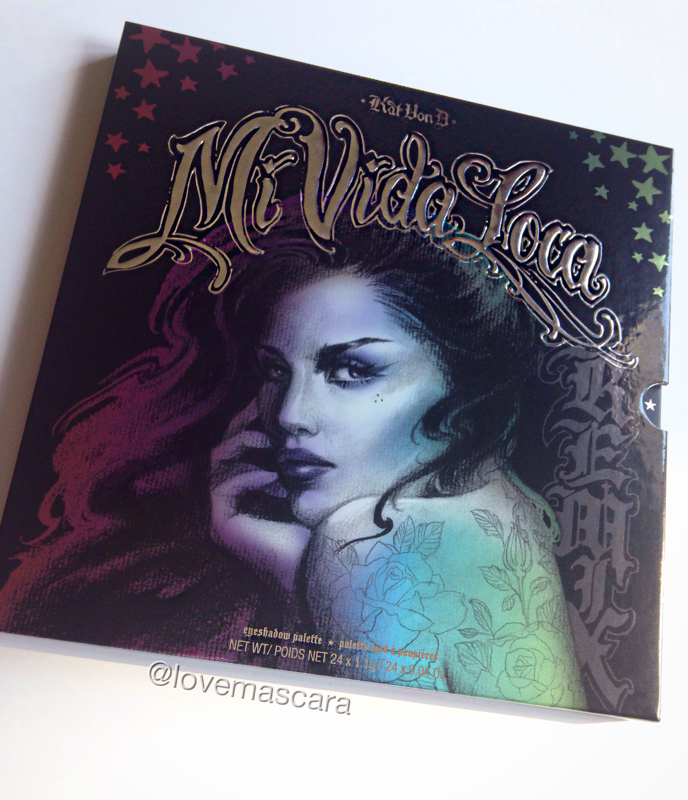 Oh my gosh, you have no idea how excited I am about this palette. This is the Kat Von D Mi Vida Loca Remix Palette. It released Tuesday online at Sephora. It's Limited Edition and part of the new holiday collections for this year. It's HUGE. I was surprised at how big it was. It's $59 and has 24 eyeshadows. Mostly mattes and about 1/3 of the palette is shimmer. In short, it's amazing. It's equally pigmented in every shade, it's bright, but has an inner wheel of neutrals. The packaging is super adorable and sturdy. Although it is big you get so much product that it's worth it. I love it. I'm in love with it. I can not say that enough. Color is my middle name though so you knew I would. 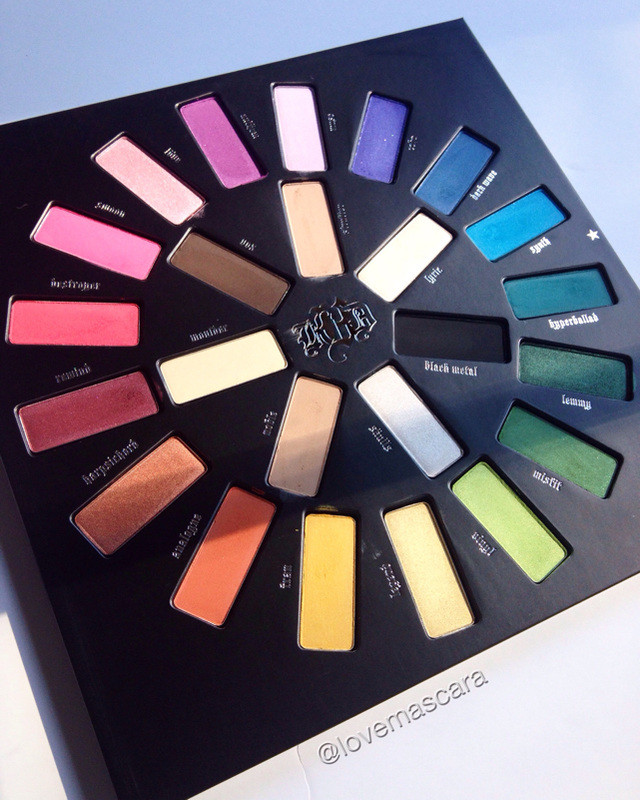 The idea behind this wheel is supposed to be a "vinyl record". It comes out of the cover like an old vinyl record would and the shades are musically inspired. What I love about this is that it's also the color wheel that we so often use. I done a whole post about how to use a color wheel for inspiration as well as canceling out colors and complimenting colors, this is so helpful for that! Instead of pulling up a color wheel for inspiration you just look at the palette and can see what shades are opposite each other on the color wheel and create a look according to what you want. It's genius! Kat Von D has slammed it out of the park this year as far as product goes. Everything she's done I'm amazed with and so impressed. She just keeps the makeup world on it's toes. This palette is a "remix" from the Mi Vida Loca palette that was 8 shades. Now it's bigger and quite frankly more bad ass. She done the artwork for it herself, naturally. It's just breath taking both the packaging and the product. 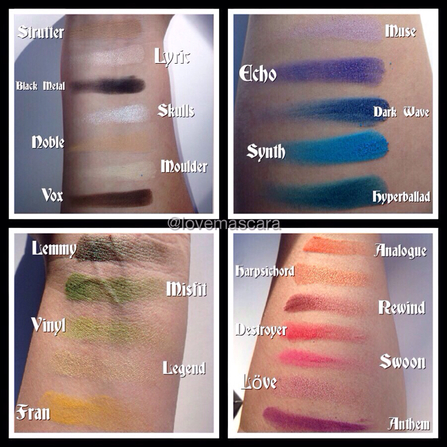 These are all the swatches. It has no primer under neath. The only shade that didn't show up well was Legend which is a pale gold shimmer that just didn't show up well on my skin tone. It's actually very pigmented. The shades are:
Every color on the color wheel is in this in a variety of finishes and brightness along with neutral mattes and shimmers to help you as well. I wouldn't think you would need any other palette's help because this has it all. If you want a nice warm crease you could use Analogue very lightly on a fluffy brush or mix Analogue and say Moulder together for a paler peachy color. Also the finishes layered on each other give a duo-chrome type effect. So it's very fun to experiment with. 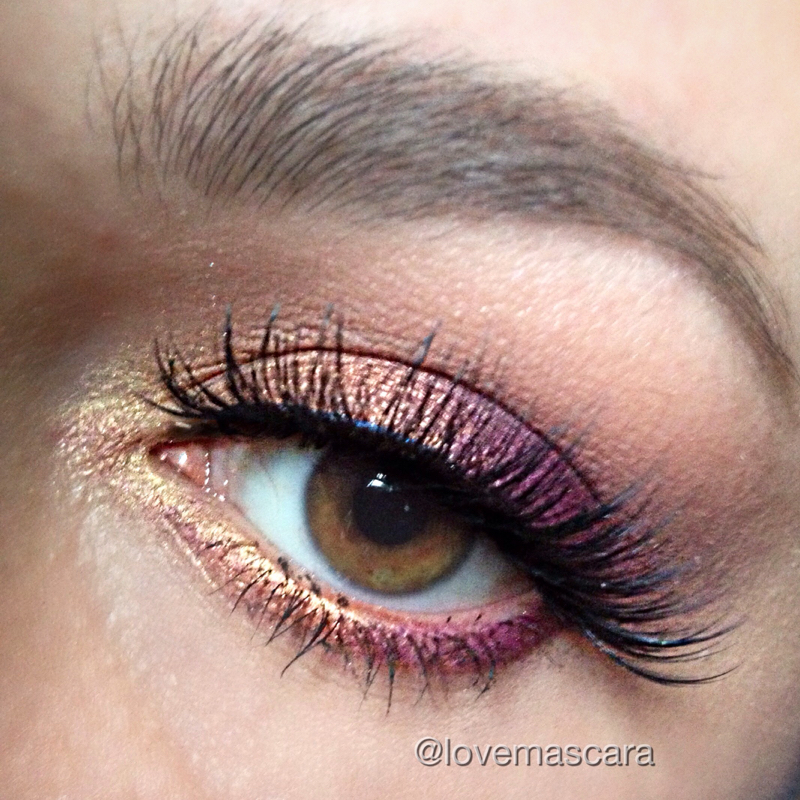 In this look I used Rewind first on the outer half and then Anthem on the center part. Then I layered Harpsichord and Legend over top to give a warm golden duo chrome effect. Analogue and Strutter are in the crease for transition shades and Lyric is my brow highlight. Lashes are Violet Voss "Vamptress" lashes. This was simple and the eyeshadows blended like a dream. They actually needed very little blending to be honest. They truly are a buttery formula. Color has never been so easy.
Check it out if interested, like I said it is going to be Limited Edition so when it's gone, it's gone. 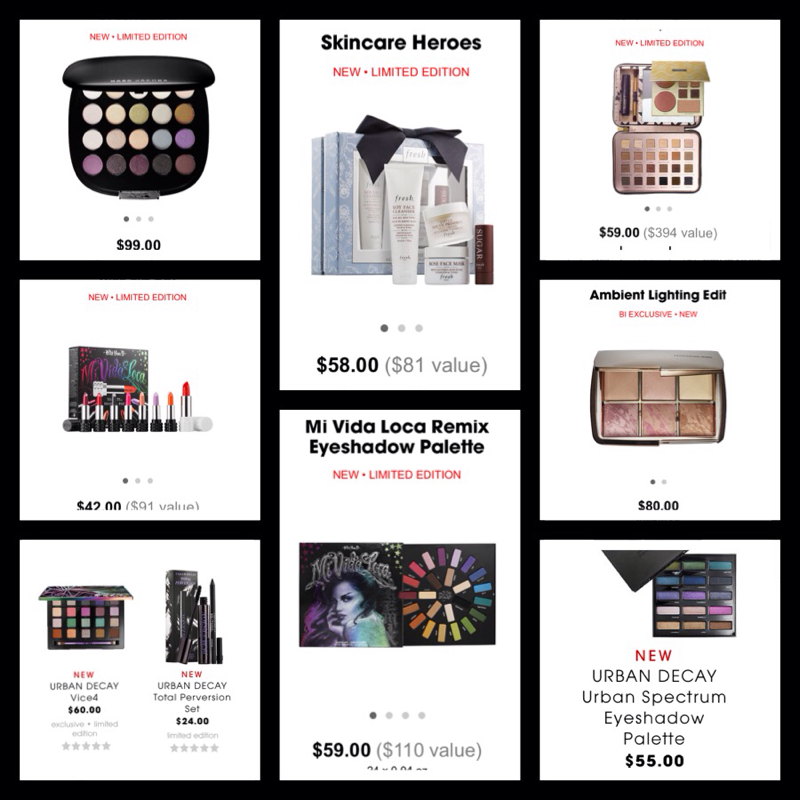 I know it's not even Halloween yet, but holiday collections are already rolling in at Sephora. I'm someone who really likes to get my shopping done as fast as possible and I've been buying Christmas gifts since July so I appreciate that these are being released already. Sephora of course isn't the only company that is receiving Holiday sets, Neiman Marcus and Macy's both have some really nice exclusive sets from YSL and Anastasia Beverly Hills. Ulta is getting sets in as well. Sephora is where my heart lies so that's where we're starting.
Row 1 top to bottom:
2nd Row
3rd Row
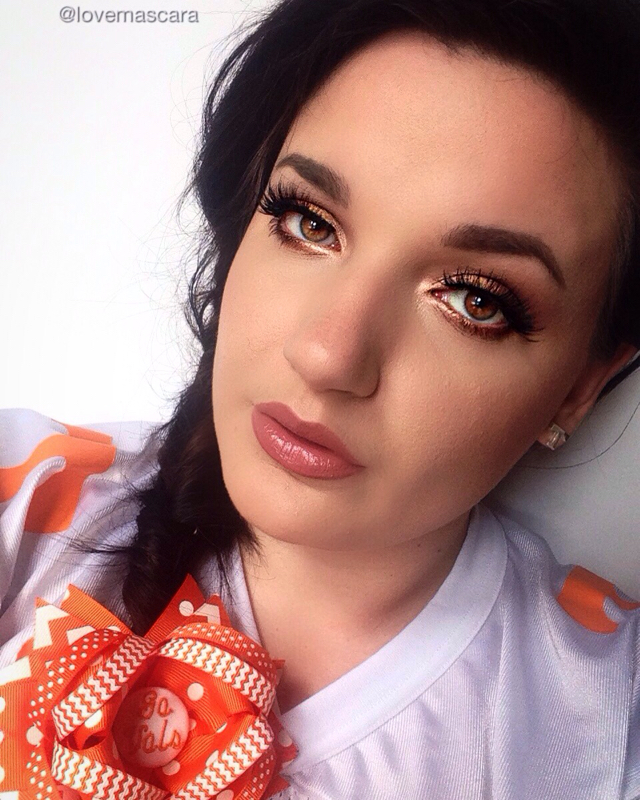 I'm from Tennessee and I'm a fan of the Tennessee Volunteers in the SEC. So this past Saturday was our first home game and a good one. We unfortunately lost in over time but I'm proud none the less. So as you can see I get pretty decked out for game day. Tennessee everything from shoes, to jewelry, hair bows and jerseys. Since we're the Big Orange my eyeshadow was a bronzey orange. Which also turns out to be a really pretty fall look in general. This braid is one that I learned from Sam Villa videos. Very easy. 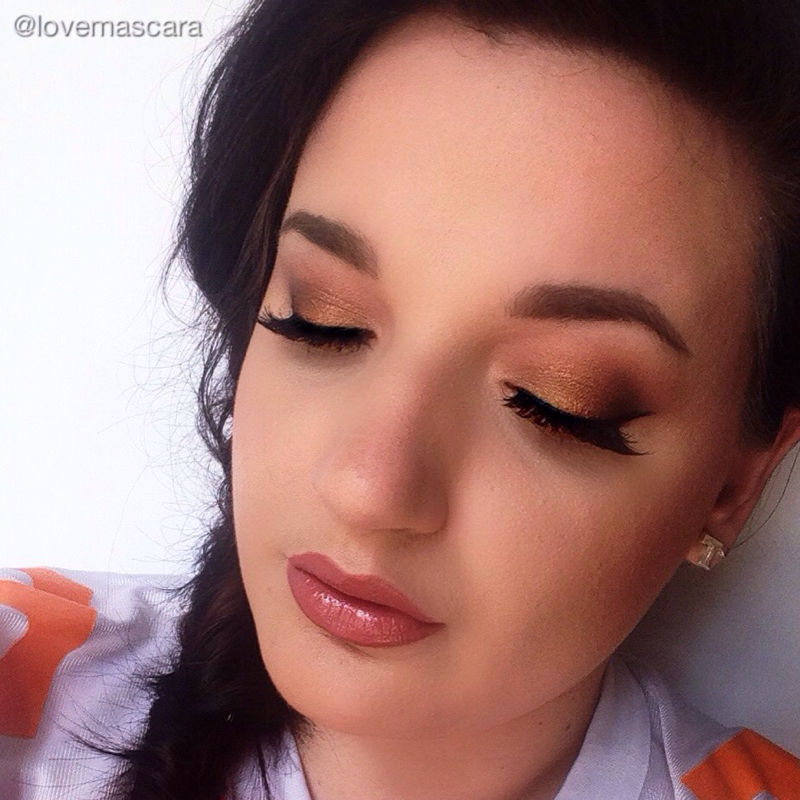 On the eyes I'm wearing:
Lips are:
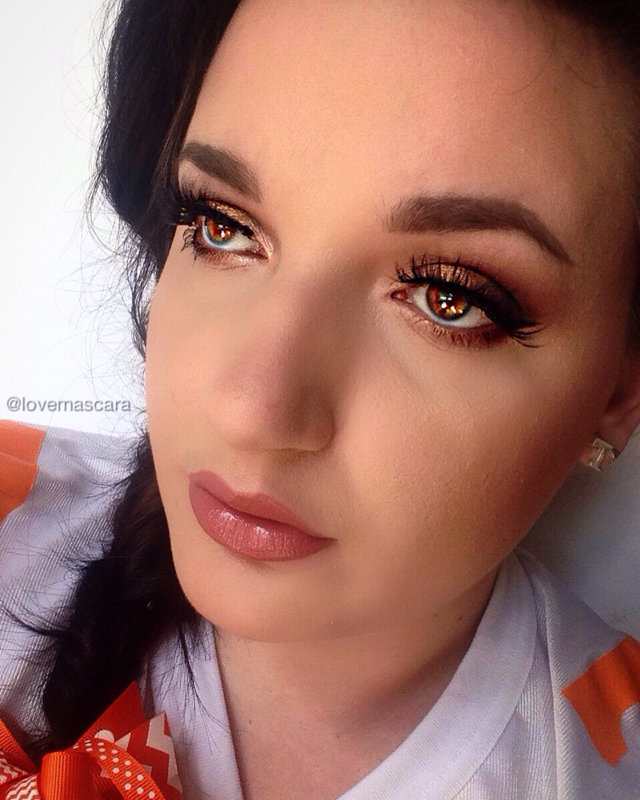 Hair Bow and earrings are from Etsy.
GO VOLS!! 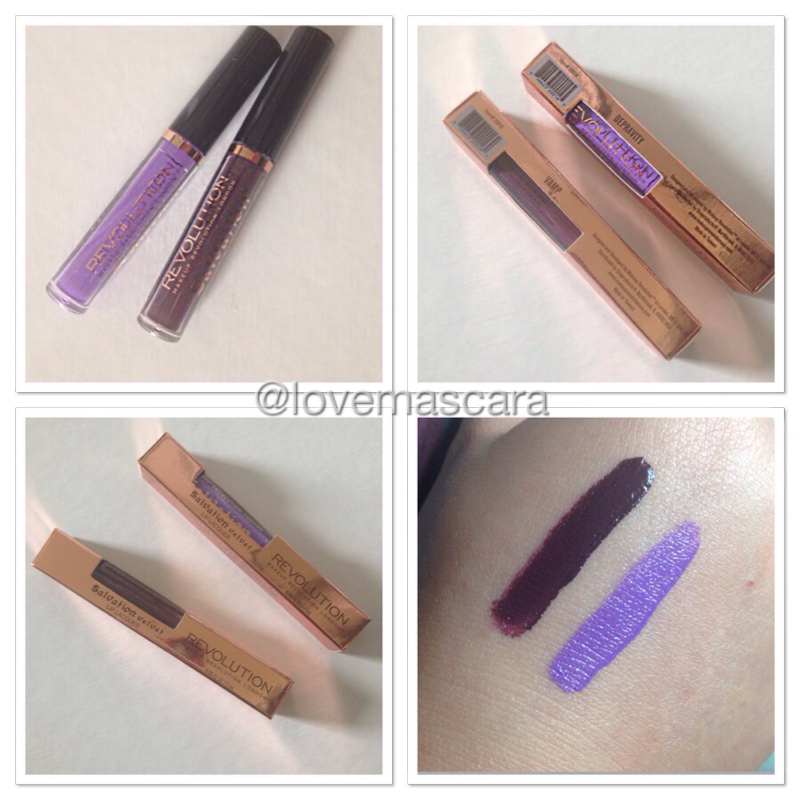 In the world of liquid lipsticks there are many brands that catch your eye. However, there is a brand that you should know about but probably don't. Makeup Revolution. Specifically their Salvation Velvet Lip Lacquers. They have a nice range of colors and they are sold at Ulta for $5.99. I got two shades to test them out but I will get more. The two shades I got was Depravity which is a bright purple shade and Vamp which is a dark blackened maroon. 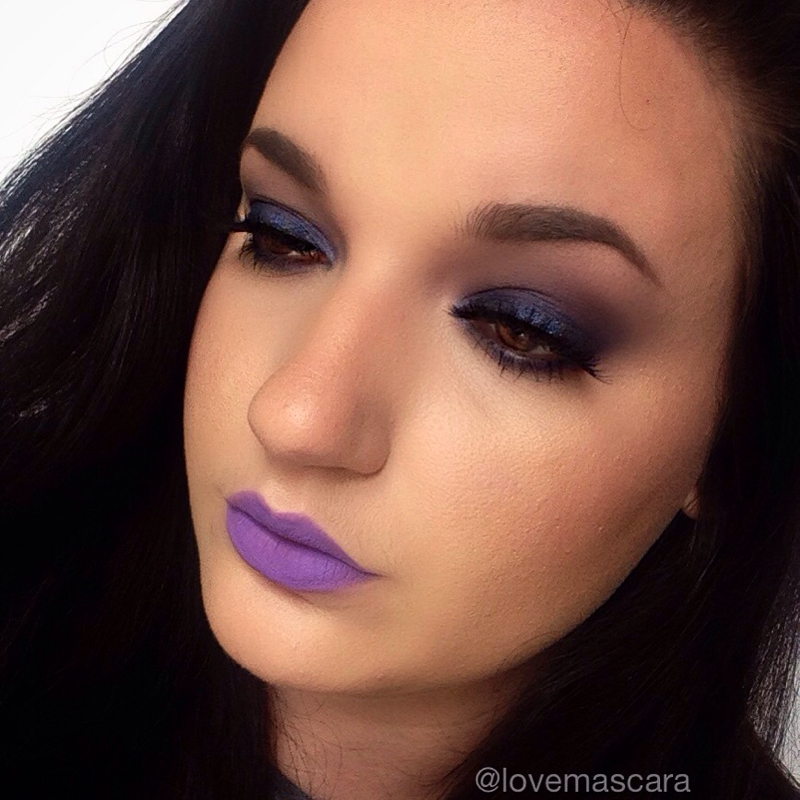 This shade is Depravity above. It's very opaque, which is good considering it's a bright color you definitely need solid pigmentation. The formula of these are not super thin like LA Splash Lip Coutures and LA Girl Matte flat finish pigment gloss, they're a bit thicker than Color Pop liquid lipsticks but not entirely mousse like. So I would compare them to the LA Splash Smitten Lip Tints formula wise. They are just like all Liquid Lipstick they are opaque they are a bit drying but that's the same as plenty of other formulas out there. What you have to remember is to really moisturize the lip before application and it won't feel as dry to you. Sometimes I even apply a gloss and let that sit on the lips while I do my makeup and then apply a liquid lipstick. It may not wear as long as it would on its own but it will feel better and not crumble on the lips when you eat or drink. So this formula to me is a good formula. 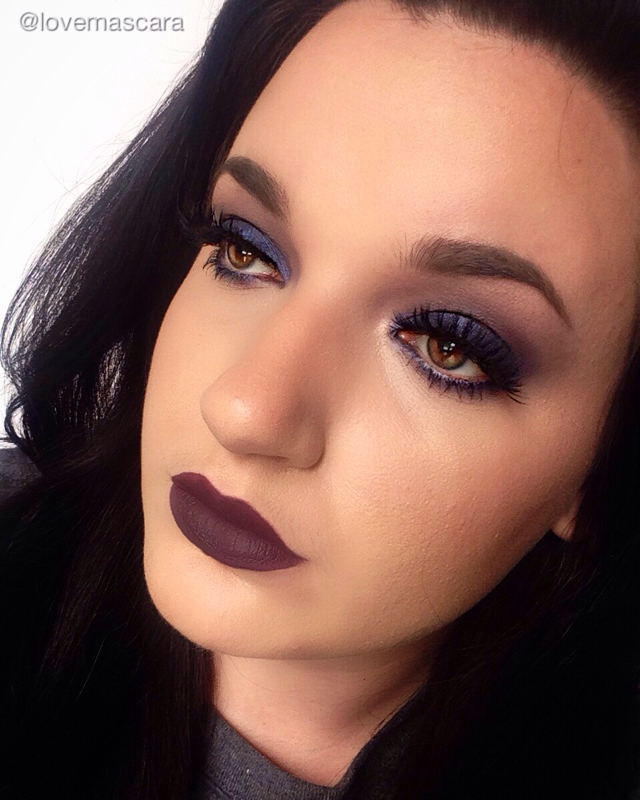 The shade above is Vamp. This is a really good dupe for LA Splash Vampire and also Sephora Collection discontinued cream lip stain in 7 that Samantha from Batalash loved. I have it and still wear it but this is a close hue to it I think. I think the name suits it perfect, it's a great dark lip if you want to be more "vampy" than say a true burgundy or dark red. It can look a little bit like black the more you apply. I don't have an issue with that, I can get down with black lips anyway but if you're a bit more cautious then I might would pick a different shade. They have plenty of beautiful colors, from neutrals, to brights, to dark shades. So there is something for everyone.
If you spend $10 at Ulta there is always a $3.50 off coupon unless you're buying "prestige cosmetics" so check that out if you're interested. 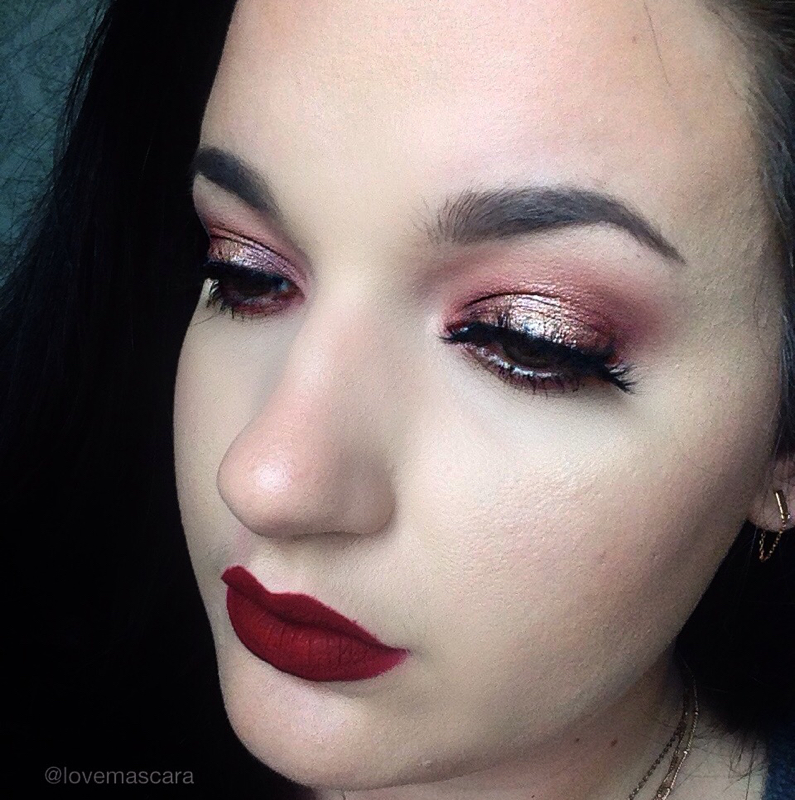 This is going to be a step by step of how I do my "halo" eye looks. Also, I incorporated gold into the look because gold is the color for Children's Cancer Awareness and September is Children's Cancer Awareness Month. This hits home for me, I had a member of my family beat liver cancer at the age of 2, I believe. So to show my support in a makeup type way, I thought I'd sport a gold look. I will also say that this was brought to my attention and inspired by Manny MUA. His video for it is right here. If you want to learn more about Children's Cancer Awareness then check out Cancer Free Kids for ways that you can help raise awareness. 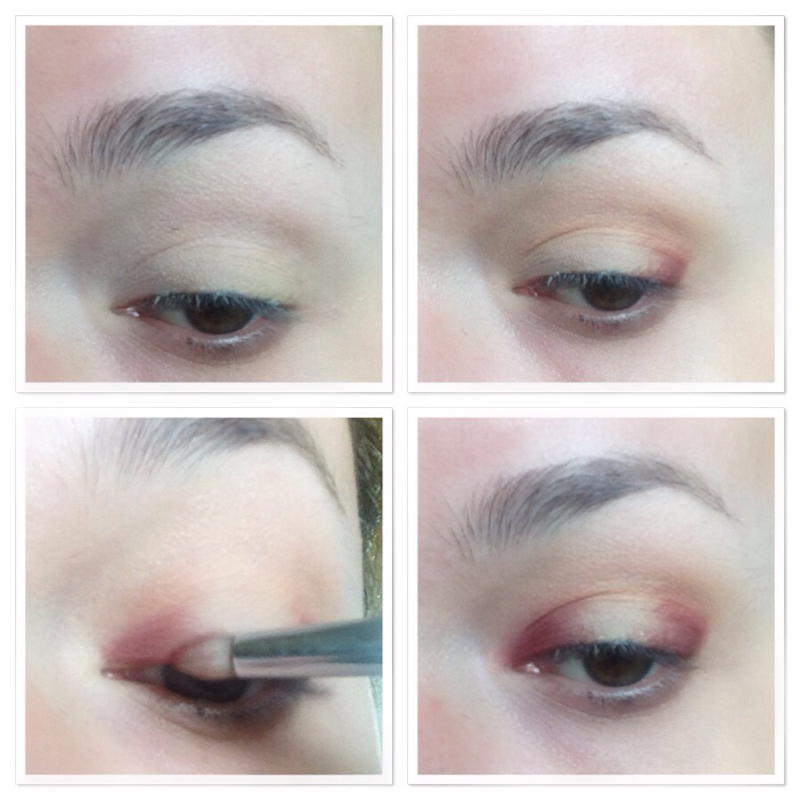 To start out my "halo" I lay down my primer, and then apply a shade of eye shadow that is closest to my skin tone so that my colors go on and blend smoother. I then put Peach Smoothie from Makeup Geek in the crease as a peach transition color. It's very pale you can barely see it. It just warms it up the crease. Next I use a pencil brush to apply a cranberry color. This one is Bitten from Makeup Geek. I apply it on the lid first from lashes then up slightly in the crease. Then I apply it on the inner corner of the lid. Trying my best to leave the middle open. 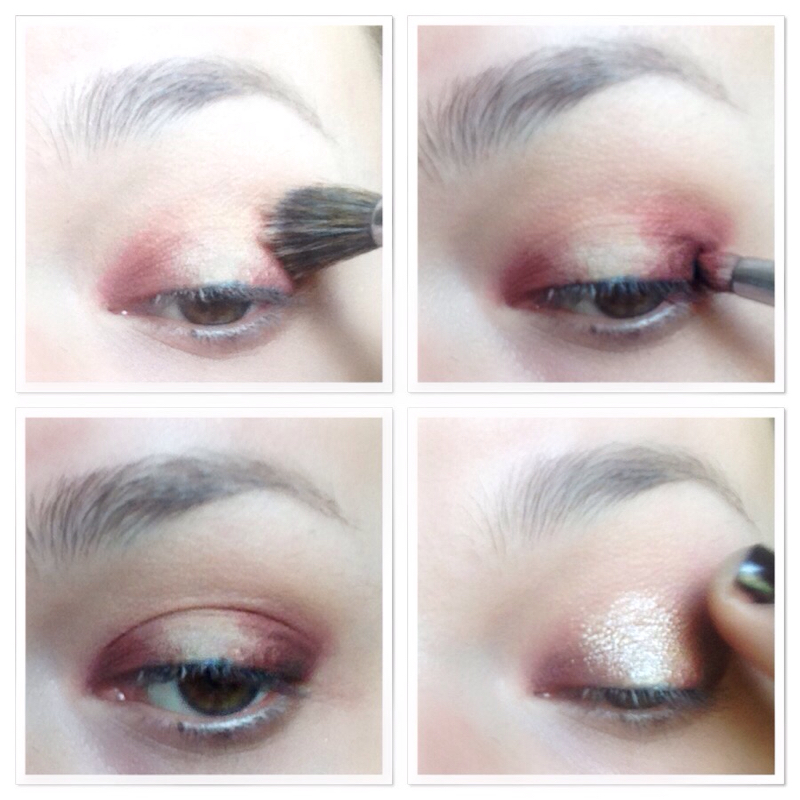 Then I take a large blending brush and blend over everything. From there, I take a darker shade, which was Deep Plum by ABH, and apply that the same way with the pencil brush. I stay closer to the lash line and don't bring it up as far as that first color. Next, I apply my middle or bright shade with my finger. I do this no matter what color it is. I don't know why I just feel like with halo looks using your finger to apply your middle shade is the best way. I used In the Spotlight from Makeup Geek first and then I put Tan pigment from MAC over top with a brush. 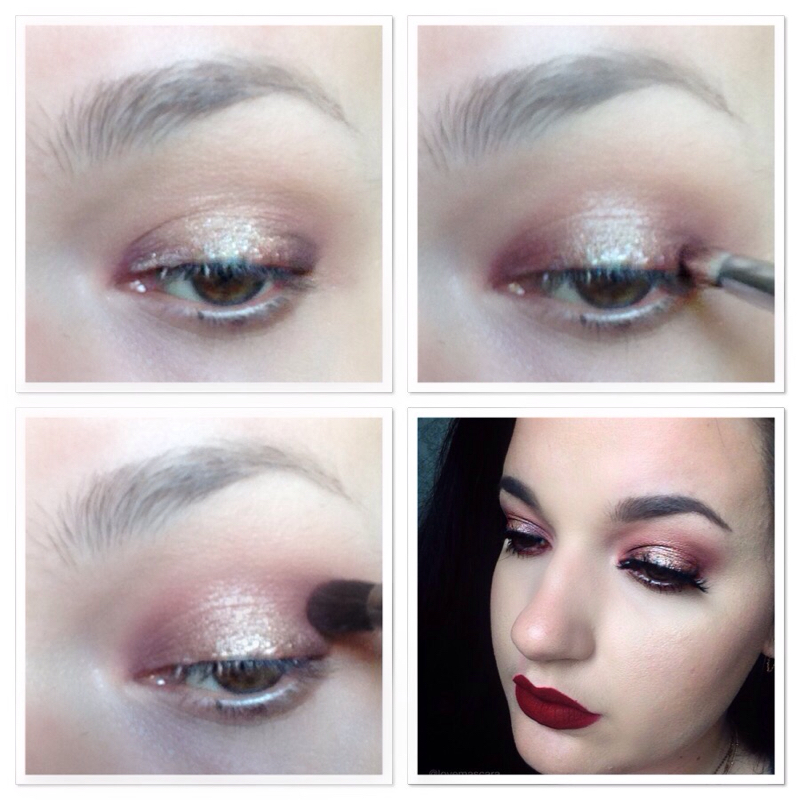 From here I blend again. Which is key with these looks, you have to constantly blend. Then I touch up the corners again so that I don't lose the intensity of the darker colors. I usually go back and add more to the center and to the corners several times until I'm satisfied.
Lastly I take a denser, smaller, blending brush and that cranberry shade again and work it into the crease. I want it to be a softer color and not so intense in the crease unlike the lid where I want the most pigment to be. Then I just apply the red shade on the entire lower lash line with a pencil brush or any other small brush would do. I add lashes, I don't do liner but you can if you want. I feel like liner is for more dramatic and structured looks and this one is a little more messy and blown out. So I would just put on a pair of fluffy lashes and be done with it. These lashes are Lilly Lashes in Mykonos. Any lash will do though. The lips are Colour Pop Cosmetics "Avenue" if you're wondering.  **Pictures are from Ulta and Sephora websites.
|
ErinI'm from Tennessee. I'm a makeup and skincare lover. I have always enjoyed creating looks but I love to help people with product knowledge and application even more. I've been able to start blogging and do these things I love because God has seen fit to bless me with the opportunity. Thanks for stopping by and visiting with me! 

 
Categories
All
Archives
January 2022
|
 RSS Feed