|
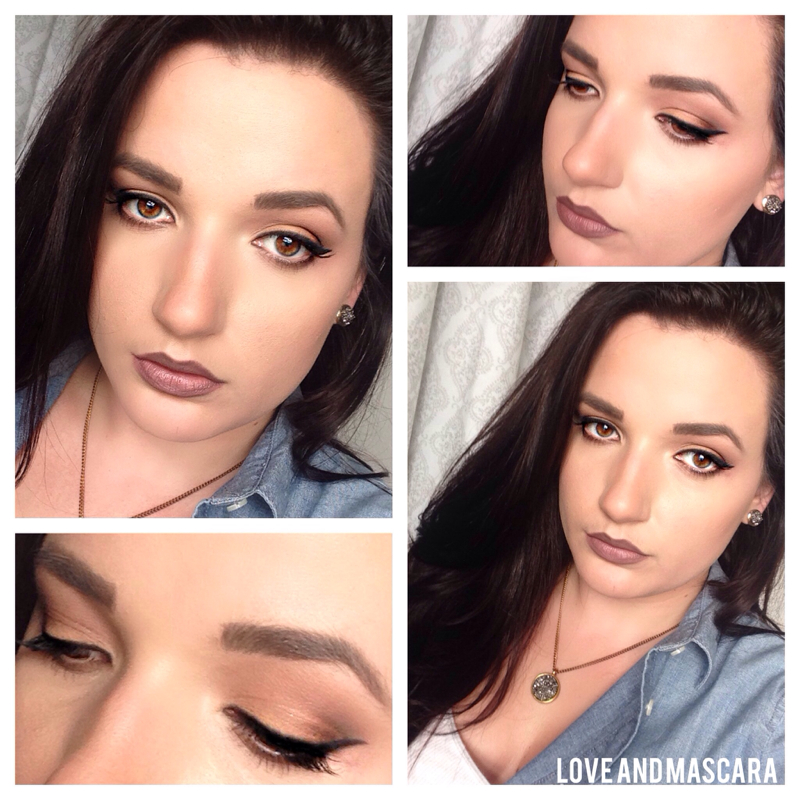
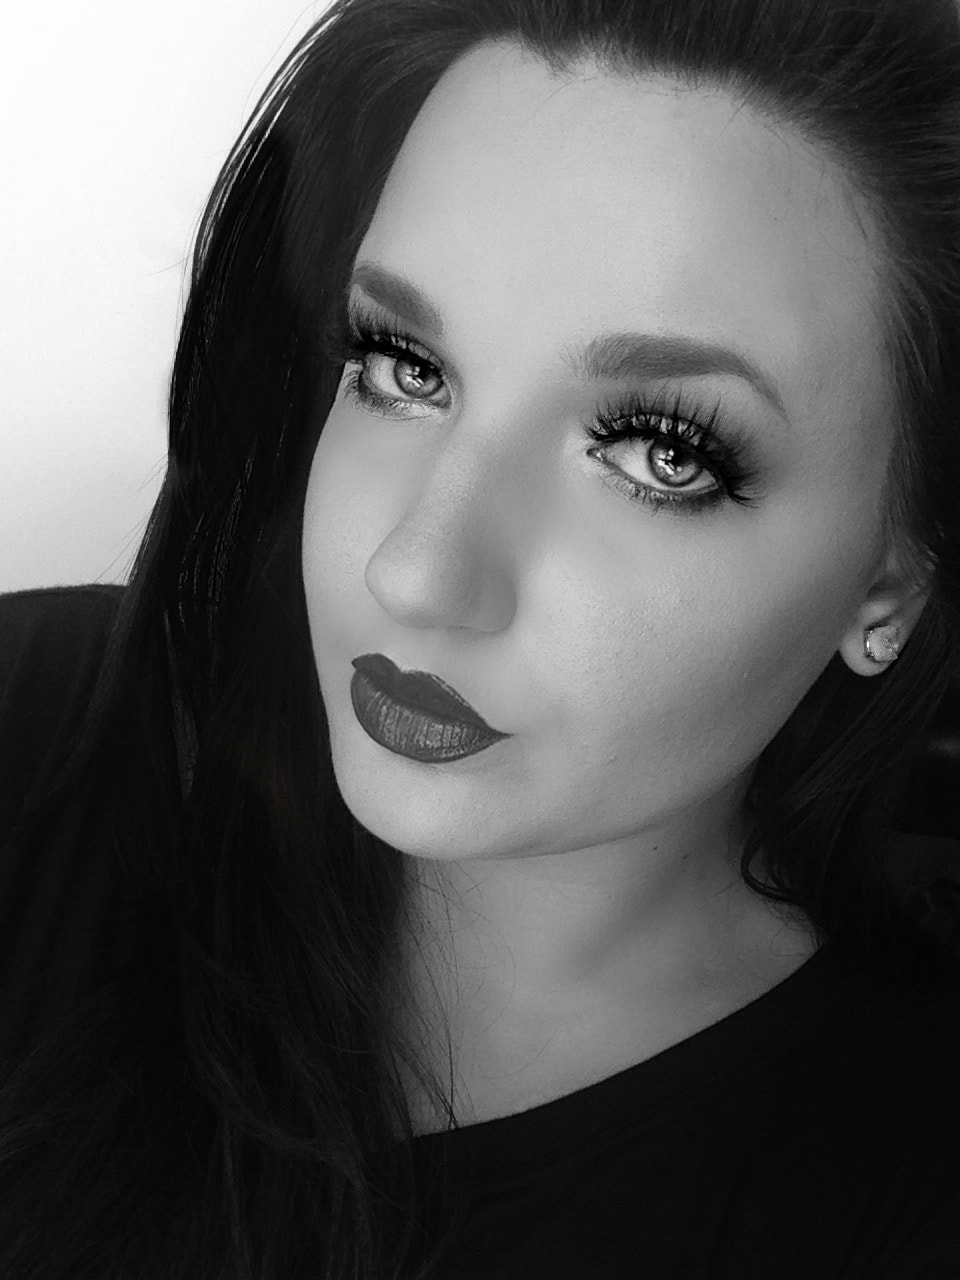
Using Eyeshadows in CS Pumpkin Pie CS Oktoberfest MUG Corrupt Winged liner using Benefit Push Up Liner. Ardell Half Strip Lashes. Lips are Anastasia Dip Brow in Medium Brown and MAC Faux lipstick.
0 Comments
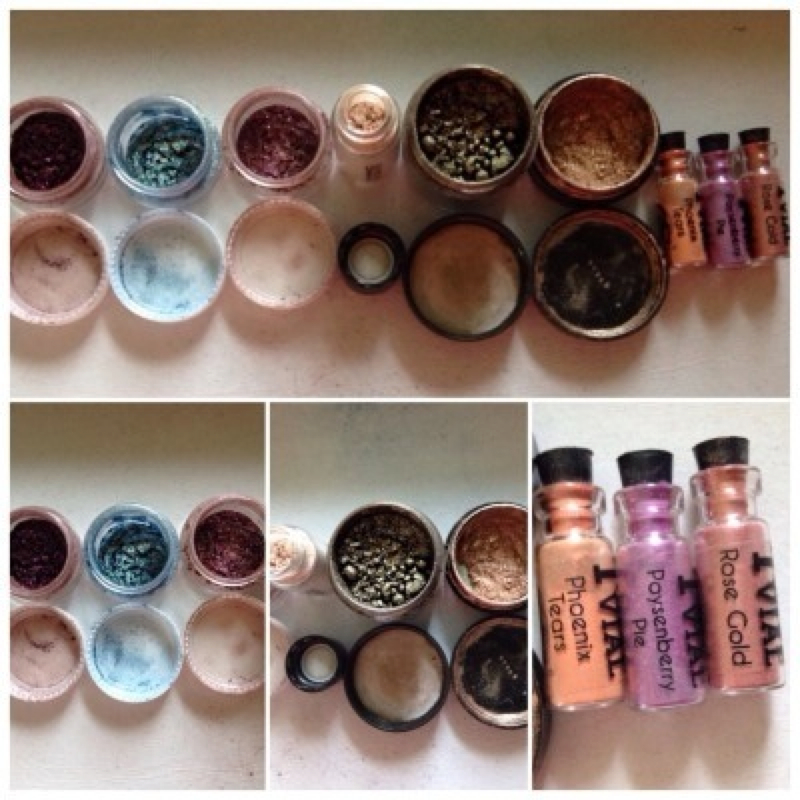
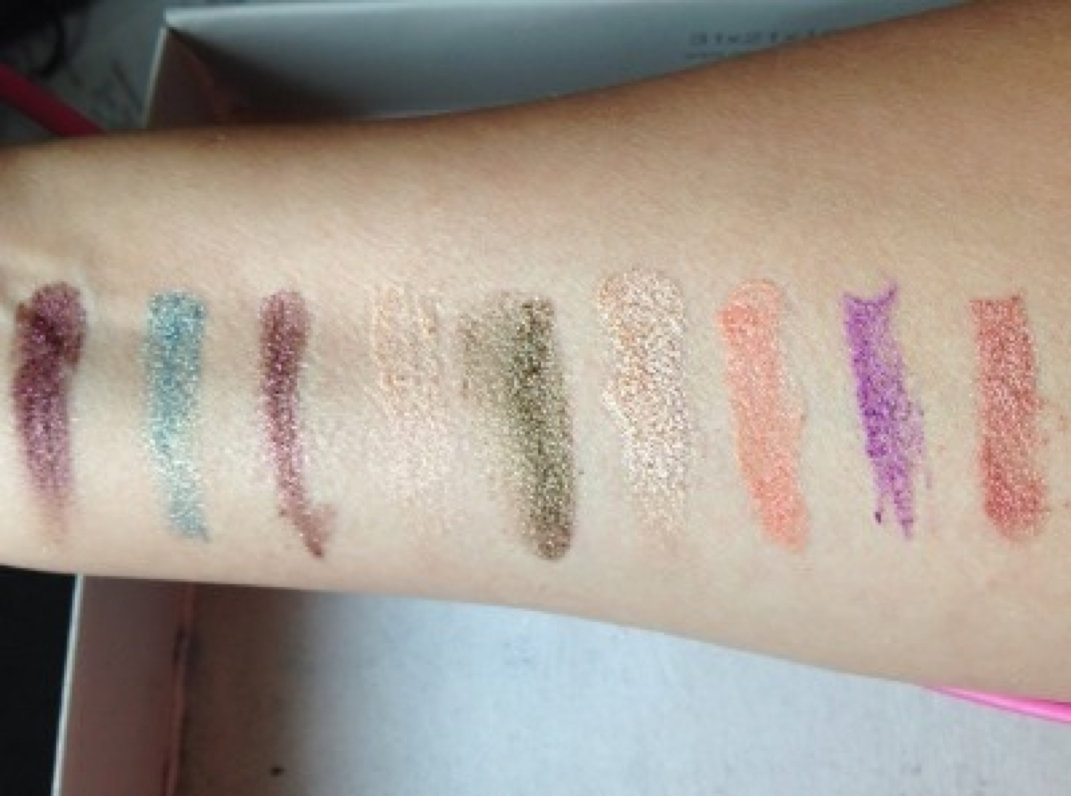
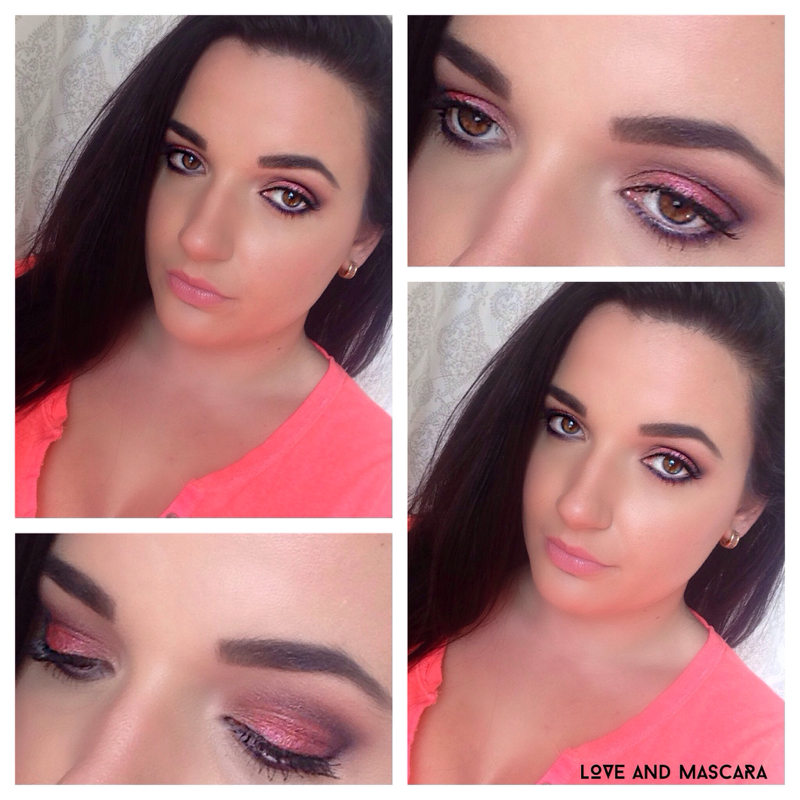
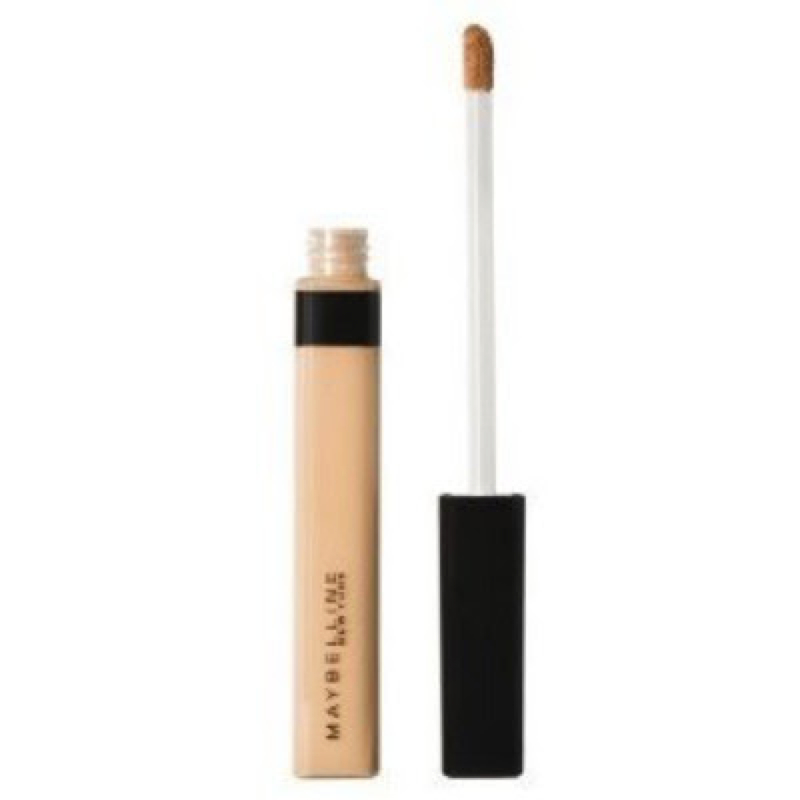
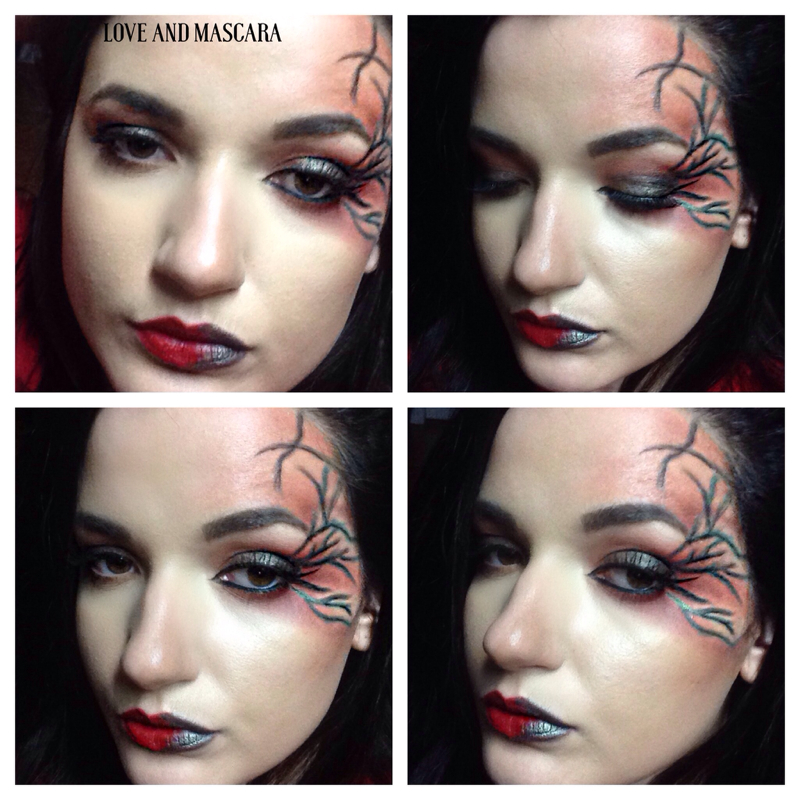
Favorite Pigments! I love pigments and it’s no secret. Some people don’t like dealing with them and the mess but personally I don’t have much of a problem with it. So not going to ramble on just going to get right to it. Left to Right Lumikki Cosmetics Spock: it’s a purple plum pigment with purple glitter in it. The picture doesn’t do it justice but it’s just so so gorgeous. Lumikki Cosmetics Aegean Sea: this was a color that surprised me. I didn’t think I’d really love it as much as I do but it’s so pretty. It’s a baby blue and gold shimmer with hints of turquoise in it. The gold shimmer is extremely noticeable which is what makes it so unique. A lot of times it doesn’t photograph the way it looks on the eye but the swatch did good today because that’s very true to the color. Lumikki Cosmetics Forbidden Love: I wasn’t going to include this because it’s similar to Spock since it’s in the same color family I guess. I couldn’t leave it out though because it truly is a favorite. It’s a mauve tone in my opinion with pink glitter. Looks so good over Laura Mercier Amethyst Caviar Stick. It’s softer than Spock but so unique and the pink glitter is so pretty. MAC Naked: this is a cult favorite I guess but it’s a good basic pigment to have. If you aren’t sure about pigments I’d start with this one it’s not overly shimmery. It has subtle hints of glitter but it doesn’t have that foiled look like some can have. MAC Copperized: this is my first pigment I ever got. Ive had it for sure over 5 years probably closer to 10. This is why I don’t ever buy full sized pigments unless that’s all they come in or it’s really really good priced because this will last me the rest of my life. It’s a golden olive. It has green undertones for sure I just used it in a look this week. It’s just a perfect olive color that can go with so many looks from neutral to bold. Makeup Geek After Glow: the swatch is true but the color in the container looks dark. Their pigments are fantastic for starters and so affordable. It’s a neutral gold that’s very very shimmery. So it’s not super yellow it’s not pink tinged. It’s just perfect. Scaredy Cat Cosmetics(SCC) Pheonix Tears: I bought this looking for a dupe for MAC Melon. It’s a beautiful pale orange like a cantaloupe. I’ve used it all summer long. I wouldn’t say it’s coral I really would go with a pale orange like sherbert and what not. SCC Poysenberry Pie: this was in my second order it is a pleasant surprise. It’s such a good vibrant purple. Not like the ones you see all the time that are bright but dark like royal purples and not dark like plums. Not pink like the fuschias out there either. It’s a true medium purple that is so glowy and universal. SCC Rose Gold: this is a true told gold. It’s a bit darker than most out in the market that are like pale pink golds or pale corals. This being darker makes it perfect for smokey looks or over browns or peaches even. So those are it. My genuine favorites that I want to use all the time and have to stop myself sometimes. Like I said don’t spend a ton of money on them if u can avoid it cause a little goes a long way. Try to find samples because they will last you a long time as well. Full sized like MAC sizes are almost impossible to use up. At the very least split them with friends. This look is using a lot of pigments wet for the intensity of the color and the slight "foil" look. Colors are: CS maroon berry CS dark mango MUG Corrupt MUG Peach Smoothie The pigments are from Scaredy Cat Cosmetics. I really encourage you to look at them on Etsy. You can get "trial vials" in sets of the colors you may want. Really super nice collection and I really like the pigments formula. I used colors: Hirundo Insomnia Poison berry Pie I really like putting black under pigments for smokier looks it's darker yes but applying the pigment wet still gives you bright color. The lower lashline is all purple (CS Maroon Berry) with Poison berry Pie on top. Product of the Week! This week my stand out product is Maybelline Fit Me Concealer in Sand Sable. This is supposedly the dupe for NARS Radiant Creamy Concealer in Custard. I do not know if it is or isn’t but I can tell you this is a nice concealer. The color is what I’m always looking for which is something with more yellow undertone as opposed to beigey pinks or just plain beige. I like yellow to highlight and it just is what I need for my skins undertone. The formula is really nice I think as well as the finish. It’s not super thick and creamy, it’s a little more thin and dries like a satin I would say. This is huge for me because I used it instead of my MAC pro longwear concealer today and LOVED IT. I will say though the MAC one has just a little better coverage (just a little) but still this is amazing. A-MAZING. Ok I’ll stop now. This is huge for me though because I’ve never found a concealer at the drugstore that I loved. I have the LA Girl concealers and they do pretty good but the yellow concealer in those oxidize a little and get like a dark yellow. However, I do really like them for correcting under eye circles when I combine the Creamy Beige and Classic Ivory together. Have a great week! My Tumblr blog has more Halloween looks but they aren't as crazy as this. I have lots of Disney and superhero looks as well. This is basically Stila eyeliner and lots of Makeup Geek: Bitten, Chickadee and Envy. Also some Dark Mango from Coastal Scents. I was going to take off my makeup from today's post and this just kinda happened. The eyeshadows for this are on the previous post.
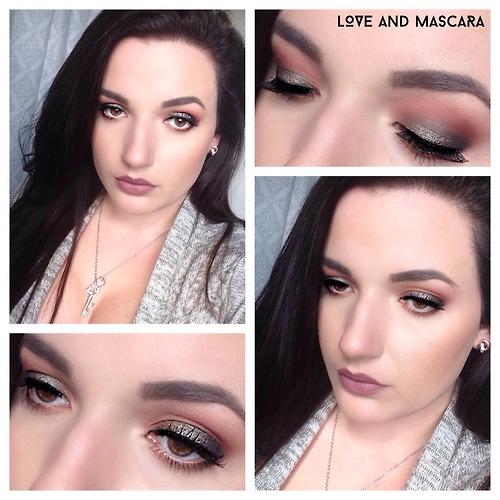
The lips, I'm obsessed with. It's my Anastasia Beverly Hills Medium Brown Dip Brow Pomade with MAC Faux lipstick over top. Muted lavenders are huge this fall. I love it as a different fall lip that's not super dark but not exaclty "neutral". Although, I would wear this all day, everyday and not care. It's like a taupey-lavender actually, which I like even more. I couldn't find a lipstick that was exactly what I wanted they were either too mauve, too berry, too dark, too plum, too brown, so on so forth. So I just decided to create it out of what I already had. I had seen on Instagram where someone had used a dip brow as a lip color it looked really different but was very taupe but it sparked an idea so I sculpted my lips with mine and then added Faux on top to come out with this dandy little creation. Which makes me even happier because I didn't have to purchase a specific lavender or taupe brown lip color. This is something I've wanted to talk about for a while lately but I was unsure how to execute it in the simplest way. I used a lot of eyeshadow in this just to show how intense and how much it could glow and change but you don't have to do this many at all. I was just going above and beyond to hopefully show how unique this can make an eye look.
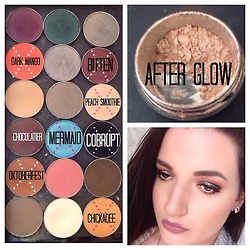
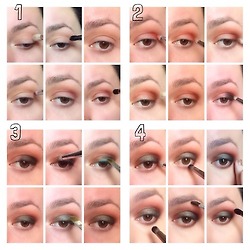
The order it goes in with each block in the 2nd collage is: Peach Smoothie (mug) with a MAC 217 Blending Brush in the crease, any medium sized fluffy blending brush with do. Chickadee (mug) with a Makeup Geek Crease Brush also in the crease. The reason it's not the same brush is because this one is tapered and will deposit more color but also not blow the color out as much as the first one. Bitten (mug) with a pencil brush. Not bringing it in quite as much as the first two and focusing it even more in the crease than Chickadee. After this I blend with my Tapered Crease Brush again with no additional product on it. Dark Mango (CS) pencil brush this is where I'm going to start placing color on the lid deliberately. There will be some on it from the blending you've done but this is going to be more precise. This color is super bright and it's going to be extremely "glowy" underneath the other colors. It's going to be on the very outer edge of the lid and going into the crease stopping about half way in ( dead center). Oktoberfest (CS) pencil brush this color is too take the "orange" tones down a notch, to a tan-orange kinda. It's going to go over the Dark Mango and you can add as much as you want to it. This is where you're really going to start seeing the undertone change and the intensity build. Chocolatier (CS) pencil brush. Again this will go over the last two shades I didn't bring it as far in on the crease as I did with the last two just because I wanted my darker color to really be in the outer V area. I packed this on quite a bit though. After this I blended with my 217 brush with no additional product because after this we'll be focusing more on lid colors and dark colors that I don't necessarily want to be blending in with the crease. I want my crease to stay bright and deep orange-tan. Corrupt (mug) outer lid with a pencil brush. this will be barely touched in the outer corner of the crease just to add that last final touch of darkness and it'll cover the outer half of the lid entirely. I'm using black because the teal I'm going to put over it I want to be a little darker than it is in the pan. Oktoberfest (CS) inner lid with pencil brush. You can skip this step I done this to connect it with the tan color that shows through in the crease but you can leave it alone entirely and let the teal color be brighter in the inner corner. It's whatever your preference. Mermaid (mug) over lid with a flat brush. With a color that's going to pop I think it's best to "pat" it instead of "swipe" it, it'll make it brighter that way because you're not actually wiping away the color. Also this is going over a mostly dark lid so I needed it's intensity to stay on point. And After Glow pigment (mug) with flat brush over that to brighten the teal just a little bit. I used this just because it kinda lightened up the look but also added in that touch of gold so there wasn't so much of the blue tones in the teal showing. It kinda neutralized it just a little bit, if that makes any sense. The lower lashline is Bitten with a pencil brush. You can put whatever color you want down here I just really like Bitten. You could use Corrupt or Chocolatier or even Mermaid. This is just how I chose to do it. Now I don't have my concealer and foundation on yet. The reason for that is: A) fall out from the colors on the lid. and B) because I'm going to actually blend in the next step and when I do my concealer and foundation it's going to clean that up but it'll still be a really smokey lower lash line. Oktoberfest with a Makeup Geek Outer V brush. This color is a tan basically the color of a bronzer so it can be really blended and blown out and not get crazy. As I said above though I hadn't applied foundation so I can blow this color out and clean it up with foundation and it not ruin my concealer or anything like a black would. The important thing for this though is the brush because it's a very dense but short "crease" brush I guess you could say. This will both place color but be dense enough to take the intensity down if you blend with it. You can use a pencil brush it just might take a little longer to blend it or work with the color. If you need to clean up the edges, after your concealer and foundation is applied you can take your ring finger and pat the outer area to clean it up as long as you haven't set your under eye yet. So instead of taking a tissue or q-tip and wiping away the eye shadow and foundation I just use my ring finger to pat it and clean it up. Obviously if you want a straighter and harsher line you'll need a tissue or q-tip, or if the shadow got really messy. But for this, I just need to smooth it out. Lastly,Urban Decay Foxy (matte) is my brow highlight. It's got a more yellow base than a beige or a pink which I like because I have a lot of pink in my skin so I don't need to have a pink brow and people think I just got waxed or something. It's also matte and I just prefer matte highlights because I think shimmer can get a little too crazy and take away from the actual look you're doing. Shimmer is fine though in light and small amounts. After I apply my brow highlight I go back over it with a blending brush that has no product on it just so there isn't a distinct line where the brow highlight and my crease colors are. So I blend to make them fade into each other better. Just lightly, you shouldn't need it hardly at all. This is long and drawn out, I just really feel like people could have so much more use and fun out of palettes if they'd start building and layering colors to bring out different looks. The possibilities are endless and can be so surprising. I just really like how it will always look unique when you build on colors whether it's 3 colors or 8 colors no one will be able to look at your eye look and go "oh yea that's Makeup Geek Bitten in the crease and Mermaid on the lid". It's going to be "Well it looks like a orange with hints of burgundy and warm brown but then on the lid it looks like black with a warm base and then a teal color on top". It makes people go look at the colors they have to try and do something similar and that's the fun part is re-discovering things you already own to make them look completely different than how you would use them. If you read all this, bless you. You're a trooper. :) Over lined lips. 90’s vs 2014.
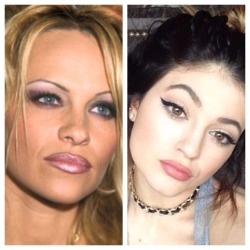
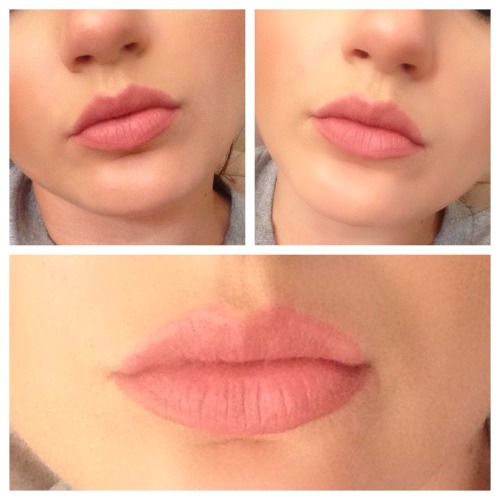
Have you all heard that song All About That Bass? I can’t stop singing it. That had nothing to do with this post, obvi. Alright, so since everyone is a buzz with the Kylie Jenner lip trend I wanted to speak on the differences between it and what most people associate an over lined lip with, which for me, is ol Pammy up there. First off let me say I have no problem with the 90’s way if that’s your bag, let’s face it this is just a similar version of that. I would also like to say I see others trying to do the “Kylie Lip” but it looks a lot like the 90’s one. So, I want to stress two things: 1) lip liner matches lipstick and 2) it’s a not overly glossy almost a matte finish. Where as in the 90’s it was usually several shades darker lip liner and either gloss or metallic finish in a totally different lipstick shade. My tips for the “Kylie Lip” is try a mauve lipstick or maybe a plum, I like Syrup from MAC, and use a lip liner which is similar. Also I’d like to add that instead of doing the whole 90’s style, which was over line the entire lip, pick the parts of your lip that need the extra plump. If you feel like your whole lip does then that’s fine over line it all. What I’m saying is that when doing this on myself I over line the sides of the Cupid’s bow but not all the way to the corners and I round out the peaks of the Cupid’s bow so the don’t look super sculpted. As for the bottom lip I don’t over line a whole lot I over line the sides some and don’t really over line the center as much basically I just try to make the whole lip look equally full which is what I feel is the “Kylie Lip” . Now I have done some more dramatic over lining in some recent looks but in general I think this is the most similar way. My next thing is texture. Her lips look incredibly soft or, “pillowy” if you will. So since I used Syrup and it has a luster finish I would add a little bit of OCC Hush lip tar in the middle which was completely matte. I will post a look of just my lips for you to see. If you don’t want to do that I also like to dab my finger into a pressed powder, I just used a face powder but if you wanted to you a similar blush or matte eyeshadow be my guest, and I would dab it lightly over the center and out slightly to take away some of the shine. I didn’t over do it I just lightly done it so I’d have the soft affect rather than looking completely matte or really shiny or metallic. Now just from my natural shape my lips don’t look as plump literally as hers. I have a good shape and size but I don’t have the fullness like she does mine are more flat. By saying this I want you to just modify the look to work best with what you have. If you’ll do something with tweaks that suit your shape more it’ll look flattering instead of really really noticeable like if you done something over the top the exact way someone done it on theirselves. I hope this was helpful, also I’d like to add done forget to moisturize with a good lip balm for a few minutes before you start it just helps the texture and usually helps when applying liner and such. Under-eye Concealing for Dark Circles.
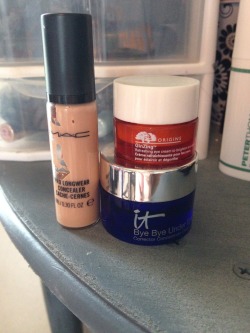
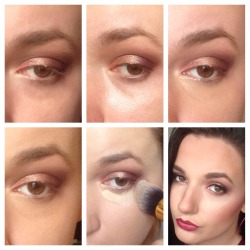
I have some pretty stout dark circles. They aren’t showing up as dark in the picture without makeup as they actually are but they’re both hereditary and partly due to being sick frequently. So first off I start with a moisturized area and I use Origins Ginzing Eye Cream. It has a pink tint to it with a lot of iridescence to it so that light reflects off of it and makes the area look brighter. Next I use It Cosmetics Bye Bye Under eye Corrector it’s a salmon corrector to cancel out the blue/purple tones. I focus it on the areas that are darker and just lightly on the rest of the area. Next I apply foundation and today I used Laura Mercier Oil-Free Foundation. After that I use my MAC Pro Longwear Concealer in NC20. It’s a thinner formula but has fantastic coverage and doesn’t crease. I blend and apply it with a tapered kabuki brush. A damp beauty blender works just as good. When I’m finished concealing I set it with Anastasia Banana Powder from her contour kit. Also it’s worth mentioning that I bring my highlighter down slightly under the outer part of the under eye. Foundation Review/Test
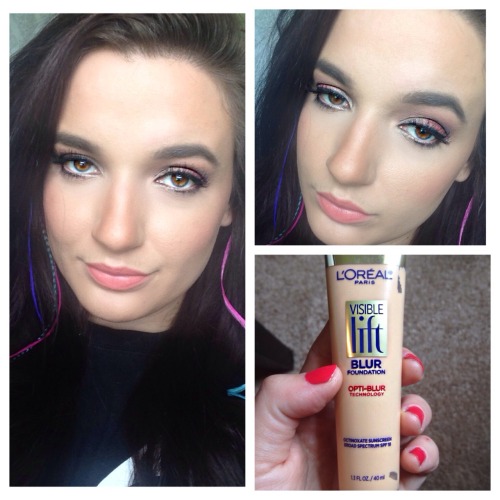
I’ve been wanting this Loreal blur foundation for weeks I just didn’t want to spend $16 on a drugstore foundation. So I finally just went ahead and bought it because my Walgreens assured me that if I didn’t like it I could return it. When I swatched it at home I was kinda disappointed cause it was thin coverage and had a powdery finish but I was determined to give it a worthy shot. On my face I used my normal primer and mosturizer that didn’t change and next I used the Dr Jart+ Water Fuss Beauty Balm that I’ve been loving before my foundation. After that I used Loreal Visible Lift Blur Foundation. Now I don’t know how it'll hold up against breakouts I had two spots that were not cute and I used my concealer and it was fine. Still noticeable texture difference but not a lot of redness or anything. This, I feel, let’s the skin show through only just more flawless and I really really like that. So it’s a natural look but really does blur out a lot of things you don’t want to see like redness, pores, minor imperfections and discoloration. I feel like it’s something to wear when your skin is being good maybe something a little heavier when it’s being bad. I don’t have an issue with it breaking down or leaving either but I have pretty dry skin do I can’t speak for any other skin type. Just my thoughts so far! |
ErinI'm from Tennessee. I'm a makeup and skincare lover. I have always enjoyed creating looks but I love to help people with product knowledge and application even more. I've been able to start blogging and do these things I love because God has seen fit to bless me with the opportunity. Thanks for stopping by and visiting with me! Categories
All
Archives
January 2022
|


 RSS Feed
