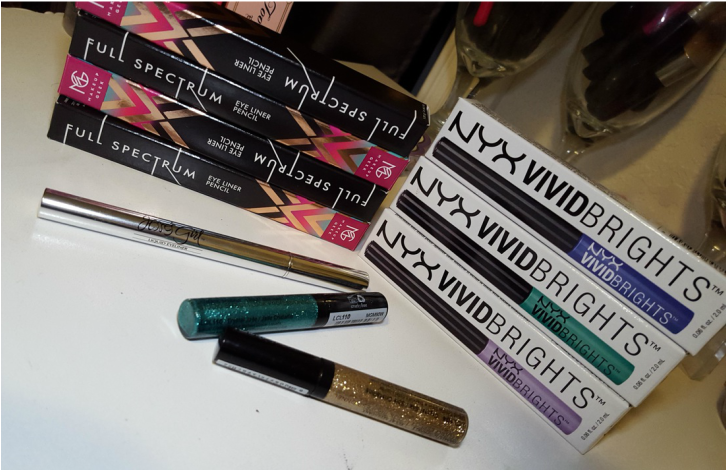
 Seems like every spring brings about colored liners as a "transition into summer" type deal. Like adding a pop of color to your makeup, much like Spring adds a pop of color to our lives. So being a person who loves color I can appreciate colored liners, and being someone who loves makeup I can appreciate any form of makeup. So today I thought I'd do a round up of some new liners I've gotten lately. Some are recently released, some have been out for a while but I thought it was worth talking about. So here's what we'll be discussing: The Makeup Geek Full Spectrum Eyeliners NYX Vivid Brights liquid liners NYX glitter liners Jesse's Girl liquid liner 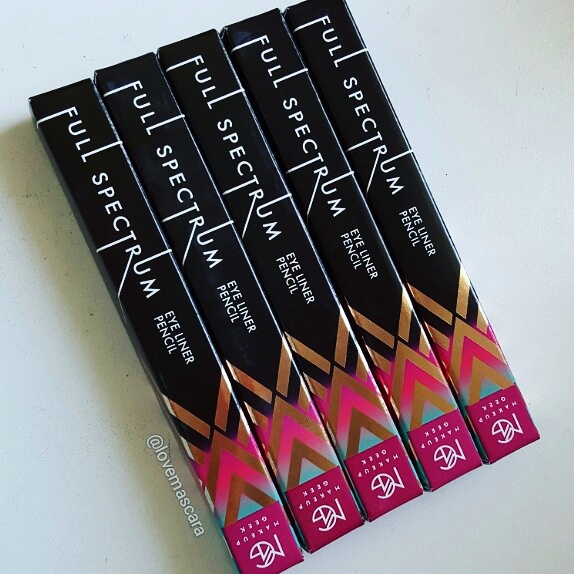 First up are the newly released pencil liners from Makeup Geek. These released a week or two ago and there are 10 shades. I got 5 but one of them is for my mom. These are $9 a piece which is a fair price and the colors I got were: Obsidian Cobalt Spice Nude These are so creamy and I mainly use crayon liners in the water line and that's it. So it has to be super pigmented in order to do that and these really are. With Cobalt you can build it up a little more if you want. Like it can be a decent blue or you can build it up to be a super bright blue. So far they've all worked really well in the water line. Nude is so opaque even in the water line. I like using a nude color in the water line to make eyes appear larger. Where as black liner makes eyes appear smaller. I typically do not use crayon liner that much because they melt very fast on me and I constantly have to check my makeup to make sure it's not all laying in the corner of my eye. These would also make a great base for shadows if you smudged them fairly quick after applying them. They do set after about 30 seconds or so and they really don't move after they have set on the skin. So keep that in mind if you love to smudge your eyeliner, do it fairly quick. 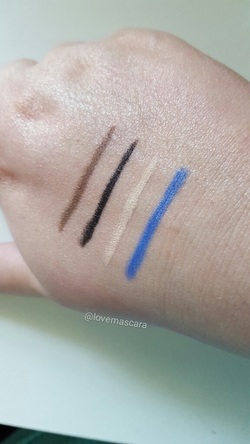 So from left to right you have: Spice, Obsidian, Nude and Cobalt Spice is like a medium taupe brown and I love that, I didn't have a liner like that at all and I really love wearing brown in the water line for smokey eyes. I actually rarely see this shade of brown in liners. If the brown is too warm it can sometimes make you look a little sick if there is a lot of red in it. This seems perfect and I think this smudged out on the top lid with some mascara would be a simple, easy, smokey look. Obsidian is black obviously and I put it up against every black liner I had and it's very dark and very comparable to Urban Decay 24/7 liner in Perversion. I do think that Marc Jacobs gel pencil liner is a bit darker but not by much. It's super creamy and super black. Nude is awesome. It's the perfect nude shade. It's opaque and it's not a yellow based nude or a pink based nude it's like an ivory shell nude. It's absolutely perfect and it impresses me how pigmented it is. Cobalt is your bright blue. I love this color like I said you may want to build it up some to really get that intensity but I wore it in the look below and it did really well. Blue liners tend to make your eyes whiter too. So it gives them a little pop. 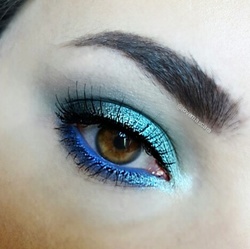 In this picture I'm wearing Cobalt in the water line and Neptune shadow on the lower lash line. It did really well all day. As with all pencil liners if you apply them to a water liner you are gonna have to touch them up through out the day. So take it with you if you're going somewhere. 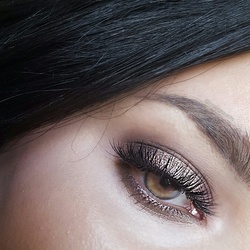 In this look I'm wearing Spice on the water line. It's hardly noticeable but it's just the perfect medium taupe brown for smokey looks. I love it. 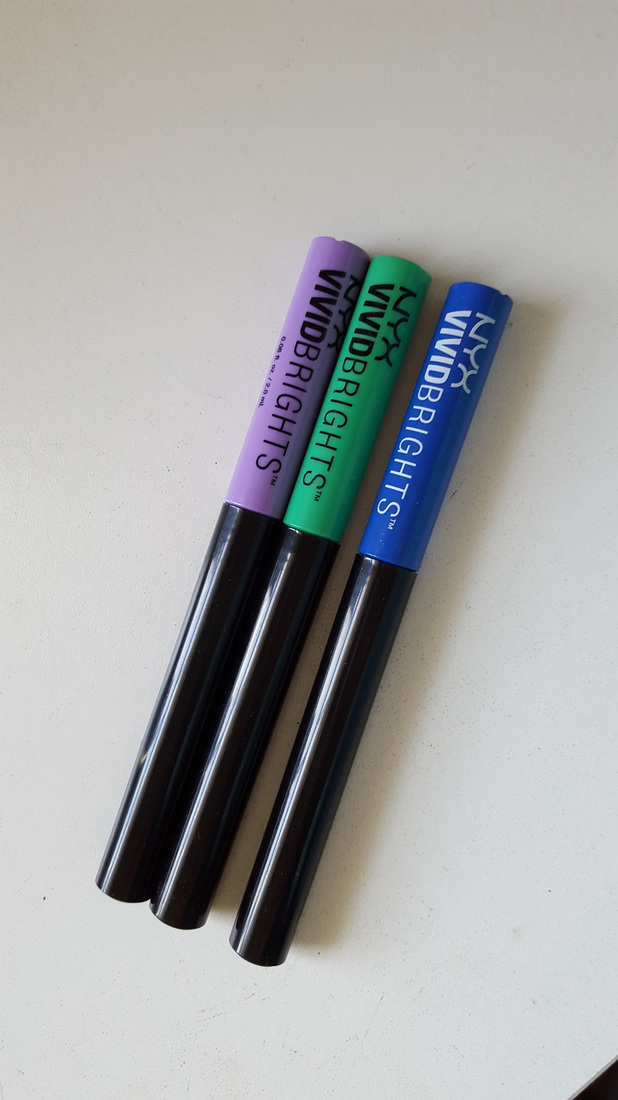 Next are the NYX Vivid Bright liquid liners which released last month I believe. These are $6.99 and they have 9 shades. They are also buy one get one 50% off right now at Ulta. I got three: Vivid Blossom, Vivid Envy, and Vivid Sapphire. 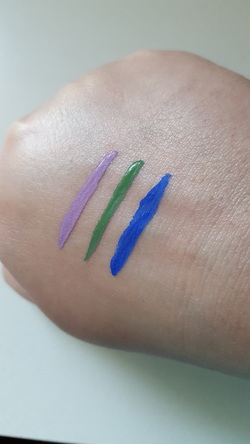 So swatched left to right is: Blossom, Envy and Sapphire. These have a brush applicator and it's quite long which I find doesn't give me as much control as I like but if I go slow and use short strokes I'm usually ok. These are quite opaque their self. Blossom isn't always opaque but it's such a pale shade I can see why. However, they dry down completely matte which is really nice and once they dry down they are very opaque. Envy looks like it would be a teal blue from the box and the tube but it is grass green folks. So keep that in mind. Grass green nothing teal about it. Sapphire is your perfect cobalt blue. These can be a little too liquid-y at times, so make sure your running the brush against the inside of the stopper to get some of the product off. 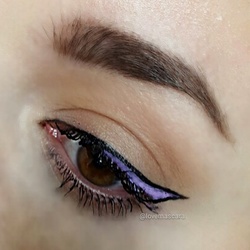 In this I wore Blossom and outlined it with Jesse's Girl liquid liner. It showed up really well but it kinda looked like pop art liner. I used Jesse's girl to get some more structure to it because Blossom on it's own didn't look neat or like a clean cut wing due to how pale it was. 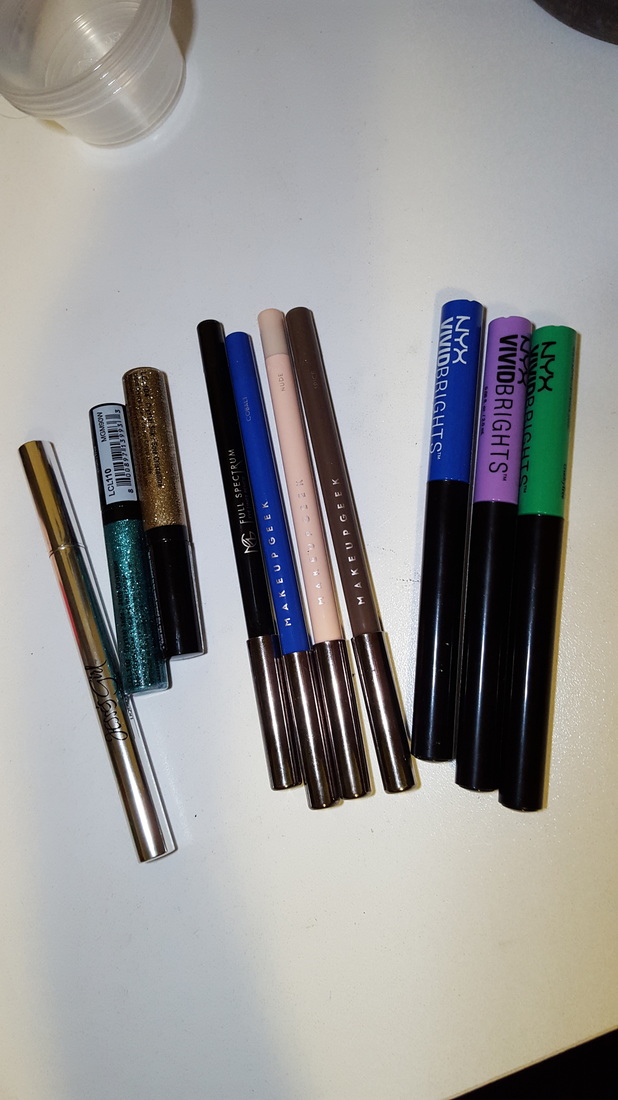 Lastly are the NYX Crystal liners and the Jesse's Girl liquid liner.
The Crystal Liner shades I got were: Crystal Champagne which is a neutral champagne gold Crystal Jade which is a blue-ish green. I got these because I didn't have any glitter liners at all. Theyre $4.49 at Ulta and they seem to be decent. I think they will need a base of something to go over if you want a wing of glitter but once they dry they seem to be more opaque with the glitter. The Jesse's Girl Liner I bought off Amazon. This is a basic black liner but it is really easy to use and affordable. I really love it, the applicator goes from bigger to super pointy so you get a sharp wing and it's easy to use. It's not super stiff to where there is no give but it's not incredible flexible either to where you make a ton of mistakes. I love this more than the Loreal Carbon black Linear Intense that I've used for years, and I believe its only $8. I don't know of anywhere that sells it actually but if you need a good every day black liquid liner definitely try this, it's a hidden gem.
0 Comments
 My friend Melissa, who is a Beauty Vlogger on Youtube, and I were discussing negative comments we get about our makeup and one thing led to another and we decided to do this Dollar Store Challenge. Not only is it fun but it is a CHALLENGE. We basically wanted to know if it takes mainly good skills to apply makeup, good products that do all the work or about half and half. Plus not everyone has tons of money to spend on Sephora or even drugstore (ie: Walgreens) makeup these days. So going as low as we could we decided to try out this challenge at our own dollar stores to see what we could find and how we were gonna make it work from application like brushes, sponges, etc to actual makeup, and for me even correctors. So we had to get creative. Here is Melissa's video: *FAIL* Dollar Tree Makeup Look Her Instagram: @melissa.juliet Her Snapchat: @melissa.juliet 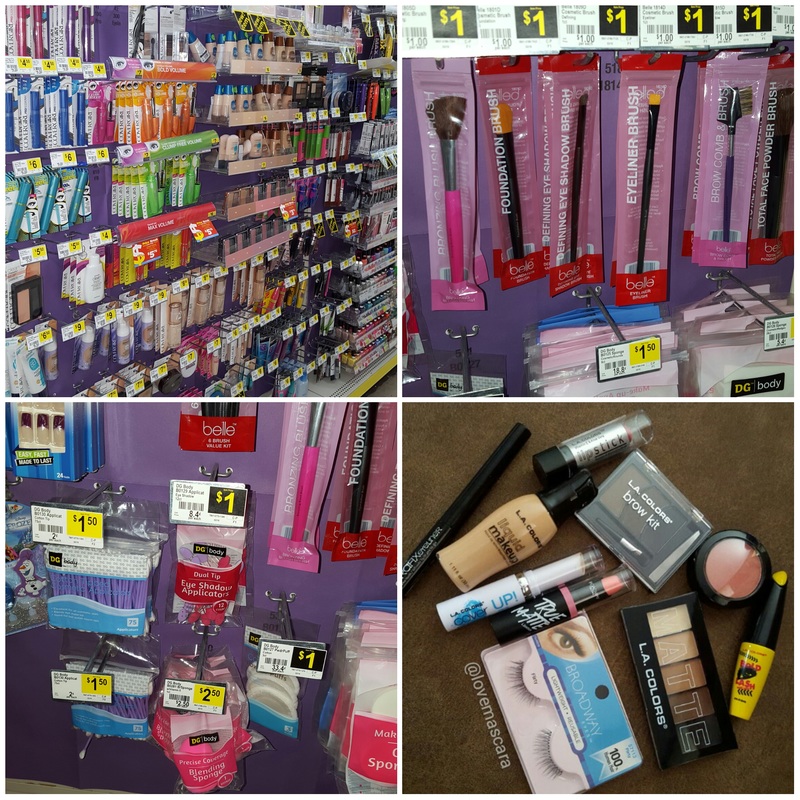 This is my local dollar store. It actually has quite a large makeup section but staying true to the task I went for the lowest price possible which was LA Colors. So basically everything I got was LA Colors and 2 things I think were Broadway Colors or something. The brushes were also $1 I only found two and there was no blending brushes, also got a Beauty Sponge. So I got: L.A Colors Graphixeyeliner in black L.A Colors Brow Kit in Medium L.A Colors Liquid Makeup in Buff L.A Colors Cover Up Pro Concealer Stick L.A Colors Matte palette in Brown Tweed L.A Colors mascara in Bold Lash L.A Colors blush in Natural L.A Colors lipstick in Dream Broadway Colors True Matte lipstick in Pink Drop Broadway Eyes lashes in Flirty Beauty Sponge Liner Brush Shader Brush Total Spent $26  So first off, I needed some type of corrector for my dark circles. So I used the lipstick in Dream, which is a pinky peach, under the eyes. I applied it very very lightly. It was a bit too bright but it worked. Next up I added a layer of concealer under the eyes, and in the T Zone so that the center of the face would have some highlight. Then I used the foundation. The foundation didn't have good coverage it was like a sheer, possible medium coverage so I had to add more concealer on afterwards to get about a medium coverage.
Next up I used the Ivory powder in the Matte eye palette to set the under eye area with the shade brush. Very very lightly. It didn't have a ton of pigment so it worked fine for setting everything under the eye. Moving onto blush this was a disaster. The brush it came with was terrible naturally and the blush itself had lots of sparkle in it. Maybe using a real blush brush would've done better but I AM COMMITTED. So I applied wayyyyy too much and then had to buff it out with the sponge. I tried using the eye shadow to contour some but it didn't hardly work out, it mainly just buffed completely away. For the eyes I used Matte shadow palette and just basically accomplished a smokey warm eye with a very smoked out liner. Speaking of liner I used the liquid liner and it was not easy. It was such a stiff applicator and dried so quickly that is was nearly impossible to make a clean wing. Therefore, I had to smoke it out which I liked better. I used the eyeliner straight brush to apply black shadow to the wing and help make the look more pulled together instead of a mess. I also used it smoke out the lower lash line as well. Then I used the mascara which seemed to work pretty well. I applied the Broadway Flirty lashes and I LOVE these. They're the perfect size for a natural look, not too long and fits the eye perfectly. I just lay them down in the center. You can hardly see them but I love that, they look like your lashes but better and you don't even feel them. Next for brows. I used the little brow kit that came with tweezers and a mini angled brush. It has three colors all cool toned browns from medium, dark, to black. I used the middle shade the dark brown. This actually worked really well. I would prefer one of my regular angle brushes but like I said we're COMMITTED. For lips I used the True Matte lipstick in Pink Drop. It's like a bubblegum pink which I wish I would've chose a different color but too late. This was very opaque and pigmented but it looked a bit dry and clung to dry patches on my lips. I believe it was just $2 if that and for that price I don't mind it looking a tad dry and I may go back and get some other colors. So all in all this was a very challenging and I'm so glad I done it. I'm so glad Melissa asked me to do it with her. Our conclusion is having good products makes a huge difference but so does having good tools. Not all brushes are super expensive either. Just check out Morphe, Crown Brush, or even Coastal Scents and get some basic brushes. Also try a real beauty sponge like the Real Techniques Miracle Sponge. Yes it does take some skill to pull off a flawless look but it takes good tools and at least decent products. Not to say that all these products wee duds. Only two or three of them were. So don't sweat it. If you wanna save some money and get some inexpensive products I do recommend the lipsticks, eyeshadow palettes, even the concealer if you aren't covering tons of blemishes, the lashes I love, and the Brow Kit. Also maybe a mascara when I find one that I really like. Jordana also has nice products for a very low price as well. The sponge I don't care for, nor the eyeliner or blush. So that was my challenge I'm linking some videos on my Instagram of how it went applying these along with some fails: Part 1 here Part 2 here Fails here 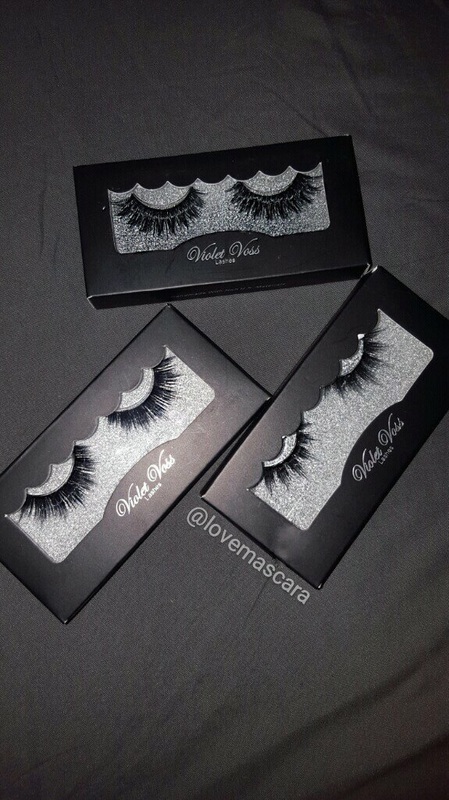 Recently Violet Voss released some new faux mink 3d lashes. I got the 3 pack bundle for $27.99. It comes with Just Slayin, Sexy and Eye Know It, and Eye Donut Care. These are $10 a piece so buying the bundle saves you some money. I loved the first line of lashes like Vamptress, Eye Dgaf, Wisp it Real Good and so on, so I was very excited about these. I will say I like the original ones more so because some of these can be difficult to wear. Particularly Eye Donut Care. It really made my eyes itch. The other two I really loved though. 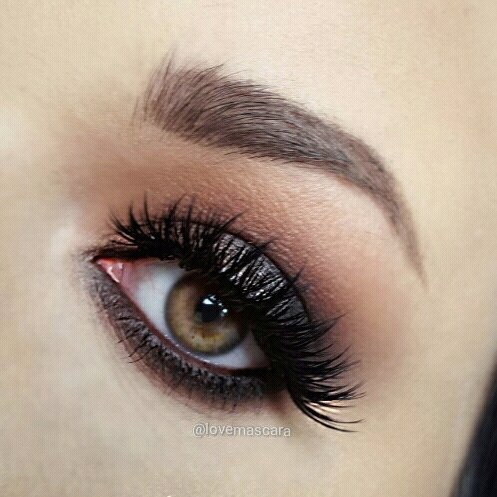 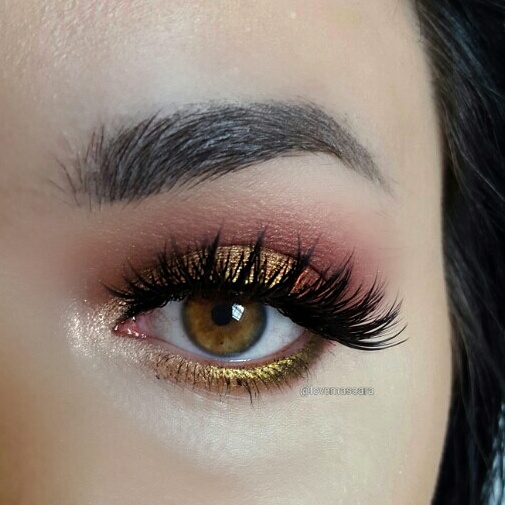 These are Sexy and Eye Know It. I paired it with a really dark smokey eye. They held their own obviously. Other lashes that are more natural would kind of get lost in a look like this and these made the look I think. They're absolutely beautiful. I'm in love. In the second picture I'm just obsessed with them. It's not an overly dramatic eye but the lashes are just perfect for it. 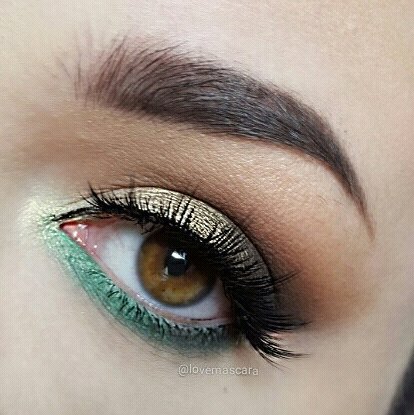 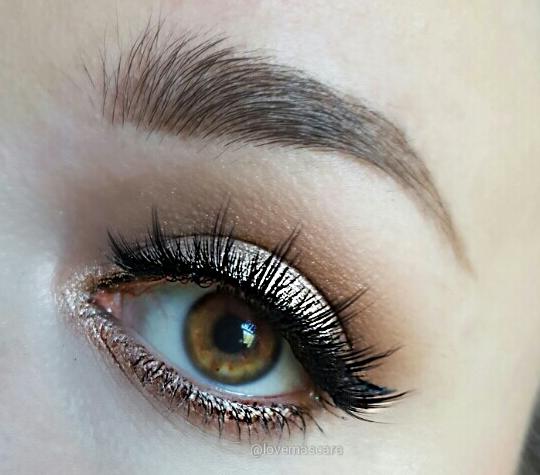 These are Just Slayin. They're very natural and dainty. As you can see these can easily get lost in a look and become very unnoticeable which can be great or kinda suck, depending on what you want. I would wear these with a lighter eye look like the 2nd picture. The first eye look is a bit smoky, so I would use these with just a winged liner look possibly or by their self. These are super wearable though in general, not the type of lashes that will make someone do a double take. 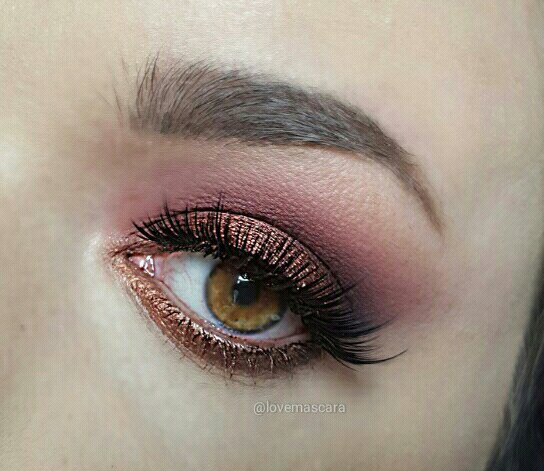 These are Eye Donut Care lashes. These are not my favorite but none the less here they are. These are just a bit more dramatic than Just Slayin'. I prefer Just Slayin'. My favorites are Sexy And Eye Know It as well as Just Slayin. My all time favorite is still Vamptress from the first line. Definitely check these out I love 3D style lashes and you can't beat this price point.
So every once in a while you stumble on some really useful makeup tricks and hacks to help you along. Luckily I've stumbled across a few whether from Youtube videos, blogs, or just luck. So I thought I'd share some with you that I actually do use and that I find very helpful.
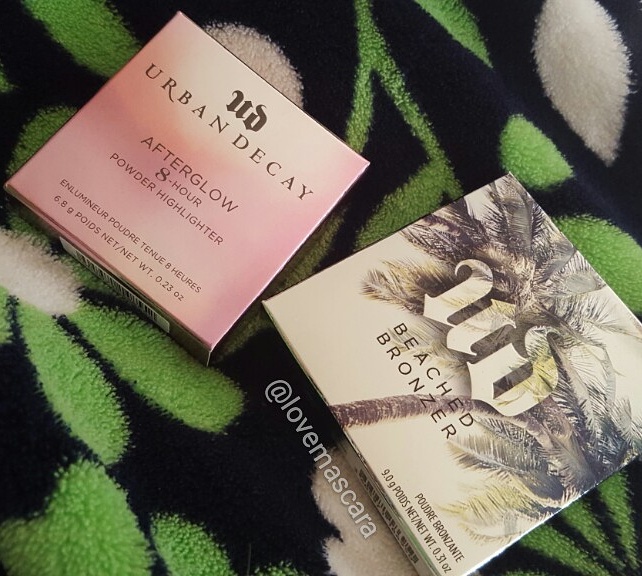 Urban Decay has blessed us with a 2016 Summer line and it is spectacular. I only got two pieces from it because a lot of it included concealer shade expansions and Naked Skin foundations. Also new 24/7 eye liner shades as well as a new Hybrid Complexion Perfector. Which I feel is along the lines of a BB Cream. It's called the Naked Skin One & Done, if you're wondering. So the two things that caught my eye were: the bronzers and highlighters. The packaging was soooo cute and I'm not sure if I've ever really had a bronzer from Urban Decay and definitely never had a highlighter. So that was what I wanted to get. The Beached Bronzer comes in two shades one is Sunkissed (light skin tones) and the other is Bronzed (Medium skin tones). I got Bronzed. I prefer darker bronzers in general. The Afterglow Highlighter comes in 3 shades Sin (champagne gold standard color) Aura (pale pink) and Fireball (peach). The highlighters look a little "duo chromed" to me which you know I love. I got Sin because I felt like that was pretty safe. 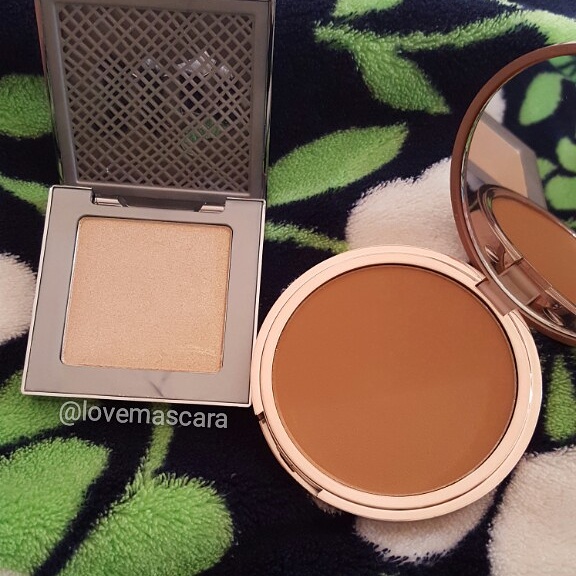 Let me say that the highlighter is the one thing I recommend you getting this summer. I RECOMMEND THIS HIGHLIGHTER. I have never in my life seen a highlighter so potent. I'm talking more highlighted than Becca, The Balm, Anastasia, etc. I have literally never seen anything this pigmented as far as a highlighter in my life. Now the formula when you swatch it with your finger feels harder. It doesn't feel dry necessarily but it's not so creamy that it clumps up if you press too hard like Becca can and others that are super soft and buttery. If that makes sense. So you swatch it and you're like "oh this is nice" but then you put it on and your like "HOLY CRAP I COULD DIRECT TRAFFIC WITH THIS LIGHT ON MY FACE" or at the very least be mildly convinced a fairy threw up on the side of your face. It takes "strobing" to a new level. I can't honestly even express how insane this is. The bronzer is like silk. It's so soft and smooth. It's not too buttery either it's like a soft thin veil of bronzer when you swatch it. I've never felt a formula like this at all. Never. It is very very warm. Remember I have the darker shade though. This is ideal for summer nights and what have you. Actually both of these are. The bronzer though is exactly what it is "a bronzer". I don't feel like you could contour with it. I think it's best used to warm up your face and make you look healthy and sunkissed. It applied so nice and blends like a dream and it's also super pigmented as well. 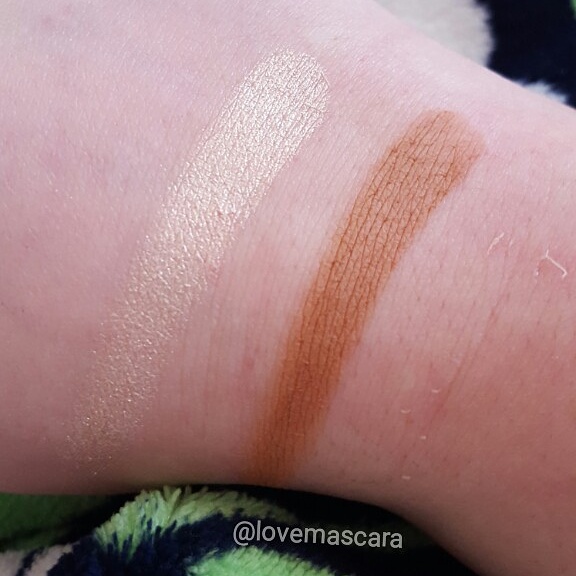 These are the swatches of Sin (left) and Bronzed (right) 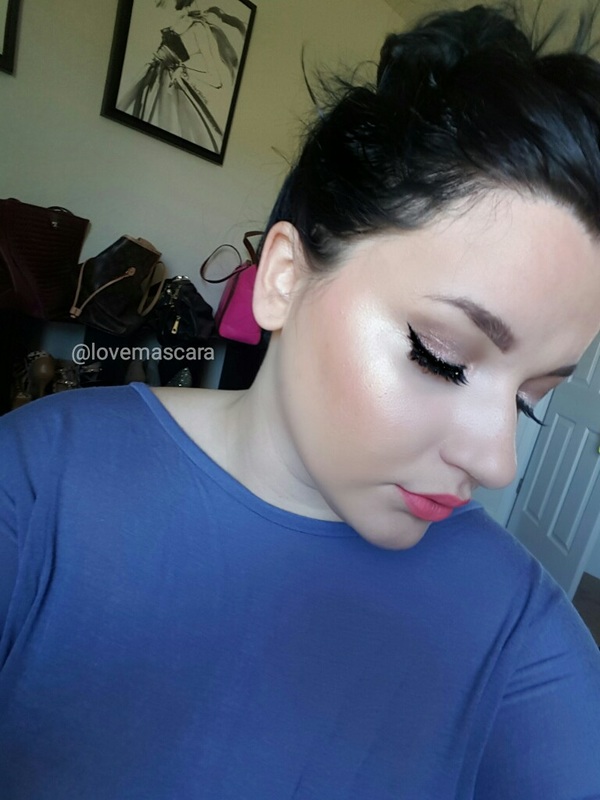 The two pictures are of me wearing Sin on the cheekbones and Bronzed around the face. I had to buff it down a little because it was much warmer than this originally. So bear that in mind. Go easy at first, with both of them actually. 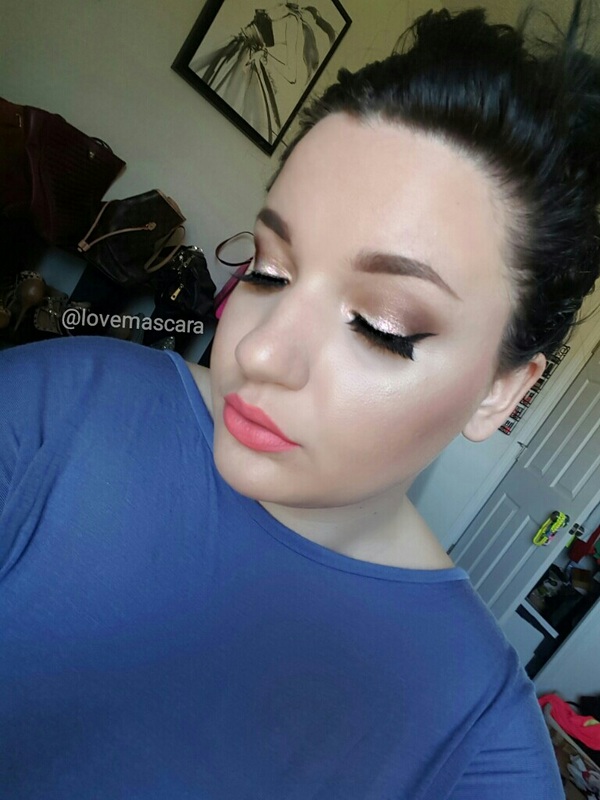 These launched on Urban Decay earlier this week. I received mine the day after. They have not been released in Sephora or Ulta yet and I don't know when they will be I'm think around the 1st of April as a ballpark estimate.
Beached Bronzer: $28 for 9.0 g Afterglow Highlighter: $26 for 6.8 g 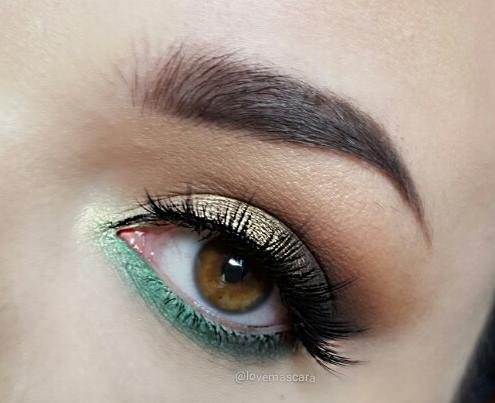 Spring is right around the corner. So lets roll into some Spring makeup and transitional makeup to give you a bit of color but not too much. As you know I'm a huge fan of color but with spring I think of pastel bright shades in greens, lavender, light blues, light pinks, and pale yellows. When I think of makeup I think of bright coral lips, bright pinks, and lilac shades. So it's more than being just colorful, it's the right shades of color. However, I'm not here to tell you what you can and can't wear as I myself tend to break any makeup rules there might possibly be out there. I have no problem wearing a navy blue or black lip in the dead of summer. So whatever floats your boat but for the sake of Spring colors lets have fun with some spring shades. The picture about is a Spring Transition look as I like to call it. It has a pop of color but very neutral as well. Top lid: MUG Voltage (inner half) Mocha, Corrupt (outer color of lid), Cocoa Bear (crease) Chickadee (crease) Lash line: Dragon Fly, and a bit of Corrupt on the outer part of the lower lash line. Lashes: Violet Voss Just Slayin 3D Faux Mink lashes ABH: Brow Definer in Dark Brown You could trade out that lower lash line with any other bright shade. I think an orange shade or periwinkle or lavender would be just as pretty.  Next up is adding a super colorful bright lip to a toned down neutral eye. I chose a red/coral lip for this. The eyes are nothing special just a warm brown in the crease and a light shimmery lid. The lips are Colour Pop Satin Liquid Lipstick in Cozy. Which is very similar to Colour Pop Matte liquid lip in Succulent. Only Succulent is more red and Cozy has a bit more orange. Both are bright as can be and gorgeous. I prefer the Satin formula more though. 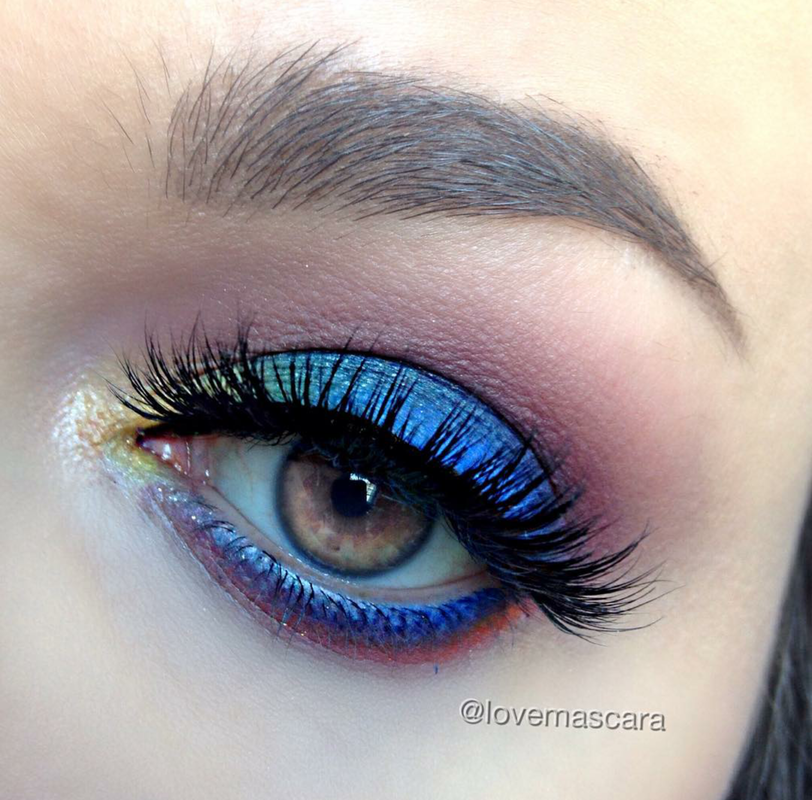 Here we have some INTENSE color. I know it's super colorful and not everyone would wear it but when I think of Spring I think of two things color, and the fact that you can use more makeup in the Spring than the Summer. In Summer I feel like less is better because everything just melts off your face and feels super heavy. Things run and move around, so in the Spring I feel like you can get away with more. This look is: Sauce Box Temptation Palette for the whole thing. You could add or take away things from this obviously. The blue in this reminds me of Neptune from MUG so that's an option if you don't want the palette. Also the orange reminds me of Dark Mango from Coastal Scents. So these shadows can be duped. The yellow I can't really dupe cause it's so hard to find super pigmented yellows. The only other one I have that would work is from the Melt Radioactive stack. If you wanted it to be more toned down then Yellow Brick Road from MUG would work I think. 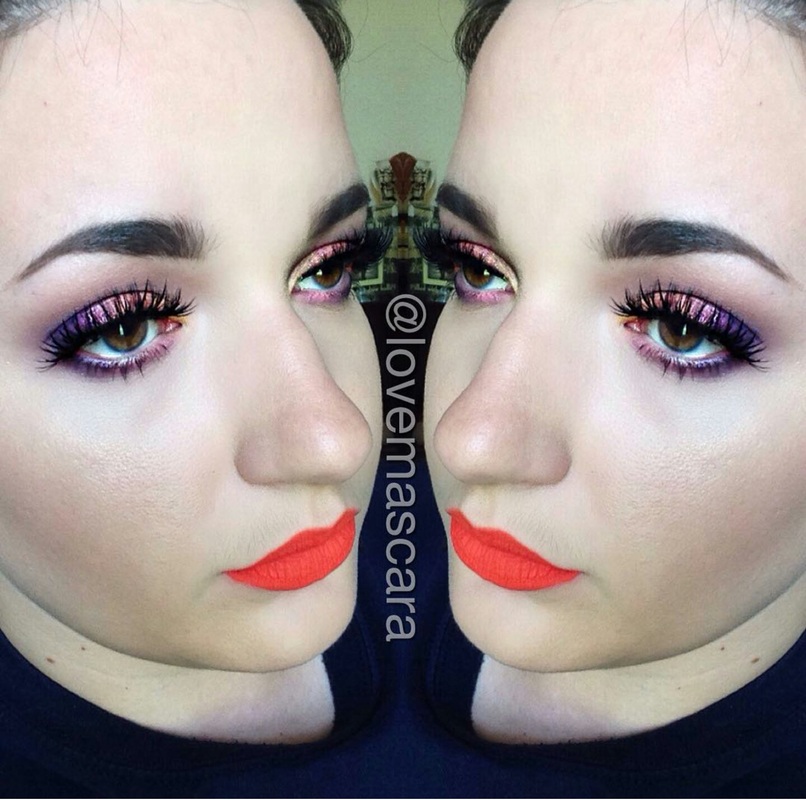 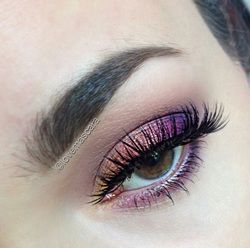 So this look has more color and brighter colors on the lids and lips. This is full blown spring and summer in my opinion. Not transition with a pop of color just all color. The lips are Colour Pop ultra matte liquid lipstick in Pacific that is a bright orange. The eyes are: Colour Pop shadows: Fantasy, Heat, and Animal You can also use a bit of black to deepen that outer corner if you want. Koko Lashes in Foxy 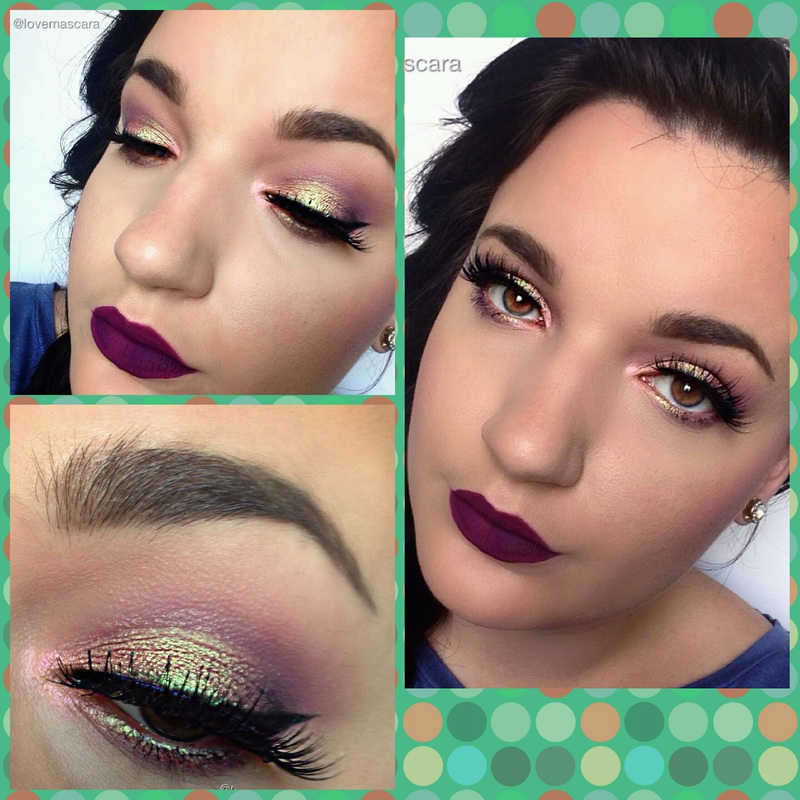 This is the final look. It's very iridescent and pale colors. With a duo chrome pigment. It's just an "enchanting" look in my opinion. The lip I went with is dark purple but you could use literally a ton of shades with this like pale peaches, lavenders, pinks, nudes, even coral in my opinion. The dark lip just helps balance out the look I think.
Eyes: MUG shadows in Mai Tai (inner corner) Wisteria (crease and lower lash line) a bit of Corrupt on the outer corner. Pigment in Hologram applied with a damp brush in the center and inner part of the lower lash line. MUG Immortal Gel Liner Violet Voss lashes in Vamptress Lips Colour Pop Zipper Seeing as how the color correcting trend isn't going anywhere anytime soon, I thought I'd make a more in depth post about how to color correct or neutralize certain things. It won't be as much about new products that are out just what type of product you might need formula wise. I'm gonna include some video links of short demo's on how I do things. 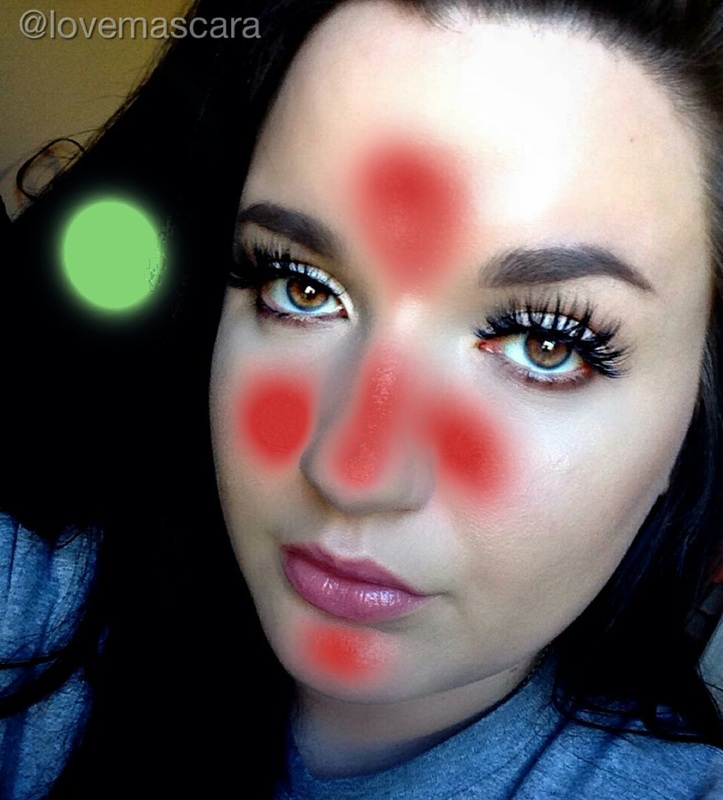 When I think of color correcting I think old school. When we didn't try to color correct everything on our face. Color correcting will not solve every single flaw, just like contouring and highlighting won't change face structure and shape. These things are done as something to HELP areas of concern. So it's ok to want to change things, or not like something but at some point you have to be ok with "hey this is just how it is and I can do things to make me feel better about it, make it look better, or whatever". Trust me when I say, someone else would love to have your issues, or your bad days, and even if you don't feel beautiful...you are. So many people see the beauty in you that you don't see in yourself. If someone is teasing you or being mean, they want to make you feel bad and make you unhappy because misery loves company. With all that aside lets get into this business. The picture about is photo shopped obviously to show some different skin scenarios. This is for those of you with really red skin, or rosecea. I'm not talking a little pink, I'm talking really red skin. So back to the color wheel: Green cancels out or neutralizes Red. I personally don't have redness. I have a little pink which we'll discuss later. Green correctors that I feel are good things to use to neutralize this issue are: primers, Smashbox has a green primer that is really well loved in "Adjust" it's $39 but it's stood the test of time and is considered the #1 primer among artists for this. Make Up For Ever has a primer Skin Equalizer Redness Correcting Primer it's $37. I really enjoy their primers. Another thing that I think is very cool if you don't like primer is, Algenist Concentrated Color Correcting Drops in Green. This is $38. I love these because it's not another layer that you have to do. It's pure pigment and can be added to your moisturizer or foundation even to neutralize the skin. I would start with one drop and go from there to see how much you needed. NYX just released some new color correcting primers for $13.99. I don't know how well they work but in general I like NYX products. L'Oreal also has one on Ulta for 12.99. When it comes to large areas that need to be corrected I like to either use primers or drops. Thicker creams get so heavy and can make you look cakey or intensify pores and I prefer not to use them if I need a large area covered. So I'd go with a full coverage possibly yellow toned foundation and a green base instead of a really thick paste like green cream. If you needed something a little thicker though Sephora Bright Future Serum Color Correctors and also Urban Decay Naked Weightless Color Corrector are both light weight with a little more coverage. 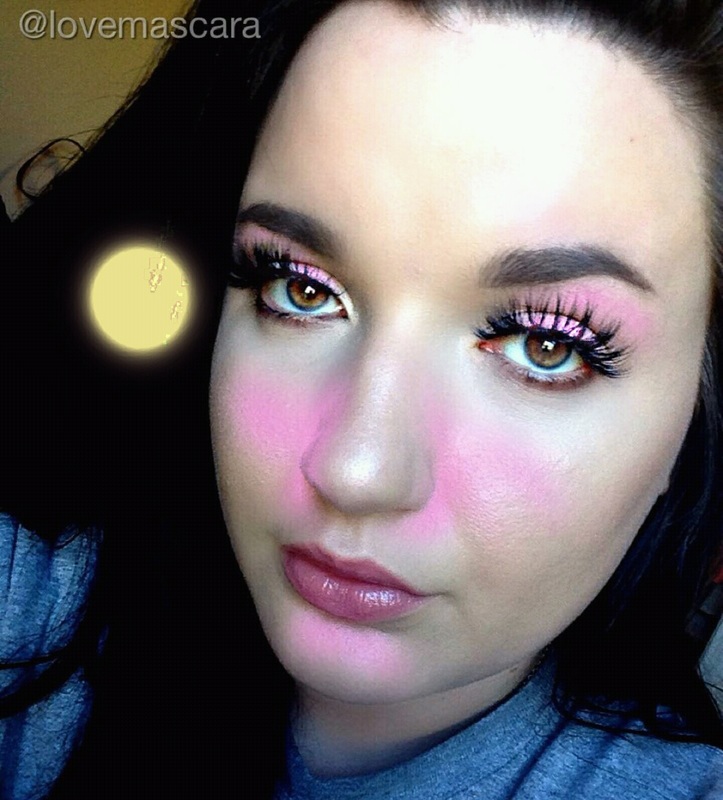 So in this picture we're correcting pink. Hormonal pink around the nose, pink eye lids and just minor things. For pink I like to use Yellow. For the eyelids especially I really like Benefit Lemon Aid eyelid corrector and primer. I also like the NYX HD Concealer in yellow and also the NYX High Coverage concealer that comes in a pot in yellow. The High Coverage is thicker and heavier but that's alright for spot treating a pimple that's a bit pink or hormonal pink or redness around the nose. I also really like Urban Decay Naked Skin Corrector in Yellow or the Weightless Concealer in Light Warm. MAC Light Boost has always been a good choice as well. Yellow correctors aren't hard to find usually. Even if you don't get a full blown corrector, a yellow toned concealer will do the trick. You can let it sit on the skin for a while so that it will build more coverage too, kinda like cooking. I don't usually feel a yellow primer is necessary for pink areas that don't cover the entire face. That's when you'd go with more green. 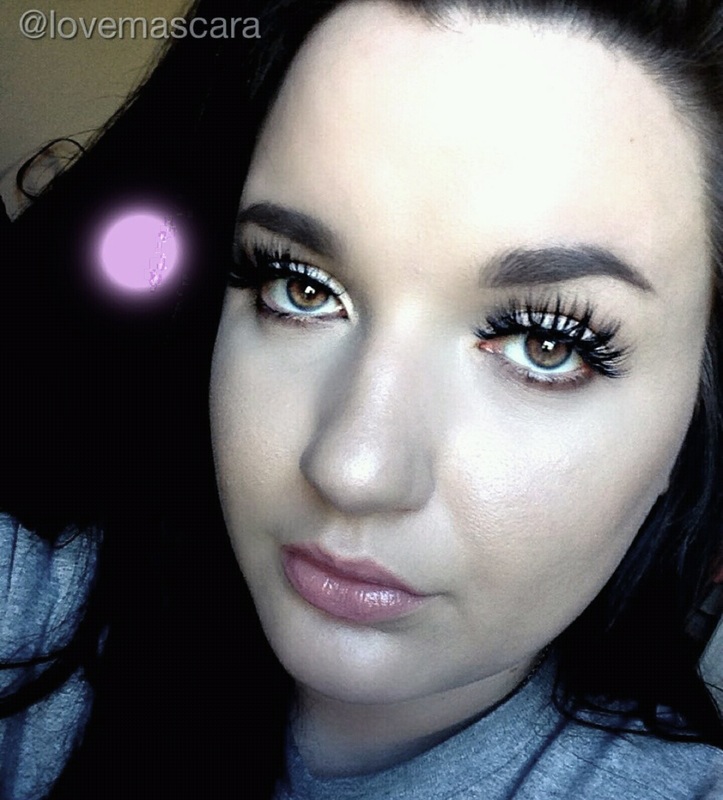 Next up is "brightening" the skin, or correcting skin that is sick looking or overly yellow. The way to do that is with pink or lavender. In the picture above I changed the saturation to make my skin look very dull with minimal color in it. Primer is another route I would go or even powder. Besame powder in Vanilla Rose is a super light pink powder that is very brightening. They also have Lavender as well and I have both of those and they work really well. NYX released a color correcting powder in Lavender but not Pink. This is easy to correct over foundation though as well as under it, so it's really up to you how you want to do it but I do prefer doing it over top of foundation. Some other good options that aren't powder are MAC Radient Rose, Urban Decay Naked Skin Color Correctors in Pink or Lavender, a pink based concealer, Maybelline Instant Age Rewind in Brightener, so on so forth. Olive skin tones may want to go with Lavender instead of pink while lighter tones may want to go with pink. Sometimes it's as easy as getting a more pink toned foundation. Of course blush and other things are gonna help put color in the skin as well. 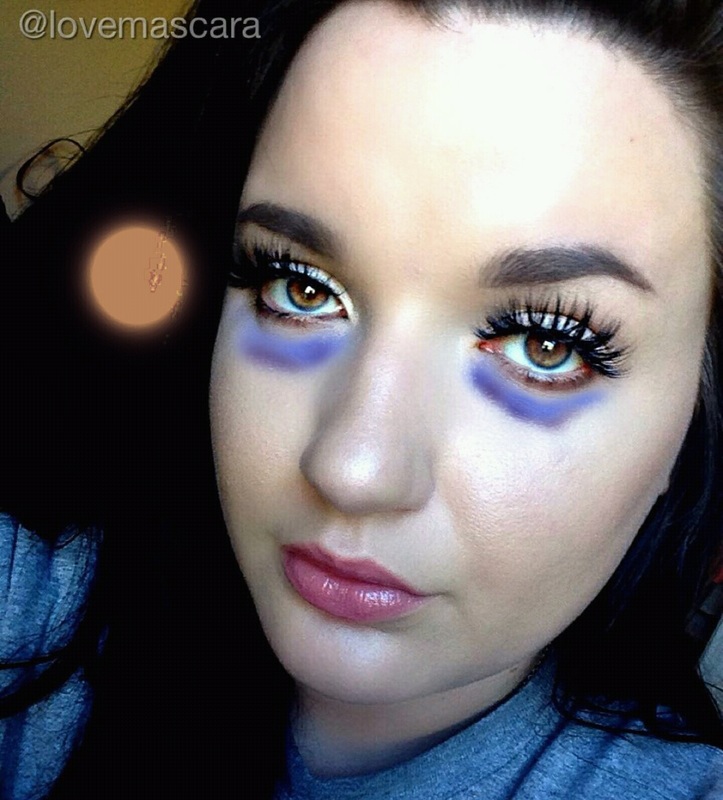 Lastly, is my biggest issue, which is dark circles. Dark circles are hereditary, also from lack of sleep and poor health as we know. I've tried dozens of products over the years. I'm very picky but I have found some really great ones. Peach is my preference for my blue and purple circles, but Pink can also be used if they aren't super dark circles. My favorite pink corrector for circles is Becca Under Eye Brightener. It's a light pink and reflects light as well so it bounces of the reflection of the corrector since it's so luminous and shiny. I also like Benefit Eye Bright I don't like the actual crayon cause I don't like to drag things on my lower eye area since it's so delicate under there and the crayon is kinda dry. I do however like it when they put it in compacts or duos. That to me is easier.
For peach correctors I like Benefit Erase Paste in shade 2 they have 3 shades. It's very very creamy which is always a plus. It goes fast though. I also really like It Cosmetics Bye Bye Under Eye Corrector which is a little less creamy but still very nice and has that shine. I love NYX Dark Circle Corrector just as much as any other it does a great job, I always have it on stand by. Recently I've been using Sephora Bright Future Corrector in Peach to cancel them when I need a bit more than pink but not a hardcore corrector. MUFE also has a line of of correctors in the Ultra HD concealer (they start with R while the others start with Y) that are more for dark circles. If you have darker skin or have actual dark spots darker peaches and oranges like papaya and mango shades might be more to your liking such as Becca Backlight Targeted Colour Corrector in Papaya. If you need a larger area covered because of pigment issues, Smash Box has a peach/orange primer base as well as NYX and MUFE has a peach primer and a caramel primer for dark skin tones. Algenist has an Apricot shade in their color drops. I've also seen people use Red for dark circles but I don't just because it runs into the already pink areas I may have and amplifies them. I have seen some though that used it and it worked wonderfully from light skin- darker complexions. There are also some products that are "balms" I however just don't really like that idea. I think other things would work better and be cheaper than the "balms" I'm seeing. Here's some videos on color correcting products I've used: Benefit Life's Little Correctors Set: I used the Eye Bright, Erase Paste, and Lemon Aid for my eyelids. Sephora Bright Future Corrector in Peach for dark circles Urban Decay Weightless Concealer in Light Warm for hormonal pink around the nose and then Benefit Shy Beam Liquid Matte highlight that is a baby pink to brighten up the face in certain areas. As always you can buy these things at Sephora and Ulta or even the drugstore for some. I also really like ordering from Frends Beauty. You can sign up and be a member for free and get 10% off your purchases at all times. As always use Ebates and get you some cash back if you can. Hope this helped you out in some way. If you have any questions don't hesitate to ask me or email me I'd be happy to help. 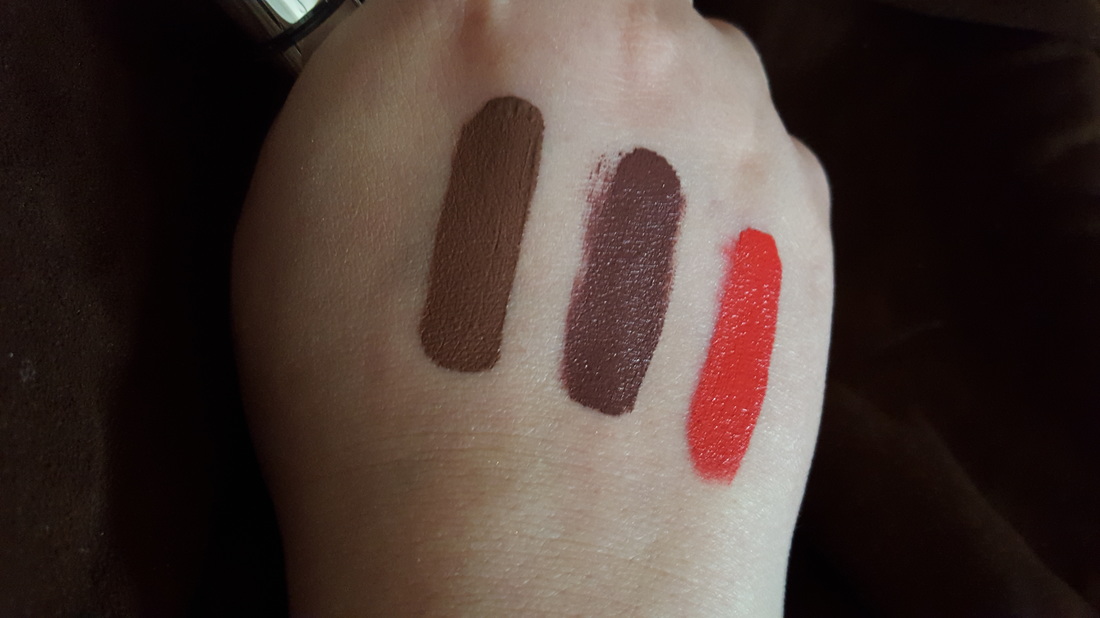 Recently I picked up some of the Satin Liquid Lipsticks from Colour Pop. These have been out since mid-late February. I got shades Mess Around, Toolips, and Cozy (swatched from left to right.) I love these. Let me repeat, I love these. The reason I love these will probably be why some people don't. I love them because they don't dry down completely. I'm kinda over the whole matte liquid lip that crumbles or cracks or looks crusty and dry. These keep their color all day but they will transfer to straws and what not, they will smear if you rub your lips but unlike a lipstick that would just wipe off this keeps it's pigment and coverage but they just don't dry completely. They're also easier to "clean up". If you've made a bit of a mistake it's easy to fix with these. They feel really nice, I don't feel like it's a must that I hydrate the lips as much as possible for a while before putting these on, like you would with super dry liquid lipsticks. These are $6 like the Ultra Matte line. I'm a huge Colour Pop fan as you know. They are one of my favorite companies. I really enjoy their products and love watching them grow. 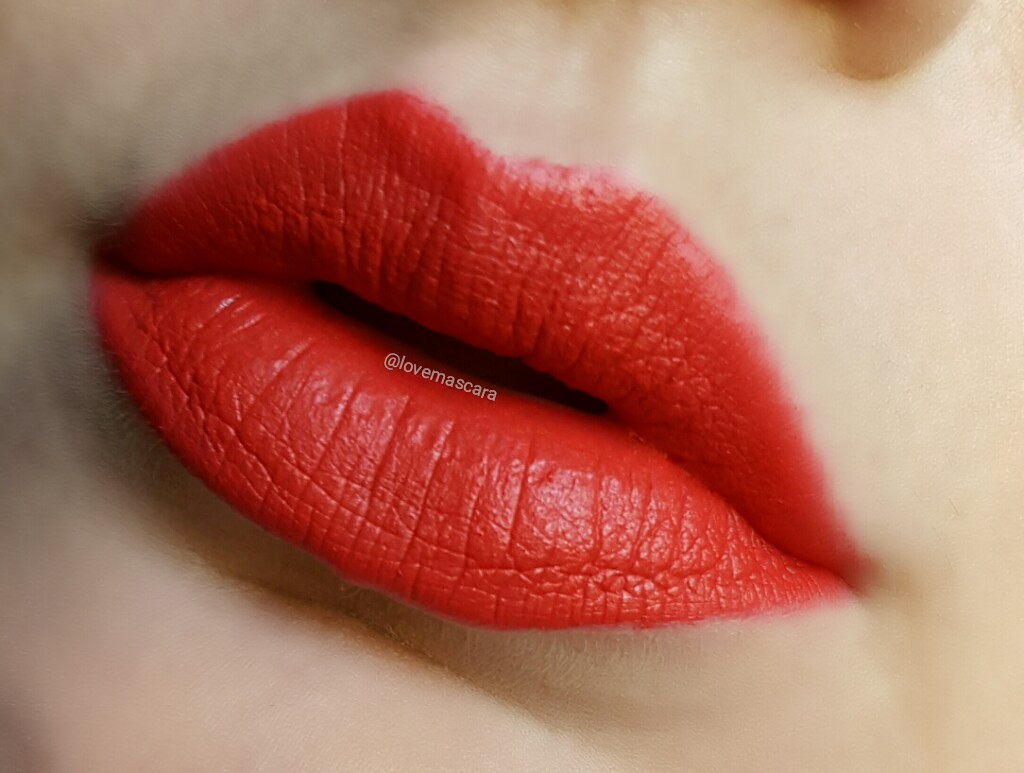 This shade is Cozy. It's a bright orange-y/red. It's very similar to Succulent from the matte line but Succulent is more red. This I guess would be more like a coral. I really am loving this as a spring and summer shade. 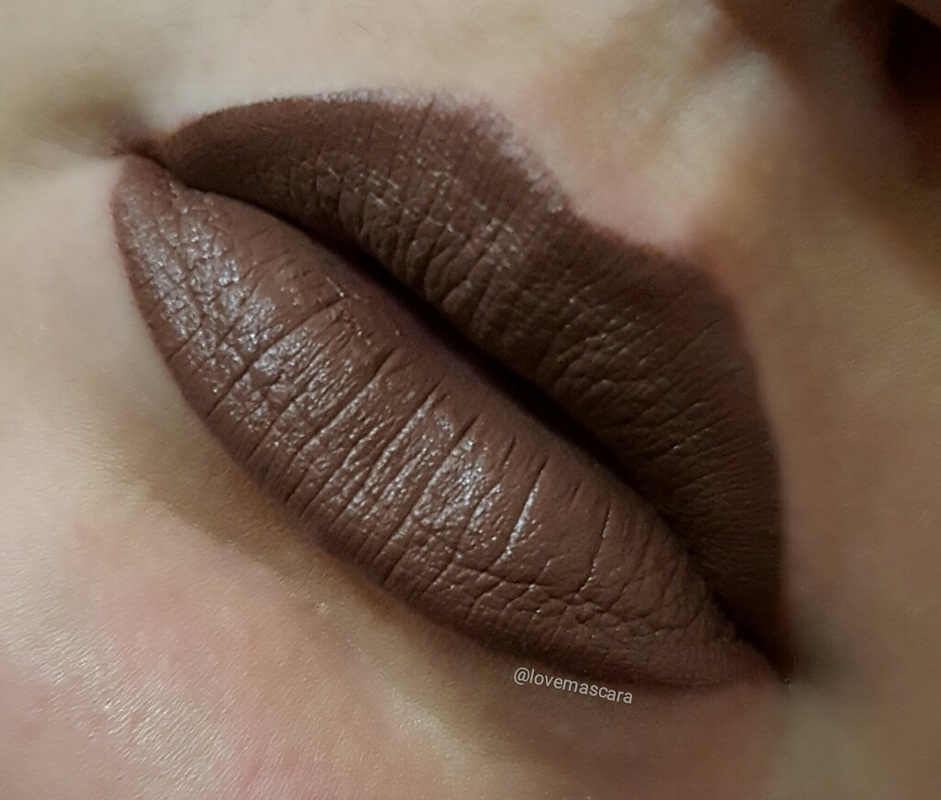 This is Mess Around. It's a medium brown lip. I didn't have any brown lip colors surprisingly. I think the lip liner in Wet would go well with this, also from Colour Pop. I really love this color. It's not a light greyish brown it's more of a true brown, but extremely wearable.  This is "Toolips". This has some brown in it as well but it's really more plum. This swatch really looks more brown but in person it's a darker warm plum-y brown shade, in my opinion. I really love it though because it's a unique shade. It looks different all the time I think. 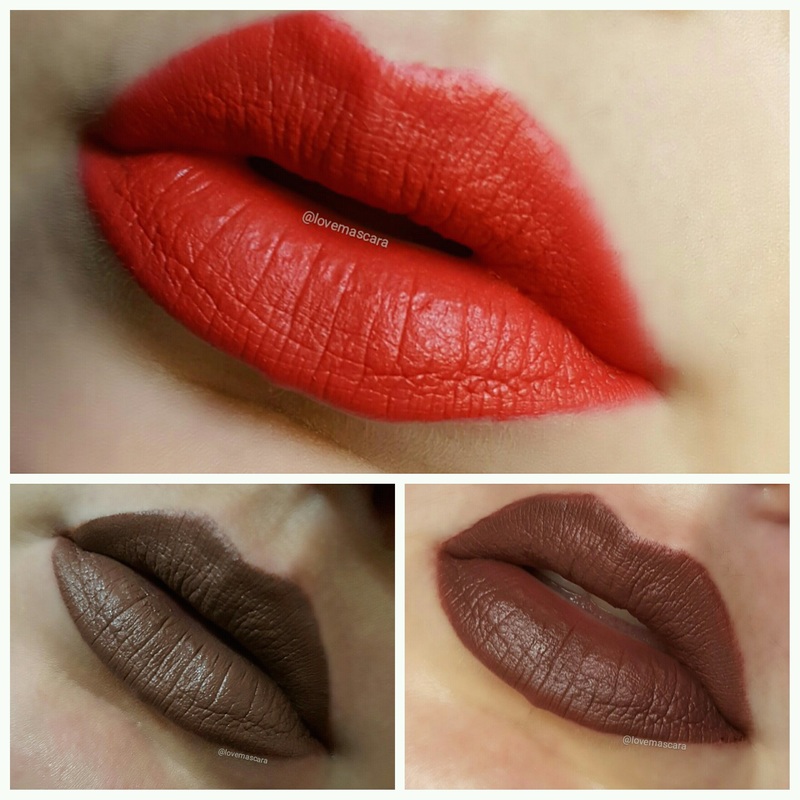 So there ya go. I love these and I will pick up more. They have some more neutral shades as well. There are 16 shades all together, only one is sold out right now. Remember, if you're shopping for the first time at Colour Pop sign up for emails and I think you get $5 off your first purchase.
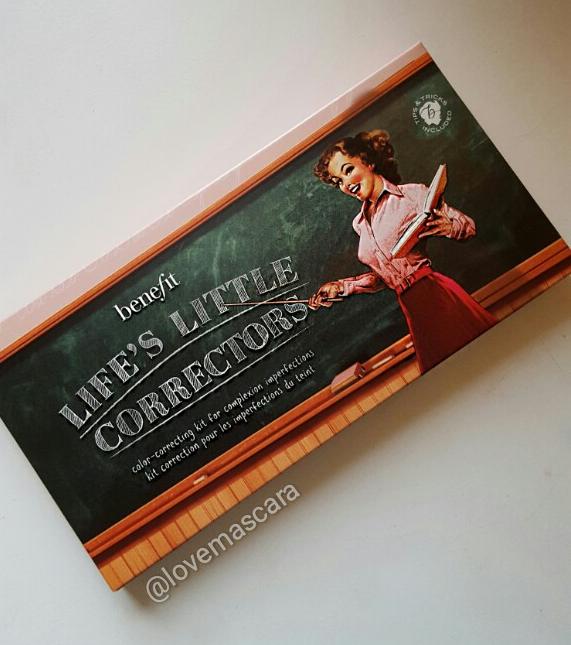 Color correcting is the new trend and while I do think there is a need for color correcting, I don't want everyone to get crazy with it like contouring is. Believe me you don't need much and you usually only need 2 maybe 3 shades at most. So I don't get down with the sets that have every shade under the sun unless you're a freelance artist. However, I really like this set because while it does have correcting qualities they serve different functions. 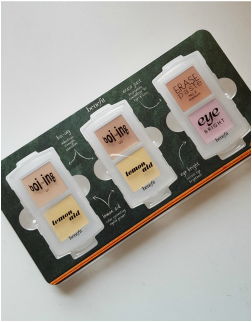 This comes with 2 "Boi-ing" concealer shades in 01 and 02. Two Lemon Aid yellow eye shadow primers that correct redness. An Erase Paste in 02 Medium for dark circles and Eye Bright to brighten up dark areas.
I used the Erase Paste for years, I've always really like Lemon Aid and Eye Bright as well. This is a cool set for a freelance kit it's very compact when the little containers come out. I really enjoy this. I done a little demo of this showing how I'd use the Erase Paste, Eye Bright, and Lemon Aid. Now on a normal day I would probably just use Erase Paste and maybe the Lemon Aid primer if my eyelids were really red. Today my whole face was red though so I used it as well. I'll link that demo here. This is pretty cut and dried you get two actual concealers for blemishes, two eyelid primers that are the same, and a dark circle corrector in peach and brightener in pink. This goes for $20 at Sephora which is a great deal, it's also limited edition as well. I'll go through the Erase Paste fastest because it's super creamy thus easier to get more product out. The rest is more dry creams so you're not accidentally getting out more than you need. I find that the darker shade of Boi-Ing concealer is a bit too pink for my taste. That's not a deal breaker though especially for the price. Remember if you're going to to get this then use Ebates and get you some cash back when you shop. Link for Ebates is in the side bar. 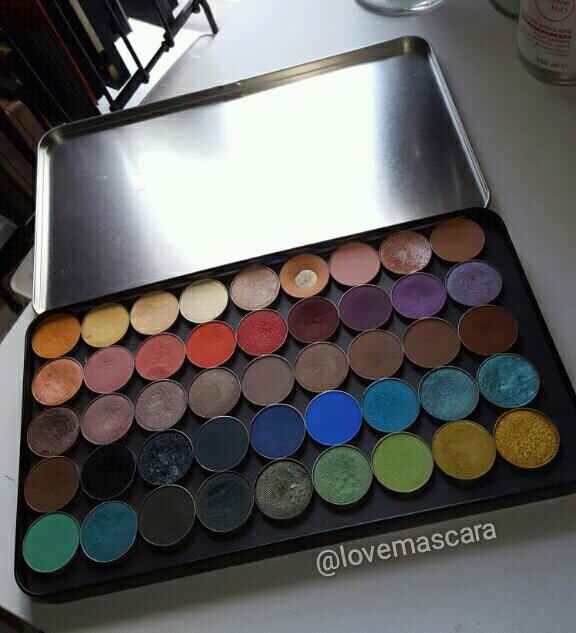 I finally completed a palette full of my Makeup Geek favorites. I actually had a smaller palette which was the Large palette from Make Up For Ever. This one is the XL palette. It holds 45 shadows that are standard size shadows. The Make Up For Ever single shadows are bigger than shadows like: MAC, Makeup Geek, ABH, Coastal Scents, and so on. Standard size is around .064 oz. So like I said these are my favorite colors and it's taken me over a year, maybe 2 years, to get all these because I'm very selective. There are only a few that I don't use that much. A great way to get MUG shadows if you haven't tried any is bundles. There is a starter pack on sale for $44 that has 9 go to shades. There is another vegan bundle pack that is mostly cool toned and greenish blues and taupe shades along with some really good basics. It's $50 but you get 2 foiled shadows which are $10 a piece and the rest are from the permanent original line. So from left to right starting with the top row: Chickadee a light orange or burnt yellow Yellow Brick Road a satiny finish pale yellow Mirage satin finished ivory Voltage duo chromed pale yellow pearl Shimma Shimma shimmery silverish ivory/beige Peach Smoothie my favorite transition shade. It's a pale warm peach. Sorbet from the Matte line. This is a perfect pale baby pink shade. You can barely see it on my skin though. In the Spotlight this is from the Foiled line. It's a silverish peach finish. You don't hardly see the peach as much as you do silver tones because of the light reflecting off it. Creme Brulee another really good transition shade. A peachy brown shade. 2nd row Mai Tai from the Duo Chrome line. One of my all time favorites. It's a pinky peach duo chrome that's more pink than peach. Cupcake from the original line. It's a mauvey pink that's great for plum or purple eye looks as a blending color. Mango Tango from the original line. A brighter peachy pink with flecks of gold. Poppy is a coral/mango bright shade. Razzleberry this is a red raspberry shade with gold glitter. Bitten this is another one of my all time favorites from the OG line. Its a matte maroon shade, its not too dark though. Curfew from the Matte line. It's a medium purple. It's not overly bright purple that pops it's more for definition. Wisteria a bright lavender, spring time purple. This is the 2015 remake. Blacklight from the duochrome line is purple based with light silver blue reflects. 3rd row Mesmerized a purple taupe shade from the Foiled line Twilight. This shade I don't use much is a shimmery silverish purple Prom Night also a shade I don't use often. Its a shimmery deeper silver Moondust a taupey shimmery silver Bedrock a matte grey Hipster a cool toned medium brown with a satin finish Barcelona Beach this is a good transition shade for cool toned looks. Its matte grey based shade with a touch of brown. Latte a light cool toned brown Cocoa Bear a warm medium brown 4th row Mocha a neutral deeper brown Corrupt the blackest black eye shadow I've ever used. Houdini from the foiled line. A foiled Navy with a touch of deep green in my opinion. Time Travel a matte muted navy Boo Berry from the matte line. A brighter navy blue like a blue berry basically. Neptune a bright royal blue Poolside a lighter super bright blue like the Caribbean water. Mermaid a teal with golden reflects shimmer Pegasus from the foiled line a foiled bright blue 5th row Dragon Fly a spring time sea foam teal Shark Bait a darker matte teal Enchanted Forest matte forest green Envy a shimmery glittery super dark green Typhoon a duo chrome of dark green and gold Appletini might be discontinued. Its a pastel green shade with gold satin finish and glitter flecks. Fuji from the matte line but it has some glitter in it. It's a lime green Pixie Dust a shimmery yellow with a bit of green in it. I use this all the time actually. Fortune Teller a foiled gold. A super bright gold. Like as gold as yellow gold gets. So that's all my MUG shades. I love them, I've not found a single one that was't great. Plus they're inexpensive. The matte, duo chrome and regular line is $6 and the Foiled Line is $10 a piece. They honestly are my favorite line of eye shadows I have. Anastasia Beverly Hills would be in second place. I'm a huge Makeup Geek fan as you know. I pretty much have loved everything they've put out. I've enjoyed watching them grow as a company, I've been a subscriber of Marlena's since before she started the company, I love them as a whole but their products can't be beat in my opinion. 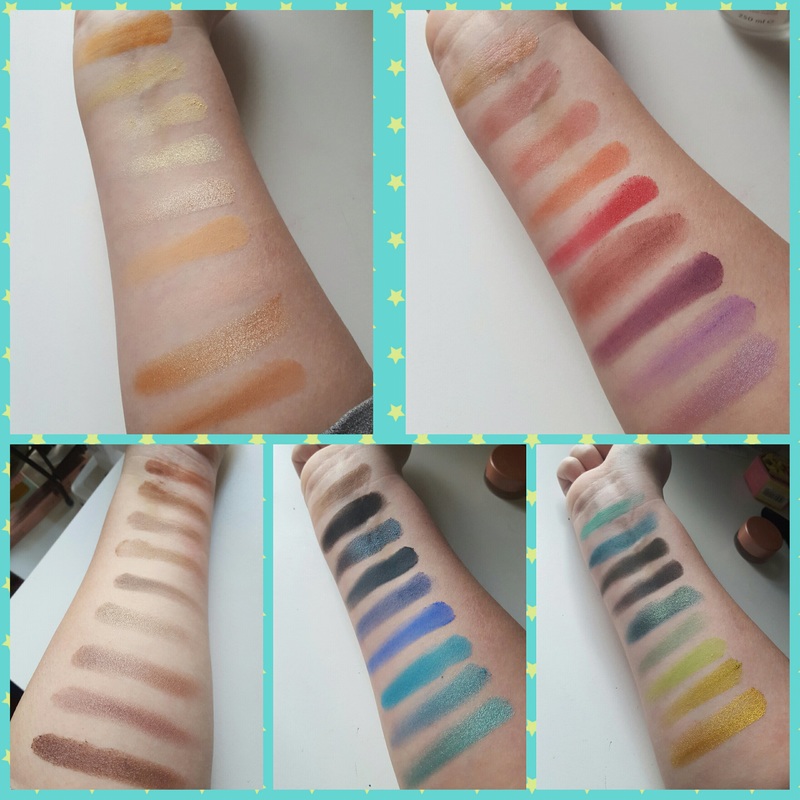 The top left pic of swatches are the top row in the palette: Chickadee, Yellow Brick Road, Mirage, Voltage, Shimma Shimma, Peach Smoothie, Sorbet, In The Spotlight, Creme Brulee The top right pic is the 2nd row in the palette: Mai Tai, Cupcake, Mango Tango, Poppy, Razzleberry, Bitten, Curfew, Wisteria, Blacklight The bottom left is the 3rd row. The swatches go from the bottom up on this one and left to right in the palette: Mesmerized, Twilight, Prom Night, Moondust, Bedrock, Hipster, Barcelona Beach, Latte, Cocoa Bear The middle pic on the bottom is the 4th row and the swatches go back to top-bottom: Mocha, Corrupt, Houdini, Time Travel, Boo Berry, Neptune, Poolside, Mermaid, Pegasus The bottom right pic is the 5th row Dragon Fly, Shark Bait, Enchanted Forest, Envy, Typhoon, Appletini, Fuji, Pixie Dust, Fortune Teller There are some things I think would be beneficial to know if you wanted to start your own palette. I really recommend the matte line. The finish is very buttery soft and softer than some of the permanent shades (not all just some) so that's something to consider. I love the color Bitten but it's drier than the actual matte line they released later on, so maybe Cherry Cola from the matte line would be something you'd be interested in. Just using that as an example. They're the same price. It's one of the things I really love about MUG is they are constantly redoing the formula if something isn't up to par. They've had several remakes over the years. Definitely look into the matte line for sure, here is a link to a video that shows what shades are in the matte line. There are 20 shades in the matte line all together. 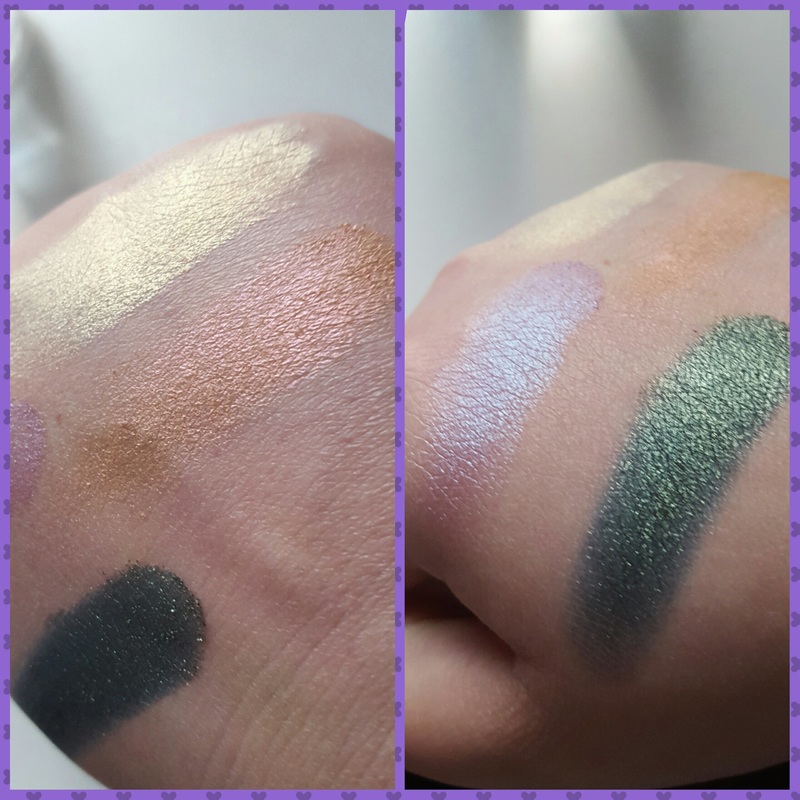 These are the duo-chromes. They are the same price as the rest except for foiled shadows. What I love about these are that they almost look foiled. I couldn't get a great pic of them on the swatches on my arm. They have to be moved around to catch the other shades in the shadow so it's hard to take just one pic of them and show what they can do. On the left side is Voltage a pearly pale yellow and then Mai Tai next to it which is a peach base with lots of pink. Mai Tai is one of my all time favorites. The right side is Blacklight. Its a purple base with a light blue duo chrome. It's very bright and lighter than what you see in the pan. Typhoon is a forest green with a gold duo chrome. It looks almost foiled for sure. Duo Chromes are really cool to use with dark or light bases. To make them really bright use white, to make the duo chromes pop more use a black base. I apply them sometimes with my finger, especially Mai Tai. They apply well with a brush though. I just use my finger when I really want to pack on the color. 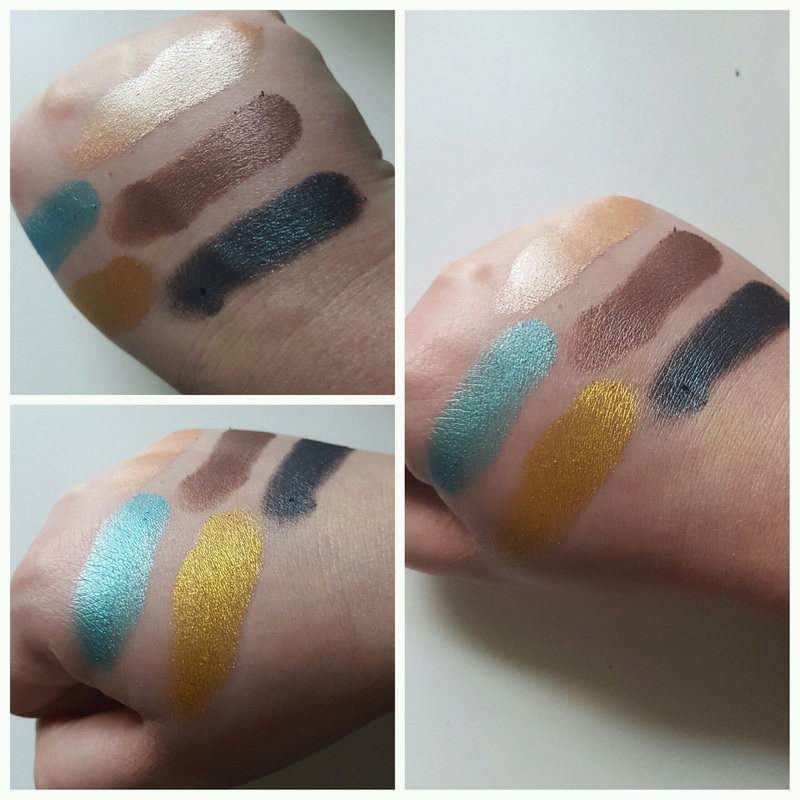 These are the foiled shadows. The top three are In The Spotlight, Mesmerized and Houdini. The bottom two shades are Pegasus and Fortune Teller. Light bounces right off these super foiled shadows. They are $10 a piece and I feel they apply best by using your finger. You get the most pigmentation that way I think. I love using these as a pop of color in the center of the lid. You can use a brush to apply these but I find it's a little harder that way. 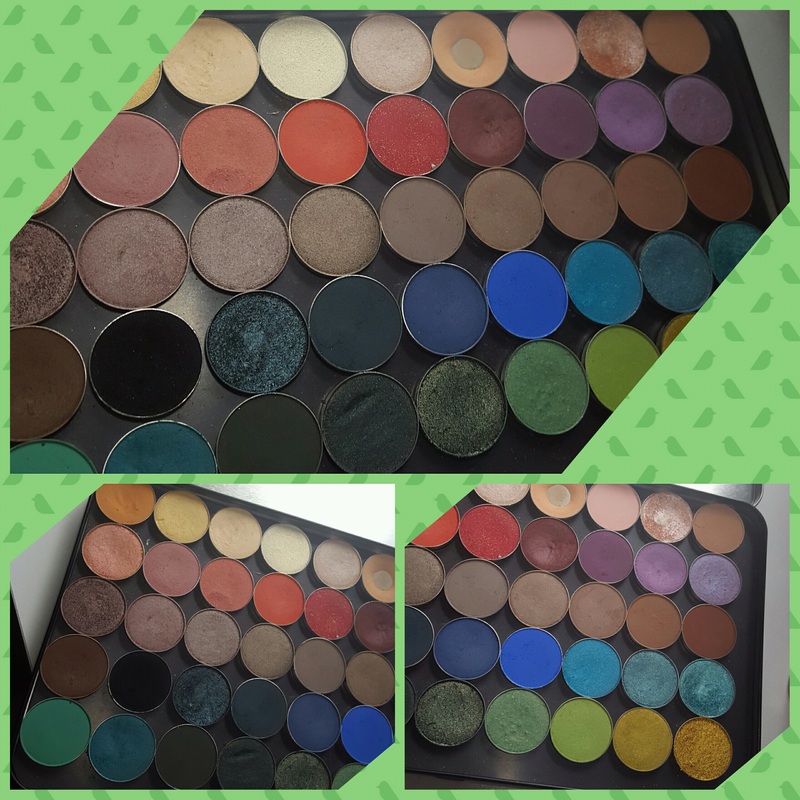 |
ErinI'm from Tennessee. I'm a makeup and skincare lover. I have always enjoyed creating looks but I love to help people with product knowledge and application even more. I've been able to start blogging and do these things I love because God has seen fit to bless me with the opportunity. Thanks for stopping by and visiting with me! 

 
Categories
All
Archives
January 2022
|
 RSS Feed