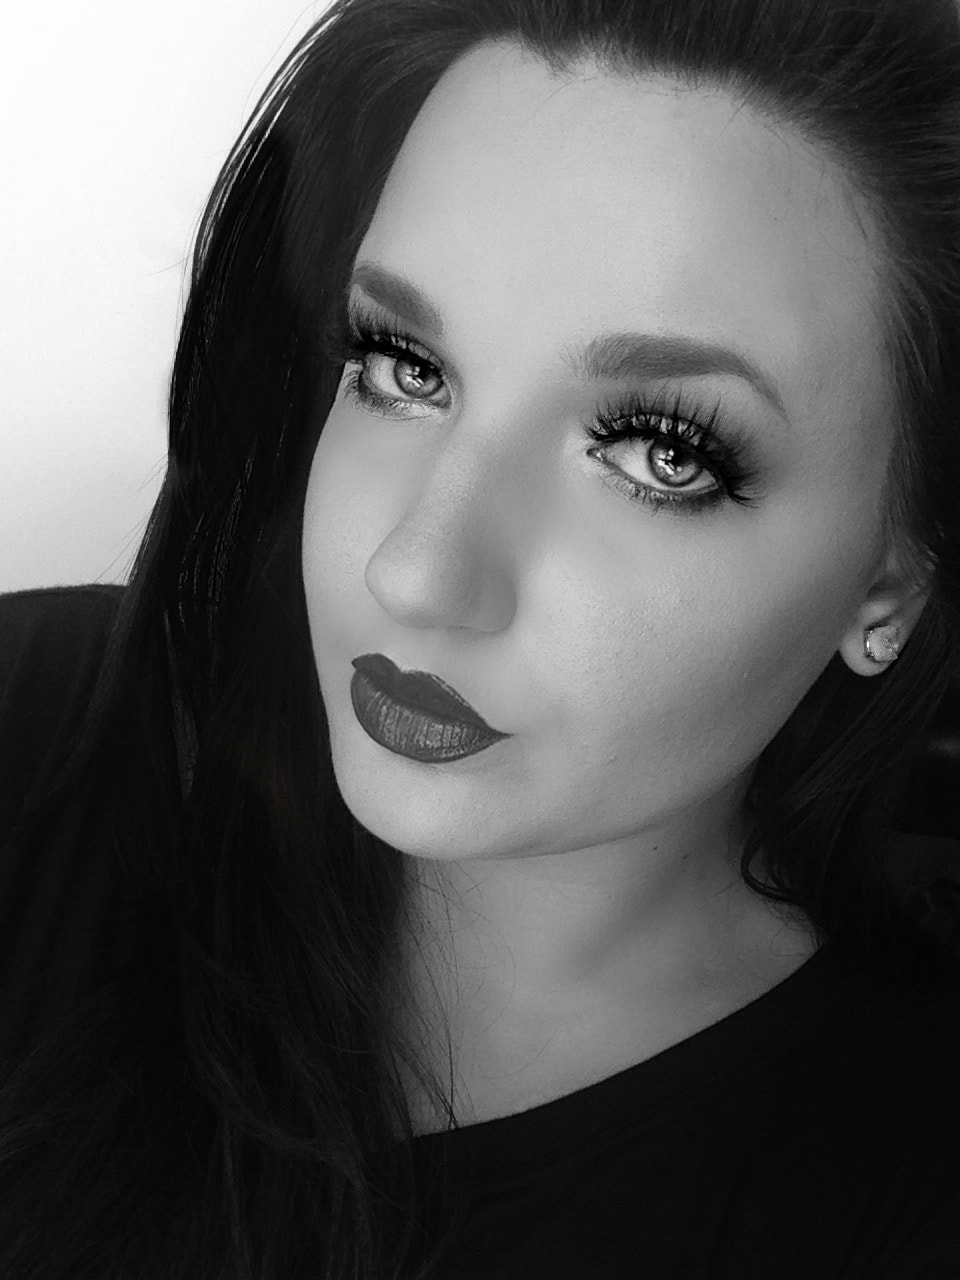
This is something I've wanted to talk about for a while lately but I was unsure how to execute it in the simplest way. I used a lot of eyeshadow in this just to show how intense and how much it could glow and change but you don't have to do this many at all. I was just going above and beyond to hopefully show how unique this can make an eye look.
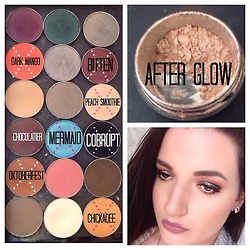
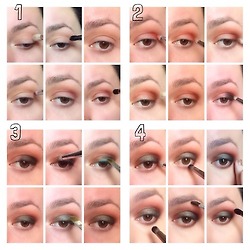
The order it goes in with each block in the 2nd collage is: Peach Smoothie (mug) with a MAC 217 Blending Brush in the crease, any medium sized fluffy blending brush with do. Chickadee (mug) with a Makeup Geek Crease Brush also in the crease. The reason it's not the same brush is because this one is tapered and will deposit more color but also not blow the color out as much as the first one. Bitten (mug) with a pencil brush. Not bringing it in quite as much as the first two and focusing it even more in the crease than Chickadee. After this I blend with my Tapered Crease Brush again with no additional product on it. Dark Mango (CS) pencil brush this is where I'm going to start placing color on the lid deliberately. There will be some on it from the blending you've done but this is going to be more precise. This color is super bright and it's going to be extremely "glowy" underneath the other colors. It's going to be on the very outer edge of the lid and going into the crease stopping about half way in ( dead center). Oktoberfest (CS) pencil brush this color is too take the "orange" tones down a notch, to a tan-orange kinda. It's going to go over the Dark Mango and you can add as much as you want to it. This is where you're really going to start seeing the undertone change and the intensity build. Chocolatier (CS) pencil brush. Again this will go over the last two shades I didn't bring it as far in on the crease as I did with the last two just because I wanted my darker color to really be in the outer V area. I packed this on quite a bit though. After this I blended with my 217 brush with no additional product because after this we'll be focusing more on lid colors and dark colors that I don't necessarily want to be blending in with the crease. I want my crease to stay bright and deep orange-tan. Corrupt (mug) outer lid with a pencil brush. this will be barely touched in the outer corner of the crease just to add that last final touch of darkness and it'll cover the outer half of the lid entirely. I'm using black because the teal I'm going to put over it I want to be a little darker than it is in the pan. Oktoberfest (CS) inner lid with pencil brush. You can skip this step I done this to connect it with the tan color that shows through in the crease but you can leave it alone entirely and let the teal color be brighter in the inner corner. It's whatever your preference. Mermaid (mug) over lid with a flat brush. With a color that's going to pop I think it's best to "pat" it instead of "swipe" it, it'll make it brighter that way because you're not actually wiping away the color. Also this is going over a mostly dark lid so I needed it's intensity to stay on point. And After Glow pigment (mug) with flat brush over that to brighten the teal just a little bit. I used this just because it kinda lightened up the look but also added in that touch of gold so there wasn't so much of the blue tones in the teal showing. It kinda neutralized it just a little bit, if that makes any sense. The lower lashline is Bitten with a pencil brush. You can put whatever color you want down here I just really like Bitten. You could use Corrupt or Chocolatier or even Mermaid. This is just how I chose to do it. Now I don't have my concealer and foundation on yet. The reason for that is: A) fall out from the colors on the lid. and B) because I'm going to actually blend in the next step and when I do my concealer and foundation it's going to clean that up but it'll still be a really smokey lower lash line. Oktoberfest with a Makeup Geek Outer V brush. This color is a tan basically the color of a bronzer so it can be really blended and blown out and not get crazy. As I said above though I hadn't applied foundation so I can blow this color out and clean it up with foundation and it not ruin my concealer or anything like a black would. The important thing for this though is the brush because it's a very dense but short "crease" brush I guess you could say. This will both place color but be dense enough to take the intensity down if you blend with it. You can use a pencil brush it just might take a little longer to blend it or work with the color. If you need to clean up the edges, after your concealer and foundation is applied you can take your ring finger and pat the outer area to clean it up as long as you haven't set your under eye yet. So instead of taking a tissue or q-tip and wiping away the eye shadow and foundation I just use my ring finger to pat it and clean it up. Obviously if you want a straighter and harsher line you'll need a tissue or q-tip, or if the shadow got really messy. But for this, I just need to smooth it out. Lastly,Urban Decay Foxy (matte) is my brow highlight. It's got a more yellow base than a beige or a pink which I like because I have a lot of pink in my skin so I don't need to have a pink brow and people think I just got waxed or something. It's also matte and I just prefer matte highlights because I think shimmer can get a little too crazy and take away from the actual look you're doing. Shimmer is fine though in light and small amounts. After I apply my brow highlight I go back over it with a blending brush that has no product on it just so there isn't a distinct line where the brow highlight and my crease colors are. So I blend to make them fade into each other better. Just lightly, you shouldn't need it hardly at all. This is long and drawn out, I just really feel like people could have so much more use and fun out of palettes if they'd start building and layering colors to bring out different looks. The possibilities are endless and can be so surprising. I just really like how it will always look unique when you build on colors whether it's 3 colors or 8 colors no one will be able to look at your eye look and go "oh yea that's Makeup Geek Bitten in the crease and Mermaid on the lid". It's going to be "Well it looks like a orange with hints of burgundy and warm brown but then on the lid it looks like black with a warm base and then a teal color on top". It makes people go look at the colors they have to try and do something similar and that's the fun part is re-discovering things you already own to make them look completely different than how you would use them. If you read all this, bless you. You're a trooper. :)
0 Comments
Your comment will be posted after it is approved.
Leave a Reply. |
ErinI'm from Tennessee. I'm a makeup and skincare lover. I have always enjoyed creating looks but I love to help people with product knowledge and application even more. I've been able to start blogging and do these things I love because God has seen fit to bless me with the opportunity. Thanks for stopping by and visiting with me! 

 
Categories
All
Archives
January 2022
|
 RSS Feed