|
So every once in a while you stumble on some really useful makeup tricks and hacks to help you along. Luckily I've stumbled across a few whether from Youtube videos, blogs, or just luck. So I thought I'd share some with you that I actually do use and that I find very helpful.
0 Comments
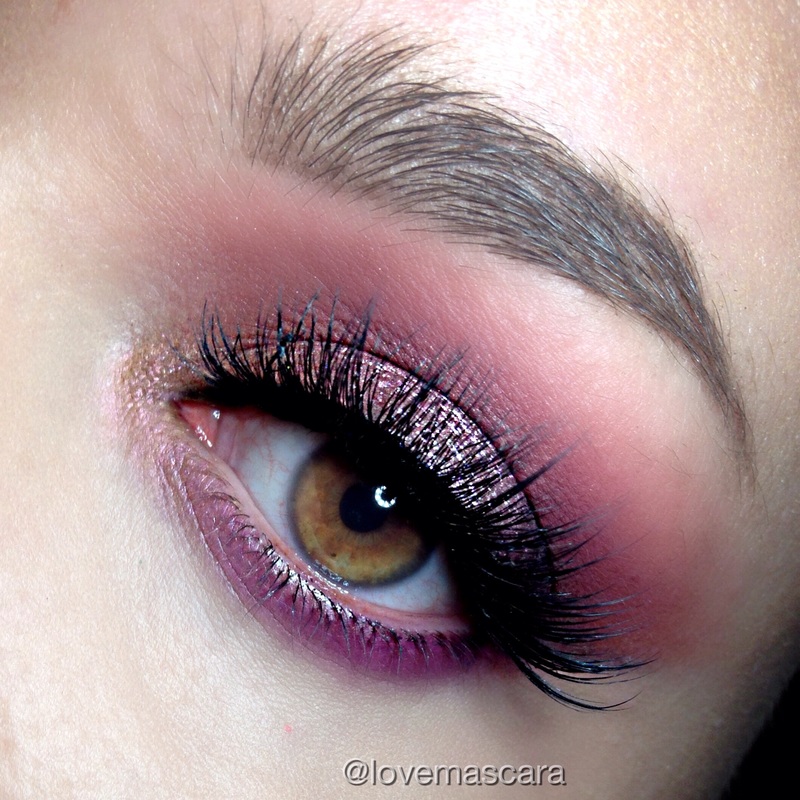 Valentines Day is upon us. So I've put together some looks that range from dramatic to neutral to festive. The one above is typical girly and festive. It has glitter, it's soft, and pink. The star of the show is Makeup Geek Halo Sparkler which is a soft cool toned pink glitter. The other shades are Makeup Geek as well and they are Sorbet, Cupcake, Bitten, Corrupt, and Mai Tai. Lashes are Violet Voss "Vamptress" lashes. The key thing to remember, as always is: Bigger blending brushes for lighter colors, smaller blending and dense brushes for darker colors. I use a pencil brush for black, dark brown, and greys. Going back to that biggest fluffy brush to blend out harsh lines. Then using a flat stiff brush to apply glitter or pigment. If you use glitter or a sparkler you'll need glitter glue if your using a pigment you can just wet the brush with eye drops or facial spray. 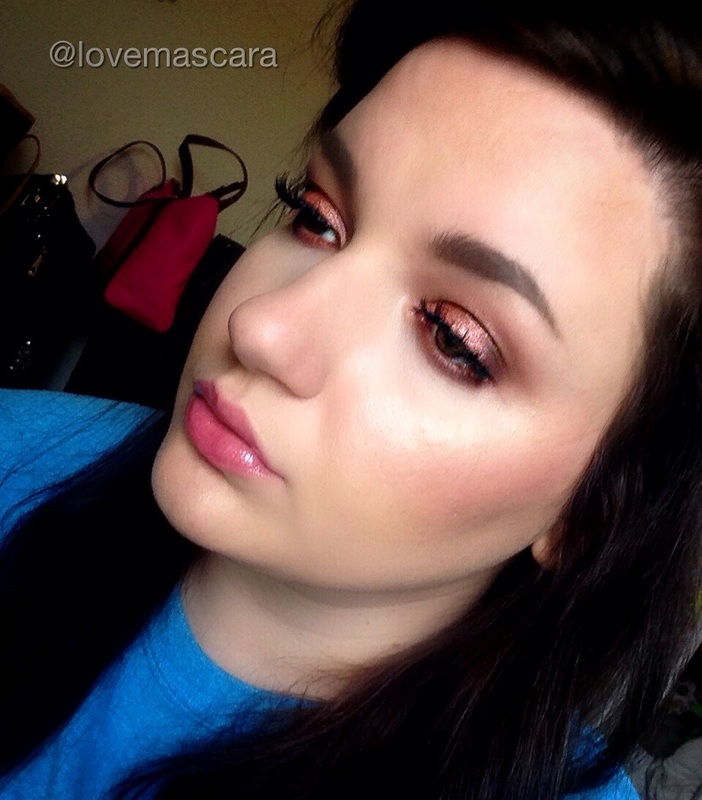 This look is very neutral, it's rose gold. I used Smashbox Art. Color. Love palette and the color Oxidize specifically. Also Ardency Inn Rose Gold is another good option. I'm just blending it with brown colors, but not taking away from the Rose Gold look. So basically you could achieve this by just sweeping a Rose Gold all over your lid and blend. It's that easy. The lashes are House of Lashes "Siren" lashes. Also very simple looking. Lips are YSL Tint Oil in 5. Which is Cherry I think. So basically just a super glossy lip that magnifies your natural lip color. 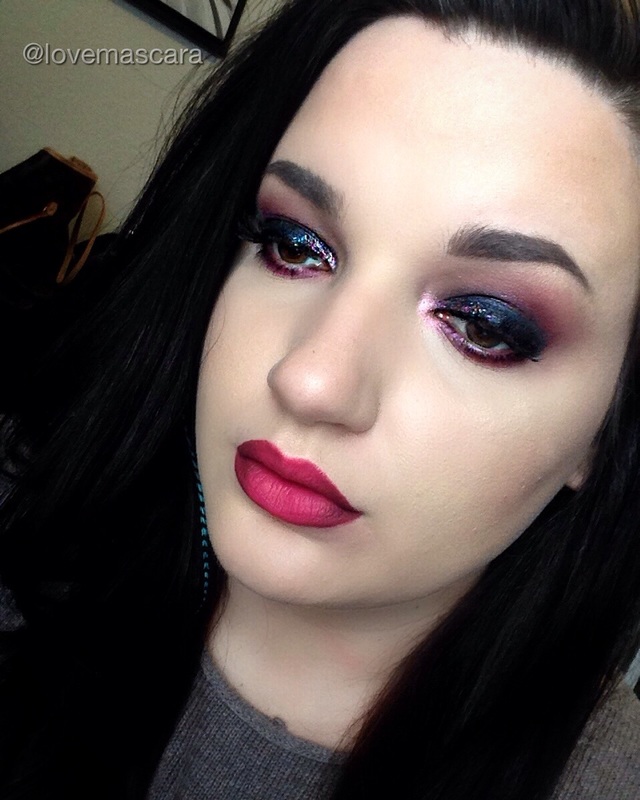 This look is super dark and dramatic with very festive lips. The eyes are: MUG: Corrupt, Mai Tai, Sorbet, Cupcake, Poppy, Bitten Star Crushed Minerals: Phantasmic glitter House of Lashes: Siren lashes Lips are: Vamp and Sweet Talker from ABH. This is an ombre lip. Here is the link for another ombre lip you could do that's very Valentine's Day appropriate and also the same technique as this one. 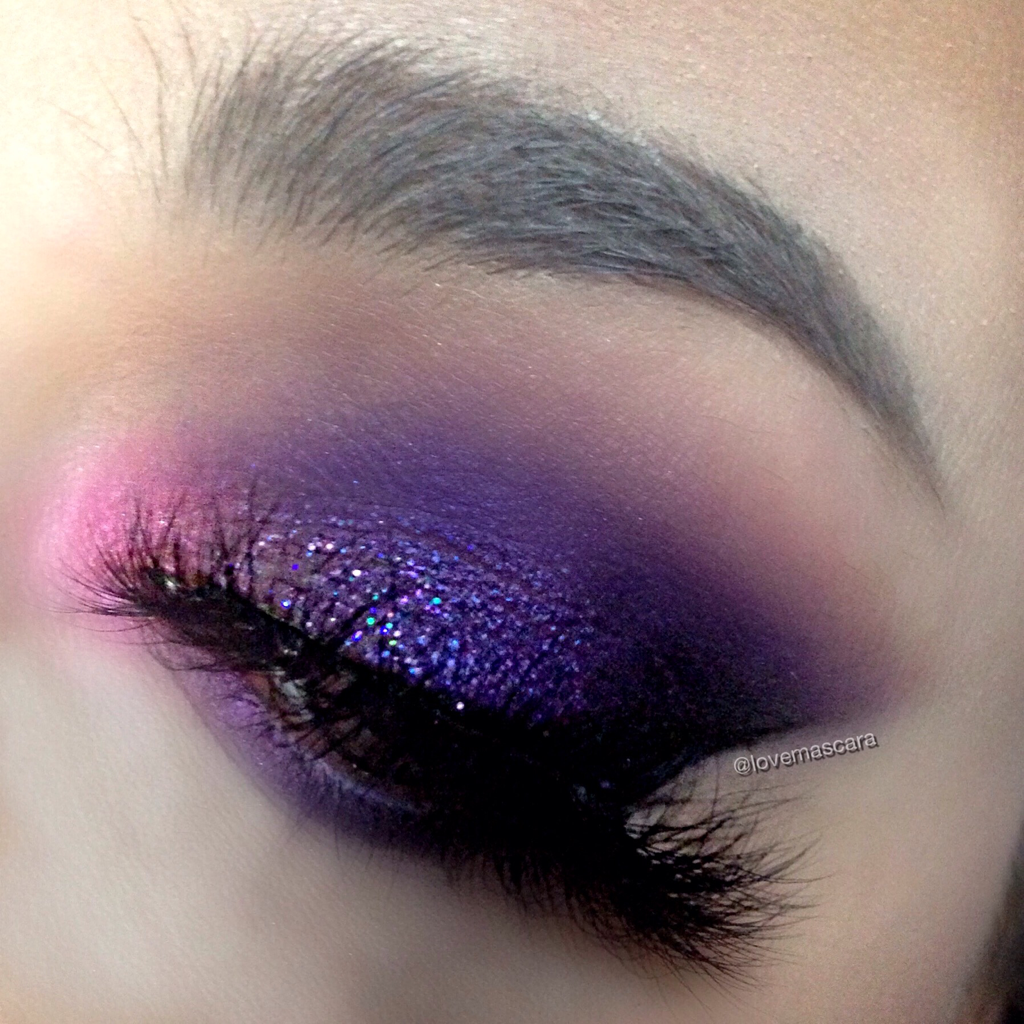 This is a super colorful, dramatic and edgy look. The colors are pretty simple: Ardency Inn "Royal" MUG Curfew, Corrupt, Mai Tai, and Poppy (Mai Tai is in the inner corner and lower lash line some) Violet Voss Wendy Glitter Colour Pop Swerve gel liner Nubounsom lashes in Dragon Li. (Which are really dramatic, you could also use Violet Voss Vamptress or Iconic lashes from HOL) 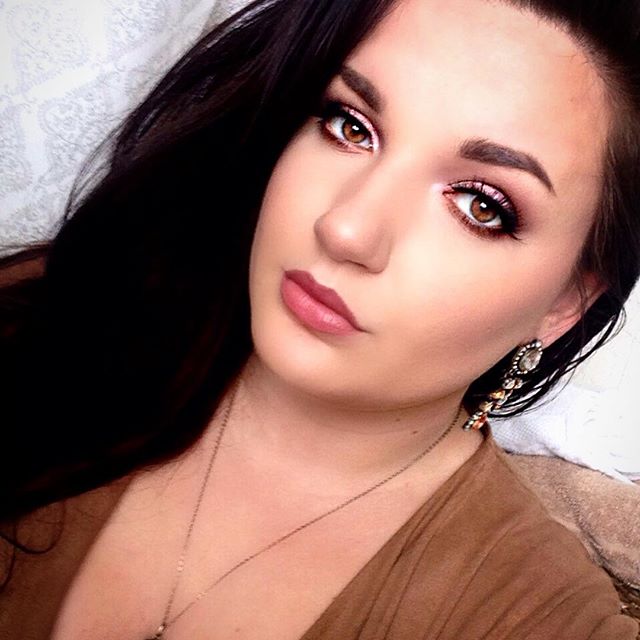 This look is very soft and neutral with just a touch of pink here and there.
The lips are Gerard Cosmetics "Rodeo Drive" The eyes are: Makeup Geek Mai Tai, Corrupt, Bitten, Latte, Cocoa Bear. Brown shadow on the lower lashline and black on the top. Nubounsom Bengal lashes ABH Brow Definer The face products are worth mentioning as well. Becca Aqua Luminous Foundation for that really healthy look, Makeup Geek Romance blush for a healthy glow to the cheeks. Makeup Geek Break Up and Infidelity contour pans. I baked the face with RCMA No Color Powder (I get mine at Frends Beauty). Benefit Shy Beam Dandelion which is a matte highlight and there is a video here with how I use the RCMA and Shy Beam, and where I place it.  Today I'm going to talk about neutral looks and how you can bring a little something extra to them with a pop of color. Whether that be on the lid it self or with your lip color. So I have three. Two of them I've linked videos to that I done for Instagram. 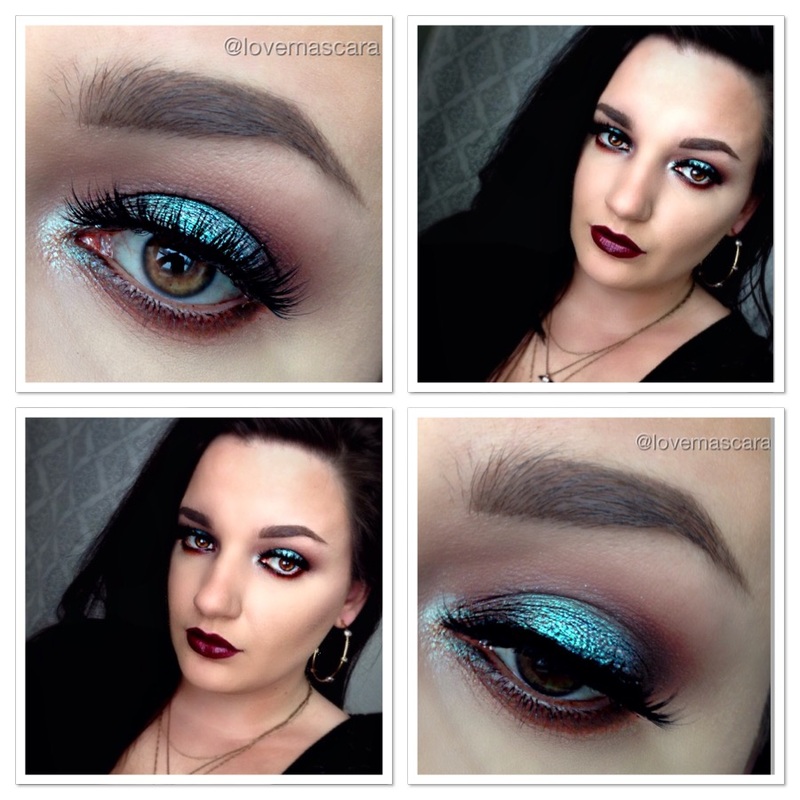 This look above, I actually seen @wickedbeautification on Instagram do with similar colors. I modified it somewhat to my own vision and used different products. Her's is gorgeous so you should check it out for sure, she's so talented. It had more plum/berry shades in it without the inner corner teal part. Mine is a bit more red brown, oranges and a lighter teal somewhat. Here's what I used to do mine:
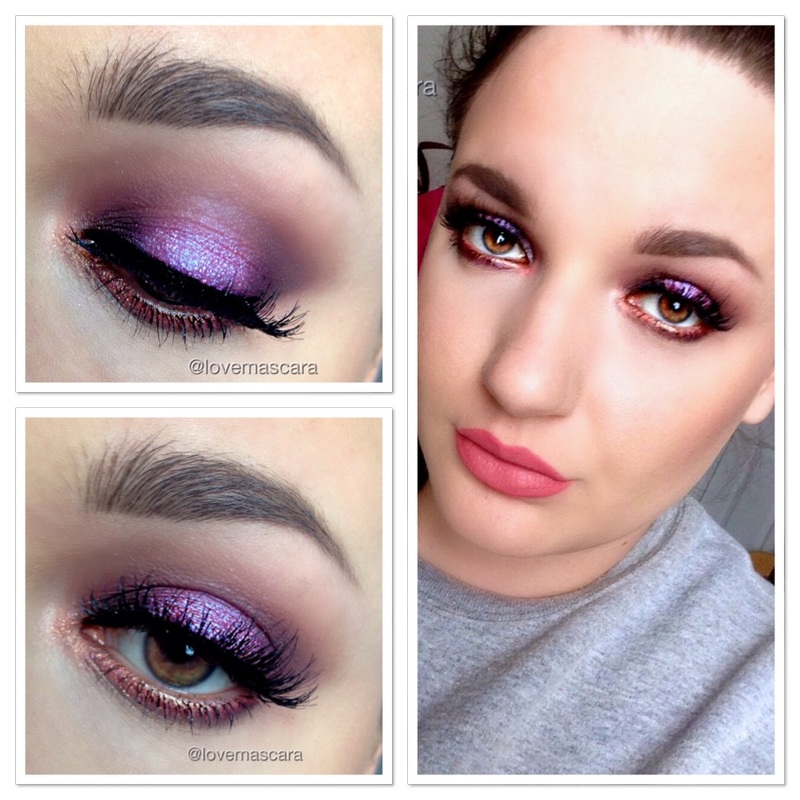 This is a more cool toned brown eye (halo again) which when you add pink over it it tends to look a little purple. I try to keep the brown tone as much as possible so I add in warmer tones to cancel out any purple it's trying to bring out. It has some orange on the lower lash line. I have a video for it here which will take you through the whole "halo" technique I use for all halo looks pretty much. Now you could actually add in much more brown to make this even more neutral. I went in hard with the pink so you may want to do less. The Star Powder pigment brings iridescence, it's not necessarily vital to the look though. You could use the pink shades and just go with a darker pink halo eye which is still beautiful. Here's what I used:
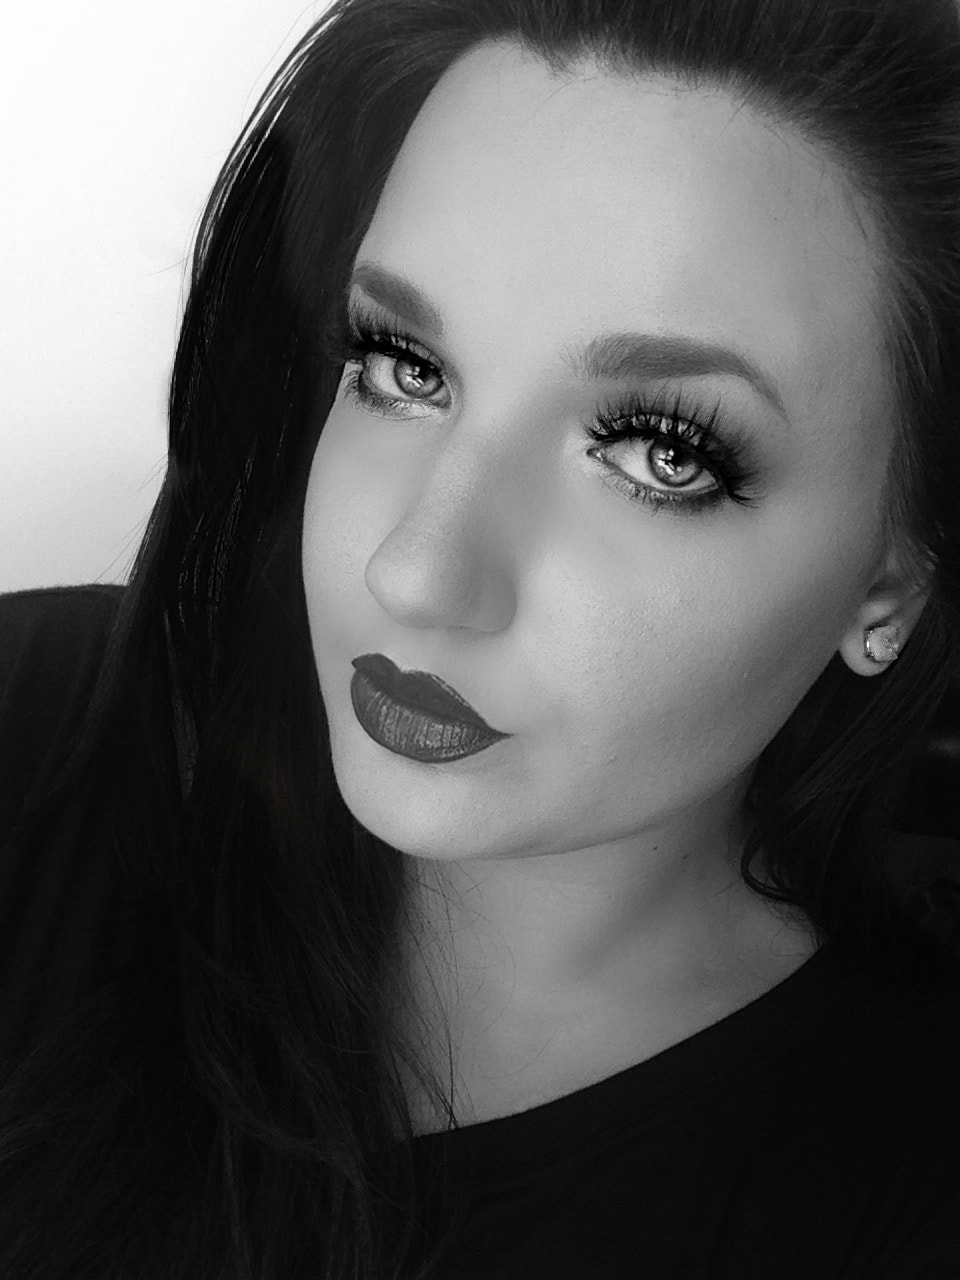
My lipstick is ABH Lovely liquid lipstick. 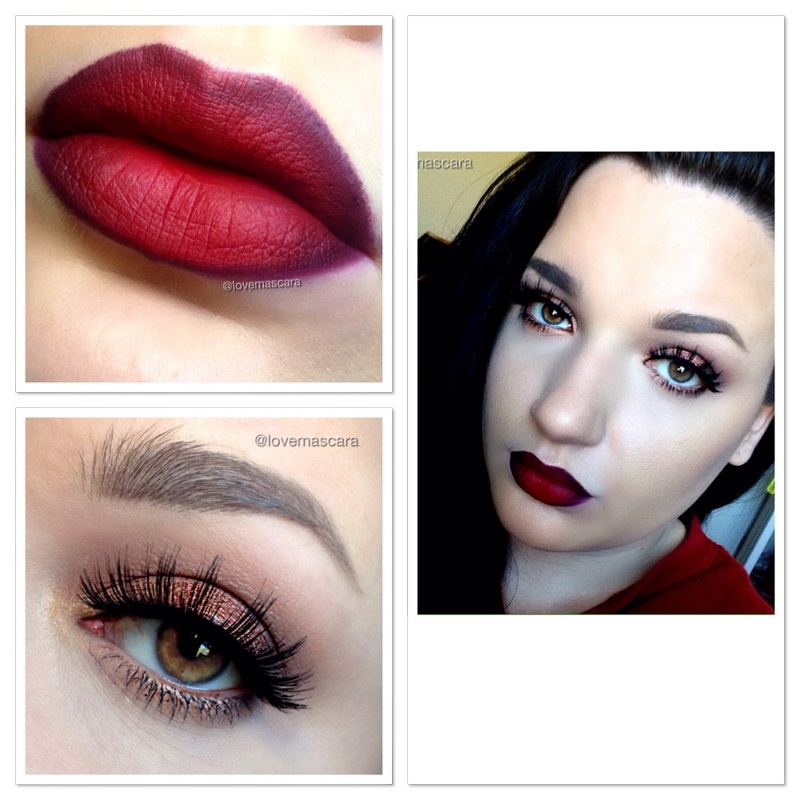 This look I really love because it's a warm neutral smokey eye with an ombre lip that has a bright red center. I have a video on how I done my ombre lip here. The eyes can be modified to what ever you want as well as the lips, I just wanted to include a pop of color that wasn't necessarily on the eye.
Here's what I used:
Lips are Feminist lip liner from Colour Pop and Atlantic City liquid lipstick from Ofra Cosmetics. So those are my latest, and best three examples of easy ways to add in color to your makeup. Whether it be daily, or for a special occasion they all would be suitable. My birthday is Friday so I'm thinking the first one with the teal is going to be my birthday look. If I don't find something I like better. Right now though it's my favorite. Also check out my Instagram (@lovemascara) for small tutorial videos every few days. I'm still working through the lighting and angles though so bear with me, I'm trying to better the quality of them. I'll sign off now and I hope this was helpful, remember to be kind to each other. Spread love not hate. I appreciate you and take care! Well kids most of the mother load has hit. There is a TON of new products that are out now at Sephora. With more on the way by the end of this month. I've compiled a pretty hefty list of the ones I think are interesting. That's not even including the ones that I'm not personally excited about. So we're gonna get into these, some of them I don't have much information on and others I know a little bit about. 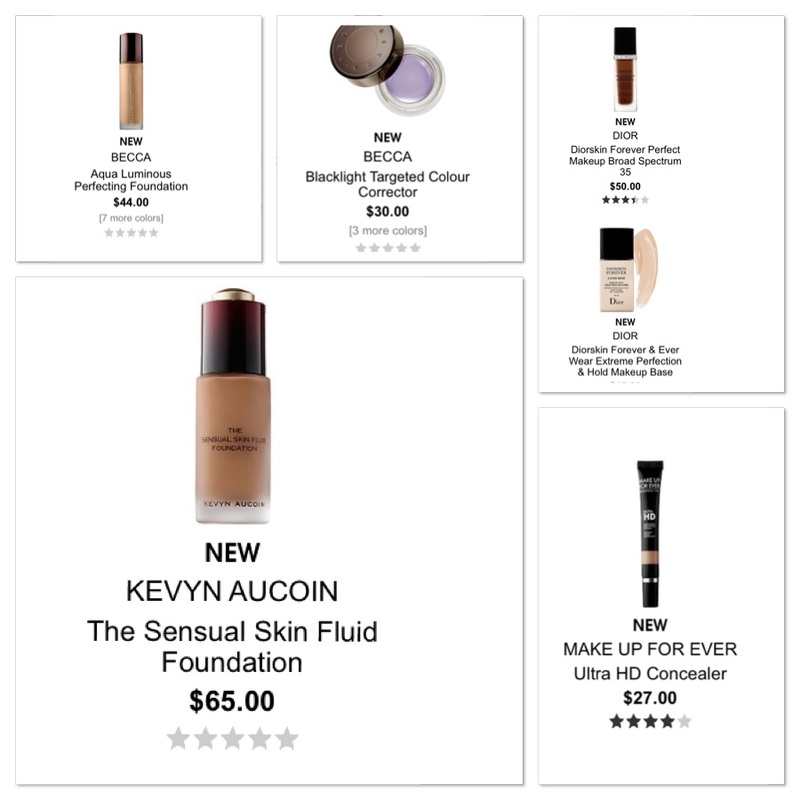 Lets hit this by category instead of brands. I think that would be easier. First category in bases. Meaning foundation, concealers, primers, so on.
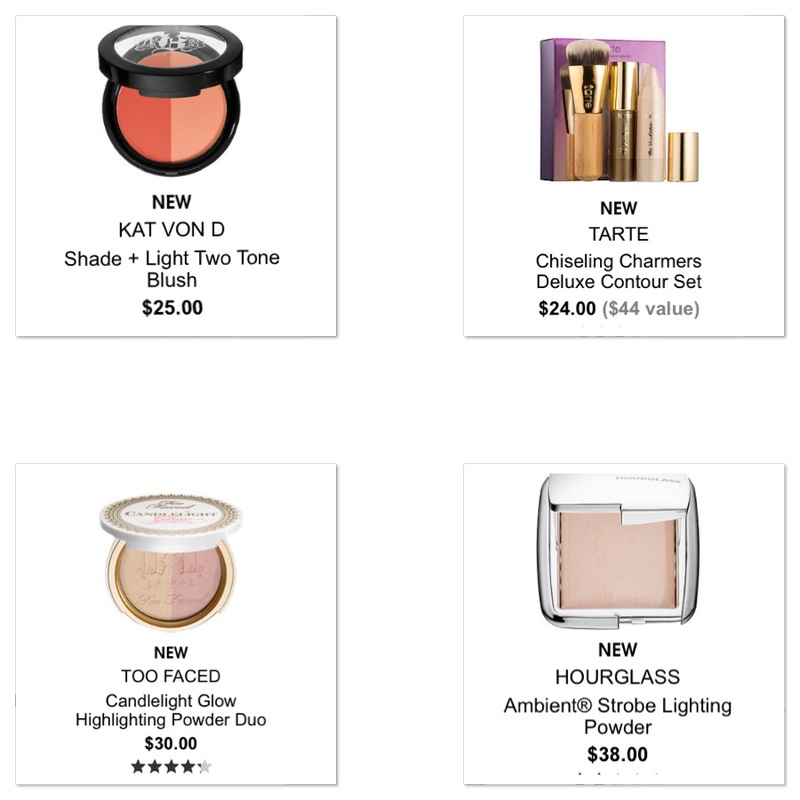 This category will be cheek products and powders.
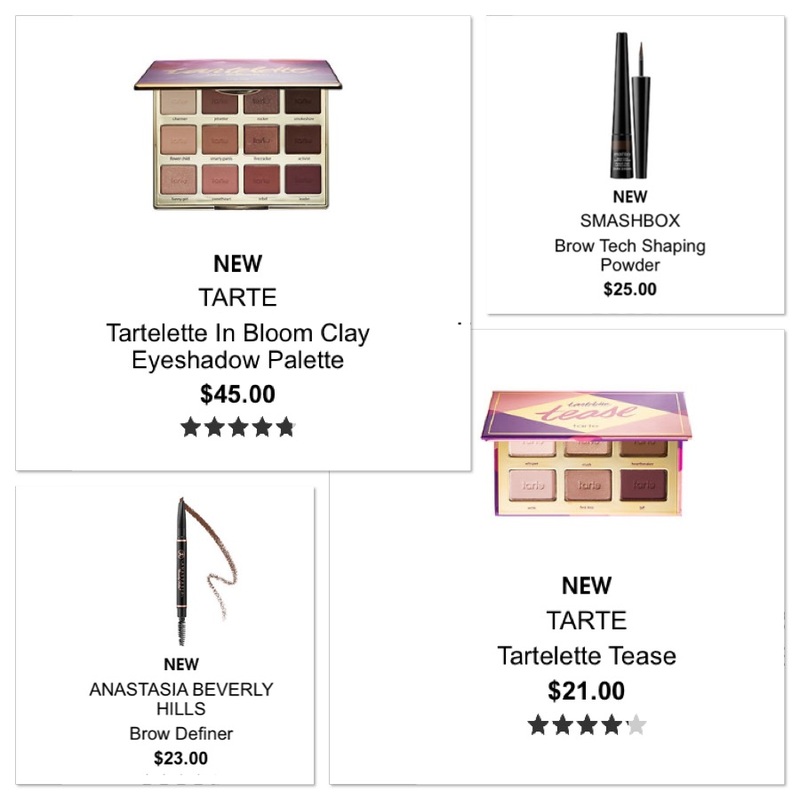 Next lets move onto eyes and brows.
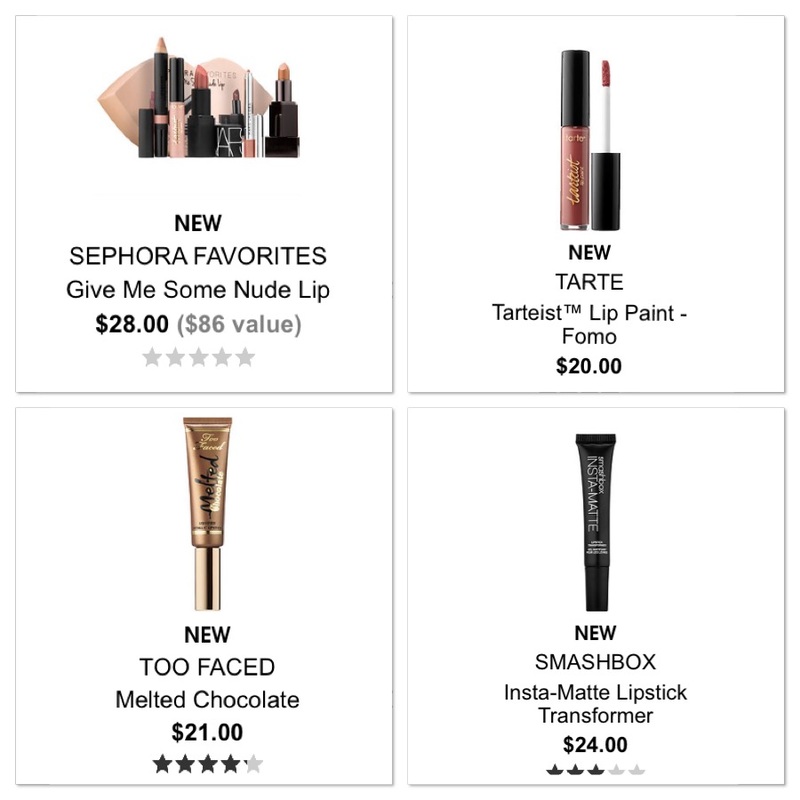 Last lets talk about lip products.
There is a 10% off code out not for VIB and VIB Rouge members that last's until the 11th of February. I don't know if all the codes are the same but try googling it and see. You should receive one in the mail though, I would think. 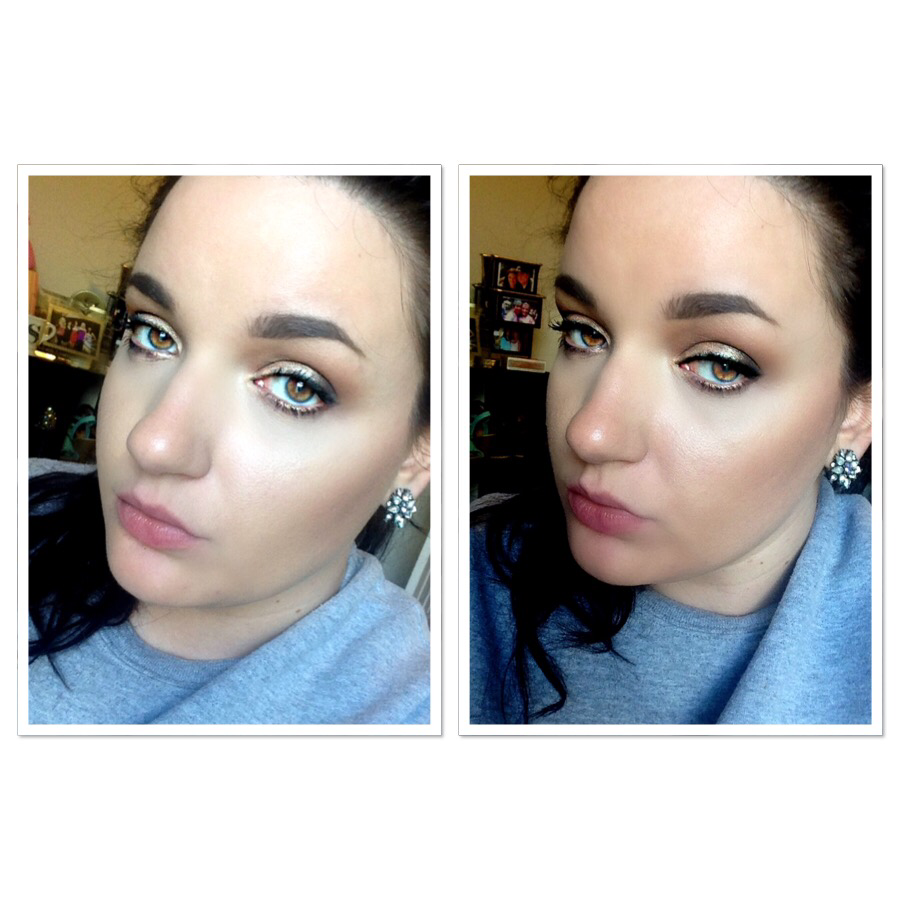 I got to looking around on my site and seen that I had a lot of concealing and highlighting but not as much contouring posts. Which is surprising because I love to contour. The picture above is just bronzer and the rest of my face products on the left side and the right pic is some contour added in. This is a more subtle contour. You can make it more dramatic though. This is also an easy guide to contouring because we're gonna do this backwards a little bit. So this is a faster and easy way to contour if you're a beginner or just don't have a lot of time. 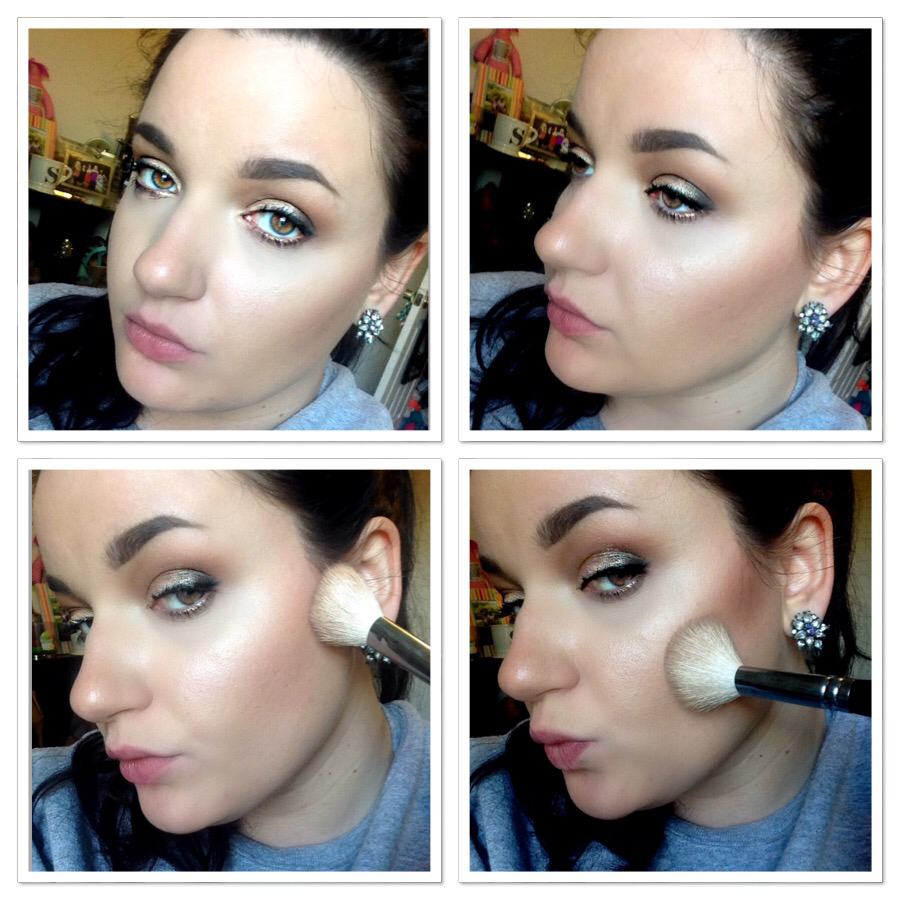 The first 2 pictures are just bronzer, which I apply with a larger face brush and dust around the perimeter of the face. Both pics are showing you where I've placed my bronzer and blush. The bottom left, I'm using a smaller angled brush from Morphe. It's supposed to be a blush brush but I feel like it's too small to do that so I use it for contour. So taking a contour powder that is darker than my bronzer and more cool toned, I just start at the top of the ear and go diagonally toward the lips (not all the way just in that direction). The reason I find this easier is because where the bronzer and blush have already been placed it gives me a bit of a guide to go by. What I mean is, I try to stay under the the blush and not go past the edges of the bronzer. Plus doing it this way means I have to blend less. I usually hit the areas where the bronzer has been placed. So I go up the temples and the sides of the forehead as well if I need to. Keep that in mind, only contour the areas you want smaller. Highlight the areas you want to be more prominent or noticed more. Just like in clothes, darker clothes make you appear slimmer so darker contour makes the face seem smaller or slimmer. 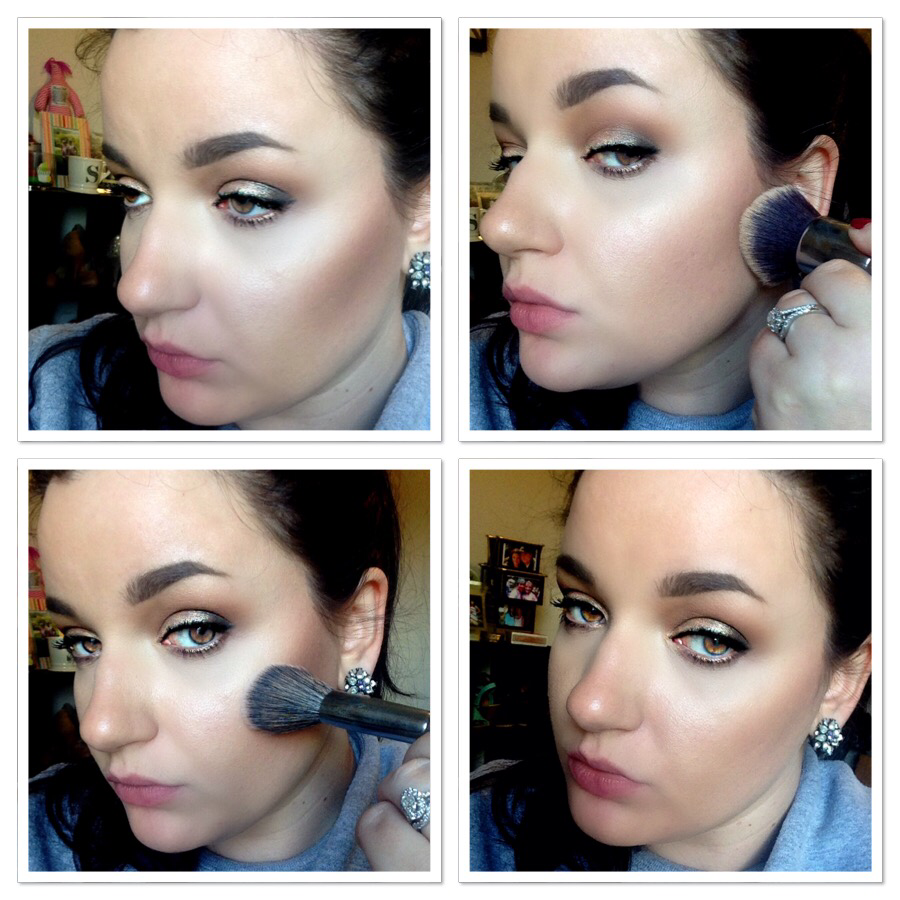 The top pick is the contour placed. You could leave it like this actually if you wanted something very dramatic and just buff the edges underneath a little but I know that some wouldn't be comfortable with that. So to show you how I blend it out and make it more subtle, I use the foundation brush (or sponge) I used for foundation that day and blend the bottom of the bronzer and contour. Then I use the blush brush that applied my blush without anymore product on it and just touch up the areas where I put my blush. After doing those two things you're left with a much more subtle contour that's a little bit more than bronzer but not heavily sculpted. Of course you could do the more traditional way of contouring which would be to contour first but I like doing it last or next to last that way I don't apply too much, get out of hand by putting it everywhere, or look manly by placing it too low on the sides of the face.
Of course this post was only about subtle contouring and not really sculpting the face. I didn't include nose contouring or anything. I can do a post about that as well. I just wanted to show you an easier way (I think) of contouring if it intimidates you, that's also very fast as well. 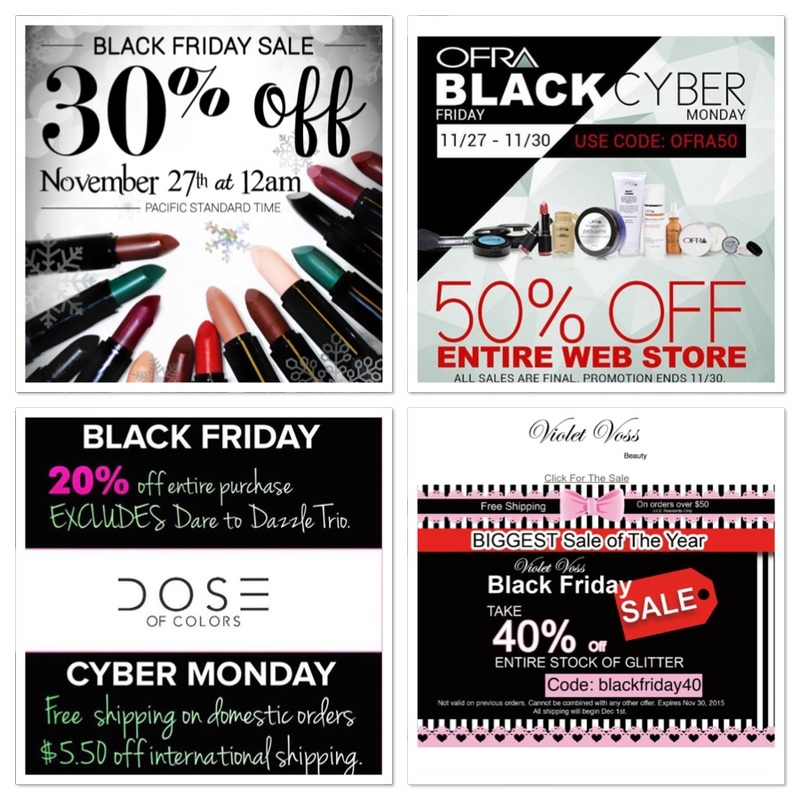 No time for chit chat. Let's get out our pens and paper and come up with a game plan of what we're gonna buy and when. So here's a list of the sale ads I've seen or emails I've received:
There will be more I'm sure. These are the ones that caught my eye. For those of you who like fashion:
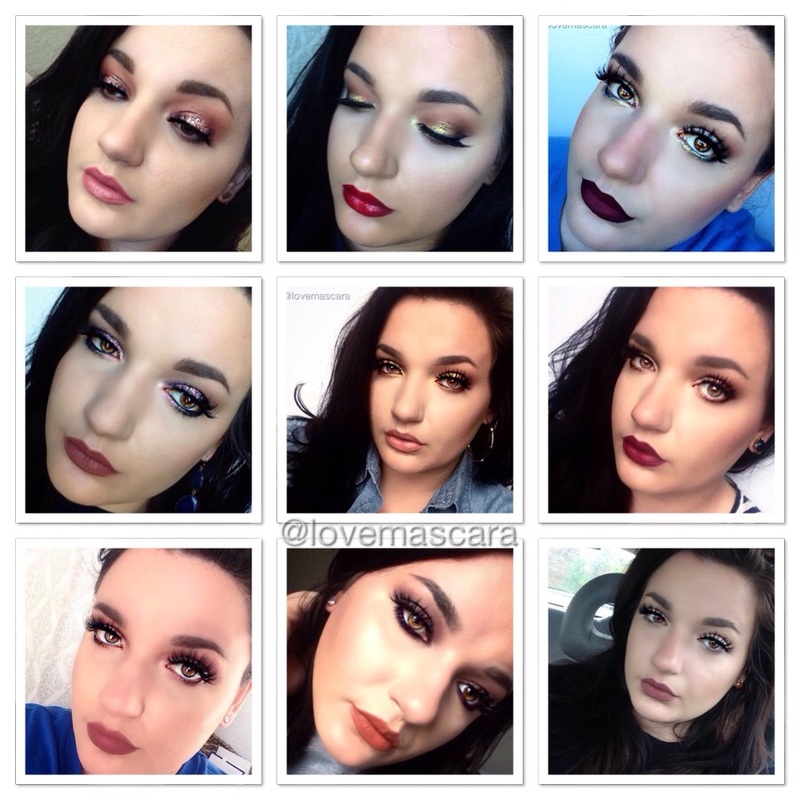 It's November and Thanksgiving is right around the corner. Which means there's going to be functions, dinners and get together's for you to go to. I put together 9 looks that I would wear to any one of those. Some have glitter, some are more colorful, others are simple and natural. It's all in what you're comfortable with.
So instead of telling you how to do each one and what I used I'm just going to give you good option for Thanksgiving/fall inspired looks. All these looks are on my Instagram page with details of products used. (@lovemascara) So here's some tips: Neutral liquid lipstick. If this comes off it won't be as noticeable as a dark color or a bright color. So think Lolita from Kat Von D, Lovely or Pure Hollywood from ABH. For dark lips or if you don't like liquid lipstick, use lip liners and fill in your entire lip with them. They last longer than a lipstick and certainly last longer than gloss. I love Colour Pop Cosmetics lip pencils. They have a ton of colors and they're $5. They are also a bit drier so they really stay on for a long time. Colors I love: Brink Tipsy Cake Fetch Feminist Wet For berry lips I really like Dose of Colors Berry Me. It's dupe is Rebel from LA Girl Cosmetics. I think Dose of Colors will look better throughout the day and fade prettier. For a neutral eye and a pop on the lips I recommend Ofra Cosmetics Miami Fever. It's like a pumpkin color. Like a burnt brown orange. For eyes that pop, try using a pigment. They're easier than you think. Buff in a crease color and then lay down a pigment either with your finger or a flat stiff brush. It makes your eye makeup look so much more complicated than it is. Some pigments I recommend are: MUG Hologram MUG Vegas Lights MAC Rose Gold MAC Heritage Rouge MUG Afterglow Also try applying a foiled shadow or a duo chrome shadow to the lid with your finger. I like In The Spotlight foiled shadow, Amber Rush from Loreal, or Mai Tai duo chrome from MUG. Also don't be afraid to try glitter. Using a glitter glue and your finger to apply it with. Tap a small amount out into the lid and go slowly so that you don't pack on too much glitter. I love Violet Voss glitters like Rosalind and Copperella, and I also love Beauty Bar Baby glitter stacks that are sample stacks where you can try a bunch of glitters for a fraction of the price. I use Fantasy and Send Me and Angel glitter from them the most. Lashes are the final touch. If nothing else I will put on Lolita lipstick and a great pair of lashes and some Benefit Gimme Brow and call it a day. I LOVE House of Lashes "Siren" and also Violet Voss "Vamptress". Of course my tried and true are still the Bianca lashes from Lena Lashes but mink lashes can get on my nerves after a few hours so I tend to go for lashes that are lighter and fit better on my lash line if I'm gonna wear them all day. 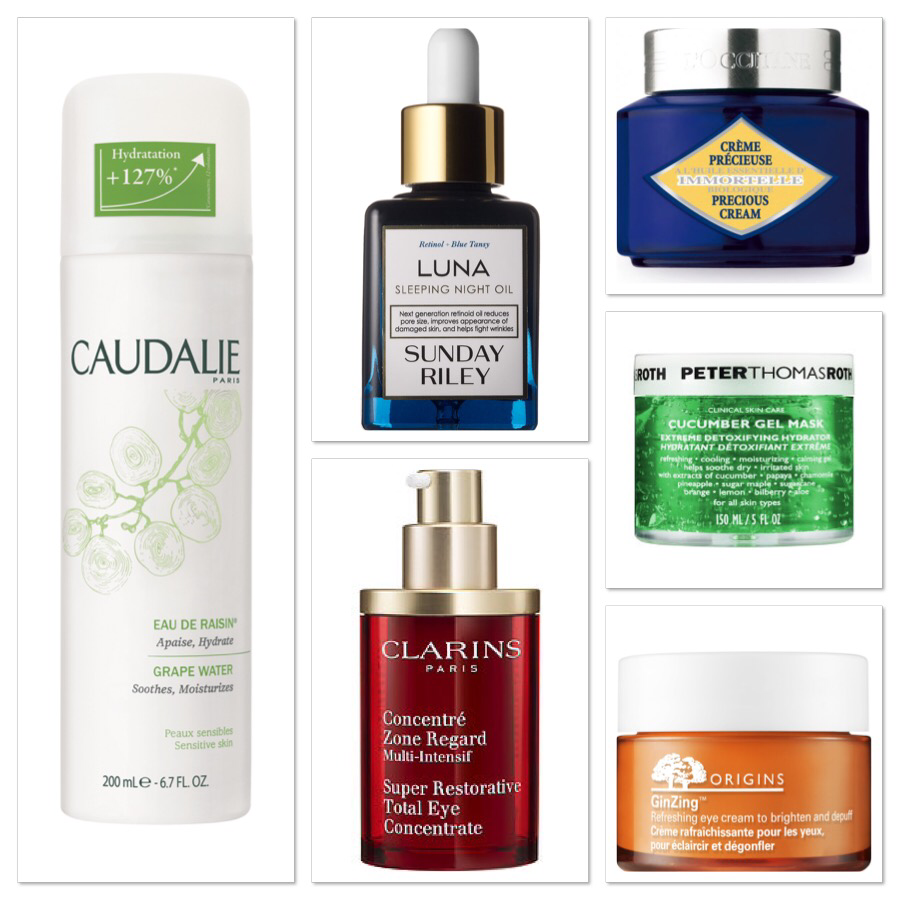 Halloween is over. My skin hurts. I've spent the day trying to get it to stop burning and feeling so dry. So I thought, why not post about what I do in such circumstances.
This is not my everyday routine. This is when my skin needs some help. My normal routine is much more simple. First I spray through out the day with Caudalie Grape Water spray. It's a spray "toner' that soothes and moisturizes skin. It's good for sensitive skin and it is very dewy. It feels so good on the skin. It's probably my most necessary product Next I used a soothing face mask. I used Peter Thomas Roth Cucumber Gel Mask today. I rarely use this but I had ran out of Sephora sheet masks and eye masks and desperately needed something so I used this. I would've rather had a Sephora mask but this works well too. After that I used thick moisturizer. I used L'Occitane Immortelle Precious Cream. It's very thick and feels (and smells) amazing. I used it this morning and at night. For my eyes I used Origins Ginzing Refreshing eye cream this morning. They were looking pretty rough so I used this to depuff and birghten the area it's also kinda thick. Then at night I used a thicker eye cream from Clarins called Super Restorative Eye Concentrate. Lastly I used Sunday Riley Luna Sleeping Oil. I rarely use this because the smell is intense. The reason I do use it thought is because of the Blue Tansy and Chamomille oils in it. They're whole purpose is to soothe. This also has Retinol but the Blue Tansy keeps the skin from getting irritated by it. I used the oil first at night before I spray my toner, or use my moisturizers, since it's a serum. Other than that, I just try to get a good night's sleep and hydrate as much as possibly. Hopefully tomorrow will be better. I do plan on using the Cover FX Calming Primer tomorrow along with a sponge to apply my foundation so that it's not rubbing on the skin. I also won't be using glitter for a little while as well lol. Some of these products are really expensive some other good alternatives are: Argan Oil, Origins Night A Mins moisturizer, Sanitas Oil Free Moisturizer, Aloe Vera gel, Sephora sheet and eye masks ($5) , and Witch Hazel. 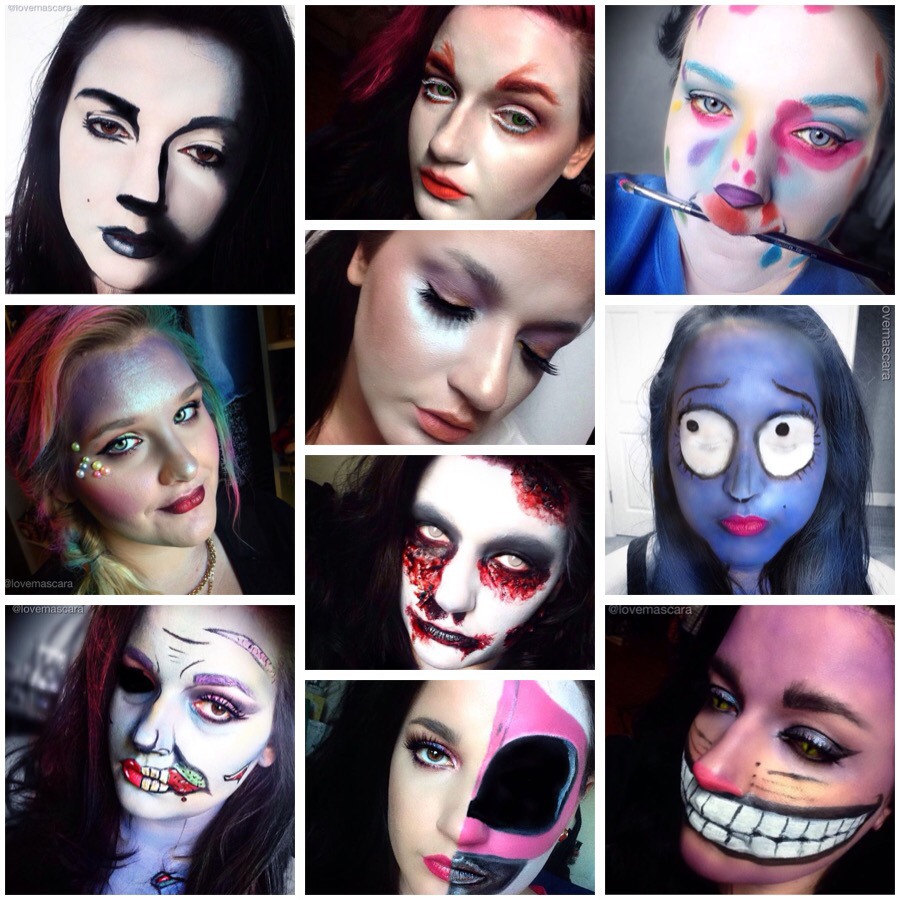 Halloween is tomorrow, so I wanted to put together my most favorite looks from this year. A few of them, my beautiful friends participated in. I'm not going to go in depth with this, just wanted to say good bye to Halloween with a look back at some of the past month (or more) work. Some being very detailed and time consuming others being easier that you think. Also wanted to tell you what products I used the most.
Left Row Top to Bottom Sketch Drawing: This was mainly black gel liner and Ben Nye Aqua Cake in white. It was relatively easy if you used a reference picture. Mermaid: My lovely friend Danielle participated in this one. It's a lot of "candy colors". Some in duo chromes and others just bright colors. Used a lot of Makeup Geek duo chromes, color hair spray, glued on pearls, and the Morphe 35S palette. Pop Art Zombie: This was hard. It was time consuming and tedious. It's also the one I'm most proud of. Lots of Ben Nye cream paints, gel liner, and lip liner. Center Row Top to Bottom Female Mad Hatter: This was fun and quite easy. I used white cream paint to make myself a lot more pale but I didn't make it indredibly opaque I let a little of my skin color show through. Lots of orange shadow, and also orange liquid lipstick from Colour Pop on my lips and brows. Green Contacts and white mascara. Angel or Fairy makeup: This was very easy and It seems like nothing but if I would've had an angel costume I would've been an angel for sure this Halloween. I literally sparkled all over. Using mainly Makeup Geek Duo Chrome Pigments and highlighters. The Undead: This was freaky. I used Ben Nye Thick Blood and Vampire Blood from Walmart. White face paint and black shadows. It was pretty easy because it's a "messy" look so you don't have to be very careful. Power Ranger: This I wish I could take credit for, my friends talked me into this look. One wanted me to do a power ranger, and one wanted me to do half the normal face and the other side the power ranger helmet to show how they have hidden identities. I used mainly Colour Pop Cosmetics lippie pencils for it. It takes a steady hand to draw out the lines. Other than that with a reference pic pulled up it was moderately easy. Right Row Top to Bottom Lisa Frank Puppy: This was very easy. I used mainly Colour Pop lip pencils for the spots. Ben Nye white face paint for the base. It was very very easy and different. The Corpse Bride: This was accomplished with the help of my friend Jamie who was willing to sit through this. It took quite a while. Using Ben Nye cream paint in blue for the base. Gel Liner for brows and detailing. White face paint for the eyes. Black shadows for contouring to hollow out the cheek bones and collar bones and around the temples. Cheshire Cat: This was just done last night. It wasn't time consuming but it wasn't very easy. I used Ben Nye purple cream paint, Colour Pop pencils and Makeup Geek purple shadows around the eyes and to contour. Gel Liner for the detailing, whiskers, and mouth. White Aqua Cake from Ben Nye to make the teeth. Cat contacts. As far as what I found I used the most. I was surprised. The things that worked the best was Colour Pop lippie pencils and they come in tons of colors. I really like Snazaroo face paints too. I used a lot of Ben Nye products as well. They wanted to sheer out a lot though. The Thick Blood was amazing and cool to work with. You can't keep messing with it because it separates on the skin so I found you had to goop it on really thick and let it dry some. Also NYX Jumbo Eye Pencils are always a great option as well. Milk and Black Bean are must haves but they have every color under the sun too and very affordable. Don't disregard your eye shadows either they are very useful over a base especially. They're great on their own or to set different colors. So there you go. Happy Halloween! Have fun and BE SAFE!  I recently got the Real Techniques Miracle Complexion Sponge. I got this from Ulta. It's $5.99 and it also comes in a two pack for $11.99. This is supposed to be the closest thing, or better than the Beauty Blender which is $20 a piece. I finally decided to try it. I think it's shape is interesting. It's mainly long and oval and has a flat side. Which is mainly it's selling point. It also has a point on the other end. It's not tapered like the point on the Beauty Blender though. Below is side by side comparisons. 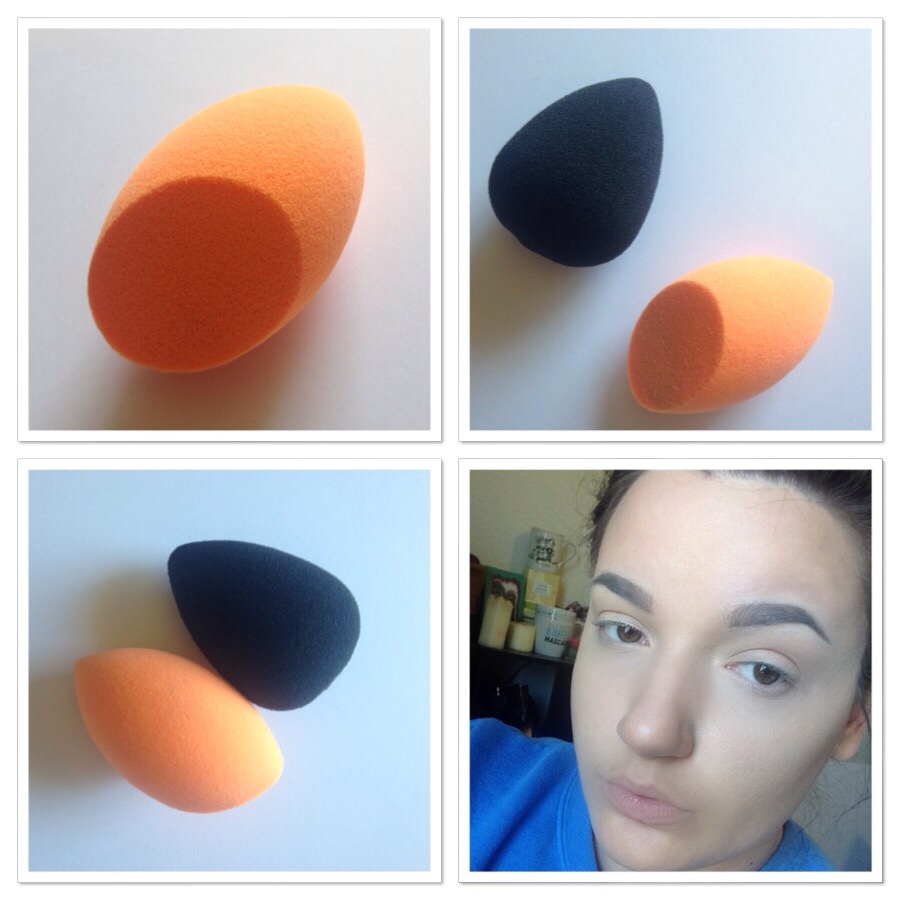 When they are damp and larger they are close in size. Sponges need to be replaced every 3 months, due to molding and bacteria growth. It's just as soft and bouncy as the Beauty Blender if not more. At first I felt like it sheered out my foundation too much. I used a full coverage foundation. You definitely have to bounce this on the face to have coverage. You can't swipe. I used this for everything I could think of, foundation, concealer, cream contour and highlighting. It worked very well. The bottom right picture is just foundation (and intense brows) no powder or anything. So it's just the work of the real techniques sponge. I really do like it. It stays damp and usable longer than a Beauty Blender. A Beauty Blender I feel gives a bit better coverage. The Real Technique sponge stains very easily. I washed it right after I used it and it wouldn't come completely clean from my concealer. Not a big deal in all actuality but if that bothers you then, there ya go. Just a heads up. Also you can use a coupon at Ulta which is $3.50 off $10 purchase which saves you even more money. 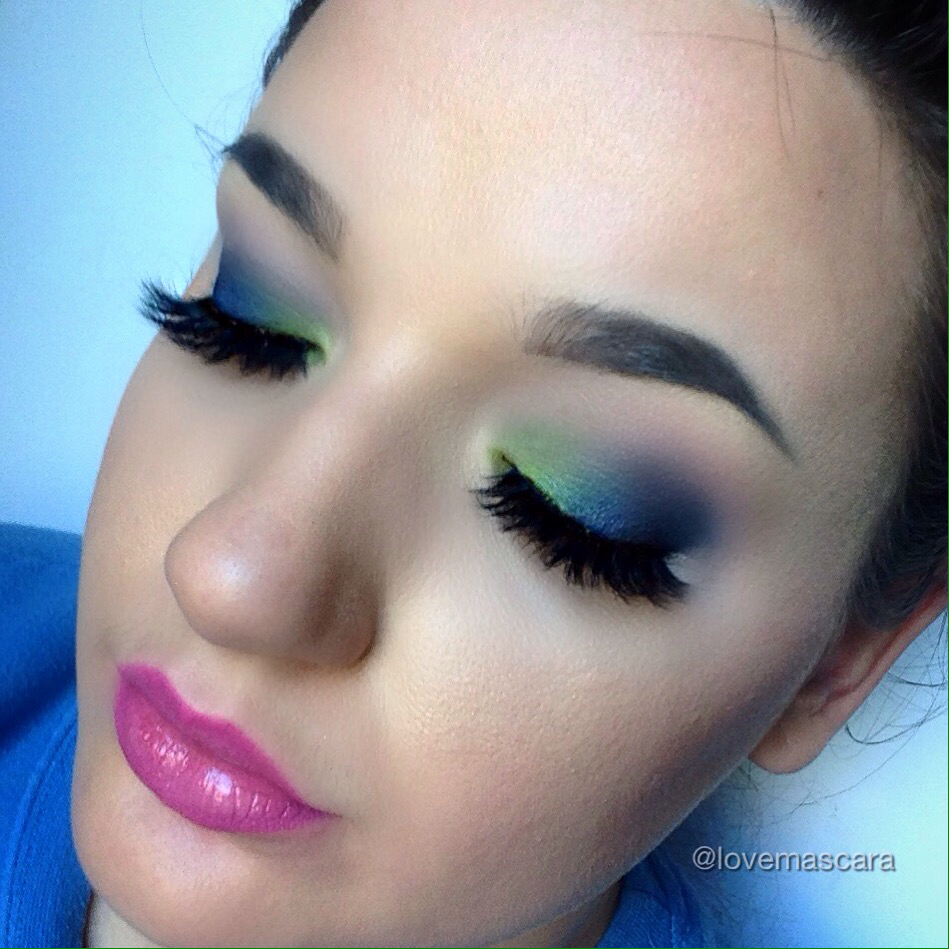 This is the look after the rest of my makeup. It done very well . It looked even more beautiful after several hours.
|
ErinI'm from Tennessee. I'm a makeup and skincare lover. I have always enjoyed creating looks but I love to help people with product knowledge and application even more. I've been able to start blogging and do these things I love because God has seen fit to bless me with the opportunity. Thanks for stopping by and visiting with me! 

 
Categories
All
Archives
January 2022
|
 RSS Feed