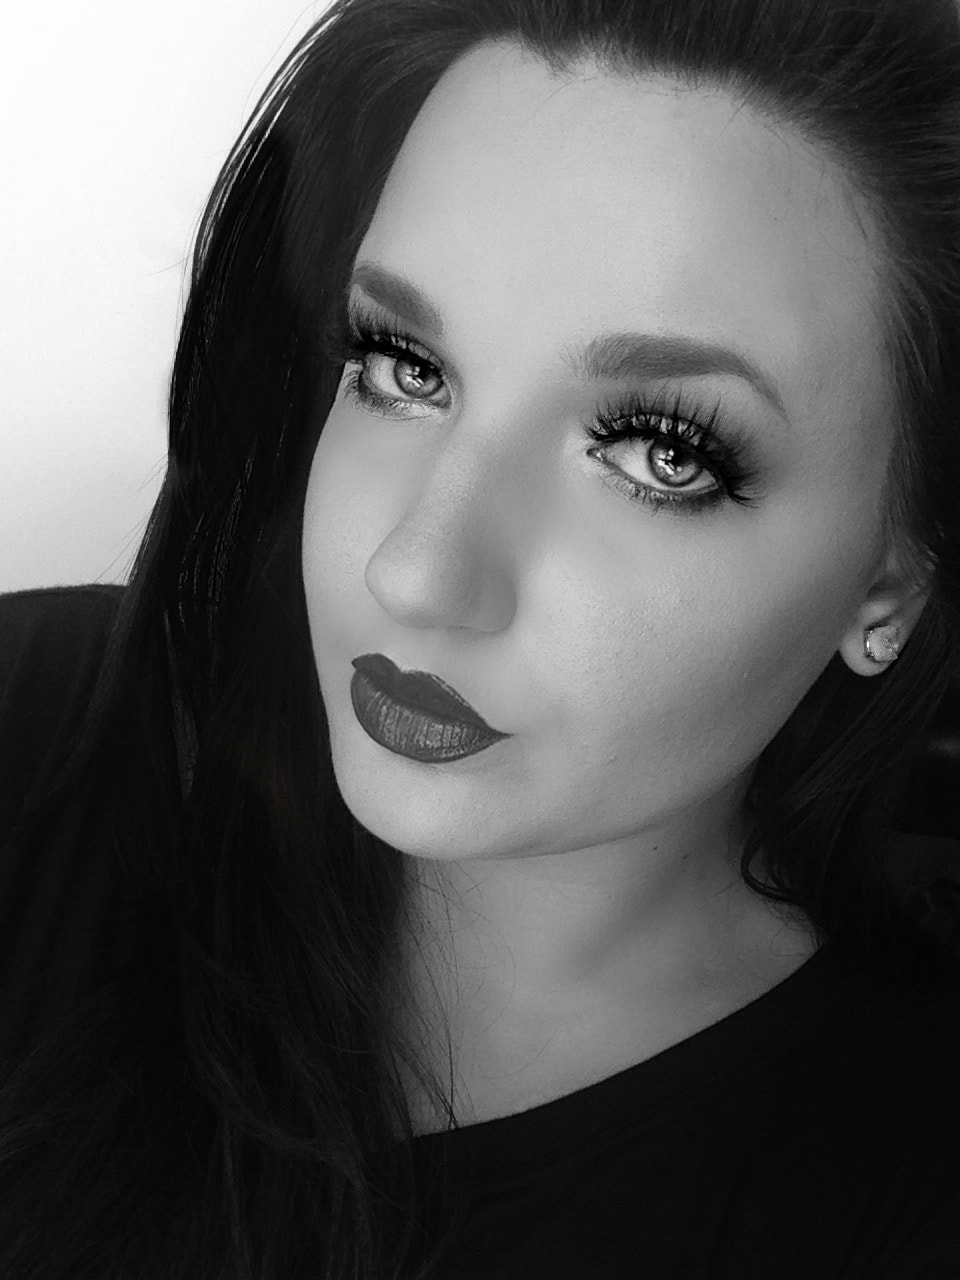
 I had my friend Savannah Miller contact me about trying Younique mascara. I had been contacted several times from people I didn't know but when someone I actually knew told me about it I decided that it would be a great thing to review and that I was a pretty good candidate for it because my lashes are thin and short. (If you're looking for a rep she's a good one to talk to about it.) So what better way to see the power it has than trying it on someone who hasn't got really good lashes to begin with. I'll provide the link to purchase this at the end of the review but I'll give you the details now. I got the Moodstruck 3D Fiber Lash Mascara which is what they're noted for. It was $30 and comes with a case and the two formulas that you have to use. I have no issue with the cost, because if you're a lover of makeup especially if you shop at Dept. stores or Sephora, you're gonna see $30 mascara every where you turn. So I ordered it on a Friday and it got to me the next Friday. 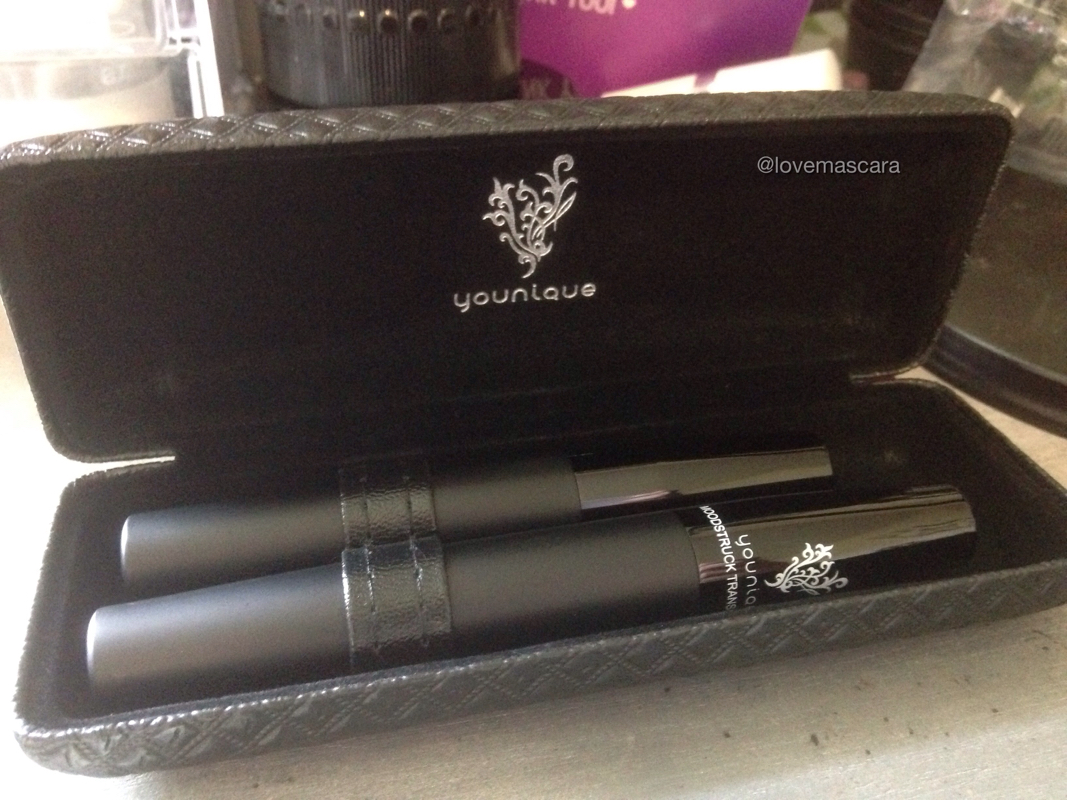 In the set you get the Transplanting Gel and the Fibers. You need to do one eye at a time and if you want you can use your own mascara first. Which I do recommend doing. I used Kat Von Immortal Lash because it really separates my lashes and its a drier formula. So using your mascara after it's dried, apply the Transplanting Gel while the Gel is still wet apply the Fibers. This is where your gonna notice the difference and don't freak out if it starts looking a little wonky. You seal it with the Transplanting Gel again and I don't skimp on this part, I really coat it good because this helps the fibers position themselves a little more natural looking and not going left or right. You can layer the product if you want, gel to fiber and back to gel. I only did two layers though. I watched Makeup By Tiffany D demo on how she used hers to really see what the best way would be and I used her tip which was taking a clean disposable mascara wand and really combing out the lashes after each layer was sealed. I did that and it did help and I recommend you to do the same. It doesn't take away the fibers it just helps straighten them and separate the clumps you may have. 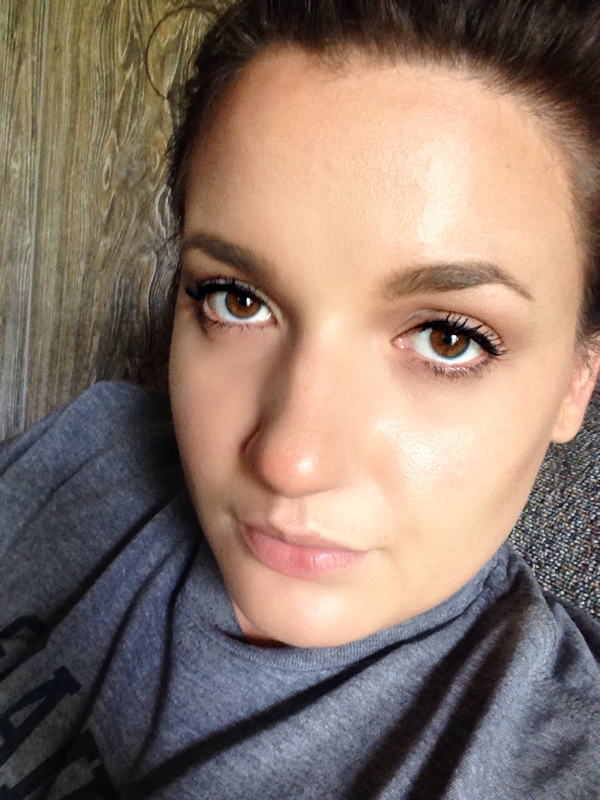 This is what it looked like when it was all said and done. I added a little bit of liner to cover up some mascara smudges, but for someone like me who literally has very thin very short lashes it's a good product to have. As far as lengthening it definitely does do that. Far better than any other that you're going to try at Sephora or the drugstore. My only issues where that I accidentally got some fibers in my eye (that was my fault completely), and it's time consuming doing it the way I did it. Not like really really time consuming but just more effort than what you would put into regular mascara and more time consuming than lashes are for me. It's a good product though and I don't mind spending time to make something look really good or better and more natural. That doesn't bother me. 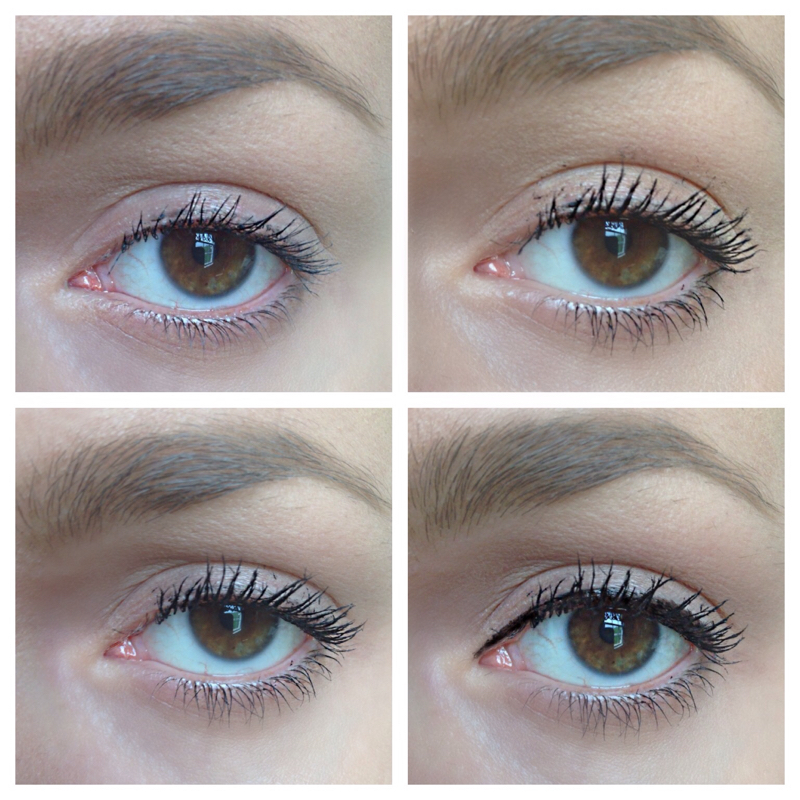 Here's the final picture the first one is my regular mascara, the second is one layer of the Younique the third is the 2nd layer of the Younique mascara and the fourth is just the finished look with a little bit of liner added to it. It looks kinda clumped together in these but really it's not it's just that my lashes are very thin and kinda sparse so the product doesn't have a lot to hold on to. Like I said this is really different and it does lengthen. It lengthens more than it thickens I think, so for people who already have nice lashes I don't know if I would get this one because the fibers can get really long which you could easily take it off but I think a nice voluminizing and thickening mascara works better for those individuals who have really long lashes already. For you ladies that are like me and have short lashes or if your lashes have become less than what they were through age this is a good product to try. My mom tried it and it really made a difference on her lashes. I don't feel like these pictures actually do it justice for how it looks in person but it was the best I could do so as time goes on I'll try to take better pictures of the results when I use this. I still really like false lashes just for the "even" and "perfect" look they give but for days when I'm not gonna wear lashes and am just low key I'll definitely reach for this because it does make a difference.
If you're interested in trying the Younique mascara the link is right here. Go check is out also I'll be adding the link to my side bar. Keep in mind that this is not a sponsored post and I do not sell Younique products, if you have questions feel free to browse around on the website and watch tutorials and read reviews on them.
0 Comments
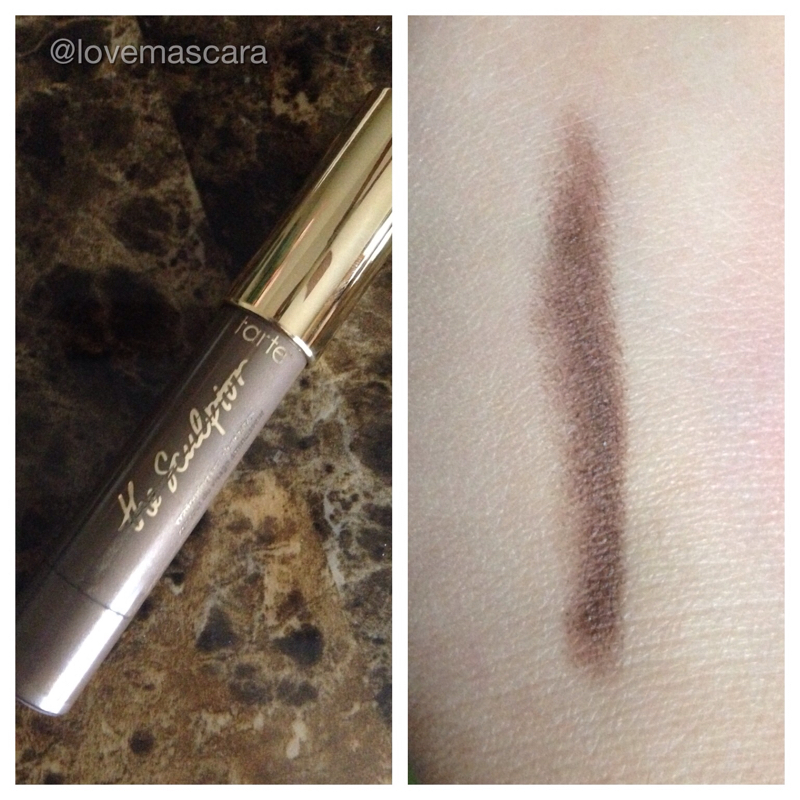 As you know I really do like the Tarte Sculptor sticks. As far as cream contour goes. I use concealers as cream highlighters so I don't really buy into the whole cream contour kit. So I got one of these as a sample/promotion in the lightest shades. It comes in 3 shades and I really liked the one I got even though it was lighter than I usually preferred. The undertone was really nice though. So when I seen it was running out I got another one in the darkest shade which is 3. Super dark huh? Yes I knew it was gonna be this dark, so no it wasn't a mistake. I wanted to try a super dark cream contour because when blended out cream contour mimics shadow better than anything so thus I wanted the darkest color. Especially since it was a cool brown. 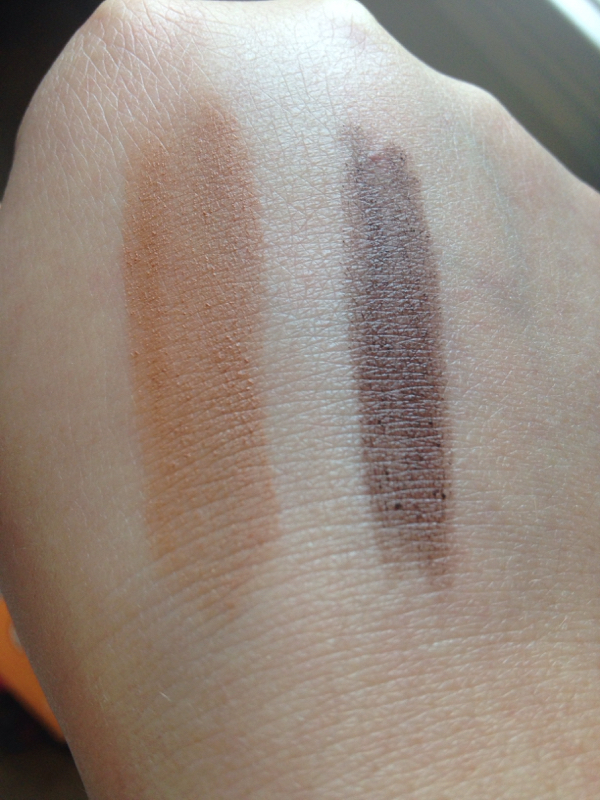 These two swatches are shade 1 and shade 3. There's a huge difference but I can use both of them. The lighter one looks a little more bronze but I can set it with a contour powder and have a nice contour going on. The darker one I use the lightest contour powder I have to set it. I don't go overboard though with powder, I set it lightly. So that's how I use the two of them. 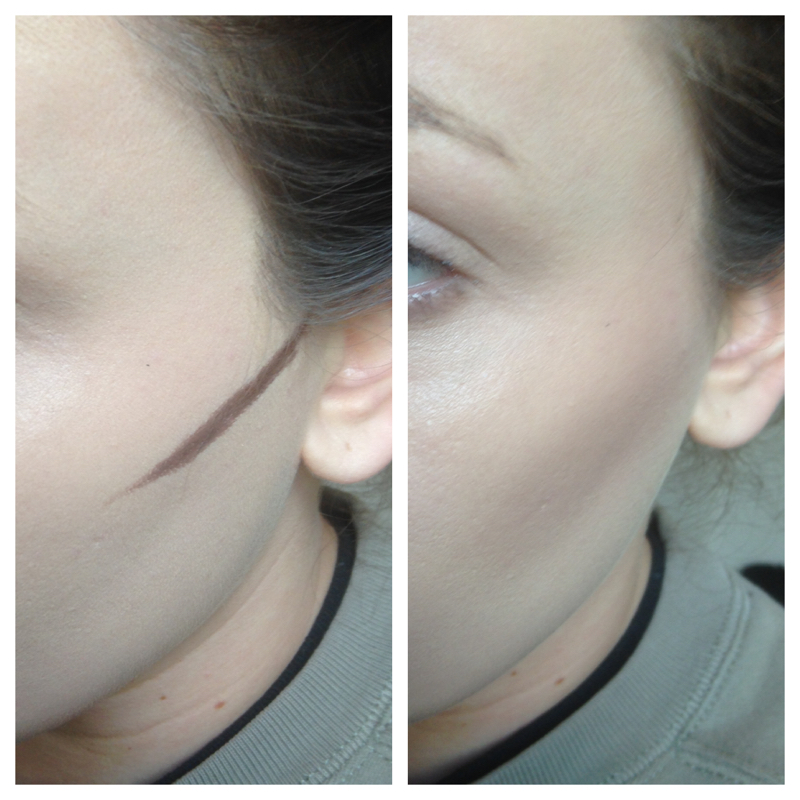 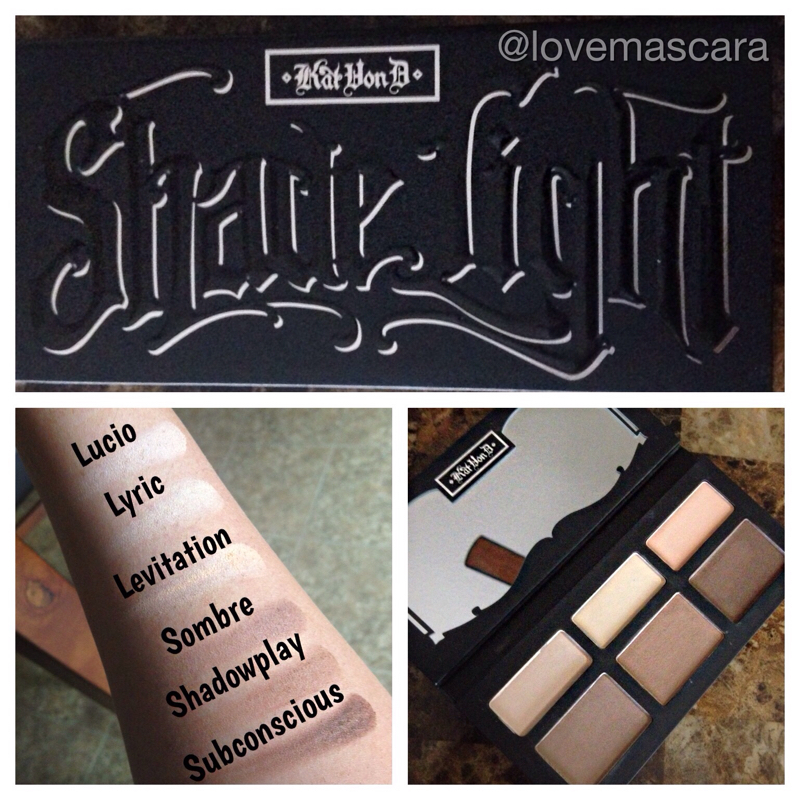 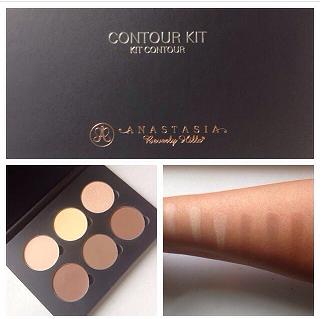 As you know, I'm a die hard Anastasia Beverly Hills fan. I use their contour kit as well as other products on a daily basis. I got the contour kit when it first came out and I've almost hit pan on the Banana shade and love the shimmery highlighter in it. As well as all the colors I really do like them. So when other contour kits came out I didn't even care. I'm not the type to buy the same thing in big products/palettes such as this. Concealer, foundation, eyeliner, etc sure I'll buy the same color in all of them because of formula and consistency but I don't do that when it comes to powder products. I usually get something I like and stick with it until it's empty and either try something else or repurchase it. When Kat Von dropped her contour palette I really didn't even bother to look at it. I figured that it was too similar so why bother when I have a perfectly good one. Then I kept reading reviews and hearing people talk about it. And then....the weirdest thing started happening. My contour powders weren't going on smooth anymore they were starting to be patchy. I really had only used one shade of contour cause too me they were too similar and I really just liked the cool toned one the best. Not that I don't use the others I do on occasion but only when I want to look more tan. So I was starting to find that the contour powders didn't seem to work well with setting cream contours the best either. They worked don't get me wrong but it took a lot of blending. The lighter shades were perfect just as they had always been but the contour powders were no longer jiving with my skin for some reason. Therefore, I decided to look into the Kat Von D Shade Light palette. This was $46 where the ABH one is $40. Also the contour powders are gigantic and the highlight shades are about half the size. The ABH one is all the same size powders. Which I like. Right off the bat swatching them I could tell the Kat Von was a smoother formula. What I also loved was there was a peach shade included in the highlight shades and there was a super dark contour shade and they all seemed to be if not cool toned then definitely more neutral. So for that reason I think it works for a larger variety of skin tones. The highlight shades are also more pigmented. The ABH ones are a little more sheer which I really like for setting my under eye area. I never have understood people getting so pissed because the highlight shades didn't actually highlight. The way I look at it is they do set your highlight and under eye area which is where highlight goes and then provided you with a shimmery highlighter that was to highlight your cheekbones. I never had an issue with that concept but some people really got mad about it. Which whatever you like that's up to you. The Shade Light palette I think will show up more but you'll want to be careful so that you don't look too cakey or powdery from it. They're also just a touch darker than the Anastasia highlight shades but not noticeable darker. I prefer to use a concealer or cream highlighter to do my highlighting and then just set it with a powder, any powder, whether it has color to it or not. I don't necessarily want to do the whole Kim Kardashian Banana powder line, piled on top of the cheek bones and stuff. Again I say, to each his own. If you want to do that I think you could easily do that with the Shade Light Palette. The contour shades are so pigmented and would easily be enough by their self, you could set a cream contour with them too but I would stick with the lighter shade to do that unless you have fairly dark skin. Mainly because this whole palette is sooooo pigmented. The Anastasia contour shades are more warm where the shade light is more cool toned. You can build your own contour kit on the Anastasia site because they have plenty of shades both warm and cool toned. Along with different shades of highlights. It's still $40 when you build it as well. This is just the universal one sold in Sephora, Ulta, and wherever else. Another thing I really like about Kat Von is that most of her products are Talc Free like her blushes, which has been known to cause breakouts. I can't find if this is for sure Talc Free but I'm thinking it probably is. I've been having some bumps under my cheek bone for months. Nothing crazy, and not pimples just bumpiness that got on my nerves. I started wondering if maybe it was because of the Talc. So I started using Makeup Geek Blushes and that helped but didn't have an alternative for contouring yet. So like I said the Anastasia had been starting to look patchy with the contour no matter what brush or sponge I used and was having texture issues so here I am trying a new contour palette hoping to resolve those issues. 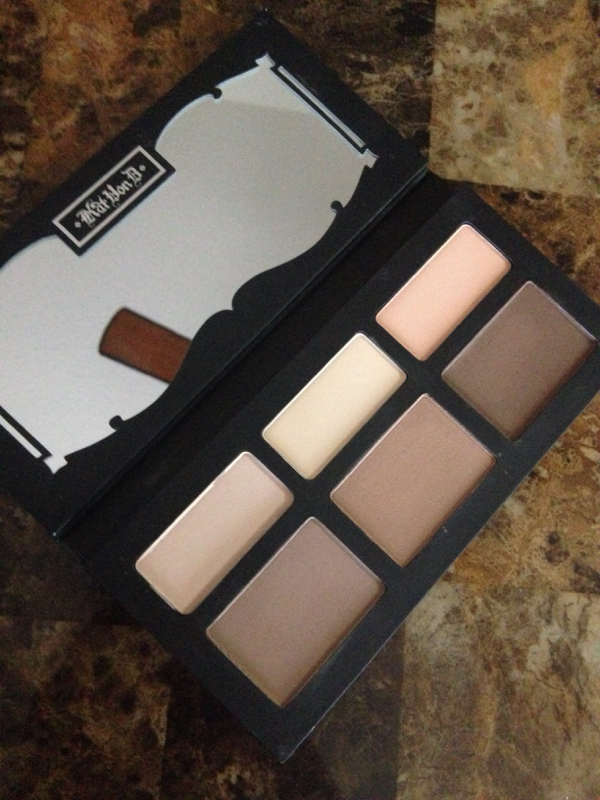 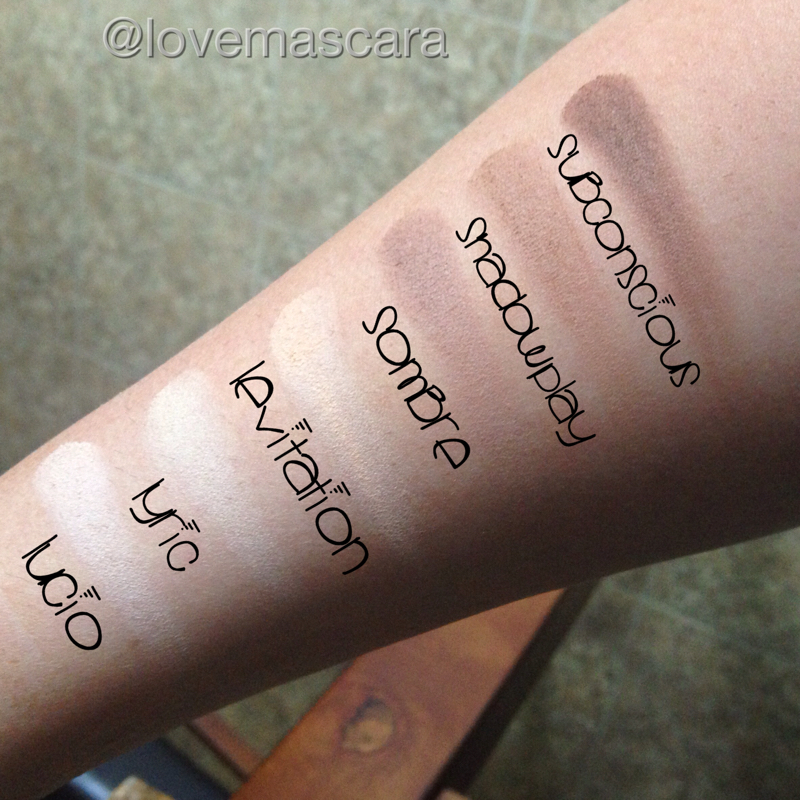 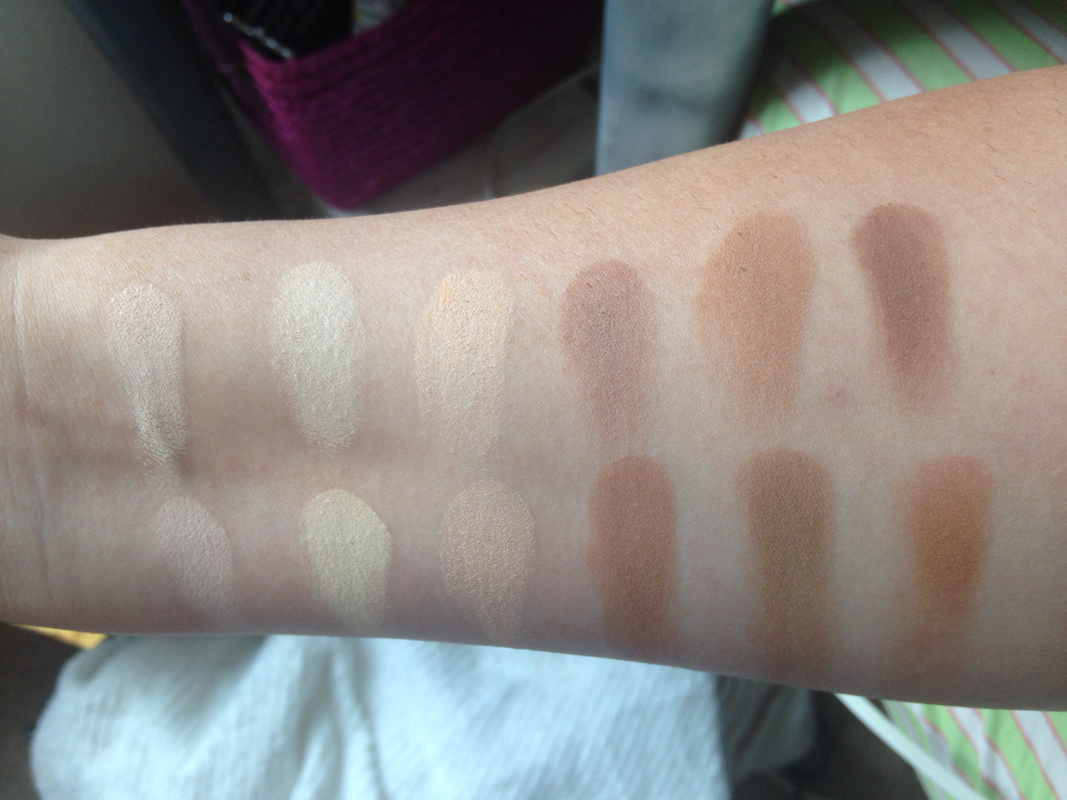 The top row is the Shade Light Palette. The bottom row is Anastasia palette. As you can see the banana shade in the Anastasia one is more yellow. The contour shades in the Shade Light are better in my opinion. They are different from each other all the way around. The Anastasia one I feel is better if you're more fair and the Kat Von is a little bit more universal for light skin tones to tan skin tones. You won't actually get a shimmery highlighter though in the Shade Light palette as you do in the Anastasia one which is one of my favorite highlighters. 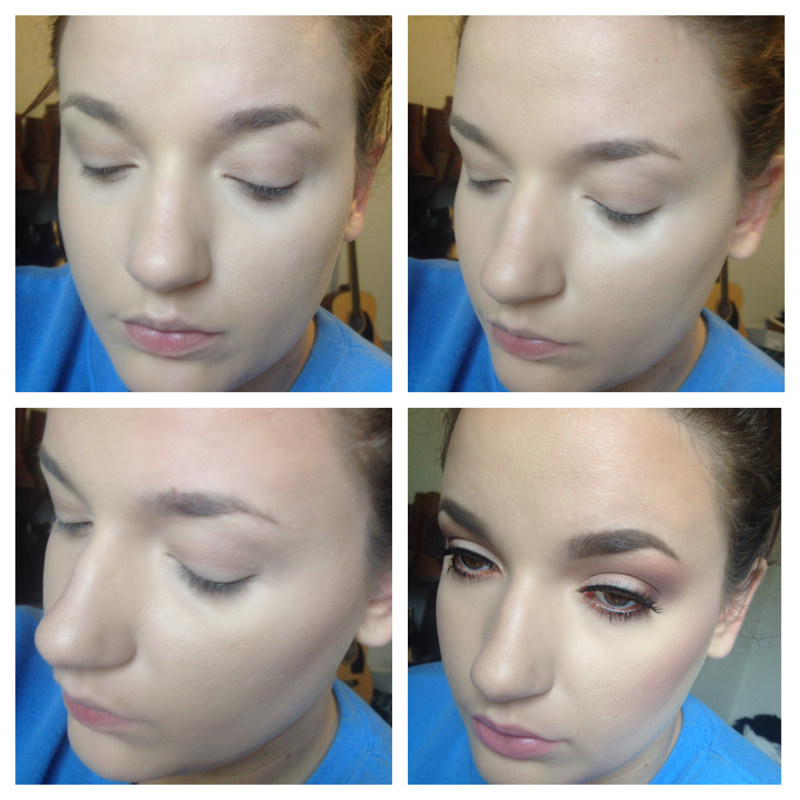 This look is using the Kat Von Shade Light Palette by itself with no cream contour or anything. Using Sombre on the cheekbones. Shadowplay on the forehead and Subconscious on the nose with a very thin eyeshadow brush. It blended beautifully. No patchiness what so ever. The highlight shades oxidized just a little and I mean very little. All in all I do prefer the Shade Light Palette for my skin tone and needs. The Anastasia one is still a favorite, it's just not working for my skin right now but it's still a good product.
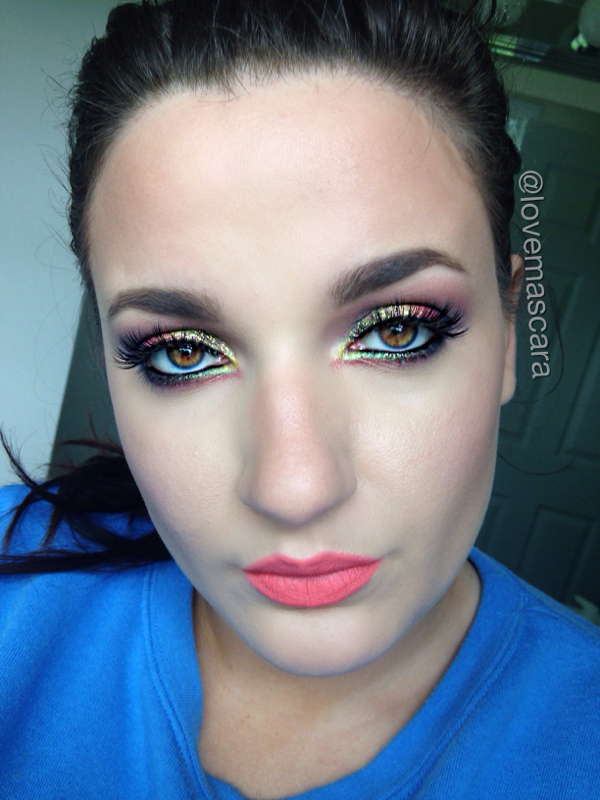 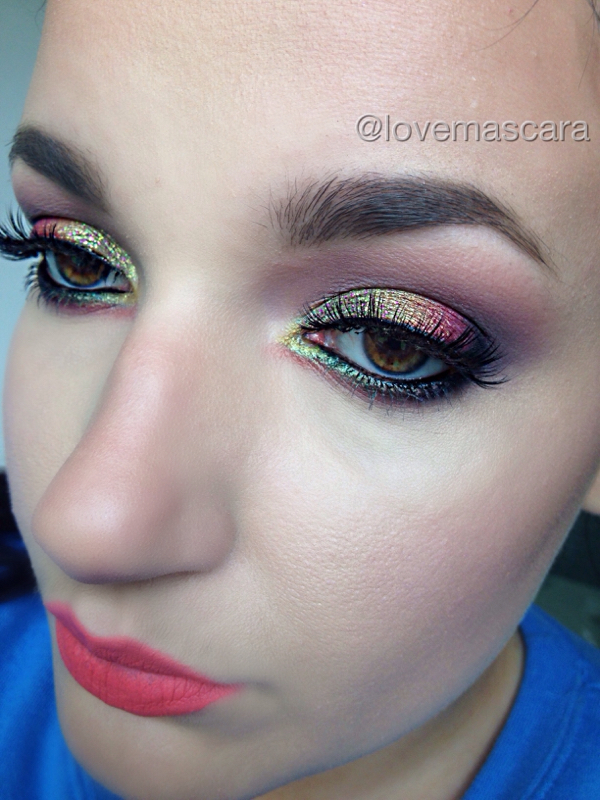 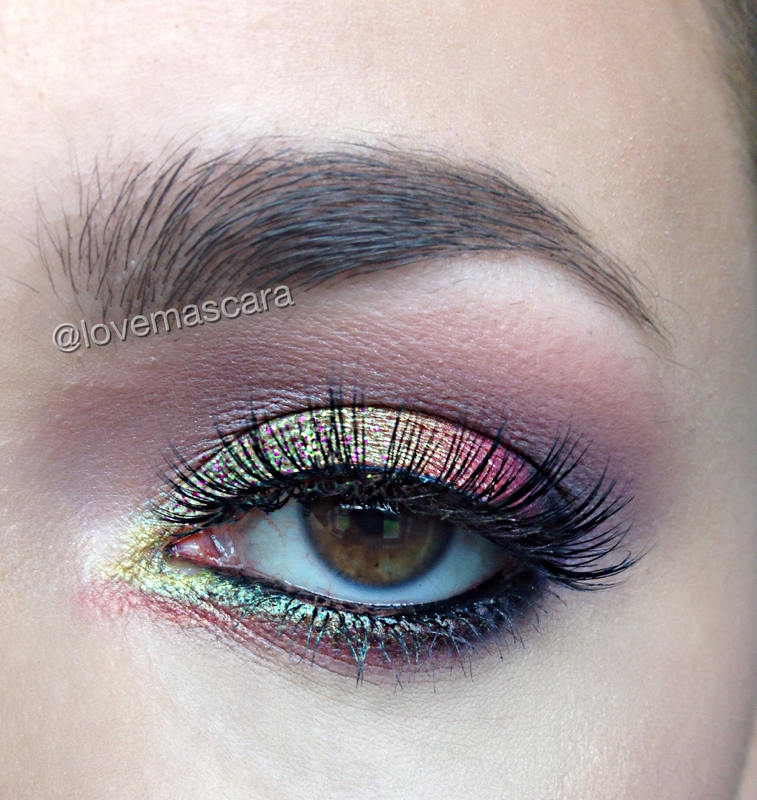 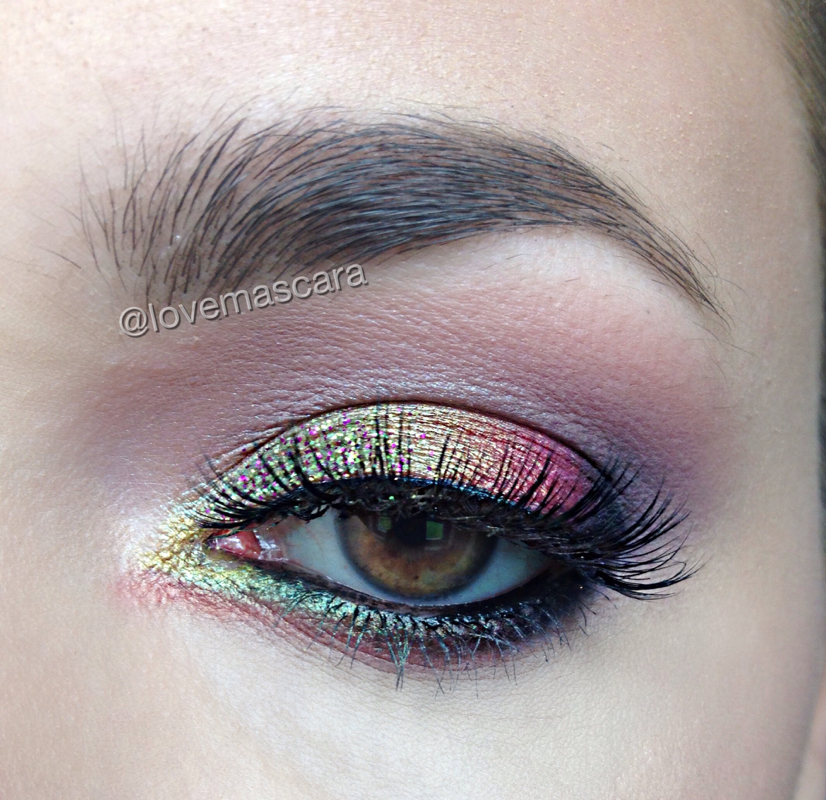 I named this Sunburst because it reminds me of A Sunburst Rose bush my husband got me last year. It was yellow that faded into pink. Hints of orange and what not. As you know I love colorful looks. This is as colorful as colorful gets. Eyes: MUG: Pixie Dust, Mermaid, Mango Tango, Corrupt, Wisteria ABH Violet Glitter Injections: Peacock Glitter Luxy Lash in Hollyhood ABH Dip Brow Face: NARS All Day foundation Color Pop Blush in Rain ABH Contour Kit Lips: ABH: Retro Coral I know that I don't have oily skin but I've worked on clients that have had minor to major oil issues. Especially teens. So I know how aggravating it can be. I've compiled a few products that I find are helpful for everyday to events. Keep in mind I do both consultations to help people learn how to do their makeup and what will work best for them and their features and issues, also on occasion I do events as well like weddings and proms depending on my health issues at the time. So I feel like I get to see both sides of the spectrum every day and special days.
I worked with someone recently who had the most oil I've ever seen in my whole life. So after some revisions to her makeup we finally got her makeup to stay on and matte for about 6 hrs. I wanted to tell you exactly what I used. First we used Murad Oil Control Mattifier Lotion Next we used Makeup Forever Step 1 Equalizer Mattifying Primer I used kabuki brushes to stipple the foundation into the skin instead of a damp Beauty Blender, which seems to make things dewy on it's own. Then I used two separate oil control/free foundations for both coverage, color, and to thin one out. Which was Revlon Colorstay Foundation for Oily to Combination skin then mixed Laura Mercier Oil Free Foundation. The Laura Mercier is much thicker and full coverage and can look a little cakey so I used the Revlon Colorstay to thin it out mainly, but also lighten the color up some to match her. Then I used all Matte powders on her. I used ABH Contour Powders the matte ones, and the contour colors to contour, and then I used matte blushes. I think I used MAC Royal Sunset with a little Peaches thrown in. No highlighter what so ever because we knew she would get some shine at some point so we didn't want to run the risk of bringing to much attention to it like highlighters tend to do. Last but not least we set it with Ben Nye Final Seal Matte Setting Spray. I sprayed it on a flat kabuki brush first and pressed it on the skin and then sprayed it onto the skin. 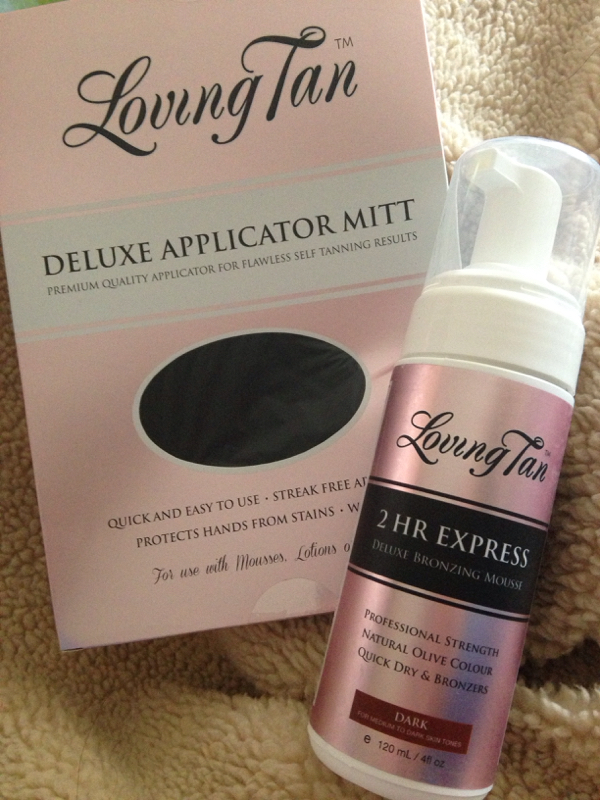 Every now and then you here about a product that's too good to be true and you're beyond excited to try it. I can honestly say this is that scenario. I love self tanner. I love self tanner mousse specifically. My go to self tanner has always been St. Tropez Bronzing mousse. I especially love using mitts to apply self tanner. I heard about this tanner through Jaclyn Hill. It's called Loving Tan and it's from Australia and just recently got a warehouse in the US. So as soon as it did I placed the order for it. When I got on there of course like everything goes, it was all sold out except the two hour express dark, which luckily was the one I wanted anyway. This one comes in Dark and Medium the regular mousse's come in few other shades. It got to me pretty fast. I didn't even get the shipping notification until after it had already arrived. So I was very impressed with that. Lets get into the review. I'm on the fence with this product I'll be honest. It's not a bad product but it's not as great as I wanted it to be. The first time I used it though I used as much as I would've use with St Tropez and it was way too much so that's the first problem and I didn't moisturize before hand because I've never had to do that with any other tanner. I should've done that with this for sure. I find this hard to blend. Even with freshly exfoliated and moisturized skin I was still having to press soooooo hard and continuously blend and even though I was using a smaller amount the 2nd go around it was still just as hard to get it even. The color is beautiful and I think if your skin is a little bit more tan than mine it wouldn't be so noticeable if it wasn't blended perfectly. It's a dead on match for the Mystic Tan I think, and it's not got too much of a scent. So all those things I love. It fades lovely though. The mitt is like a velvet mitt, where the St Tropez mitt is a foam. This bronzer is definitely darker than my St Tropez bronzer. It's a better color than St Tropez Dark which I also have which is green based and just very olive toned. I don't know if this is darker than that exactly but I prefer this color way more. I used code "jaclyn" and got free shipping and a free mitt. The tanner cost $40 for a 4 oz. The regular mousse's are $35 mostly. The St Tropez mousse is $32 for a 4 oz bottle and keep in mind its not an express tan nor as dark. 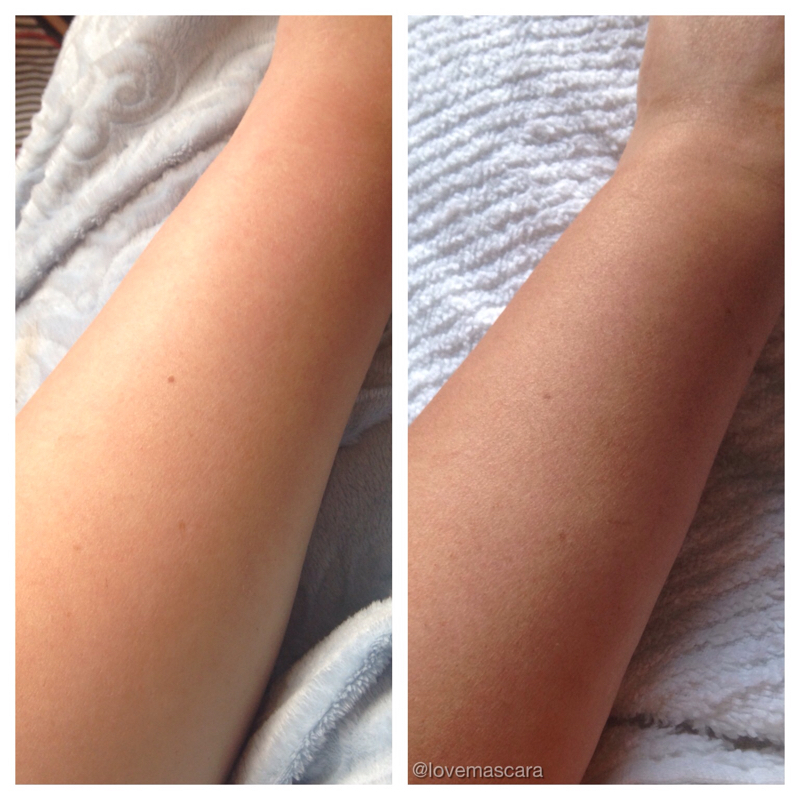 This is my before and after. It really is a beautiful color. On the back of the arm and under the arm is a little streaked. Just slightly nothing incredibly noticeable. 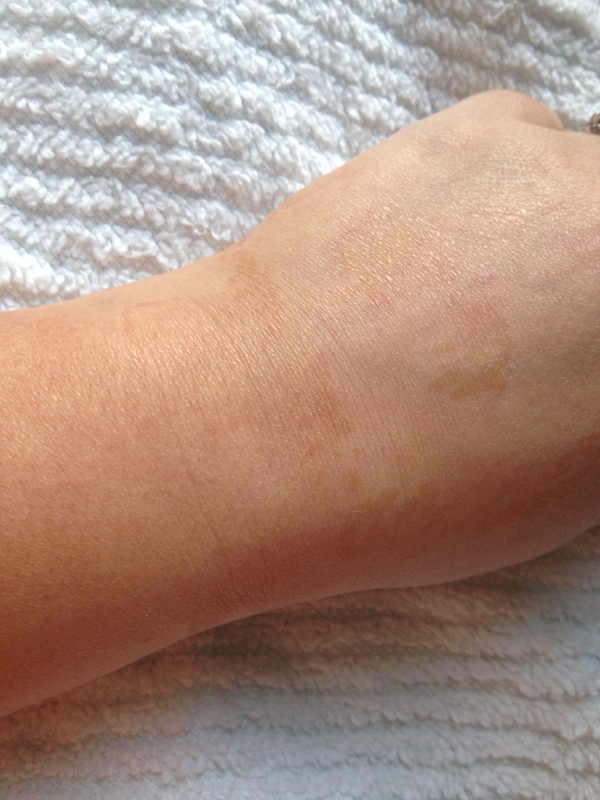 I wanted to show my hand which is blotchy part. I have drier skin so I think for someone who didn't have that issue may not have the patchy issue like this above but I had moisturized heavily and this still happened. So that was a bummer. My legs did a lot better than my arms and I don't know why. My chest got a little patchy too but not really noticeable to anyone but me.
So that's all the facts that I can give you, you can decide if you want to try it or not. I'm going to use it because I did pay for it and I'm not gonna ship it back to return it or give it away. I do love that it takes a small amount to give so much color and for that reason it'll last much longer than most I think. Unless I find a miraculous trick to this to make it easier to blend, I don't think I'll repurchase it though. I don't think this is a bad product I just don't think it's a great product for me because there are so many people out there that LOVE it. So I really think the issue lies with me and not the tanner really. 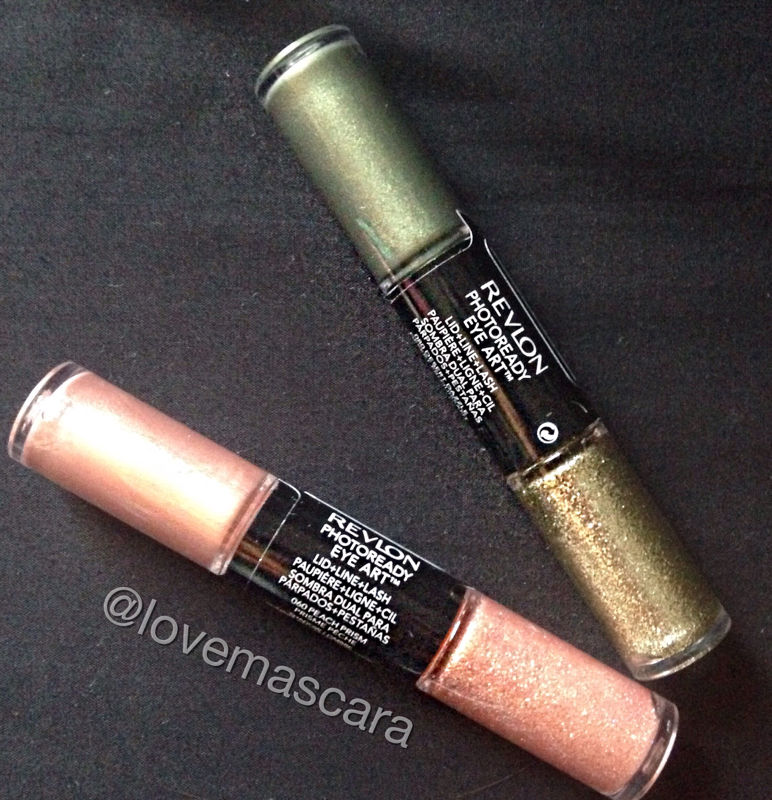 Thursday I went to my local Walgreens to get some lashes for prom. While I was there I was looking through the makeup, as you do, and spotted these little guys. So since it's the same packaging as their nail art product I thought it was just new colors. Then I seen that it said Eye Art. I was immediately drawn to the Peach Prism color. So I picked it up and then I seen they were buy one get one half off so I picked out the Desert Dazzler for the gold glitter in it. I used the Peach Prism in yesterday's look. It's basically a cream shadow and then the glitter is the "art" side of it for liner or detailing. A wand is for the cream shadow and a brush is for the glitter side. It's very on trend for the "liquid" lids look that's going on. I will say Peach Prism is similar to Amber Rush from Loreal. So far I like the product. The glitter is a little thick and goopey, so I don't really think much detailing could be done with it. If you want to use it as liner you would about half to put another liner on first to provide definition. If you want to just add glitter to the lid you could apply it with your ring finger but I don't really like it that way because it picks up some of the lid color and makes it kinda patchy. The cream shadow part I apply with the wand straight to the eye. It's most intense that way and when you use your finger you have to work fast with it and I found that it made it more sheer and if you tried to build then you'd need to let it dry and then add your next layer or it would again get patchy because it gets tacky as it dries. Also, you can't really blend it with a brush or anything because it just rolls up or crumbles so it has to be lid color, so be sure of where you place it. What I love is that it's easy to use the wand and apply it on the lower lash line and it stays intense and "wet" looking which is hard to do on the lower lash line. This is great for cut crease looks, it's also an easy look that looks like you put more work into it than you did. In each look I only used the cream on the lid and lower lash line and then I used just a simple blending color for the crease. I used the glitter pretty much the same way in each definitely more on the lower lash line, and with the green look over top of the winged liner as you can see. These were $8.50 buy one get one free at Walgreens and it's $5.99 at Ulta. I love them I think they're interesting and unique so I would say give them a try if you're interested. 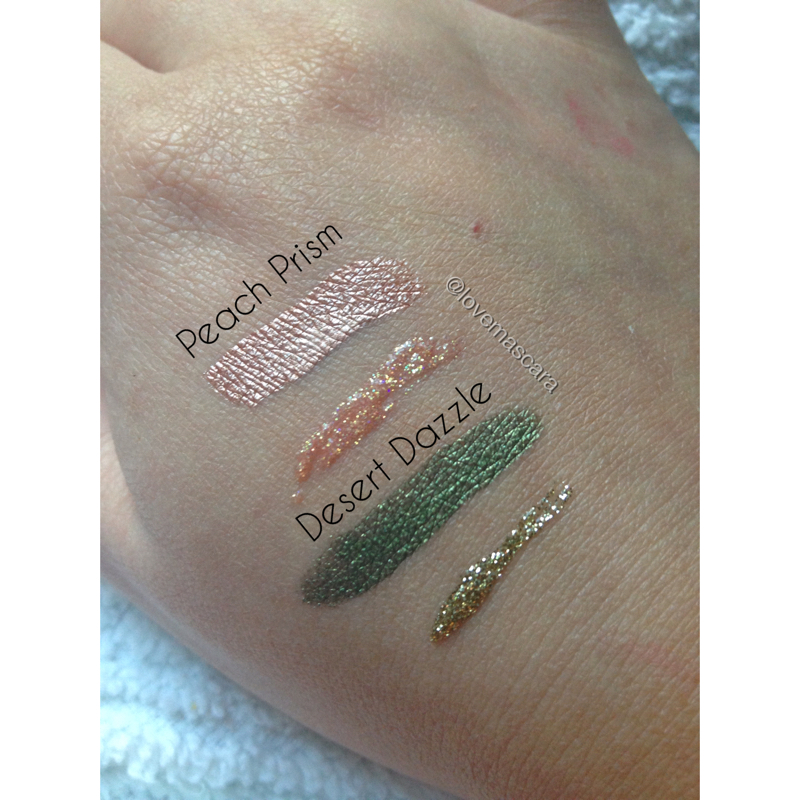 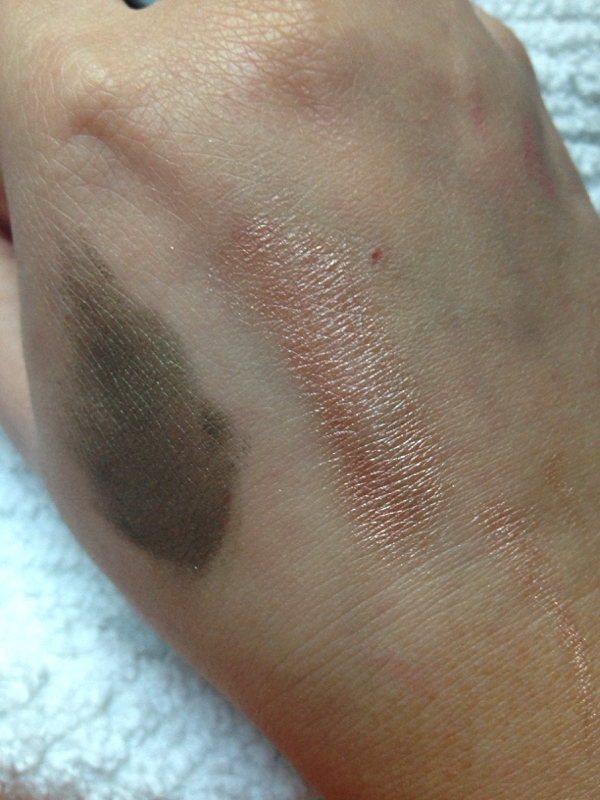 This is swatches of the cream shadow when used with your finger. As you can see the Peach Prism is a little see through. 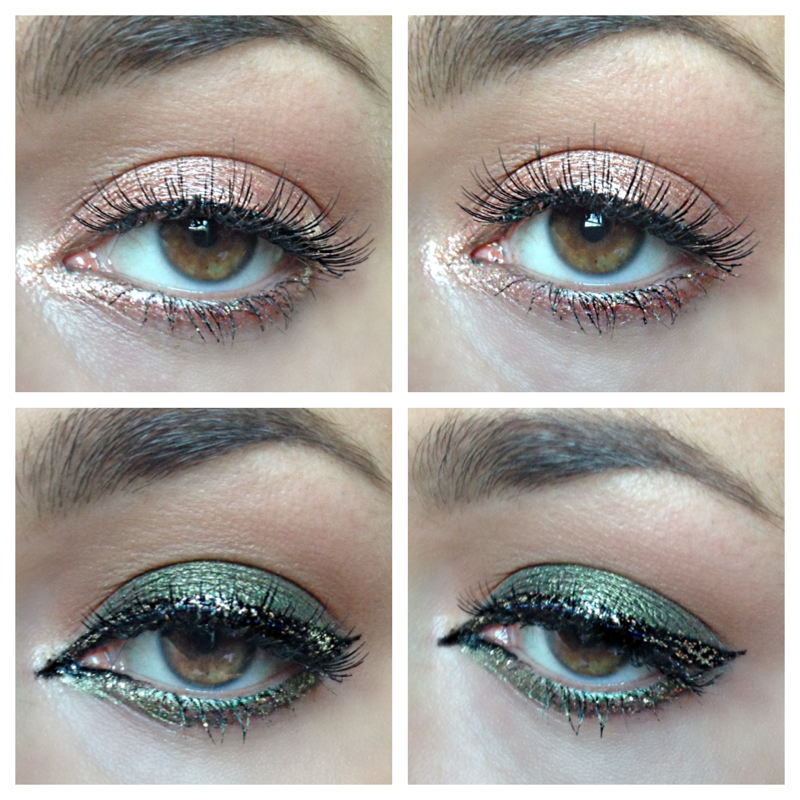 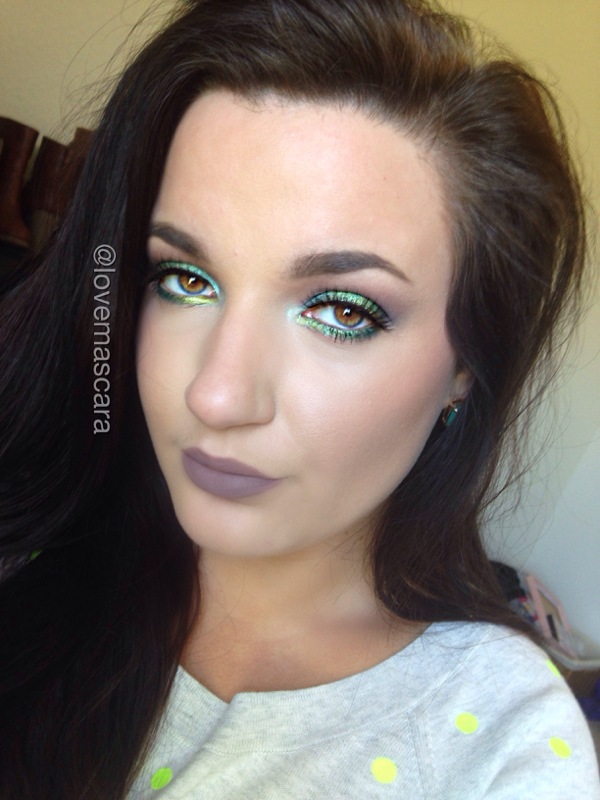 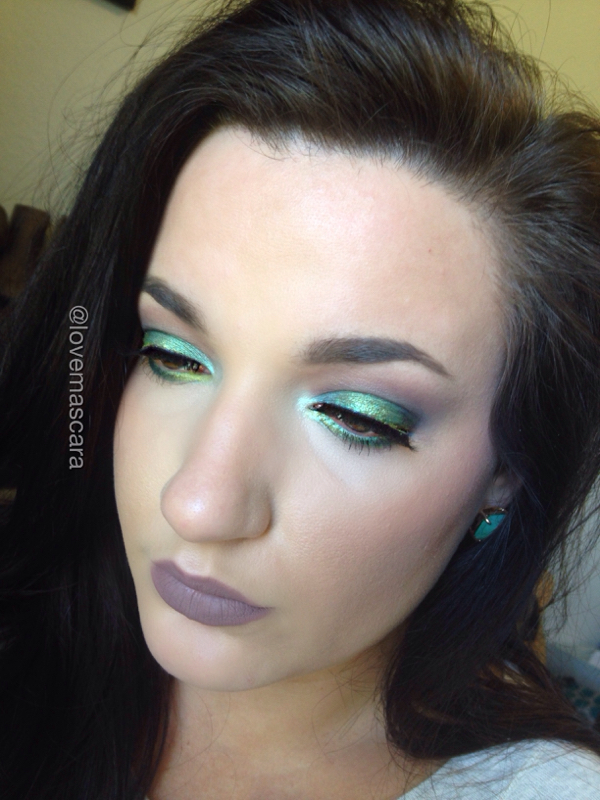 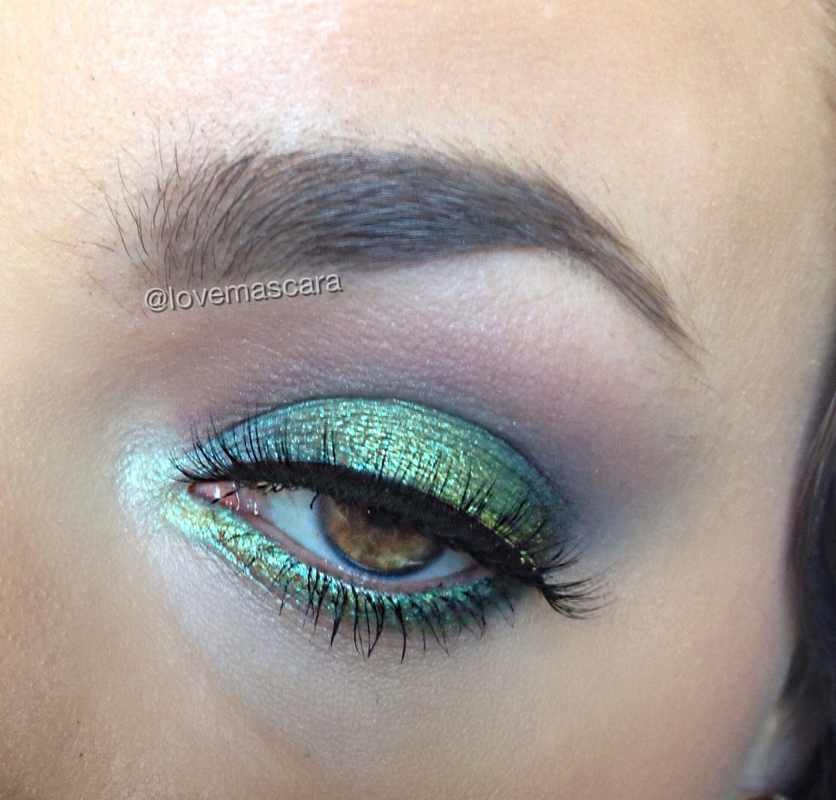 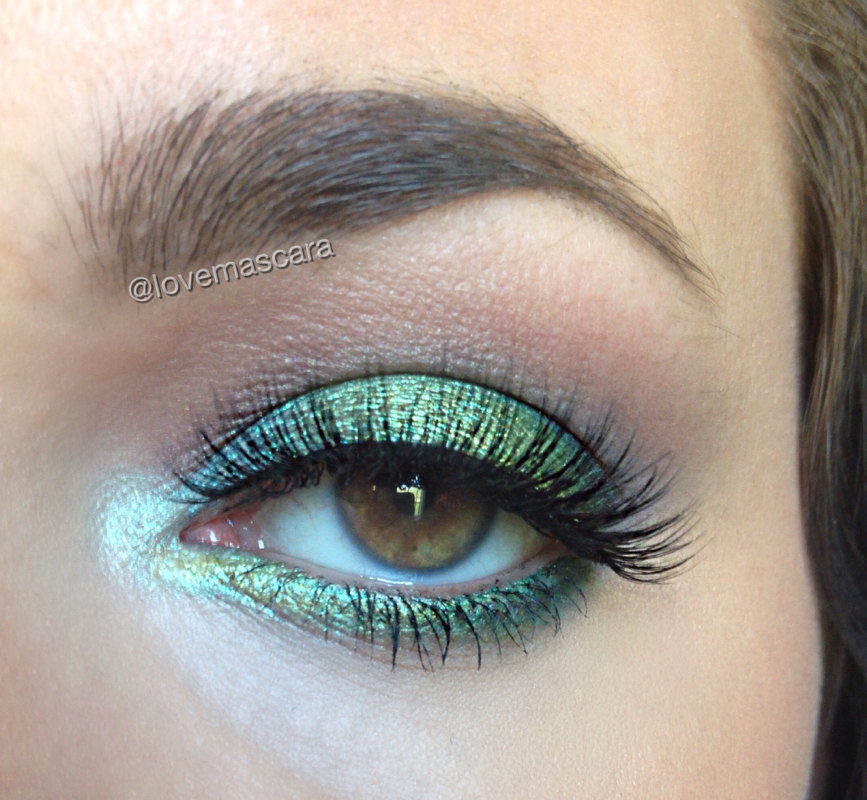 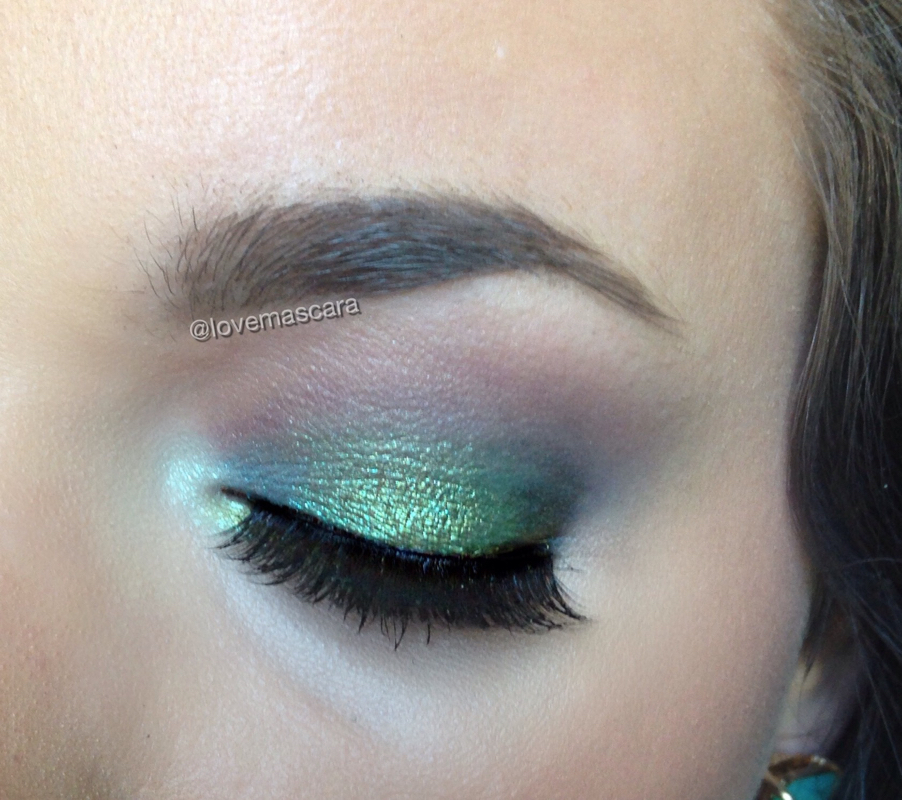 Today's makeup is a fresh green spring look. I love it. It's using basically all Makeup Geek shadows with the exception of a pigment. Eyes: MUG: Shark Bait, Mermaid, Pixie Dust, Envy, Corrupt, Wisteria (crease) Chickadee (crease) Sugarpill: Lumi Luxy Lash: Woke Up Like This ABH: Dip Brow Face: MUFE: Mattifying Primer Diorskin Star Foundation Tarte Sculptor ABH Contour Kit MAC Modern Mandarin blush Stila Kitten Duo Shimmer Lips: LA Splash Ghoulish 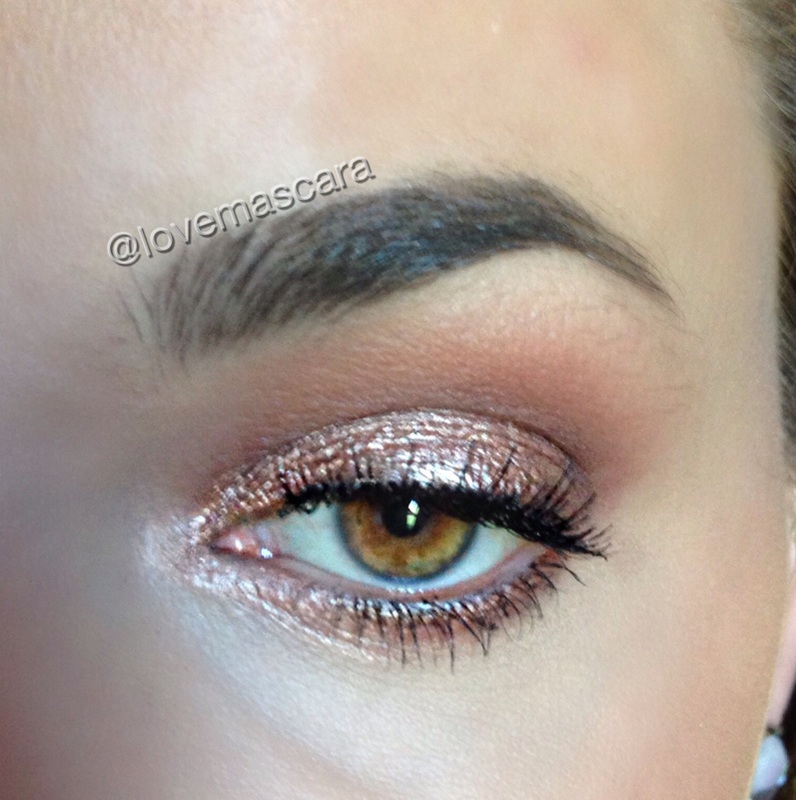 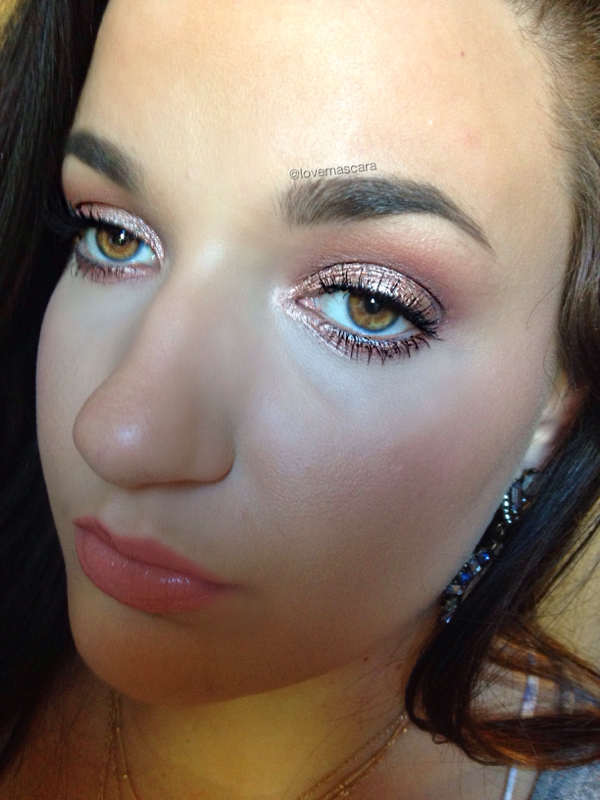 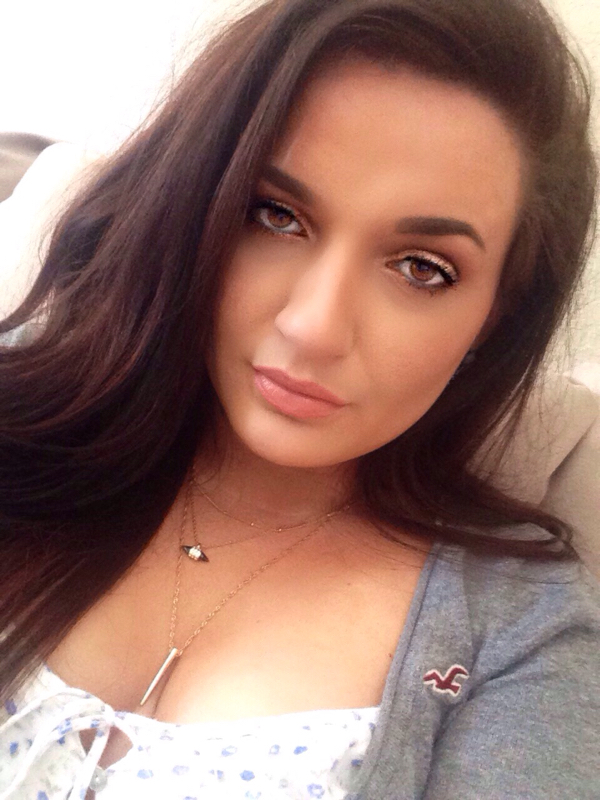 Today, although still April, it felt like summer. Which caused me to do my favorite summer look. I got to use a new product in this that I'm really excited to talk about in a future post.
Eyes: It Cosmetics Naturally Pretty Palette: Sunset, Sunrise, Java, and Noir Revlon Eye Art in Peach Prism Loreal Carbon Black Voluminous Mascara with Kiss Lashes that are just short banded and only in the center. Really cool if you're not used to lashes and wanted to try some out. The cool part of this was that the Revlon Eye Art is one side liquid/cream shadow that's metallic and foiled looking and the other side is liquid glitter. I only used the shadow part. I put this on under and over my eye shadow for that super foiled look but the part that I LOVED was that I could put it on my lower lash line and it looked awesome because it's applied with a wand and it stayed so shiny and foiled. I just can't even explain how cool it looks on the lower lash line. Face: MUFE Step 1 Equalizer Mattifying Primer Loreal Lumi Foundation Tarte Sculptor #1 MAC Careblend Pressed Powder in Dark with a big fluffy brush to look extra sunkissed NARS Dual Intensity in Fervor applied with a dense blush brush sprayed with Fix + Lips: Stila Bellissima liquid lipstick Smashbox Pout lipgloss Today was prom, and I was so honored to be asked to do these ladies makeup for such a special time. Even though I don't do a lot of freelance due to medical issues I was able to do this and it really made me feel good. What I loved about it was that each girl wanted something completely different and that's where the fun begins. 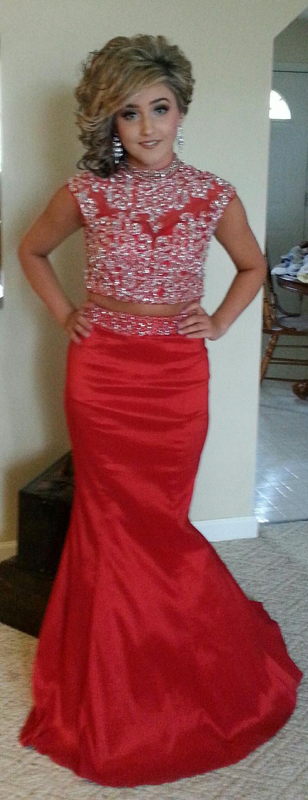 First up is Haley. Haley, who is full on glam everyday which I love cause that's me as well, wanted a neutral look with a harsh edge and lots of glitter. So we used neutral colors for the crease and we built it up as we went. So first using Peach Smoothie in the crease, then Bengal with a more dense brush to have more control and pigmentation and make it slightly darker. Then we used Mocha in the outer crease, not extending it to the inner part of the eye. I also brought it down onto the outer lid slightly. Then starting with a pencil brush I used Smoke to start drawing out the wing. I don't use tape to get that harsh line I just clean it up eye makeup remover and a pointed q-tip or folded kleenex. I clean up last though. With an angled brush I used Corrupt to again make the outer lid darker and I barely extended up in the crease. This creates a sharp line in general so it's super easy to clean up. I make sure the lower part is what's harsh and as it goes up it gets softer. The lid I used MAC Whisper Pink and then we used lots of glitter. We used MAC Reflects Pearl first and then Violet Voss Wendy and Rose Gold. We didn't do anything on the lower lash line. We did darken up the outer crease in the end just a little bit more with Mocha. It's a lot to take in I know but it was very beautiful and dramatic while still being neutral. It was a great prom look that was glamorous and fun. She done the rest of her makeup herself because she is no amateur at makeup and she done a great job. 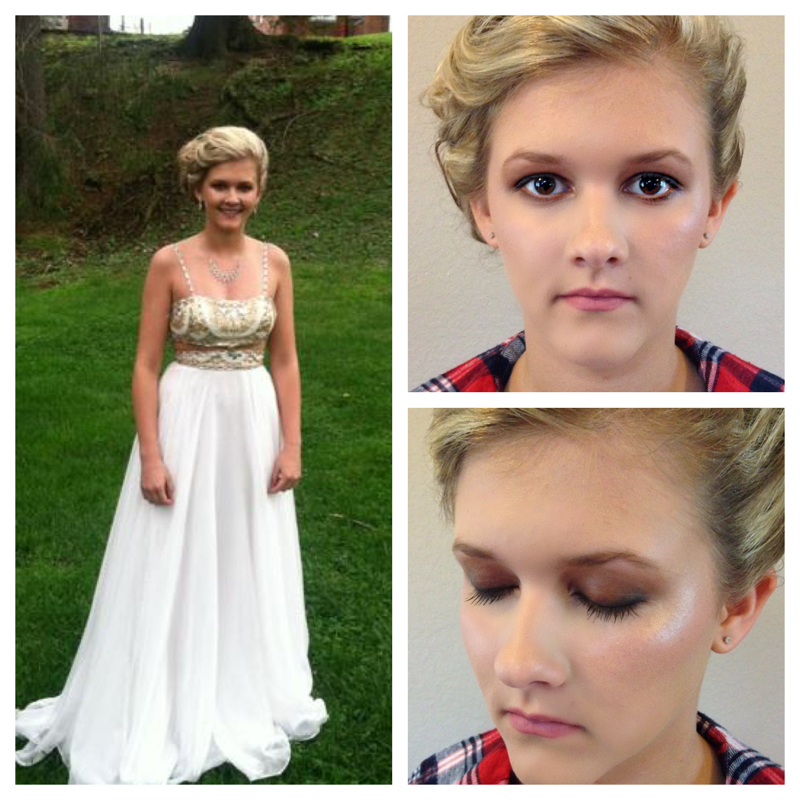 Next we have Hannah who is super sweet and naturally gorgeous. Gorgeous skin, great lashes, just all around great features. She doesn't need nor wear a lot of makeup on a daily basis so we basically just intensified her features. She wanted a dark smokey eye that was mostly matte and actually quite dark. So we used Bengal in the crease, Red Earth on the lid, and Smoke on the outer lid and we really blew out the shadow to keep it smokey but not incredibly defined or anything. The only sparkle we done was just a touch of gold in the inner corner for a small inner corner highlight, I used Makeup Geek After Glow to do that. We didn't use liner we just used black shadow on an angled brush and smudged it on the lash line. She didn't want lashes and she didn't need them either because hers were so long and gorgeous. I used IT Cosmetics Fiber Lash Extensions mascara on her just to give an affect of fake lashes from the fibers that attach themselves to the lashes. Her skin was great and easy to work with. What I love about this look is the highlight on her cheek bone. She has such high cheek bones naturally that adding a highlight to it stood out so much and was just gorgeous. I use Becca Opal on her cheeks. We barely contoured because she didn't need it. I used powder to fill in her brows just a little. Brows frame the face so I always advise you to at least fill in the gaps or any sparse areas you may have. We kept it neutral on her lips mixing ABH Pure Hollywood and Lovely. 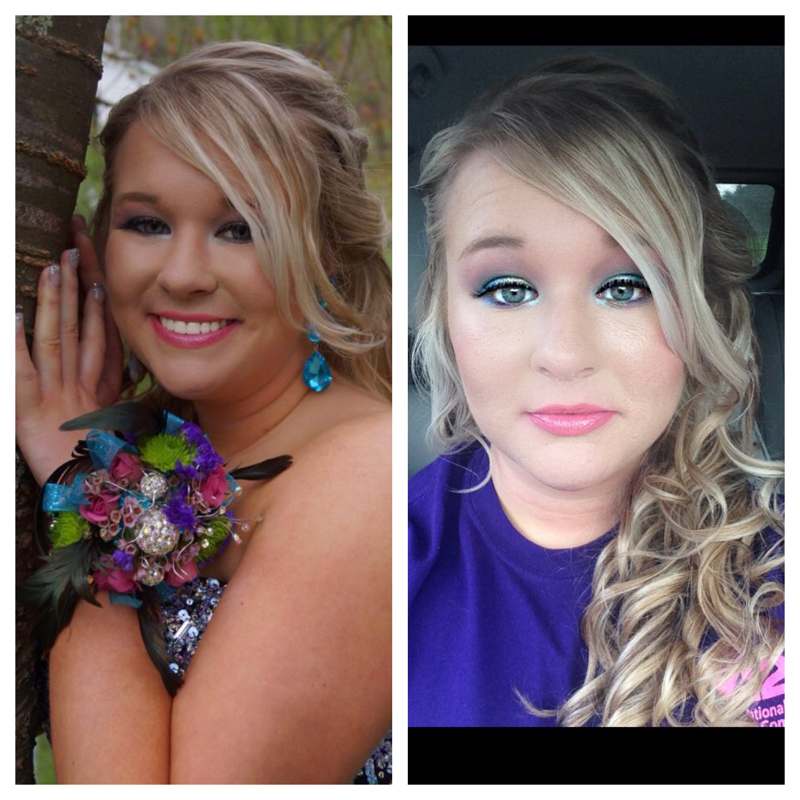 Next is Sydney which was a hoot. She's a girl after my own heart and wanted to do some color, lashes, and glitter. I must say I absolutely loved her makeup. She was like mermaid barbie. It was fantastic. We mixed some green, teal, and purple and added glitter and pigment. So I used Shark Bait which is matte teal/turquoise I used it in the center and slightly over on the outer half of the lid. Then I went in with Pixie Dust which is a frosted lime yellow green.This went slightly over the Shark Bait and mainly in the center. Then I used Colour Pop Dare on the outer corner over the whole lid but leaving the inner part empty. On the inner part we used Sugar Pill Lumi which is a super pale teal, I then extended it basically over the first half of the lid and lower lash line. I went back in with Pixie Dust on my finger to brighten it up in the center and a little bit of Makeup Geek Mermaid as well which is a super frosted light teal. Then we got into glitter. I used MAC Reflects Teal glitter on the whole lid. After that I used Glitter Injection Peacock glitter which is light blue, purple, and gold glitter. We really packed it on the lid and it was out favorite part of the whole look. I used Wisteria in the crease to bring out the purple a little bit more. The lower lashline is Shark Bait in the outer part then Mermaid into Pixie Dust and into Lumi. We used Ardell Wispies as her lashes. Her skin is relatively dry and can tend to have some dry patches. When you have that, product always clings to it and can emphasize it. If you have this issue then the best thing to use is MAC Fix + so I spray the brush then apply the foundation, each time that I went in with another layer I spray the brush again. The foundation I used Diorskin Star Foundation mixed with NARS All Day Luminous Weightless foundation. I sprayed another brush and patted it on the areas that were dry and we also set the makeup with Fix + when we were done. Fix + is extremely hydrating and wonderful for people with dry skin. The lips were more gloss than anything we put Sweet Talker on and then wiped it off which still leaves the lips a softer pink, we put concealer over it just to even out the color. I mixed Buxom Nicole and Smashbox Pout to make it a little bit lighter. The lips actually turned out to be a really really pretty watermelon color which I loved the outcome of. We contoured with cream contour so I used the Tarte Sculptor stick in #1 to do it and it worked so well we set it with powder of course but she didn't require a lot of contouring either. 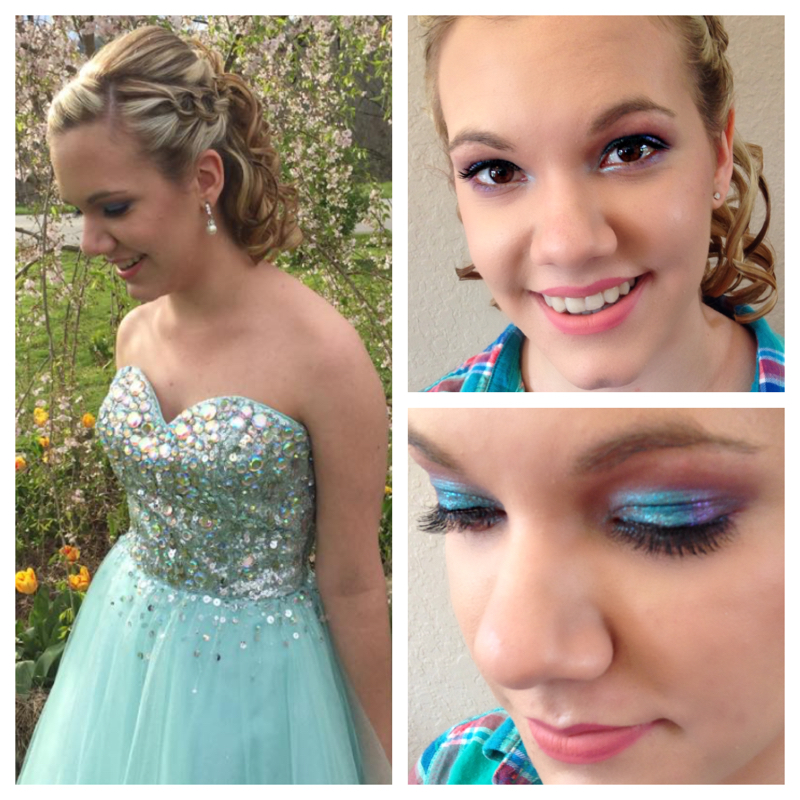 Last but not least is my Emily who is super sweet and gorgeous.. Emily has oily skin, so I had to do more oil control than anything. I used Murad Oil Control Mattifier Lotion, and then Makeup Forever Mattifying Primer. We used Oil Free Foundations specifically made for Oily Skin. I mixed Toofaced Shadow Insurance and Glitter Glue because her eye lids always crease. Her eyeshadow was actually Mermaid, and Electro and Lumi in the Corner. We then used Colour Pop Ibiza and Dare over top. Which actually worked better than glitter. For glitter we used Violet Voss in Teresa. We used Wisteria in the crease. Also Electro on the lower lashline to so the center of the look was teal but there was a purple glow around it. We used matte blush and matte setting powder. Colour Pop Fetch and Stila Bellisima is on her lips. To set it, we used Ben Nye Final Seal which is also a matte setting spray. I sprayed it on the brush first and patted it on the skin and then sprayed it again on the skin. No highlighter or blushes or bronzers with shimmer or sheens to them because the oil will eventually come back through and make you dewy. * I want to remind everyone that this is a negative free space, so be kind you can critique me but you will be blocked for any unkind references to my beauties in this post whether here or Instagram. |
ErinI'm from Tennessee. I'm a makeup and skincare lover. I have always enjoyed creating looks but I love to help people with product knowledge and application even more. I've been able to start blogging and do these things I love because God has seen fit to bless me with the opportunity. Thanks for stopping by and visiting with me! 

 
Categories
All
Archives
January 2022
|
 RSS Feed